How to Make Compost at Home
A practical guide to making garden compost at home in the UK. Covers bin types, what to add, layering, turning, troubleshooting, and using finished compost.
Key takeaways
- A 300-litre bin suits an average UK garden and costs from fifteen pounds via council schemes
- Mix 50% green materials (grass, food scraps) with 50% brown materials (cardboard, leaves)
- Compost is ready in 6-12 months, or 8-12 weeks with hot composting above 60C
- Turn compost every 2-4 weeks to speed decomposition and prevent bad smells
- Never compost cooked food, meat, dairy, or diseased plant material
- Finished compost improves soil structure, feeds plants, and reduces landfill waste
Composting is the simplest way to improve your garden soil. Garden Organic’s composting guide is a good companion resource. It turns kitchen scraps and garden waste into a dark, crumbly material that feeds plants, improves drainage in clay soils, and adds moisture retention to sandy ones. Every UK garden produces enough raw material to make compost. The process requires no special skills, minimal equipment, and works year-round.
This guide explains how to set up a compost system, what to add, how to manage the process, and how to use the finished product. Whether you have a large garden or a small urban plot, composting works at any scale. You can find more practical guides in our how-to section.
Choosing a compost bin
The right bin depends on your garden size, the volume of waste you produce, and your budget. All types work. The differences are speed and convenience.
Plastic dalek bins
The most common type in UK gardens. Council-subsidised bins cost around fifteen pounds from schemes like GetComposting. A standard 300-litre bin suits a typical family garden.
Pros: cheap, easy to set up, retain heat and moisture, small footprint. Cons: difficult to turn compost inside them, small capacity for large gardens.
Wooden slatted bins
Build your own from pallets or buy ready-made. A single bay measures roughly 1m x 1m x 1m and holds about 1,000 litres. The open front makes turning and emptying easier.
Pros: large capacity, easy access for turning, good airflow. Cons: take up more space, need building or assembly, wood rots after 5-8 years.
Tumbler bins
Sealed drums mounted on a frame. You turn the entire bin by spinning it, which mixes the contents without a fork. Capacities range from 100 to 300 litres.
Pros: easy to turn, faster composting, rodent-proof sealed design. Cons: expensive (sixty to two hundred pounds), limited capacity, heavy when full.
Hot composting systems
Insulated bins like the HotBin or Green Johanna maintain temperatures above 40C even in winter. They process cooked food and meat (which standard bins cannot handle safely). Temperatures reach 60-70C, killing weed seeds and pathogens.
Pros: fastest composting (30-90 days), accept wider range of waste, work in winter. Cons: expensive (one hundred to two hundred pounds), need careful management, smaller capacity.
Comparison
| Bin type | Cost | Capacity | Speed | Ease of turning | Rodent-proof |
|---|---|---|---|---|---|
| Plastic dalek | Fifteen to thirty pounds | 300-400L | 6-12 months | Difficult | Partially |
| Wooden slatted | Twenty to eighty pounds (DIY) | 500-1000L | 6-12 months | Easy | No |
| Tumbler | Sixty to two hundred pounds | 100-300L | 3-6 months | Very easy | Yes |
| Hot composting | One hundred to two hundred pounds | 200L | 1-3 months | Varies | Yes |
Gardener’s tip: If you have space, use two bins. Fill one while the other matures. By the time the second bin is full, the first is ready to use. This gives you a continuous supply.
 Three compost bin styles. From left: wooden slatted for large gardens, plastic dalek for most situations, and a tumbler for faster results.
What to compost
Compost needs two types of material: greens (nitrogen-rich) and browns (carbon-rich). The ideal ratio is roughly 50:50 by volume. Getting this balance right is the single most important factor in making good compost.
Green materials (nitrogen-rich)
- Grass clippings (in thin layers, not thick dumps)
- Vegetable and fruit peelings
- Tea bags and coffee grounds
- Annual weeds (before they set seed)
- Soft plant prunings and deadheads
- Nettles and comfrey leaves (excellent activators)
Brown materials (carbon-rich)
- Cardboard (torn into small pieces)
- Newspaper (scrunched, not flat sheets)
- Dried leaves (autumn leaf fall)
- Straw and hay
- Woody prunings (chipped or shredded first)
- Egg boxes and toilet roll tubes
- Sawdust from untreated wood
What NOT to compost
- Cooked food, meat, fish, dairy - attract rats and create foul smells
- Diseased plant material - spreads disease when you use the compost
- Perennial weed roots - bindweed, couch grass, and ground elder survive composting and regrow
- Cat and dog faeces - contain harmful pathogens
- Glossy paper and magazines - coatings do not break down
- Treated or painted wood - chemicals leach into the compost
Warning: Never add perennial weed roots like bindweed, couch grass, or horsetail to a standard compost bin. They survive the process and spread when you use the compost. Drown them in a bucket of water for 4-6 weeks first, then add the resulting liquid as a feed.
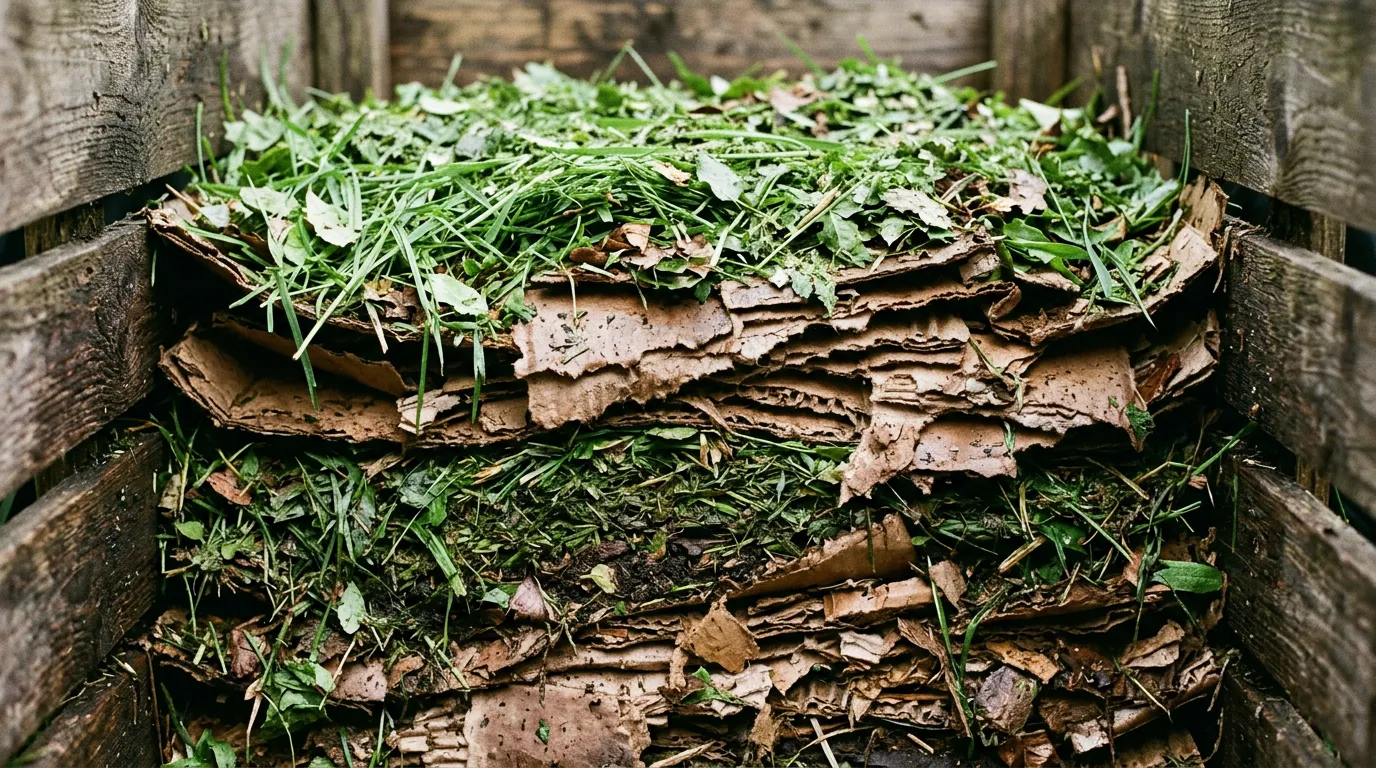 Alternating layers of green and brown materials. This 50:50 balance is the key to fast, smell-free composting.
How to build a compost heap
Location
Place your bin on bare soil, not concrete or paving. Soil contact allows worms, beetles, and microorganisms to enter the heap from below. These creatures do most of the decomposition work.
Choose a spot that is:
- Level - prevents waterlogging on one side
- Semi-shaded - full sun dries the heap out, deep shade keeps it cold
- Accessible - you need to reach it easily with a wheelbarrow
- Away from the house - at least 3m from doors and windows
A compost heap also attracts birds and wildlife. Robins forage for insects around active heaps, and slow worms shelter in the warm, damp conditions underneath.
Building in layers
Start with a 10cm layer of coarse material at the base: twiggy prunings, straw, or scrunched cardboard. This creates airflow underneath the heap.
Then alternate layers:
- A 10-15cm layer of green material
- A 5-10cm layer of brown material
- Repeat
Do not compact the layers. Loose material decomposes faster because air circulates through it. If adding a large batch of one material (like a lawn-mower box of grass), mix in cardboard or newspaper to prevent it forming a dense, airless mat.
Moisture level
Compost should feel like a wrung-out sponge: damp but not dripping. Too wet and it goes anaerobic (slimy, smelly). Too dry and decomposition stalls.
In summer, water the heap during dry spells. In winter, cover with a lid or old carpet to stop rain saturating it. If the heap gets too wet, mix in torn cardboard to absorb excess moisture.
Managing your compost
Turning
Turn the heap every 2-4 weeks with a garden fork. This introduces oxygen, which the composting microorganisms need to work. Move material from the outside to the centre, where temperatures are highest.
Turning is the biggest factor in speed after the green-brown ratio. Regularly turned compost is ready in 3-6 months. Unturned heaps take 9-12 months.
In a plastic dalek bin, turning is awkward. Lift the bin off, set it beside the heap, and fork the material back in. This aerates the entire pile. Do this every 4-6 weeks.
Temperature
A working compost heap generates heat through microbial activity. The centre of an active heap reaches 40-60C. You can feel this warmth with your hand.
Hot composting (deliberately maintaining 55-65C) kills weed seeds and pathogens, producing cleaner compost. It requires more management: frequent turning, precise green-brown ratios, and sufficient volume (at least 1 cubic metre).
Cold composting is what most gardeners do. The heap stays below 40C and breaks down slowly. Weed seeds may survive, so avoid adding weeds that have set seed.
Activators
Compost activators are nitrogen-rich materials that kick-start microbial activity:
- Fresh nettles (excellent free activator)
- Comfrey leaves
- Grass clippings
- Urine (yes, really - diluted or direct)
- Commercial activators (unnecessary if you balance greens and browns)
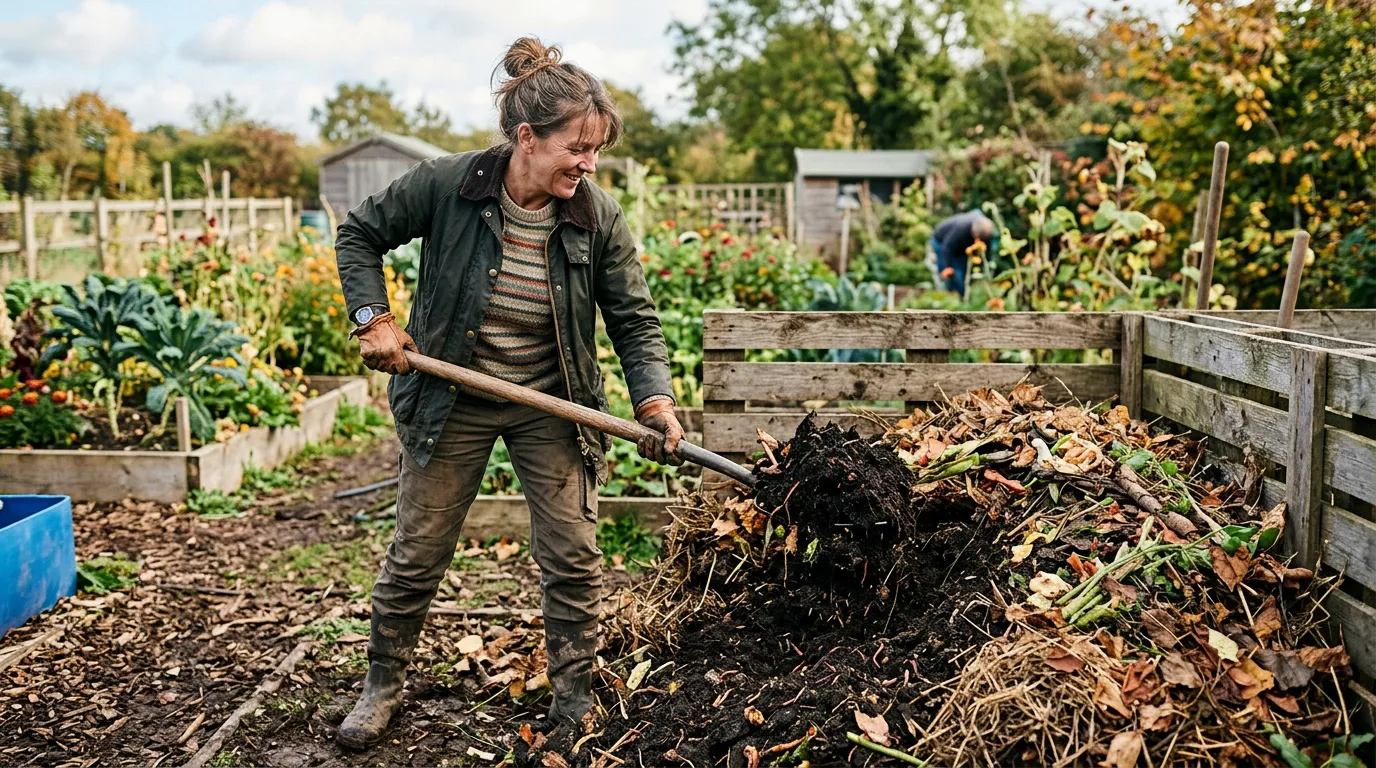 Turning a compost heap with a fork. Move outer material into the centre to speed up decomposition.
Troubleshooting
Slimy, smelly compost
The heap is too wet and lacks oxygen. Add brown materials: torn cardboard, scrunched newspaper, dry leaves. Turn the heap to introduce air. This fixes the problem within 1-2 weeks.
Dry, unchanged material
The heap is too dry for microbial activity. Water it thoroughly and mix in green materials. Cover with a lid or old carpet to retain moisture. In summer, water the heap every week during dry spells.
Rats and mice
Rats visit compost bins for food. Slugs also shelter in and around compost bins. Remove the food source: stop adding cooked food, meat, and dairy. Ensure the base of the bin sits flat on the ground with no gaps. Wire mesh underneath the bin deters digging. A sealed tumbler bin eliminates rodent access entirely.
Ants
Large ant colonies in the heap mean it is too dry. Water the heap well and turn it. The disturbance and moisture make it inhospitable for ants.
Slow decomposition
Several causes: material too large (chop or shred it), too much brown material (add greens), heap too small (minimum 50cm in each dimension), or cold weather. In winter, decomposition slows naturally. It picks up again in spring.
Using finished compost
Finished compost is dark brown, crumbly, and smells like a woodland floor. You should not recognise any of the original ingredients. It takes 6-12 months by cold composting, 8-12 weeks by hot composting.
Soil conditioner
Dig finished compost into beds before planting at a rate of one wheelbarrow per 3-4 square metres. It improves the structure of both clay and sandy soils. Clay becomes more workable, and compost is one of the best amendments for improving clay soil. Sand holds more moisture and nutrients. It also enriches shady borders under trees where soil is depleted. This is the best use for homemade compost and the foundation for growing vegetables successfully.
Mulch
Spread a 5cm layer around established plants in spring. Keep it away from stems and trunks. Mulching suppresses weeds (including common lawn weeds at border edges), retains moisture, and feeds the soil as it breaks down. It is one of the key techniques behind low maintenance gardening. It is particularly valuable in raised beds where soil quality matters.
Potting mix ingredient
Mix sieved compost with sharp sand and perlite for a homemade potting mix. Use one-third compost, one-third sand, and one-third perlite. This blend drains well and provides nutrients for container plants. It is not suitable for seed sowing, which needs finer, lower-nutrient compost.
Lawn top dressing
Sieve compost through 10mm mesh and spread thinly over lawns in autumn. This feeds the grass, improves soil structure, and helps level minor dips. Apply 3-5mm depth and work in with a stiff broom.
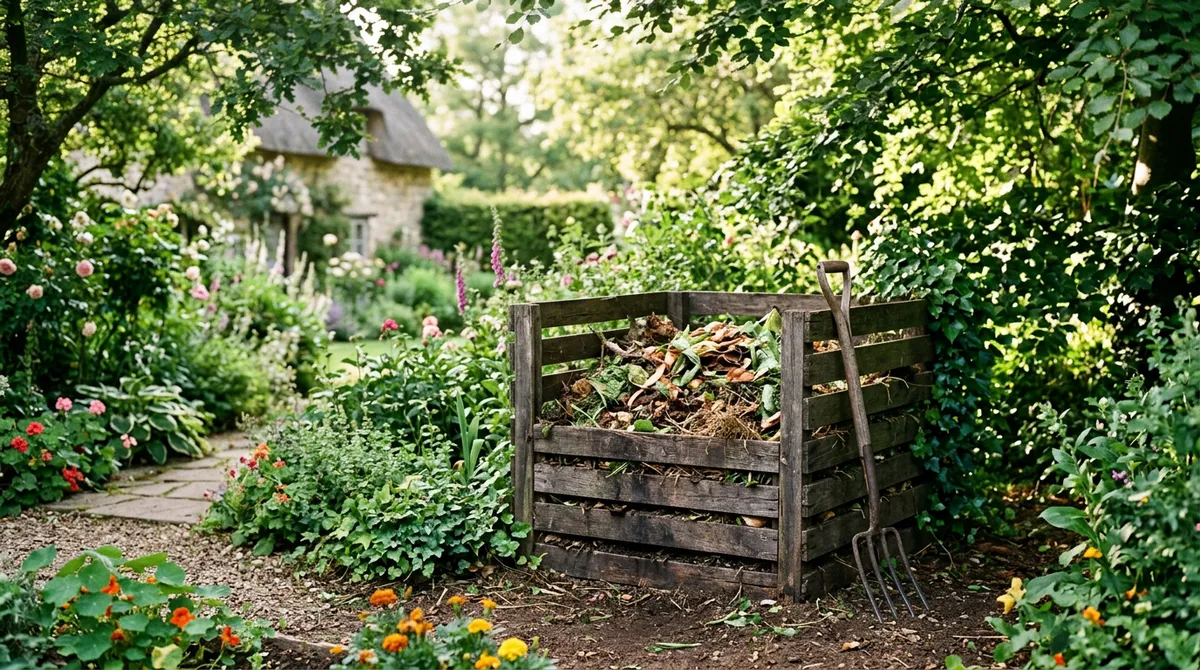
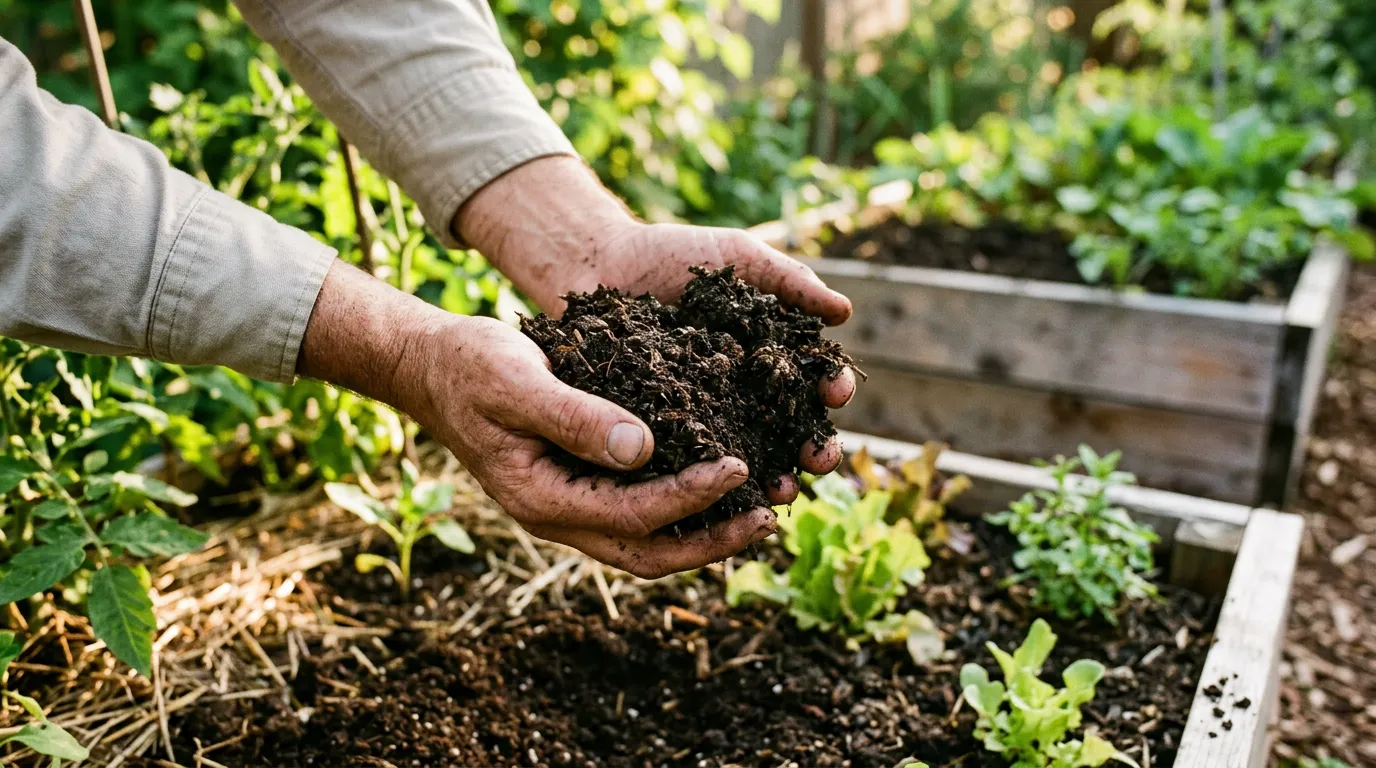 Finished compost: dark, crumbly, and smelling like woodland floor. This batch took 8 months by cold composting.
Month-by-month composting calendar
| Month | Activity |
|---|---|
| January | Add kitchen waste. Decomposition is slow. Do not turn in frosty weather. |
| February | Start collecting brown materials for spring grass influx. Check moisture level. |
| March | Activity increases as temperatures rise. First turn of the year. |
| April | Heavy grass mowing begins. Mix clippings with cardboard 50:50. |
| May | Peak green material season. Balance with browns. Turn every 2-3 weeks. |
| June | Check moisture in hot weather. Water heap if dry. Turn regularly. |
| July | Fastest decomposition. Harvest finished compost from base of heap. |
| August | Continue turning. Add soft prunings from deadheading and trimming. |
| September | Add end-of-season crop waste. Remove any diseased material first. |
| October | Shred autumn leaves for brown material. Store excess in bags for winter use. |
| November | Insulate bin with old carpet or bubble wrap. Slow down turning. |
| December | Add kitchen waste only. Minimal garden waste this month. |
Common mistakes
Adding too much grass at once
Fresh grass clippings dumped in thick layers form an airless, slimy mat that smells terrible. Always mix grass with brown materials. Spread grass clippings in thin 5cm layers between cardboard or dried leaves.
Expecting instant results
Composting takes months, not weeks. First-time composters often check their bin after a fortnight and conclude it is not working. Be patient. Even a well-managed heap needs 3-6 months. Cold composting through winter takes 9-12 months.
Putting the bin in deep shade
A bin in full shade stays cold and decomposes slowly, especially through winter. Semi-shade is the ideal position. Morning sun warms the heap. Afternoon shade prevents it drying out.
Neglecting to turn
Compost that never gets turned becomes compacted, airless, and anaerobic. It still breaks down eventually, but takes twice as long and smells worse. Turn every 2-4 weeks for the best results. Even occasional turning makes a noticeable difference.
Adding diseased plants
Blight-infected tomato plants, clubroot-affected brassicas, and other diseased material should never go in a home compost bin. Home bins rarely reach temperatures high enough to kill pathogens. Bag diseased material and send it to council green waste, which is processed at higher temperatures.
Frequently asked questions
How long does it take to make compost?
Cold composting takes 6-12 months to produce usable compost. Hot composting, where you actively maintain temperatures above 55C, produces finished compost in 8-12 weeks. Speed depends on the green-brown ratio, turning frequency, and ambient temperature. Summer composting is always faster than winter.
What should you not put in a compost bin?
Never add cooked food, meat, fish, or dairy products. These attract rats and produce foul smells as they decompose. Also avoid diseased plant material, perennial weed roots like bindweed and couch grass, cat and dog faeces, and glossy printed paper. All other garden and raw kitchen waste is fine.
Can I compost grass clippings?
Yes, grass is an excellent high-nitrogen composting material. Mix it thoroughly with brown materials like torn cardboard or dried leaves to prevent it forming a slimy, smelly layer. Add grass in thin layers of no more than 5cm. A full mower box of grass needs roughly the same volume of brown material mixed in.
Do I need to turn my compost?
Turning adds oxygen and significantly speeds up decomposition. Turn every 2-4 weeks for the fastest results. Compost that is never turned still breaks down, but takes 9-12 months instead of 3-6 months. Use a garden fork to move outer material into the centre of the heap.
Why does my compost smell bad?
A bad smell signals too much moisture or too little air. Add dry brown materials like torn cardboard, scrunched newspaper, or dried leaves. Turn the heap with a fork to introduce oxygen. Within 1-2 weeks the smell should disappear. Healthy compost smells earthy, like a forest floor.
How do I know when compost is ready?
Finished compost is dark brown, crumbly, and has an earthy woodland smell. You should not be able to identify any of the original materials. Sieve through 10mm mesh before use to remove any large pieces. Return unfinished material to the active heap for further decomposition.
Can I compost in winter?
Yes, continue adding materials through winter. Decomposition slows below 5C but does not stop entirely. The heap re-activates in spring as temperatures rise. Insulating the bin with old carpet, cardboard, or bubble wrap helps retain warmth and keeps the process moving through the coldest months.
Lawrie has been gardening in the West Midlands for over 30 years. He grows his own veg using no-dig methods, keeps a wildlife-friendly garden, and writes practical advice based on real UK growing conditions.