How to Grow Jerusalem Artichokes UK
Practical guide to growing Jerusalem artichokes in UK gardens. Covers varieties, planting tubers, containment, harvesting through winter, and cooking tips.
Key takeaways
- Plant tubers 10-15cm deep from February to April in any reasonable soil, including heavy clay
- They are sunflower relatives, not related to globe artichokes despite sharing a name
- Plants reach 2-3 metres tall and make effective windbreaks for exposed allotment plots
- Harvest tubers from November through March, leaving them in the ground until needed
- Fuseau produces the smoothest tubers and is the easiest variety to prepare in the kitchen
- Contain the spread by growing in sunken barriers, raised beds, or harvesting every single tuber
Jerusalem artichokes are one of the easiest and most productive crops a UK gardener can grow. Plant a single tuber in February and by November you will be lifting 1.5-2.5kg of knobby, nutty-flavoured tubers from the same spot. They thrive in almost any soil, tolerate frost, shade, and neglect, and come back year after year whether you want them to or not.
Despite the name, Jerusalem artichokes have nothing whatsoever to do with Jerusalem or with globe artichokes. They are a species of sunflower, Helianthus tuberosus, native to North America. The “Jerusalem” part is widely believed to be a corruption of the Italian word girasole, meaning sunflower. The “artichoke” comes from early European settlers who thought the tubers tasted similar to globe artichoke hearts. The two plants are not related. Globe artichokes are Mediterranean thistles grown for their flower buds. Jerusalem artichokes are sunflower relatives grown for their underground tubers. If you are planning your growing space for the year, our crop rotation planner helps you fit perennial crops like these alongside annual vegetables.
Which Jerusalem artichoke variety should I grow?
British seed catalogues and garden centres offer a handful of named varieties. The differences matter because tuber shape directly affects how much time you spend peeling and scrubbing in the kitchen.
| Variety | Tuber shape | Skin colour | Average yield per plant | Best for |
|---|---|---|---|---|
| Fuseau | Long, smooth | Pale cream | 1.5-2kg | Kitchen ease, soups, roasting |
| Dwarf Sunray | Rounded, compact | White | 1-1.5kg | Small gardens, containers |
| Gerard | Knobby, irregular | Red-purple | 2-2.5kg | Maximum yield, allotments |
| Red Fuseau | Smooth, elongated | Pink-red | 1.5-2kg | Attractive tubers, salads |
Fuseau
Fuseau is the best all-round variety for UK gardens. The tubers are long, smooth, and relatively easy to peel compared with traditional knobby types. Skin is pale cream. Flavour is sweet and nutty after roasting. This is the variety sold by most British garden centres and the one recommended by the RHS for home growing. Plants reach 2-2.5 metres tall and produce reliable crops on most UK soils.
Dwarf Sunray
Dwarf Sunray grows to around 1.5 metres, making it the most practical variety for smaller gardens, borders, and large containers. The white-skinned tubers are rounded and moderately smooth. Yield is lower than full-sized varieties but the compact growth habit means less staking and less shading of neighbouring plants. This is a good choice if you want the crop without the 3-metre jungle.
Gerard
Gerard produces the heaviest yields of any commonly available UK variety. The trade-off is knobby, irregular tubers that take longer to prepare in the kitchen. Skin is an attractive red-purple. Plants grow vigorously to 2.5-3 metres and spread aggressively. Grow this one if you have space on an allotment and want maximum tonnage. The flavour is excellent, slightly sweeter than Fuseau.
Red Fuseau
Red Fuseau combines the smooth tuber shape of Fuseau with an attractive pink-red skin. The flesh is white and crisp when raw, sweet and nutty when roasted. Plants grow to a similar height as standard Fuseau. Availability is more limited in UK garden centres, so you may need to order online from specialist suppliers. The coloured skin looks striking sliced raw into winter salads.
Why we recommend Fuseau as the only variety most UK gardeners need: After growing all four varieties side by side on our Staffordshire allotment for five seasons, Fuseau consistently delivers the best balance of yield, tuber shape, and flavour. The smooth tubers take a fraction of the peeling time compared with Gerard, and the plants are vigorous enough to produce 1.5-2kg per tuber planted without any special treatment.
How to plant Jerusalem artichoke tubers
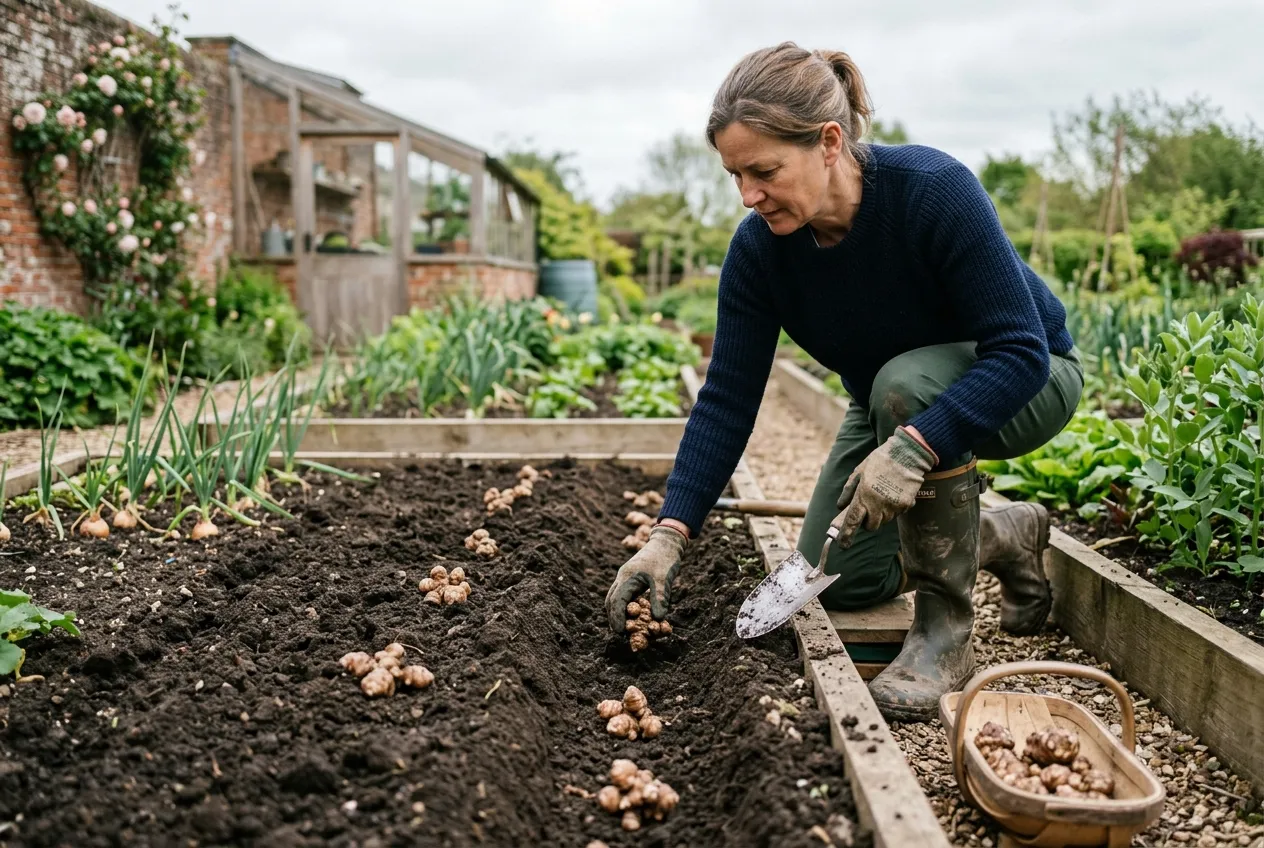
Planting Jerusalem artichoke tubers in a prepared trench in spring. Space them 30cm apart and cover with 10-15cm of soil.
Jerusalem artichokes are grown from tubers, not seeds. You can buy named varieties from garden centres in late winter, or simply plant tubers from a greengrocer or supermarket. Shop-bought tubers grow perfectly well. Choose firm ones with visible buds (eyes) and no soft or mouldy patches.
When to plant
Plant tubers from February to April. Jerusalem artichokes are fully hardy and tolerate cold soil, so there is no need to wait for warm spring conditions. In mild southern counties, February planting gets the crop established early. Northern gardeners and those on heavy clay can plant from March to mid-April once the worst waterlogging has drained. Late planting still works because the growing season extends right through to November.
How to plant
- Dig a trench 10-15cm deep along the intended row
- Space tubers 30cm apart along the trench
- Place each tuber with the buds facing upward
- Backfill with soil and firm gently
- Water in if the soil is dry
Space rows 90cm apart to allow access between the tall plants later in the season. If you are growing a single row as a windbreak or screen, the 30cm spacing within the row is sufficient.
Soil requirements
Jerusalem artichokes grow in almost any soil. They produce good crops on heavy clay, light sand, chalk, and everything in between. The one condition they dislike is prolonged waterlogging, which rots the tubers. If your plot sits wet through winter, grow them on a raised mound or in a raised bed.
They are not heavy feeders. A bed that has been improved with compost at some point in the previous two years provides enough nutrients. There is no need to add fertiliser at planting time. On very poor or sandy soils, fork in a bucketful of well-rotted compost per square metre before planting.
Why containment matters (and how to do it)
This is the section every experienced grower warns you about. Jerusalem artichokes spread aggressively through the soil and will colonise any uncontained bed within two seasons. Every tiny tuber fragment left in the ground after harvest grows into a new plant the following year. On allotments across the country, Jerusalem artichokes rank alongside mint and horseradish as the plants most likely to escape and invade neighbouring plots.
Sunken barrier method
The most reliable permanent containment is a physical root barrier buried around the planting area. Use rigid plastic sheeting, old plastic dustbin liners (doubled up), or sections of metal flashing. Bury the barrier vertically to a depth of 45cm, with 5cm protruding above soil level to stop surface runners. This creates an underground wall that tubers cannot cross.
Raised bed method
Growing in a raised bed with solid sides (timber, brick, or metal) contains the spread effectively. The bed floor sits on existing soil, so tubers can push downward but not outward. A bed 60cm tall is enough. Check the base each spring and remove any tubers that have grown underneath.
Container method
Large containers, old dustbins with drainage holes, or heavy-duty grow bags eliminate the spreading problem entirely. Each container holds one or two plants and produces a smaller but perfectly manageable crop. Use a minimum container size of 40 litres. Fill with a mix of multi-purpose compost and garden soil. Expect 1-1.5kg per plant in containers versus 2-2.5kg in open ground.
The harvest-everything method
If you grow Jerusalem artichokes in an open bed, the simplest containment strategy is to lift every single tuber at the end of each season. In late February or March, before new growth starts, fork over the entire bed thoroughly. Feel through the soil by hand for any tubers you missed with the fork. One overlooked tuber the size of a marble will produce a full plant the following year.
Caring for Jerusalem artichokes through the season
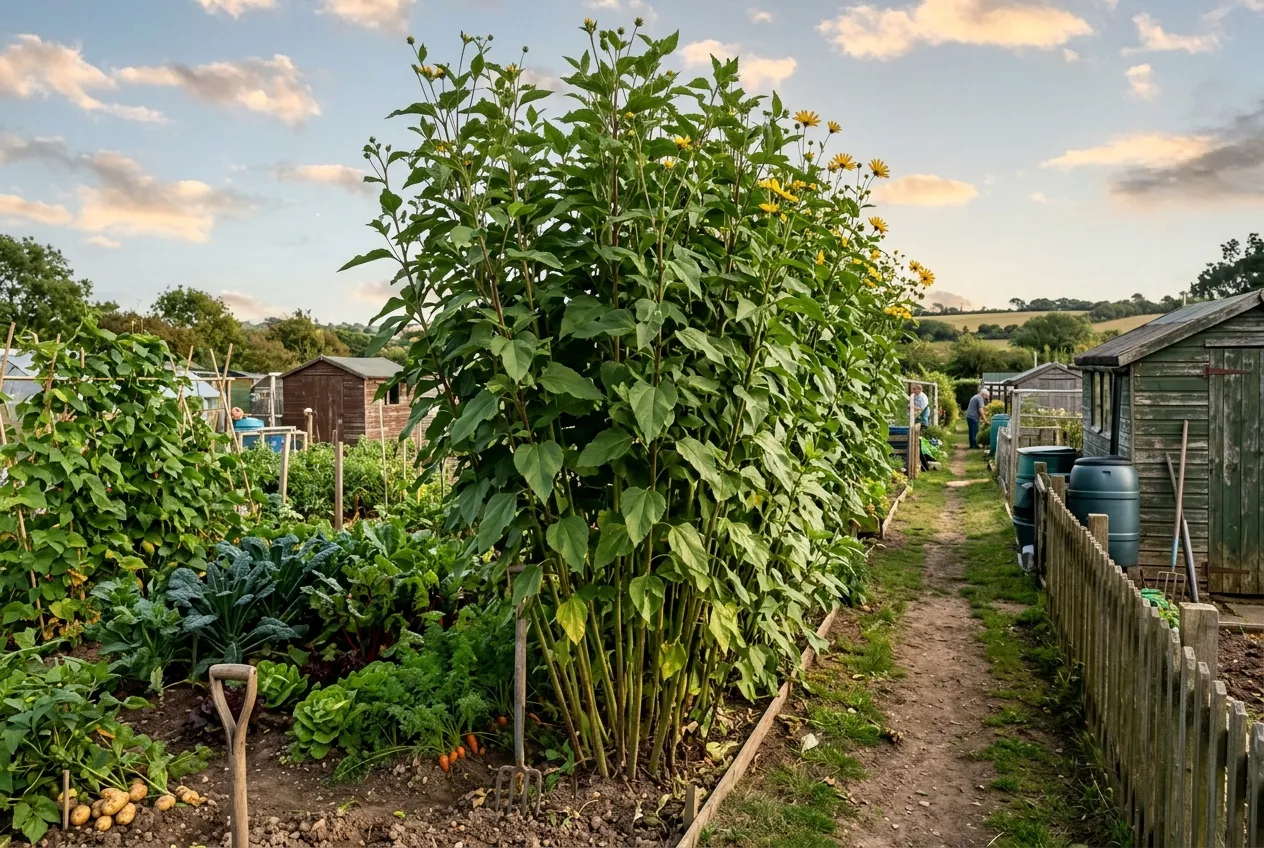
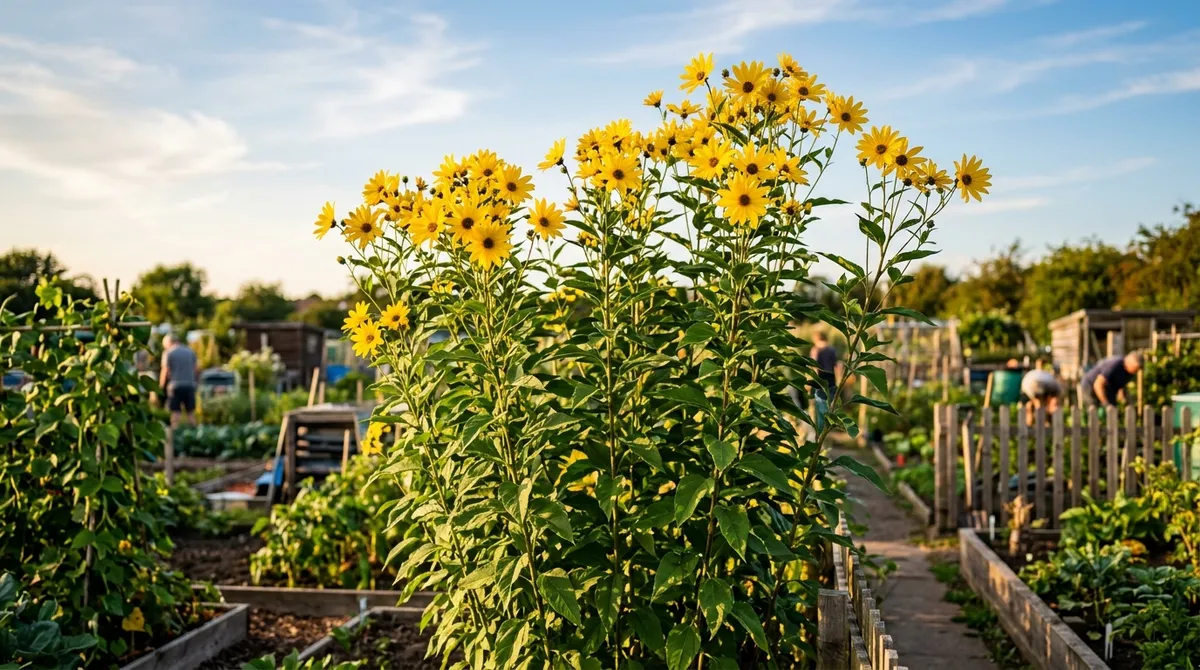
Jerusalem artichokes reach 2-3 metres tall by late summer, making them effective windbreaks for exposed allotment plots.
Jerusalem artichokes are among the lowest-maintenance crops you can grow. Once the tubers are in the ground, the plants largely look after themselves through the British growing season.
Watering
Established plants rarely need watering in a normal British summer. Their extensive root system finds moisture deep in the soil. During prolonged dry spells in July and August, a thorough soaking once a week helps maintain tuber size. Container-grown plants need regular watering because pots dry out faster than open ground.
Staking and support
Plants grow 2-3 metres tall with thick, sturdy stems. In sheltered gardens they are usually self-supporting. On exposed sites or windy allotments, the tall stems can catch autumn gales. Run a horizontal wire or string between stout posts at about 1.5 metres height along the row to keep plants upright. Alternatively, cut the stems back to 1.5 metres in late August once the tubers are developing. This reduces wind resistance without significantly affecting yield.
Weeding
The dense, tall growth shades out most weeds from midsummer onwards. Keep the bed weeded while plants are small in spring. Once the canopy closes, little else survives beneath it. This is one reason Jerusalem artichokes are popular with no-dig gardeners who use thick mulch in spring and let the plants do the rest.
Feeding
No feeding is necessary during the growing season on reasonable soil. If you want to boost yield on poor ground, scatter a handful of general-purpose organic fertiliser around each plant in May and water it in. Overfeeding produces excessive leafy top growth at the expense of tuber development.
The yellow flowers
In late summer and early autumn, Jerusalem artichokes produce clusters of bright yellow flowers at the top of the stems. These look like small sunflowers, which is exactly what they are. The flowers are attractive to bees and other pollinators and add genuine ornamental value to an allotment or vegetable garden. Removing the flower heads does not significantly increase tuber yield, so leave them for the pollinators.
Harvesting Jerusalem artichokes through winter
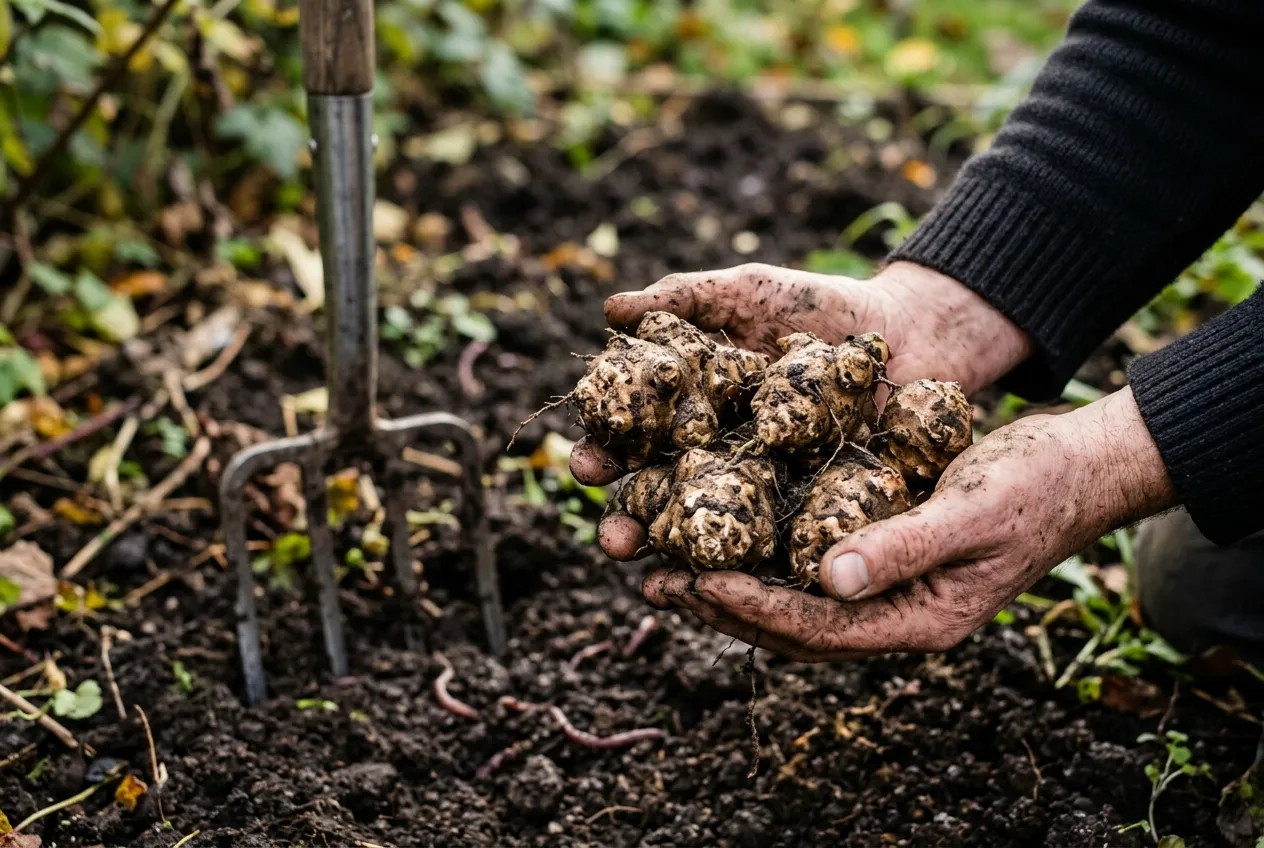
Freshly lifted Jerusalem artichoke tubers. The knobby varieties like Gerard yield more but take longer to clean and peel.
The harvest season is one of the great advantages of growing Jerusalem artichokes. While most vegetable crops are lifted and stored in autumn, Jerusalem artichokes sit happily in cold ground right through the British winter, ready to be dug whenever you need them.
When to start harvesting
Tubers are ready to lift from November onwards. Wait until the foliage has been blackened by the first hard frost, then cut the stems down to 10cm above ground level. The tubers are now dormant in the soil and will not grow any further until spring.
How to lift tubers
Push a garden fork into the soil about 20cm from the base of the cut stem. Lever upward to loosen the soil and pull the entire clump out by hand. Feel through the loosened soil carefully for stray tubers that have broken away from the main cluster. Each plant produces tubers in a cluster around the base of the stem, but some wander 15-20cm outward through the soil.
Leave them in the ground
The soil is the best storage system. Lift only what you need for each meal and leave the rest in the ground. Tubers keep perfectly in cold winter soil for months. They tolerate repeated freezing and thawing without damage. This rolling harvest approach means you always have the freshest possible tubers, which is far better than lifting the entire crop and watching it shrivel in a shed.
Forced storage
If you must store tubers out of the ground, place them in a paper bag or box of damp sand in a cool, dark place. They keep for 2-3 weeks this way. Do not store in plastic bags because moisture builds up and causes rot. Do not wash tubers before storage because the thin skin dries out and they go soft within days.
Final spring clearance
In late February or early March, before new shoots appear, lift every remaining tuber. This is your last chance to clear the bed before the cycle starts again. Set aside a few of the best tubers for replanting and compost or eat the rest. Be thorough. Fork over the entire area and check for fragments by hand. This spring clearance is the single most important step in preventing Jerusalem artichokes from becoming an invasive problem.
Cooking and preparing Jerusalem artichokes
Jerusalem artichokes have a distinctive sweet, nutty flavour that works in soups, roasts, gratins, and salads. The main challenge is the knobby shape of most varieties, which makes peeling time-consuming. Fuseau tubers are notably easier to prepare than traditional varieties.
Preparation tips
Scrub tubers under running water with a stiff vegetable brush. For smooth varieties like Fuseau, a standard vegetable peeler works well. For knobby types, it is often easier to boil or roast them unpeeled and slip the skins off afterwards. Cut tubers discolour quickly, so drop peeled pieces into a bowl of water with a squeeze of lemon juice.
Best cooking methods
| Method | Temperature / time | Result |
|---|---|---|
| Roasted | 190C for 35-45 minutes | Caramelised, sweet, crispy edges |
| Soup | Simmer 20 minutes with onion and stock | Silky, earthy, classic winter starter |
| Mashed | Boil 15-20 minutes, mash with butter | Smooth, slightly sweet, pairs with game |
| Raw in salad | Sliced thinly or grated | Crisp, nutty, water chestnut texture |
| Gratin | 180C for 40 minutes with cream and garlic | Rich, indulgent, French bistro classic |
The wind issue
There is no tactful way around this. Jerusalem artichokes cause significant digestive wind in most people. The tubers contain high levels of inulin, a carbohydrate that human enzymes cannot digest. Gut bacteria ferment the inulin, producing gas. The effect is strongest the first few times you eat them and diminishes as your gut bacteria adapt over two to three weeks of regular consumption.
Slow roasting reduces the problem. Cooking at 190C for 40-50 minutes breaks down a proportion of the inulin. Boiling is less effective. Some cooks add a teaspoon of caraway or fennel seeds to Jerusalem artichoke dishes, which may ease digestion. Start with small portions if you are new to eating them and increase gradually.
Growing Jerusalem artichokes as a windbreak or screen
The 2-3 metre height of Jerusalem artichoke plants makes them genuinely useful as a living windbreak on exposed sites. On allotments in particular, a single row along the north or west boundary shelters lower-growing crops from prevailing winds without the permanence of a hedge.
Plant a row at 30cm spacing along the boundary in February. By July the plants form a dense wall of foliage and thick stems. The shelter effect extends roughly five times the height of the screen, so a 2.5 metre row of Jerusalem artichokes protects crops up to 12 metres downwind.
The screen dies back each winter, which suits allotment gardeners who need temporary summer shelter. It also means the row does not permanently shade the plots behind it during the short winter days. If you are setting up a new allotment plot, our guide to starting an allotment covers layout planning for windbreaks and productive beds.
Unlike a permanent hedge, a Jerusalem artichoke windbreak produces a usable crop. You harvest the tubers through winter, replant a few in spring, and the screen rebuilds itself over the growing season. This dual-purpose characteristic makes it one of the most practical plants on any exposed growing site.
Common problems and pests
Jerusalem artichokes are remarkably trouble-free compared with most vegetable crops. Serious diseases are uncommon in UK gardens.
Slugs
Slugs occasionally damage young shoots as they emerge in spring. This is rarely severe enough to affect the crop. Standard slug control measures such as evening patrols, beer traps, or nematode biological controls handle the problem if it occurs. Once the plants are growing strongly, slug damage is negligible.
Sclerotinia rot
Sclerotinia is a white fungal rot that occasionally affects tubers in storage or in wet ground. Infected tubers develop a white cottony mould with hard black fungal bodies. Remove and destroy affected tubers. Do not compost them. Good drainage and crop rotation reduce the risk, though moving Jerusalem artichokes around the garden is impractical if you are using them as a permanent feature.
Aphids
Blackfly sometimes colonise the growing tips in early summer. This rarely affects tuber production. A strong jet of water from a hose dislodges most colonies. Ladybirds and hoverfly larvae usually arrive within a week and provide natural control. Chemical sprays are unnecessary for this crop.
Spreading out of control
The most common problem is not a pest or disease but the plant itself. If containment fails, Jerusalem artichokes appear in beds, paths, and neighbouring plots for years afterwards. Every fragment of tuber left in the soil regrows. The only solution is persistent lifting. Fork over invaded areas in spring and remove every piece. It may take two or three seasons of thorough clearance to eliminate unwanted plants from an area.
From our allotment trials: We deliberately left a small patch uncontained for three seasons to test how aggressively Jerusalem artichokes spread in Staffordshire clay soil. By the third year, tubers had migrated 1.2 metres from the original planting row in all directions and appeared in the adjacent potato bed. Complete clearance took two further seasons of spring forking. The lesson: never skip the February clearance.
Month-by-month growing calendar
| Month | Task |
|---|---|
| February | Plant tubers 10-15cm deep, 30cm apart. Prepare containment barriers |
| March | Complete any remaining planting. Watch for emerging shoots |
| April | Weed around young plants while they are still short |
| May | Mulch around stems if desired. Plants growing rapidly |
| June-July | Plants reach full height. Water in prolonged dry spells only |
| August | Stake or support on exposed sites. Cut to 1.5m if wind is a concern |
| September | Enjoy the yellow sunflower-like blooms. Good for pollinators |
| October | Foliage begins to yellow. First frost blackens the leaves |
| November | Cut stems to 10cm. Begin harvesting tubers as needed |
| December-January | Continue harvesting through winter. Tubers store perfectly in the soil |
| Late February | Final clearance. Lift all remaining tubers. Save the best for replanting |
Frequently asked questions
Are Jerusalem artichokes related to globe artichokes?
No, they are completely different plants. Jerusalem artichokes are tubers from a North American sunflower species, Helianthus tuberosus. Globe artichokes are Mediterranean thistles grown for their flower buds. The shared name is misleading. The flavour of Jerusalem artichoke tubers was thought to resemble globe artichoke hearts by early European explorers, which is likely how the name stuck.
When should I plant Jerusalem artichoke tubers in the UK?
Plant tubers from February to April. The soil does not need to be warm because Jerusalem artichokes tolerate cold ground. In most UK regions, late February to mid-March is ideal. Northern gardeners and those at altitude can plant up to late April without losing yield. Tubers planted later simply produce slightly shorter plants.
How do I stop Jerusalem artichokes spreading?
Harvest every single tuber each spring. Even a small fragment left in the soil will regrow. For permanent containment, plant inside a sunken barrier of thick plastic or metal sheeting buried 45cm deep. Raised beds with solid sides also work. Growing in large containers eliminates the spreading problem entirely but reduces yield.
Can I eat Jerusalem artichokes raw?
Yes, raw Jerusalem artichokes are crisp and nutty. Slice them thinly into salads or grate into slaws. Raw tubers contain more inulin than cooked ones, which means they cause more digestive wind. If you are new to eating them, start with small portions and increase gradually as your gut bacteria adapt over two to three weeks.
Why do Jerusalem artichokes cause wind?
Jerusalem artichokes are rich in inulin, a fibre that human enzymes cannot break down. Gut bacteria ferment the inulin in the large intestine, producing gas. The effect varies between individuals and decreases with regular consumption. Slow roasting at 190C for 40-50 minutes breaks down some inulin and reduces the problem. Fuseau has slightly less inulin than knobblier varieties.
How do I harvest Jerusalem artichokes?
Lift tubers with a garden fork from November onwards. Push the fork in 20cm away from the stem to avoid spearing tubers. Loosen the soil and pull the entire clump out by hand. Feel through the loosened soil for stray tubers. Leave tubers in the ground and lift only what you need each week. They store better in cold soil than in a fridge.
Do Jerusalem artichokes need full sun?
They grow best in full sun but tolerate partial shade. In shade, plants grow taller with thinner stems and produce a smaller crop. A south or west-facing position gives the best yield. They cope well with exposed, windy sites because the thick stems are remarkably resilient. Wind damage is rare even in autumn gales. For more tips on getting the most from your plot, Garden Organic has a good variety guide.
Lawrie has been gardening in the West Midlands for over 30 years. He grows his own veg using no-dig methods, keeps a wildlife-friendly garden, and writes practical advice based on real UK growing conditions.