How to Start an Allotment in the UK
How to get an allotment in the UK, from council waiting lists to first-year planting. Covers plot sizes, costs, tools, layout, and what to grow first.
Key takeaways
- A full allotment plot is 250 sq m (10 rod), but half plots of 125 sq m are the most common letting size
- Annual rent costs twenty-five to one hundred pounds depending on your local council
- Urban waiting lists average 2-3 years, rural areas often have plots available immediately
- Budget two hundred to five hundred pounds for first-year setup including tools, seeds, and compost
- Plan to spend 5-10 hours per week in summer and 2-3 hours in winter on your plot
Taking on an allotment is one of the best decisions a UK gardener can make. The National Allotment Society (NSALG) estimates there are roughly 330,000 allotment plots across England, Scotland, and Wales, feeding around 90,000 families. A single half plot of 125 square metres produces enough vegetables to feed two people through summer and well into autumn.
This guide covers every step, from getting your name on a waiting list to harvesting your first crops. Once you have your plot, our allotment for beginners guide covers crop rotation, soil improvement, and practical growing techniques. If you are completely new to growing food, our guide to starting a vegetable garden covers the basics of soil, tools, and easy first crops.
Finding and applying for an allotment
Council allotments
The quickest route to an allotment is through your local council. Under the 1908 Small Holdings and Allotments Act, councils in England and Wales have a legal duty to provide allotments when there is demand. In practice, most councils maintain existing sites rather than creating new ones, but they remain the main provider.
To apply:
- Search your council’s website for “allotments” or contact the parks and leisure department
- Complete the application form (most councils now accept online applications)
- State your preferred site if the council manages multiple locations
- Specify whether you want a full, half, or quarter plot
You will receive a place on the waiting list. Councils prioritise residents who live in the parish or ward where the allotment site is located.
Alternative routes
If your council’s waiting list is long, try these alternatives:
- National Allotment Society (NSALG) maintains a directory of allotment sites across the UK
- Allotment associations run many sites independently of councils. Contact them directly.
- Community gardens and land share schemes match growers with landowners who have unused garden space
- Parish councils in rural areas sometimes manage their own allotment land separately from the district council
Tip: Apply to every site within reasonable distance, not just your nearest one. A plot fifteen minutes away with no waiting list beats a two-year wait for the site next door.
Understanding waiting lists
Waiting times vary enormously across the UK:
| Area type | Typical wait | Notes |
|---|---|---|
| Inner London | 3-7 years | Some boroughs exceed 10 years |
| Outer London | 2-5 years | Shorter in outer boroughs |
| Major cities (Birmingham, Manchester, Bristol) | 2-4 years | Varies by ward |
| Towns and suburbs | 1-2 years | Often shorter than expected |
| Rural areas | 0-6 months | Many sites have immediate vacancies |
Requesting a half plot rather than a full plot often shortens the wait. Many councils are splitting full plots to serve more tenants. Half plots are also more practical for beginners and anyone with limited free time.
Plot sizes explained
Allotment plots in the UK are traditionally measured in rods (also called poles or perches). One rod equals 25.29 square metres.
| Plot type | Size | Equivalent | Best for |
|---|---|---|---|
| Full plot (10 rod) | 250 sq m | 30m x 8m roughly | Experienced growers, families, year-round supply |
| Half plot (5 rod) | 125 sq m | 15m x 8m roughly | Most beginners, couples, regular cropping |
| Quarter plot (2.5 rod) | 62.5 sq m | 8m x 8m roughly | Complete beginners, limited time, supplementary growing |
A half plot is the best starting size for most people. It produces a serious amount of food without being overwhelming. A full plot is a significant commitment, particularly in the first year when ground clearance and soil improvement dominate your time.
Tip: If offered a full plot when you wanted a half, ask whether the council will let you cultivate half the plot initially and expand in year two. Many councils allow this as long as both halves are maintained to a reasonable standard.
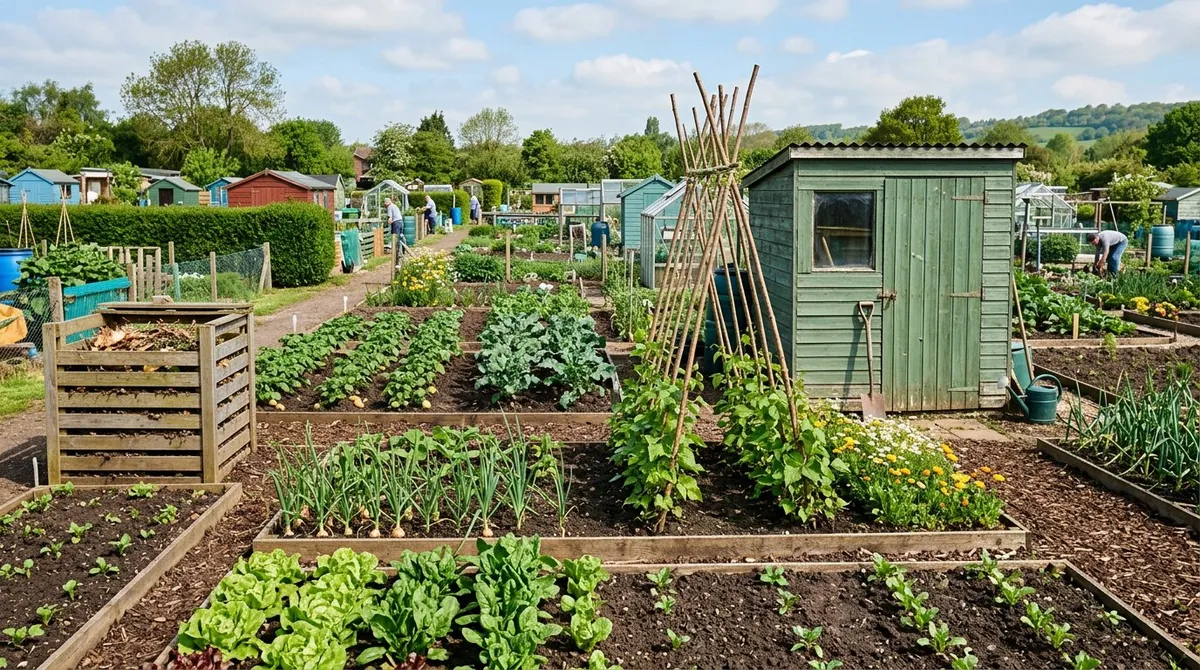
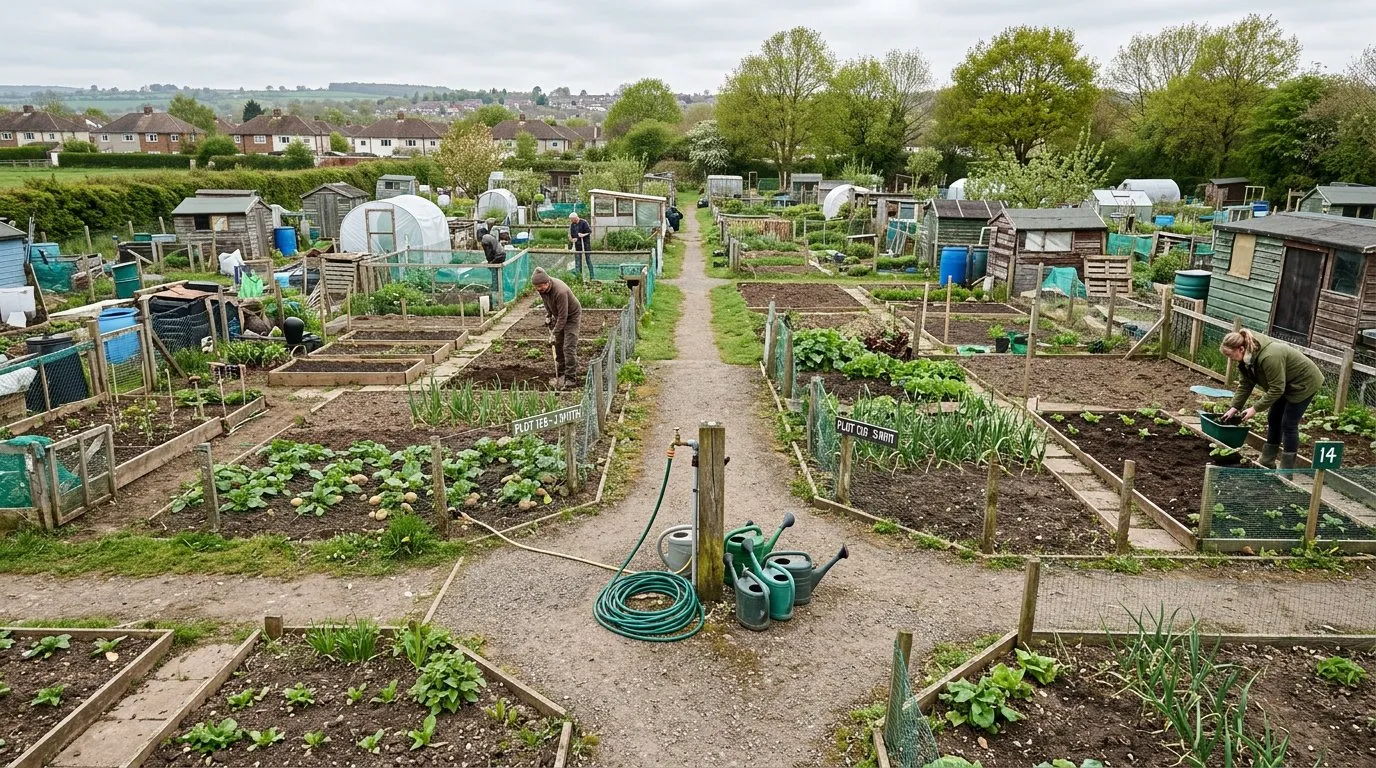 A typical UK allotment site in midsummer. Each plot reflects its tenant’s approach, from neat raised beds to traditional row cropping.
Costs: what to budget
Annual rent
Allotment rent is set by the local authority or allotment association. Rates vary widely:
| Council type | Typical annual rent (full plot) | Half plot |
|---|---|---|
| Rural parish councils | Fifteen to thirty pounds | Eight to fifteen pounds |
| Town councils | Twenty-five to fifty pounds | Fifteen to thirty pounds |
| City councils | Forty to one hundred pounds | Twenty-five to sixty pounds |
| London boroughs | Sixty to one hundred pounds | Thirty-five to sixty pounds |
Most councils offer concessions of 25-50% for pensioners, unemployed tenants, and those receiving certain benefits. Water supply is usually included in the rent. Some sites charge a small additional levy for communal facilities.
First-year setup costs
Your first year on an allotment costs more than subsequent years. Budget for:
| Item | Estimated cost | Notes |
|---|---|---|
| Seeds and seed potatoes | Fifteen to thirty pounds | 8-12 varieties for year one |
| Garden fork and spade | Twenty to forty pounds | Buy once, buy quality |
| Hand tools (trowel, hand fork, secateurs) | Fifteen to twenty-five pounds | Essential trio |
| Watering can (10L) | Eight to twelve pounds | Unless site has nearby standpipes |
| Canes, string, plant supports | Ten to twenty pounds | Runner beans need 2.4m canes |
| Compost and manure | Thirty to sixty pounds | For beds and mulching |
| Weed-suppressant membrane | Ten to twenty pounds | For paths and uncultivated areas |
| Miscellaneous (labels, netting, fleece) | Twenty to thirty pounds | Accumulates over the season |
| Total | One hundred and thirty to two hundred and forty pounds | Excluding rent and shed |
A basic shed (if permitted and not already on site) adds sixty to two hundred pounds. Many allotmenteers manage perfectly well with a lockable storage box instead. Our guide to garden storage solutions covers sheds, lock boxes, and lean-to stores at every budget.
Your first visit: assessing the plot
When you take on a new plot, resist the urge to start digging immediately. Spend your first visit assessing what you have.
What to look for
- Orientation: which way does the plot face? South-facing plots get the most sun.
- Water supply: where is the nearest standpipe or water trough? Carrying water more than 30 metres gets tiring quickly.
- Existing features: look for fruit bushes, rhubarb crowns, or perennial herbs. Previous tenants often leave valuable plants behind.
- Soil condition: push a fork in. Clay, sand, or loam? Compacted or workable? Our guide on how to improve clay soil covers the most common problem soil.
- Weed situation: identify perennial weeds (couch grass, bindweed, dock, brambles). These need different treatment from annual weeds.
- Boundaries and paths: check fences, edges, and path condition. Know where your plot ends and your neighbour’s begins.
Dealing with an overgrown plot
Most new tenants inherit an overgrown plot. Do not panic. The weeds prove the soil is fertile.
Method for clearing an overgrown plot:
- Cut everything down to ground level with a strimmer, shears, or sickle
- Remove all debris, bricks, glass, and rubbish
- Cover the worst areas with black weed-suppressant membrane or thick cardboard weighed down with bricks
- Focus on clearing and cultivating one area at a time, typically a quarter of the plot
- Plant potatoes in the cleared section. They break up compacted soil and suppress remaining weeds.
Do not try to clear the entire plot in your first weekend. Work in stages across the first season.
Planning your plot layout
A well-planned layout saves hours of work over the growing season. Divide your plot into functional zones.
Essential zones
Growing beds: the main area. Use beds 1.2m wide (reachable from both sides without treading on soil) with 45cm paths between them. See our guide to raised bed gardening for bed construction methods.
Paths: keep main paths at least 60cm wide for wheelbarrow access. Mulch paths with woodchip, cover with membrane, or leave as compacted earth. Grass paths look tidy but need mowing.
Compost area: position in a corner or along the back edge. Two or three compost bins allow a rotation system. One fills, one rots down, one is ready to use. Our guide on how to make compost covers the full method.
Shed or storage: if your site allows sheds, place them on the north side so they do not shade the growing area. A small shed stores tools, keeps seeds dry, and provides shelter during rain.
Soft fruit area: a permanent section for raspberry canes, gooseberry bushes, and strawberry beds. Position along one edge so they do not interfere with annual crop rotation.
Water butts: collect rainwater from shed roofs. Rainwater is better for plants than tap water, and it reduces demand on the site’s supply.
Warning: Check your tenancy agreement before building structures. Most sites have rules about shed size, fencing height, and what materials you can use. Breaking these rules can lead to eviction notices.
Essential tools
You need fewer tools than you think. Buy quality basics rather than a cheap multi-piece set.
The starter kit
| Tool | Approximate cost | Why you need it |
|---|---|---|
| Digging fork | Twelve to twenty pounds | Turning soil, lifting root crops |
| Digging spade | Twelve to twenty pounds | Digging beds, moving compost |
| Hand trowel | Five to eight pounds | Planting, weeding close work |
| Hoe (Dutch or draw) | Ten to fifteen pounds | Weeding between rows |
| Rake | Eight to twelve pounds | Levelling soil, preparing seedbeds |
| Watering can (10L) | Eight to twelve pounds | Watering seedlings and transplants |
| Wheelbarrow | Twenty-five to fifty pounds | Moving compost, clearing weeds |
| Secateurs | Eight to fifteen pounds | Pruning, cutting back |
| String line and pegs | Three to five pounds | Marking straight rows |
Total starter kit: ninety to one hundred and sixty pounds. Some allotment sites have communal tool stores where you can borrow larger items like wheelbarrows, which brings your personal outlay down.
Tools to add later
In year two and beyond, consider a garden hose with fittings (if your site allows them), a cold frame or mini greenhouse for raising seedlings, netting and cloches for crop protection, and a soil thermometer for accurate sowing timing.
What to grow in your first year
Your first year is about learning your plot, not about maximising production. Choose crops that are productive, forgiving, and teach you the basics.
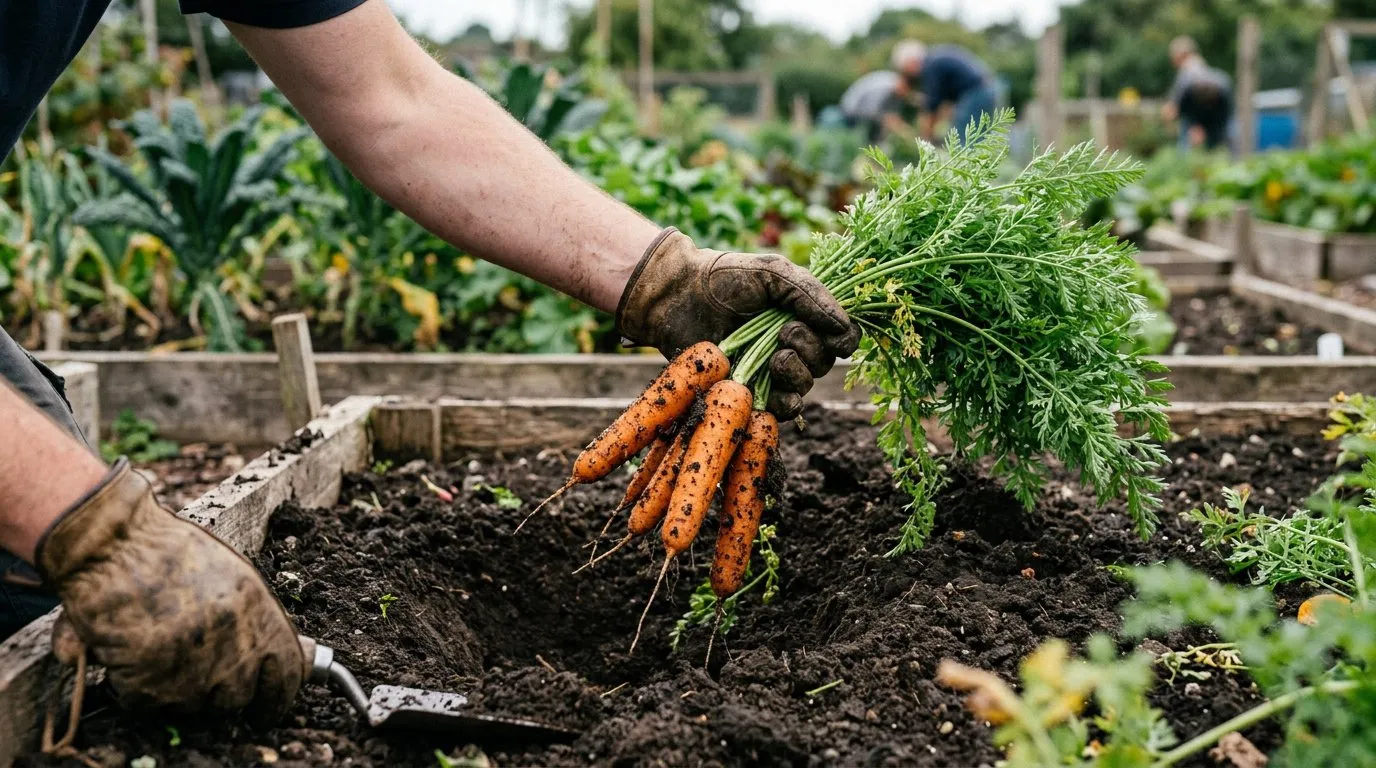
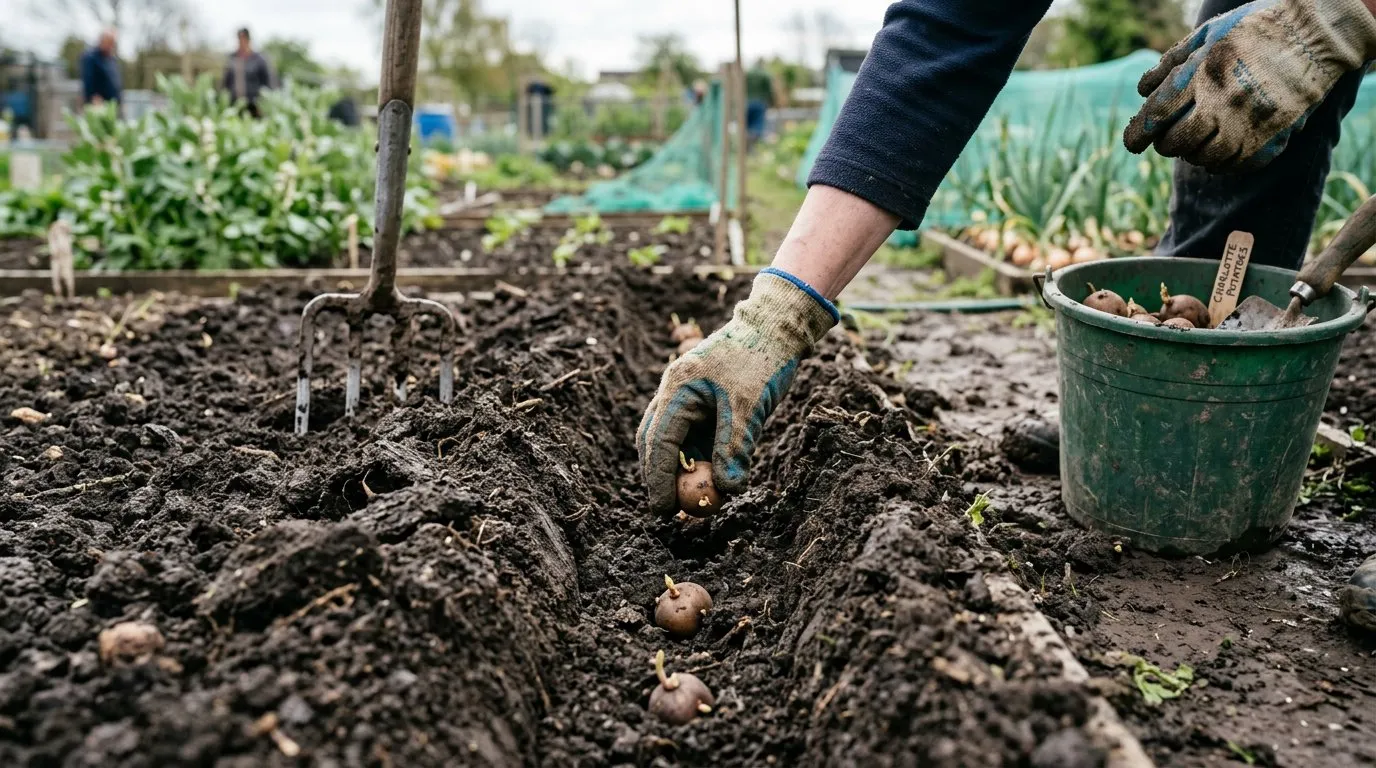 Planting seed potatoes in March. Potatoes are the ideal first-year allotment crop because they break up compacted soil as they grow.
The best first-year crops
Potatoes are the number one first-year allotment crop. They break up compacted ground, suppress weeds with their dense canopy, and produce a satisfying harvest. Plant first earlies in March for new potatoes by June. Our complete guide to growing potatoes covers varieties, planting, and harvesting in detail.
Courgettes are incredibly productive. Two plants produce more than a family of four can eat. Sow indoors in April, plant out after the last frost in late May. Pick fruits at 15-20cm for the best flavour.
Runner beans and French beans grow fast, crop heavily, and fix nitrogen in the soil for the following year’s crops. Push seeds directly into the ground beside a wigwam of canes in May. Pick every 2-3 days to keep them producing.
Salad leaves give the fastest results. Sow lettuce, rocket, and mixed salad directly into prepared soil from March. You will be eating your own salad within 4-6 weeks. Sow small amounts every 2-3 weeks for continuous supply. Our seed sowing calendar shows timing for each crop.
Onions and garlic from sets are almost effortless. Push sets into the soil in March (onions) or October-November (garlic). Both need minimal care and store well.
Why we recommend potatoes as the definitive first-year allotment crop: After 30 years of helping new allotmenteers establish their first plots, potatoes outperform every other starter crop for soil improvement and confidence-building. On one compacted clay plot we worked in 2019, a single season of maincrop potatoes broke up a 30cm pan that two years of digging had barely touched. The harvest was 18kg from a 4-metre row — more than enough to convince the grower they had made the right decision.
Broad beans sow directly outdoors from March. They tolerate cold, crop heavily, and fix nitrogen. A 3m row produces enough beans for multiple freezer bags.
What to avoid in year one
Do not attempt brassicas (cabbage, broccoli, cauliflower) in your first year. They need net protection from pigeons, a long growing season, and firm, well-conditioned soil. Save them for year two when your soil has improved and you have learned the site’s pest pressures.
Sweetcorn needs a large block planting for pollination and takes up space that produces more food when planted with other crops. Asparagus needs a 2-3 year establishment period before you can harvest. Both are better saved for later years.
First-year allotment calendar
| Month | Tasks |
|---|---|
| January | Sign tenancy agreement. Order seeds and seed potatoes. Plan plot layout on paper. |
| February | Begin clearing plot. Cut back brambles and perennial weeds. Start chitting seed potatoes on a windowsill. Cover cleared beds with black plastic to warm soil. |
| March | Plant first early potatoes. Sow broad beans, peas, and lettuce directly outdoors. Sow courgettes and tomatoes indoors. Set onion sets. Lay paths with membrane and woodchip. |
| April | Plant second early potatoes. Sow beetroot, carrots, spring onions, radish outdoors. Earth up potato shoots. Continue clearing uncultivated areas. |
| May | Plant out courgettes, runner beans, and tomatoes after last frost. Erect bean supports. Sow French beans directly. Hoe weeds regularly. Harvest first lettuce and radish. |
| June | Harvest first early potatoes and broad beans. Succession sow salads. Water in dry spells. Fill gaps left by harvested crops with new sowings. Start composting weeds and waste. |
| July | Peak harvest month. Pick beans every 2-3 days. Harvest courgettes, beetroot, onions. Sow autumn salads and spring cabbage. Water consistently. |
| August | Continue harvesting. Lift and dry onions. Sow overwintering onion sets. Plant out kale and spring cabbage if started. Collect and dry bean seeds for next year. |
| September | Clear spent crops. Dig over empty beds and sow green manure (field beans, clover). Plant garlic cloves. Harvest maincrop potatoes. Assess what grew well and what to change next year. |
| October | Final harvests. Mulch empty beds with compost or cardboard. Tidy plot for winter inspection. Plant bare-root fruit bushes and strawberry runners. Clean and oil tools. |
| November | Spread autumn leaves as mulch. Repair shed, paths, and raised bed frames. Order seed catalogues. Review and plan for year two. |
| December | Rest. Browse seed catalogues. Make a planting calendar for next year. Join online allotment forums. The plot does not need you this month. |
Plot layout: a practical plan
Here is a practical layout for a half plot (125 square metres), divided into four main growing zones plus permanent features.
Zone 1: Potatoes and roots (30 sq m)
Rotate potatoes through this section in year one to break up the soil. In subsequent years, follow a four-year rotation: potatoes, then legumes, then brassicas, then roots.
Zone 2: Legumes and salads (30 sq m)
Runner beans on wigwams, French beans in rows, broad beans, peas. Salad leaves grow between the rows using the available light. This zone fixes nitrogen for the following year’s brassicas.
Zone 3: Courgettes, squash, and sweetcorn (30 sq m)
Space-hungry crops that produce heavy yields. Two or three courgette plants and a few squash plants fill this zone. Add sweetcorn from year two onward.
Zone 4: Brassicas and onions (20 sq m)
Onions and garlic from year one. Add brassicas (kale, sprouting broccoli, cabbage) from year two when the soil is in better condition and you have netting to protect against pigeons.
Permanent features (15 sq m)
Shed or storage area, compost bins, soft fruit area (raspberries, gooseberries, strawberries), paths, and water butts. Position these along the north and east edges to minimise shading.
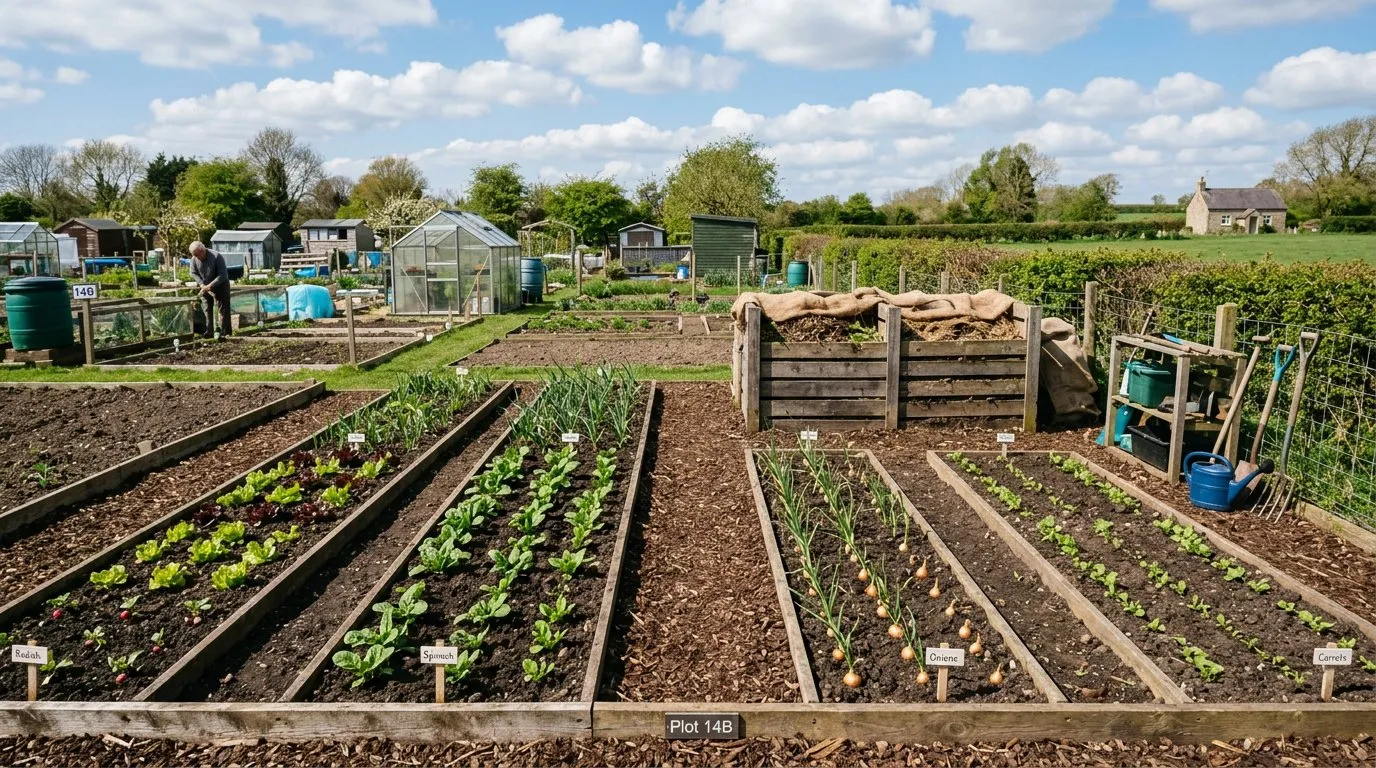 A practical half-plot layout. Four rotation zones, permanent soft fruit along one edge, shed and compost in the far corner.
Allotment rules and tenancy agreements
Every allotment site operates under a tenancy agreement. Read yours carefully before signing.
Common rules
- Cultivation requirement: you must keep at least 75% of your plot under active cultivation. Uncultivated areas must be kept tidy (mowed, covered, or clearly being prepared for planting).
- No livestock beyond bees and hens (and hens only on some sites with specific permission).
- Structures: sheds, greenhouses, and polytunnels have size limits. Typical maximum shed size is 1.8m by 1.2m. Some sites allow larger structures with committee approval.
- Bonfires: many sites ban bonfires entirely. Others allow them only on specific days or in specific months. Check before lighting anything.
- Chemicals: some sites are fully organic. Others allow limited use of approved pesticides. Know your site’s policy.
- Plot inspections: councils and associations inspect plots regularly, typically 2-4 times per year. Failure to maintain your plot can result in warnings and eventually eviction.
- Guests and helpers: most sites welcome family members and helpers. Some require all regular users to be named on the tenancy.
Rent and notice periods
Rent is typically due annually, in advance. Most tenancies run on an annual basis with a month’s notice to quit from either side. Some councils offer reduced rent for the first year as an incentive to take on neglected plots.
The community side
An allotment is not just a patch of ground. It is a community. This is one of the best things about allotment life, and something no back garden can replicate.
What to expect
- Neighbours share knowledge. The experienced grower three plots along will happily tell you what varieties work on your site, when the blight usually arrives, and where to source cheap manure.
- Surplus sharing is standard. You will give away courgettes in August (everyone has too many) and receive runner bean plants in May.
- Communal composting operates on many sites. A central composting area reduces individual effort and produces better compost through volume.
- Working days bring the site together for path maintenance, communal area upkeep, and infrastructure repairs. Attending these is how you become part of the community.
- Plot-sitting happens naturally. Neighbours water your crops when you are on holiday. Return the favour.
Tip: Introduce yourself to your immediate neighbours on your first visit. Offer a cup of tea. The advice and support you receive will be worth more than any gardening book.
Common mistakes new allotment holders make
Taking on too much plot
The single most common mistake. A full plot of 250 square metres is a serious undertaking that needs 8-10 hours per week in summer. If you have never gardened before, a quarter or half plot is more realistic. It is far better to have a well-maintained small plot than a neglected large one.
Not covering uncultivated ground
Bare soil grows weeds. If you are not ready to plant an area, cover it with black membrane, thick cardboard, or a green manure crop. Leaving bare ground invites couch grass, bindweed, and docks, which are far harder to remove once established than they are to prevent.
Ignoring the soil
New allotmenteers often start planting without improving the soil first. Compacted, nutrient-poor ground produces poor crops regardless of what you sow. Spend the first season adding compost, manure, and organic matter. The harvest will come. Growing good soil is the foundation of everything else.
Planting everything at once
Sowing twenty different crops in March leads to a glut in July and empty beds by September. Use succession sowing for fast crops like lettuce, radish, and beans. Sow a short row every 2-3 weeks rather than the whole packet at once. This spreads your harvest across the entire season.
Underestimating the time commitment
An allotment needs consistent attention. Short, regular visits of 1-2 hours three or four times per week are far more effective than a single marathon session at the weekend. Weeds grow fast. Crops need watering. Runner beans need picking every 2-3 days. Be realistic about your available time before committing to a plot.
Time commitment by season
| Season | Hours per week (half plot) | Main tasks |
|---|---|---|
| Spring (March to May) | 5-8 hours | Soil preparation, sowing, planting, weeding |
| Summer (June to August) | 6-10 hours | Watering, weeding, harvesting, succession sowing |
| Autumn (September to November) | 3-5 hours | Clearing, composting, planting overwintering crops |
| Winter (December to February) | 1-3 hours | Maintenance, planning, ordering seeds |
These figures are for a half plot. Double them for a full plot. Reduce by half for a quarter plot.
Beyond year one
Your first year is about establishing the plot, learning your soil, and discovering what grows well in your specific conditions. Our allotment for beginners guide covers the practical growing techniques — crop rotation, succession sowing, and soil improvement — that turn a cleared plot into a productive food garden. From year two onward, the work shifts from clearing and building to growing and refining.
Year two priorities
- Introduce a four-year crop rotation across your beds
- Add brassicas now that the soil is improved and you understand pest pressures
- Plant permanent fruit: raspberry canes, gooseberry bushes, blackcurrant bushes
- Build a cold frame for raising seedlings on site rather than transporting them from home
- Try overwintering crops: garlic, overwintering onions, broad beans sown in November
Long-term improvements
Over 3-5 years, a well-managed allotment develops rich, dark, productive soil that grows almost anything. The community becomes familiar, the annual rhythm becomes second nature, and the plot becomes one of the most productive and satisfying places in your life.
A single half plot, well cultivated, can produce two hundred to four hundred pounds worth of fresh vegetables per year. More importantly, it grows food that tastes better than anything from a supermarket, provides regular outdoor exercise, and connects you to a growing community of people who share your enthusiasm.
Now you have secured your allotment and planned your first year, read our allotment for beginners guide for the practical growing techniques — crop rotation, succession sowing, and soil improvement — that turn a cleared plot into a productive food garden.
Frequently asked questions
How do I apply for an allotment in the UK?
Contact your local council directly through their website or parks department. Most councils accept online applications. You can also search through the National Allotment Society (NSALG) directory or approach individual allotment associations near you. Apply to multiple sites to increase your chances of a shorter wait.
How long is the average allotment waiting list?
Urban waiting lists average 2-3 years across most UK cities. London boroughs often exceed 5 years, with some inner-city sites reaching 10 years. Rural areas are dramatically shorter, with many councils offering plots immediately. Request a half plot rather than a full one, as this often moves you up the list faster.
How much does an allotment cost per year?
Annual rent ranges from twenty-five to one hundred pounds for a full plot, depending on your council. Half plots typically cost 50-60% of the full rate. Rural councils can charge as little as fifteen pounds. Most authorities offer concessions of 25-50% for pensioners and benefit recipients. Water is generally included in the rent.
What size is a standard allotment plot?
A full plot is 250 square metres, equivalent to 10 rod (the traditional unit). Most councils now let half plots of 125 square metres as the standard size for new tenants. Quarter plots of 62.5 square metres are available on some sites and are ideal for beginners with limited time.
What should I grow on a new allotment?
Start with potatoes, courgettes, runner beans, and salad leaves in your first year. Potatoes break up compacted soil and suppress weeds. Courgettes produce heavy yields with minimal effort. Runner beans fix nitrogen in the soil. Salad leaves give you a harvest within 4-6 weeks of sowing. Add onion sets and broad beans for variety.
How much time does an allotment need?
A half plot needs 5-10 hours per week during the growing season (April to September). Winter maintenance drops to 2-3 hours per week. Short, regular visits of 1-2 hours are more effective than infrequent long sessions. A full plot roughly doubles the time requirement. Be realistic about your schedule before committing.
Can I put a shed on my allotment?
Most sites allow sheds within size limits, typically 1.8m by 1.2m or 2.4m by 1.8m depending on the site. Check your tenancy agreement before buying or building. Some sites provide communal tool stores instead. Position sheds on the north edge of your plot to avoid shading crops. Materials may need to match site guidelines.
Lawrie has been gardening in the West Midlands for over 30 years. He grows his own veg using no-dig methods, keeps a wildlife-friendly garden, and writes practical advice based on real UK growing conditions.