How to Build a Greenhouse Base UK
How to build a greenhouse base in the UK. Covers concrete slab, paving slab, and steel base kit options with levelling, costs, and ground anchors.
Key takeaways
- A level base is the single most important factor in greenhouse longevity and weather resistance
- Paving slabs on a compacted sub-base are the most popular DIY option for hobby greenhouses
- Steel base kits bolt directly to each greenhouse model and raise it 50-75mm above ground level
- Concrete slab bases suit larger greenhouses and exposed, windy sites
- Ground anchor kits from 69 pounds secure greenhouses to soft ground without a permanent base
- Check the base is level to within 5mm across the full width and length before assembling the frame
A greenhouse is only as good as the base beneath it. A poorly laid base leads to twisted frames, cracked glazing, jammed doors, and eventual structural failure. Getting the base right is the single most important step in any greenhouse project.
This guide covers the three main base types used in the UK: concrete slabs, paving slabs, and steel base kits. It includes the practical steps for each method, along with ground anchor options for softer ground and exposed sites.
Why does a greenhouse need a solid base?
A greenhouse frame is designed to sit on a perfectly flat, rigid surface. Even a 10mm deviation across a 6ft span puts twisting force on every bar, bolt, and glazing panel.
The base serves four purposes. It keeps the frame level. It anchors the structure against wind (a 6x8ft greenhouse catches considerable force in a gust). It raises the greenhouse above standing water and splash-back. And it provides a clean, stable floor inside.
Without a proper base, you will spend years fighting stiff doors, draughty gaps, and panels that pop out in strong winds. The time spent building a good base pays back every single season.
Paving slab bases: the most popular option
Paving slabs are the go-to choice for most UK hobby greenhouses up to 8x10ft. They are affordable, forgiving of minor errors, and provide natural drainage through the joints between slabs.
How to lay a paving slab greenhouse base
-
Mark out the area. Your base must match the external footprint of the greenhouse exactly. Check the manufacturer’s base dimensions, which are often slightly different from the nominal size (a “6x8ft” greenhouse may need a base of 1930mm x 2540mm). Add 25-50mm clearance on each side.
-
Excavate to 125-150mm depth. Remove all turf, topsoil, and roots. Dig down to firm subsoil. If the soil is heavy clay, excavate an extra 50mm and add more hardcore to aid drainage.
-
Compact the sub-base. Spread 75mm of MOT Type 1 hardcore. Compact it with a plate compactor or heavy hand tamper. This creates the stable foundation that stops slabs rocking or sinking.
-
Lay a sand-and-cement bed. Spread 25-30mm of a dry 6:1 sharp sand-to-cement mix. Screed it flat using a straight edge and two parallel timber rails.
-
Lay the slabs. Start from one corner and work outward. Use a rubber mallet to tap each slab into place. Check level across every slab and between neighbouring slabs with a spirit level. The entire base must be level to within 5mm across the full width and length.
-
Fill the joints. Brush kiln-dried sand or a dry mortar mix into the joints. This locks the slabs in position while still allowing water to drain through.
Gardener’s tip: Lay slabs in a single layer without cutting where possible. Choose a slab size that fits the greenhouse footprint with minimal gaps. 450mm x 450mm slabs work well for most hobby greenhouse sizes.
This method works brilliantly with raised beds around the greenhouse, creating a neat growing area right outside the door.
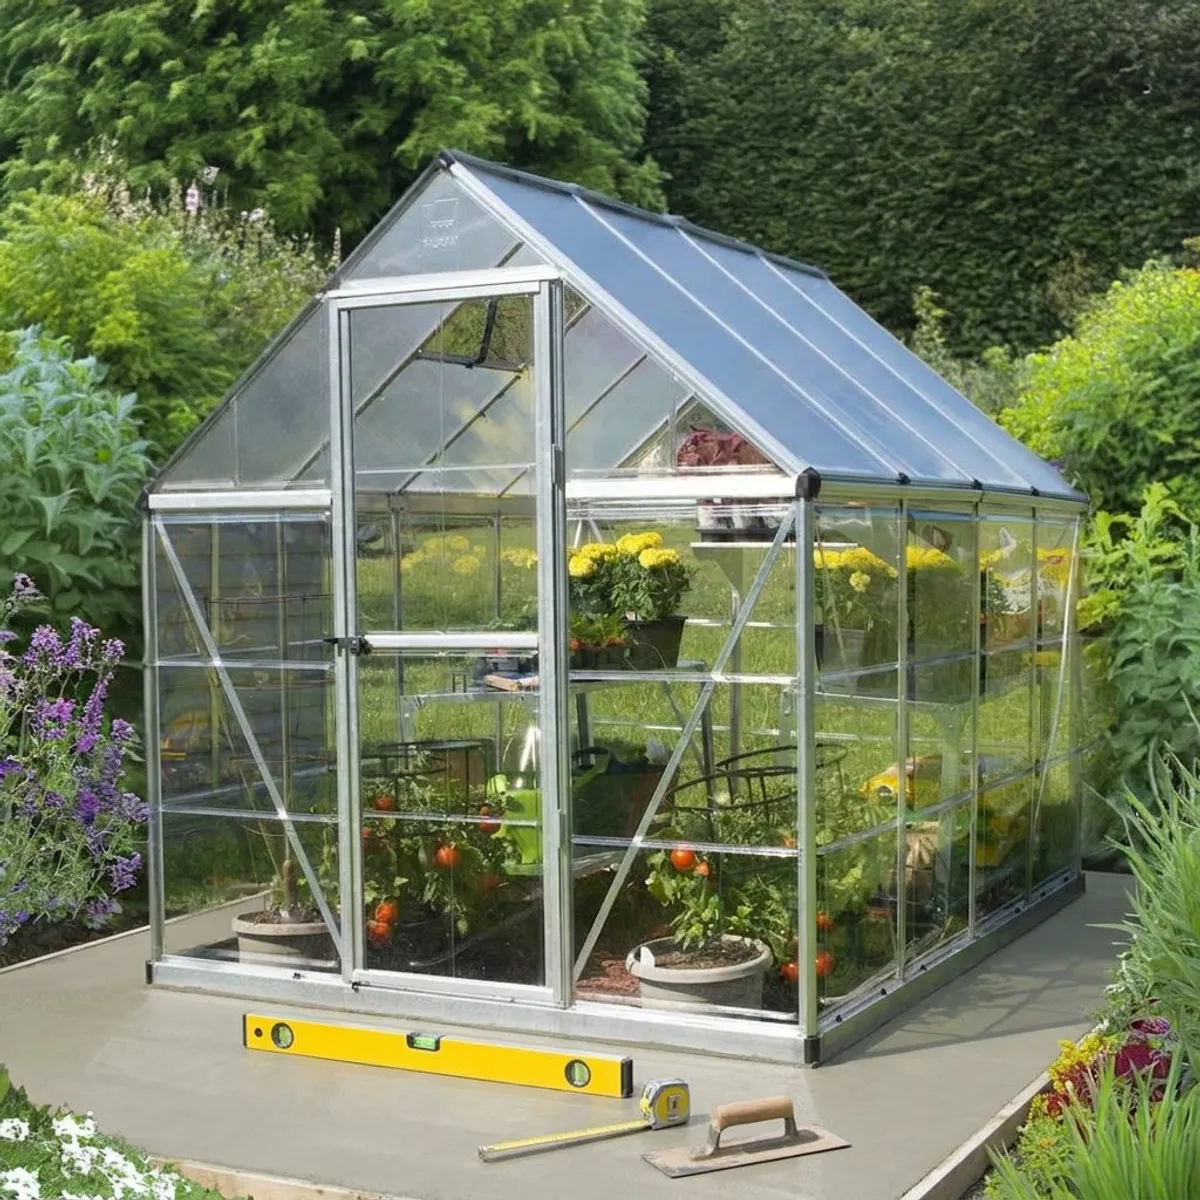
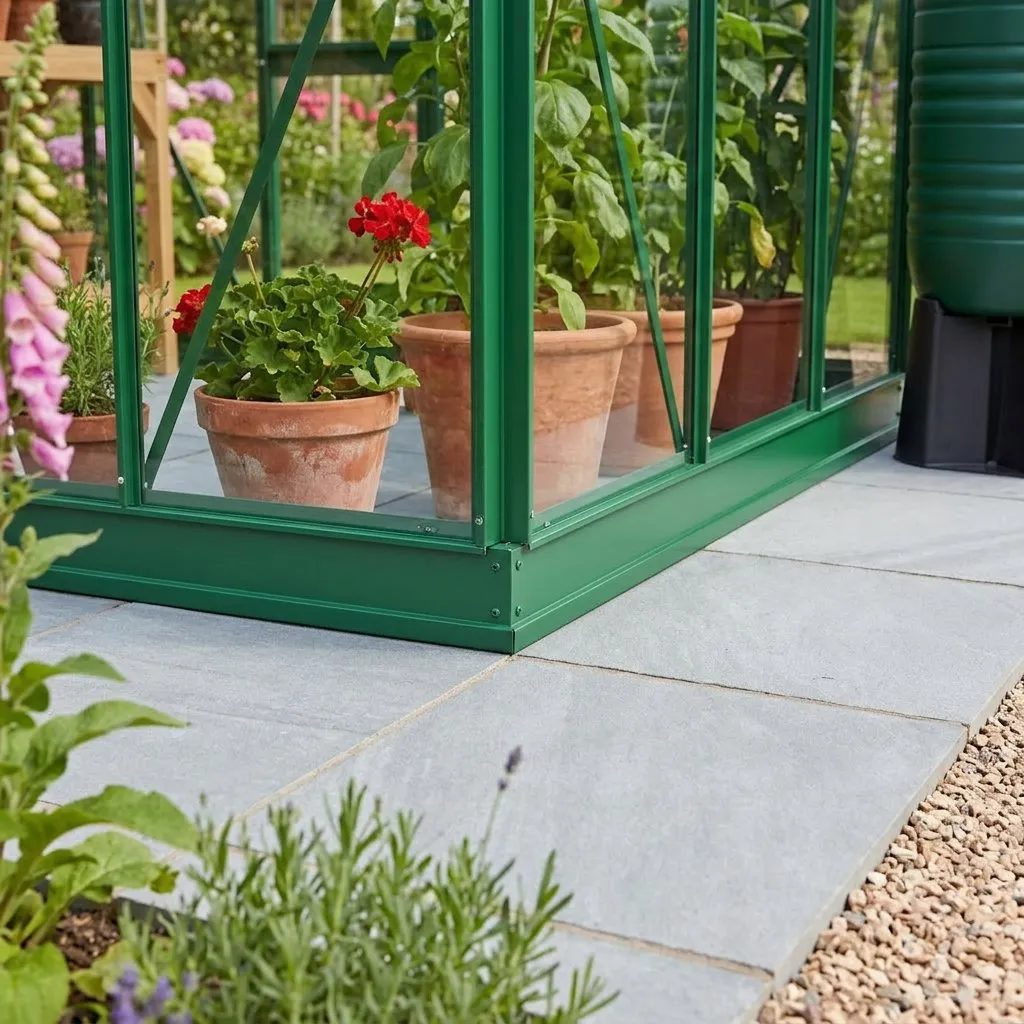 The Palram Hybrid 6x8 sits perfectly on a level paving slab base with compacted sub-base beneath.
Shop the Palram Hybrid 6x8 at Greenhouse Stores →
Concrete slab bases: the strongest option
A poured concrete slab is the strongest base you can build. It suits larger greenhouses (8x10ft and above), exposed sites, and anyone who wants a permanent, solid floor.
How to pour a concrete greenhouse base
-
Excavate to 175-200mm depth for a combined sub-base and concrete slab of 150-200mm total thickness.
-
Build formwork from 100mm timber boards around the perimeter. Ensure the formwork is dead level. This defines the finished surface of your base.
-
Lay and compact 75-100mm of MOT Type 1 hardcore within the formwork.
-
Add steel mesh for greenhouses over 8x10ft. Lay A142 or A193 welded mesh on spacers so it sits in the lower third of the concrete.
-
Pour concrete to a depth of 75-100mm. Use C20 or C25 mix (suitable for domestic foundations). Tamp the surface level with a straight edge and finish with a wooden float for a slightly textured surface.
-
Cure for 48 hours minimum before assembling the greenhouse frame. In cold weather (below 5C), allow 72 hours and protect the surface from frost with insulating sheets.
Cost guide: A DIY concrete base for a 6x8ft greenhouse costs around 150 to 200 pounds for materials (hardcore, cement, sand, aggregate, and mesh). Hiring a mixer adds roughly 40 pounds per day.
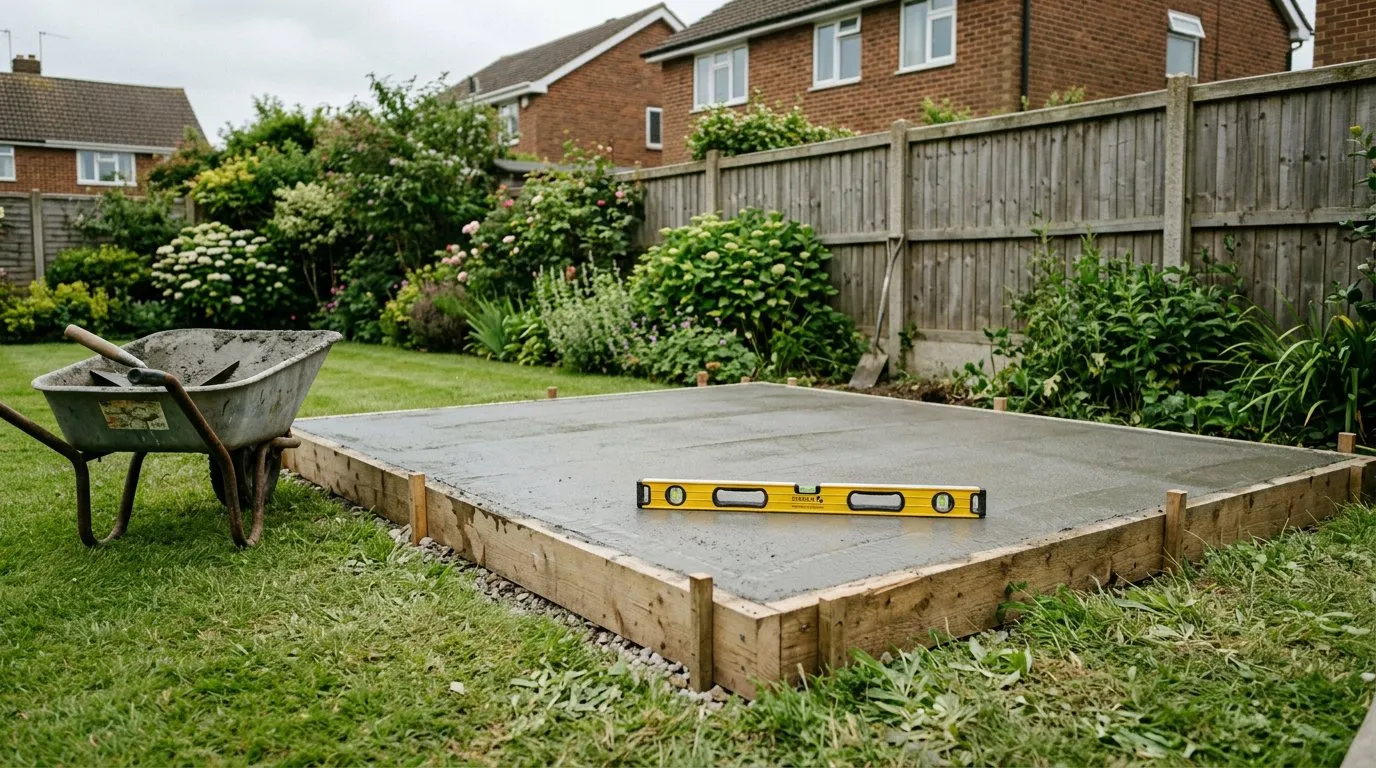 A freshly poured concrete greenhouse base inside timber formwork, levelled with a spirit level before curing.
For sites where drainage is already a concern, consider adding a 50mm gravel margin around the base to channel rainwater away from the greenhouse walls.
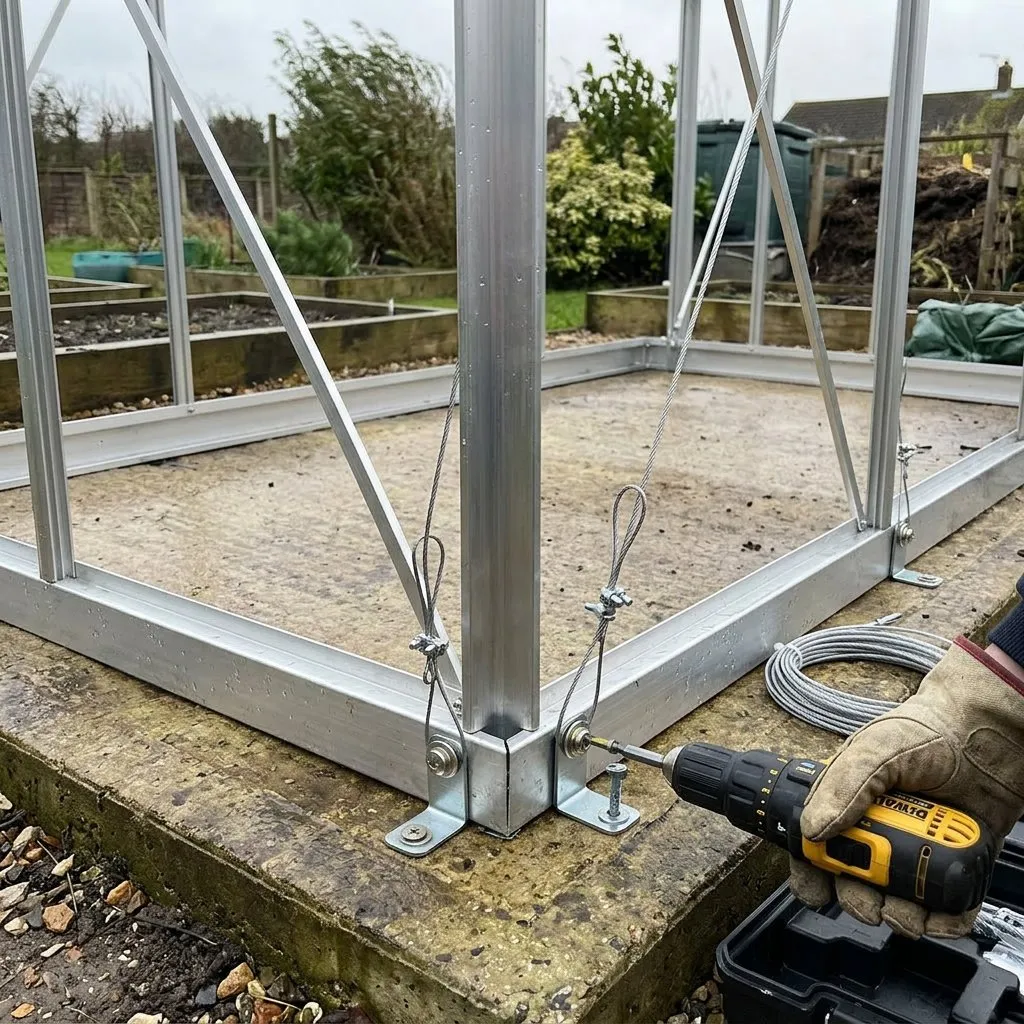
Steel base kits: the matched solution
Most greenhouse manufacturers sell steel base kits designed for their specific models. These galvanised steel frames bolt together and sit directly on level ground, raising the greenhouse 50-75mm above the surface.
Why choose a steel base kit?
Steel base kits are precisely sized to each greenhouse model. There is no measuring, no cutting, and no guesswork about whether the base fits the frame. They also provide a clean anchor rail for bolting the greenhouse superstructure down firmly.
Vitavia greenhouse bases start from around 105 pounds and cover sizes from 4x6ft to 8x14ft. They arrive flat-packed with all fixings included. Assembly takes under an hour.
How to install a steel base kit
-
Prepare the ground. The kit still needs level ground beneath it. Strip turf and topsoil, then lay 50-75mm of compacted gravel or paving slabs. The key requirement is flatness.
-
Assemble the base frame following the manufacturer’s instructions. Most kits bolt together at the corners and along the mid-rails.
-
Check level across both diagonals. A twist in the base frame transfers directly to the greenhouse above. Adjust by adding or removing gravel beneath the rails.
-
Peg or bolt the base into the ground. Most kits include ground pegs. On hard ground, anchor bolts through paving slabs are more secure.
Steel base kits pair well with loose gravel or soil testing and ground preparation inside the greenhouse, where you plan to grow directly in the ground.
Ground anchors for soft ground
Not every site allows a permanent base. Polycarbonate greenhouses and smaller aluminium models can be secured with ground anchor kits on compacted earth or gravel.
The Palram Canopia Greenhouse Anchor Kit costs around 69 pounds. It includes four steel anchors with auger tips that screw directly into the soil, plus brackets to bolt to the greenhouse base rail. This system suits allotment greenhouses where permanent bases are not allowed.
Ground anchors work best in firm, compacted soil. In very loose or sandy ground, they may not hold in extreme wind. For exposed or windy allotment plots, consider growing vegetables in containers as a complement to greenhouse growing, keeping your most wind-sensitive crops under cover.
 The Palram anchor kit secures a greenhouse to soft ground without the need for a permanent concrete base.
Shop the Palram Anchor Kit at Greenhouse Stores →
Levelling: getting it right
No matter which base type you choose, levelling is the step that determines success or failure.
| Check | Method | Tolerance |
|---|---|---|
| Width level | Spirit level across the front and back rails | Within 5mm |
| Length level | Spirit level along both side rails | Within 5mm |
| Diagonal check | Measure corner to corner both ways; readings must match | Within 5mm |
| Square check | 3-4-5 triangle method at each corner | Within 3mm |
A 12mm error across a 6ft span pulls the greenhouse frame 8mm out of true at the ridge. That is enough to stop roof vents from opening and to leave gaps around the door seal that let in wind, rain, and pests.
Gardener’s tip: If your ground slopes more than 75mm across the greenhouse footprint, build up the low side with compacted hardcore rather than excavating the high side. This keeps the greenhouse floor above the surrounding ground level, which improves drainage and reduces damp.
Floor options inside the greenhouse
Once the base is laid and the greenhouse assembled, choose a floor surface that suits your growing style.
Gravel (10-20mm pea shingle) is the most popular greenhouse floor. It drains freely, provides humidity when wet, and can be topped up cheaply. Lay it over weed membrane on top of your base.
Paving slabs give a clean, flat surface ideal for staging, potting benches, and wheelchair access. The Fastfit 6x8 Greenhouse Floor Kit at around 160 pounds provides interlocking floor panels designed specifically for greenhouse interiors.
Soil borders work if you plan to grow tomatoes or other crops directly in the ground. Leave one or two rows of slabs as paths and fill the rest with improved soil or raised beds.
The RHS greenhouse growing guide recommends a combination: a paved central path with gravel borders, giving stable footing and natural humidity from damp gravel beneath the staging.
Base type comparison
| Factor | Paving slabs | Concrete slab | Steel base kit | Ground anchors |
|---|---|---|---|---|
| Cost (6x8ft) | 80 to 150 | 150 to 200 | 105 to 180 | 69 |
| DIY difficulty | Moderate | Moderate-hard | Easy | Easy |
| Build time | Half a day | Full day + cure | 1 hour | 30 minutes |
| Permanence | Semi-permanent | Permanent | Removable | Removable |
| Drainage | Good (through joints) | Poor (needs gravel margin) | Good (open floor) | N/A |
| Best for | Most hobby greenhouses | Large or exposed sites | Matched greenhouse models | Allotments, soft ground |
Most greenhouses sold in the UK, including popular brands available from Greenhouse Stores, come with optional steel base kits tailored to each model. Ordering the base kit with your greenhouse saves measuring and guarantees a perfect fit.
Why we recommend paving slabs over a concrete slab for most hobby greenhouses: After 30 years of building greenhouse bases across varying ground conditions, paving slabs on a compacted MOT sub-base consistently offer the best balance of performance and practicality. Unlike a poured slab, a slab base can be partially lifted and relevelled if the ground settles — a common issue on clay soils in the first two winters. We have relevelled three slab bases that would have required a full concrete break-out and repour to correct.
Common mistakes to avoid
Skipping the sub-base. Slabs laid directly on soil sink within a season. Always compact a layer of MOT Type 1 hardcore beneath any base.
Building the wrong size. Greenhouse base dimensions are not always the same as the greenhouse name. A “6x8” greenhouse may need a 1930mm x 2540mm base. Check the manufacturer’s specification sheet before cutting a single slab.
Ignoring drainage. A greenhouse collects a large volume of rainwater from its roof. Direct this into gutters and a water butt. Without drainage, water pools around the base and undermines the soil beneath it.
Forgetting anchor bolts. Even the heaviest greenhouse needs bolting to its base. Wind loading on a 6x8ft greenhouse can exceed 500kg in a strong gust. Gravity alone will not hold it down. Our guide on how to secure a greenhouse in wind covers anchoring, glazing choices, and storm preparation in detail.
Whether you are starting with a small 4x6ft starter greenhouse or planning a large walk-in model, the hours you spend on the base are the best investment you will make. A good base means straight frames, smooth doors, tight seals, and a greenhouse that stands strong through every UK winter storm. Get the base right and everything else follows. If you are still deciding which greenhouse to buy, our guide to the best greenhouse for UK gardens compares frame materials, glazing, and sizes.
Now you’ve mastered building a greenhouse base, read our guide on the best greenhouse for UK gardens for the next step in choosing the right structure to go on top.
Frequently asked questions
Do I need a base for a greenhouse?
Yes, every greenhouse needs a level base. Without one, the frame twists under its own weight. Doors and vents jam, and glass or polycarbonate panels crack from uneven stress. A level base also raises the greenhouse above ground water and provides anchor points against wind.
What is the best base for a greenhouse UK?
Paving slabs on a compacted sub-base are the best option for most UK hobby greenhouses. They are affordable, straightforward to lay, and provide good drainage at the slab joints. Concrete slab bases are stronger but cost more and seal the ground completely.
How thick should a concrete greenhouse base be?
A concrete greenhouse base should be 75-100mm thick, poured over 75-100mm of compacted MOT Type 1 hardcore. For greenhouses over 8x10ft, increase the concrete to 100mm and add steel mesh reinforcement. The total excavation depth is typically 175-200mm.
Do I need planning permission for a greenhouse base?
Most domestic greenhouse bases do not need planning permission. Under permitted development, garden buildings under 2.5m to the ridge are usually allowed without an application. Listed buildings and conservation areas have different rules. Check with your local authority before starting.
Can I put a greenhouse on soil or grass?
Placing a greenhouse directly on soil or grass is not recommended. The frame sinks unevenly, creating gaps that let in wind and pests. If you cannot build a permanent base, use a steel base kit pegged into the ground or a ground anchor kit to hold the frame.
How do I level a greenhouse base on sloping ground?
For gentle slopes, build up the low side with extra sub-base hardcore and compact it firmly. For steeper slopes over 150mm fall, you may need a low retaining wall on the downhill side. Pour concrete or lay slabs to a level datum set from the highest corner. Check with a spirit level across both diagonals.
Lawrie has been gardening in the West Midlands for over 30 years. He grows his own veg using no-dig methods, keeps a wildlife-friendly garden, and writes practical advice based on real UK growing conditions.