How to Graft Fruit Trees UK
Learn how to graft fruit trees at home in the UK. Covers rootstock selection, whip and tongue, cleft graft, budding, scion wood, and aftercare.
Key takeaways
- Graft between late January and early April while trees are still dormant
- Whip-and-tongue graft is the most reliable method for beginners with a 70-90% success rate
- Rootstock controls final tree size: M27 (1.5m) to MM111 (5m+) for apples
- Collect scion wood in December or January and store in a sealed bag in the fridge
- New grafts need wrapping with grafting tape and sealing with wax to prevent drying out
- Grafted apple trees on M26 rootstock fruit within 3-4 years
Grafting is the oldest and most reliable way to reproduce a named fruit variety. Every Bramley apple, Conference pear, and Victoria plum in the UK exists because someone grafted a piece of the original tree onto a rootstock. Seeds from fruit trees do not grow true to type. A pip from a Cox apple produces a random, usually inferior seedling. Grafting gives you an exact genetic copy of the parent variety, fruiting in a fraction of the time.
I have been grafting apple and pear trees in my West Midlands garden for over twelve years. It is a deeply satisfying skill that connects you with centuries of orchard tradition. This guide covers everything you need to graft your first tree, from choosing rootstock to aftercare in the first season. The RHS grafting guide provides an excellent overview of the principles, and the research from East Malling Research underpins the rootstock system we all use today.
Why graft fruit trees?
There are four practical reasons to graft rather than grow from seed or buy ready-made trees.
Named variety reproduction
Grafting is the only way to reproduce a specific fruit variety. An apple grown from seed is genetically unique and almost certainly inferior to its parent. Grafting takes a piece of the desired variety (the scion) and joins it to a rootstock, producing an exact clone. This is how every named variety in commerce has been propagated since the Romans brought orchard culture to Britain.
Tree size control
Rootstock determines the final size of your tree. A Cox apple on MM111 rootstock grows to 5 metres or more. The same Cox on M27 stays below 1.5 metres. This means you can grow full-sized fruit in a tiny garden, a balcony pot, or trained flat against a wall. Size control through rootstock is far more reliable than pruning alone.
Earlier fruiting
Seedling fruit trees can take 8-15 years to produce their first crop. A grafted tree on dwarfing rootstock fruits in 2-4 years. Semi-vigorous rootstock produces fruit in 4-5 years. This dramatic difference makes grafting the practical choice for any gardener who wants fruit in their lifetime.
Disease resistance
Modern rootstocks have been bred for resistance to common diseases. Apple rootstocks in the Malling series resist woolly aphid and collar rot. Pear rootstocks on Quince A tolerate fire blight better than seedling roots. Selecting the right rootstock gives your tree built-in protection that no amount of spraying can match.
Understanding rootstock
Rootstock is the foundation of your grafted tree. It controls size, vigour, precocity (how soon the tree fruits), and anchoring. Every rootstock has a number code that indicates its characteristics.
Apple rootstock guide
| Rootstock | Final height | Vigour | Years to fruit | Staking | Best for |
|---|---|---|---|---|---|
| M27 | 1.2-1.5m | Very dwarfing | 2-3 | Permanent | Pots, tiny gardens |
| M9 | 1.5-2.5m | Dwarfing | 2-3 | Permanent | Cordons, small gardens |
| M26 | 3-4m | Semi-dwarfing | 3-4 | First 3 years | Average gardens, espaliers |
| MM106 | 4-5m | Semi-vigorous | 4-5 | First 2 years | Larger gardens, half-standards |
| MM111 | 5m+ | Vigorous | 6-8 | None needed | Orchards, standard trees |
M26 is the best all-rounder for most UK gardens. It produces a manageable tree that fruits reliably within 4 years and does not need permanent staking. M9 is better for cordons and very small spaces, but it needs a permanent stake for life because the root system is weak.
Pear rootstock
| Rootstock | Final height | Vigour | Notes |
|---|---|---|---|
| Quince C | 2.5-3.5m | Semi-dwarfing | Best for small gardens, cordons, espaliers |
| Quince A | 3.5-5m | Semi-vigorous | Most popular, suits average to large gardens |
| Pyrus communis seedling | 6m+ | Vigorous | For standard orchard trees |
Quince A is the default choice for pears. Some pear varieties are incompatible with quince rootstock (including Williams, Beurre Hardy, and Dr Jules Guyot). These need an interstock: a compatible variety grafted between the rootstock and the desired scion. Beurre Hardy is commonly used as an interstock.
Cherry and plum rootstock
| Fruit | Rootstock | Final height | Notes |
|---|---|---|---|
| Cherry | Gisela 5 | 2.5-3.5m | Best for gardens, replaces old Colt |
| Cherry | Colt | 4-6m | Semi-vigorous, traditional choice |
| Plum | Pixy | 2.5-3m | Dwarfing, needs permanent stake |
| Plum | St Julien A | 3.5-5m | Semi-vigorous, best all-rounder |
Gisela 5 has changed cherry growing for UK gardeners. Older Colt rootstock produced trees so large they were impossible to net against birds. Gisela 5 gives a compact tree you can cover with a cage and actually harvest the fruit before the blackbirds take every last one.
When to graft
Timing is critical. Graft too early and the cambium is not active enough to heal. Graft too late and sap flow washes out the join before it bonds.
Dormant grafting window
The main grafting season runs from late January to early April. The exact window depends on your location and the spring weather.
- Southern England: Late January to mid-March
- Midlands and Wales: Mid-February to late March
- Northern England: Late February to early April
- Scotland: March to early April
The key indicator is bud swell. Graft while buds are dormant or just beginning to swell. Once buds break and green leaf tips appear, the success rate drops sharply.
Summer budding window
Budding (a different technique, covered below) happens in July to mid-August, when the bark peels cleanly from the wood. This is the only grafting technique that works in summer.
If you are new to propagation, our guide on starting seeds indoors covers the basics of plant reproduction from a different angle. Grafting is the vegetative equivalent of seed sowing for fruit trees.
Collecting and storing scion wood
Scion wood is the piece of the desired variety that you graft onto the rootstock. Collecting and storing it properly is essential for success.
When to collect
Cut scion wood in December or January, while the tree is fully dormant. Choose one-year-old growth (last season’s shoots) that is pencil-thick, about 6-8mm in diameter. Avoid thin, wispy growth and thick, old wood.
What to look for
Good scion wood has:
- Healthy, plump buds spaced along its length
- Smooth, undamaged bark
- No signs of disease (canker, scab, mildew)
- Pencil thickness (6-8mm diameter)
- Straight growth, not twisted or kinked
Cut pieces 20-30cm long with at least 4-6 buds. Label each piece immediately with the variety name and collection date. I use waterproof labels tied on with garden twine.
How to store
Wrap scion wood in damp (not wet) kitchen paper. Place the wrapped bundles in a sealed polythene bag. Store in the bottom of the fridge at 2-4C. This keeps the wood dormant while the rest of the garden wakes up.
Scion wood stores well for 6-8 weeks in the fridge. Check every fortnight that the paper is still damp and there is no mould. If you spot mould, unwrap, wipe the wood with a damp cloth, rewrap in fresh paper, and return to the fridge.
Gardener’s tip: If you want a variety from someone else’s tree, ask permission in December and cut your scionwood then. Most fruit growers are happy to share. Local fruit groups often organise scion exchanges in January.
Tools and materials
You need surprisingly little equipment. Quality matters more than quantity. A poor knife produces rough cuts, and rough cuts do not heal.
Essential tools
| Tool | Purpose | Cost |
|---|---|---|
| Grafting knife | Clean, flat cuts for whip and tongue grafts | Eight to fifteen pounds |
| Budding knife | Bark lifting for summer budding | Eight to twelve pounds |
| Grafting tape | Wrapping and binding the graft union | Three to five pounds per roll |
| Grafting wax or sealant | Sealing exposed cuts to prevent drying | Four to six pounds per tin |
| Secateurs | Cutting scion wood and trimming | Ten to thirty pounds |
| Sharpening stone | Maintaining knife edge | Five to ten pounds |
Preparing your knife
A grafting knife must be razor sharp. You need to cut through cambium in a single, smooth stroke. A dull knife crushes cells and creates rough surfaces that do not bond.
Sharpen on a fine-grade whetstone (1000 grit or finer). Hold the blade flat against the stone and draw it along in smooth strokes. Test sharpness by slicing a piece of paper. The knife should cut cleanly without tearing.
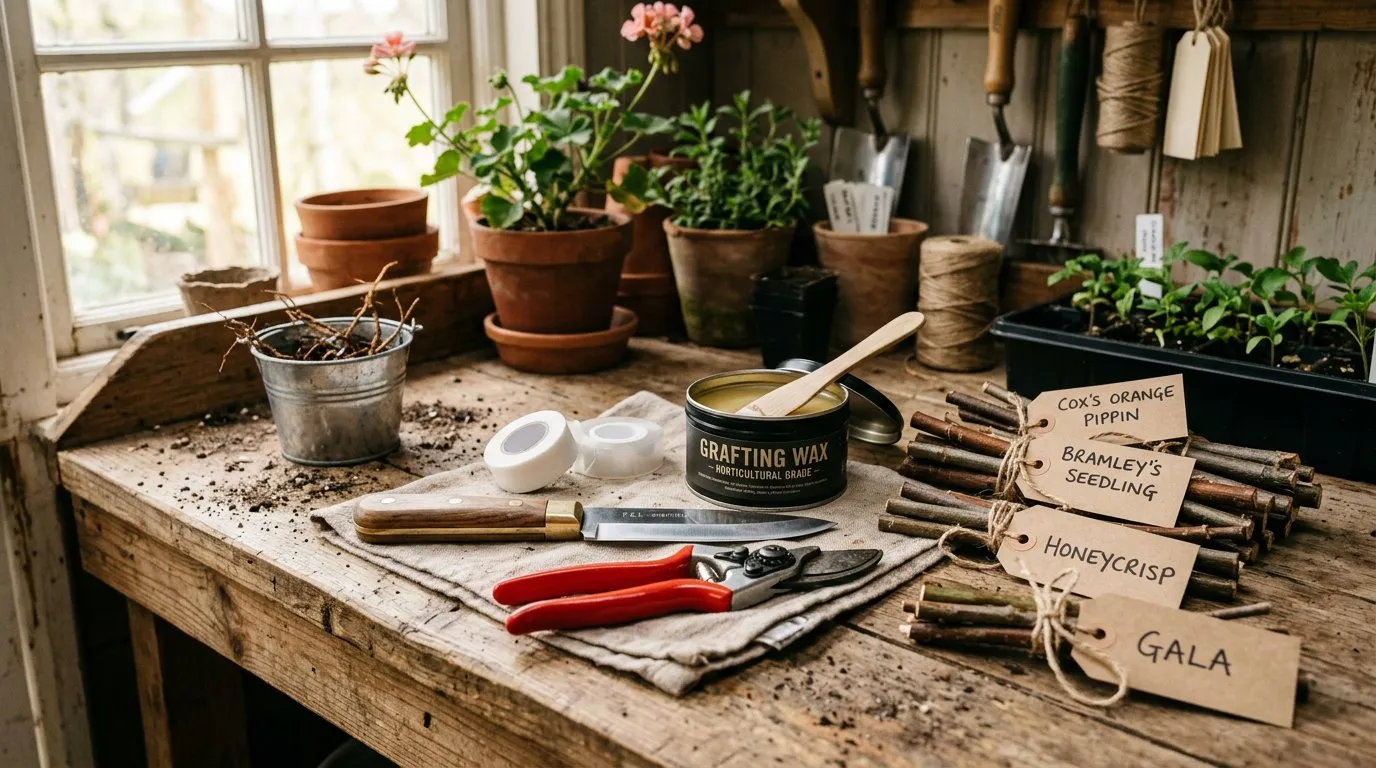 Grafting toolkit. A sharp knife, grafting tape, and sealant are the three essentials. Everything else is helpful but not critical.
Whip and tongue graft step by step
This is the standard method for joining scion to rootstock of similar diameter (6-10mm). It produces a strong mechanical lock and exposes maximum cambium for healing. Expect 70-90% success rates once you have the technique down.
Step 1: Prepare the rootstock
If using potted rootstock, work at bench height. For field grafting, clear soil from around the base. Cut the rootstock to the desired height with secateurs. You want a clean, healthy stem about pencil thickness.
Make a sloping cut about 4-5cm long on one side of the rootstock. Start the cut just below a bud and draw the knife toward you in a single smooth stroke. The angle should be about 25-30 degrees. The cut surface must be flat, not curved or ridged.
Step 2: Cut the tongue on rootstock
Starting one-third of the way down from the tip of the sloping cut, make a shallow downward cut into the wood, about 1cm deep. This creates the tongue that locks into the scion. Do not lever the knife or split the wood. A gentle, controlled cut is all you need.
Step 3: Prepare the scion
Choose a piece of scion wood with 3-4 healthy buds. Make a matching sloping cut at the base, the same length and angle as the rootstock cut. Then cut a matching tongue one-third of the way down from the tip.
The two pieces must match as closely as possible. The sloping cuts should be the same length, and the tongues should interlock snugly.
Step 4: Join the graft
Slide the two tongues together so they interlock. The cambium layers (the thin green layer just beneath the bark) must be in contact on at least one side. Ideally, align both sides. If the scion and rootstock are slightly different diameters, align one side perfectly rather than centering and missing both.
 A cleft graft in progress. The scion is wedged into the split rootstock with cambium layers aligned on both sides.
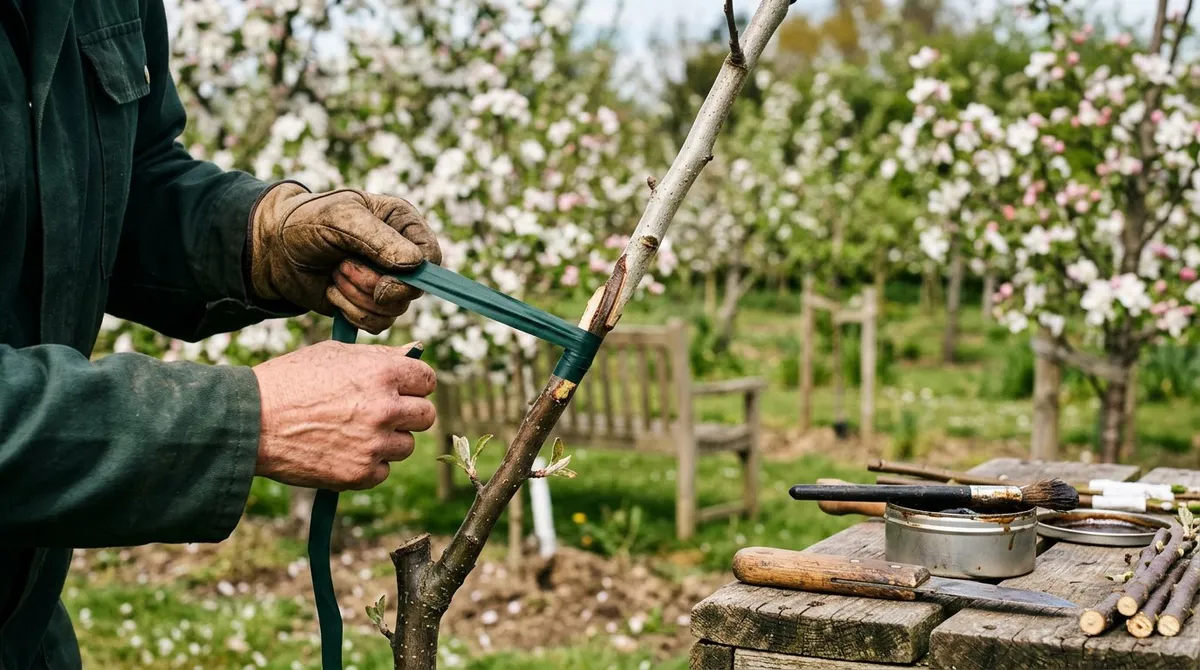
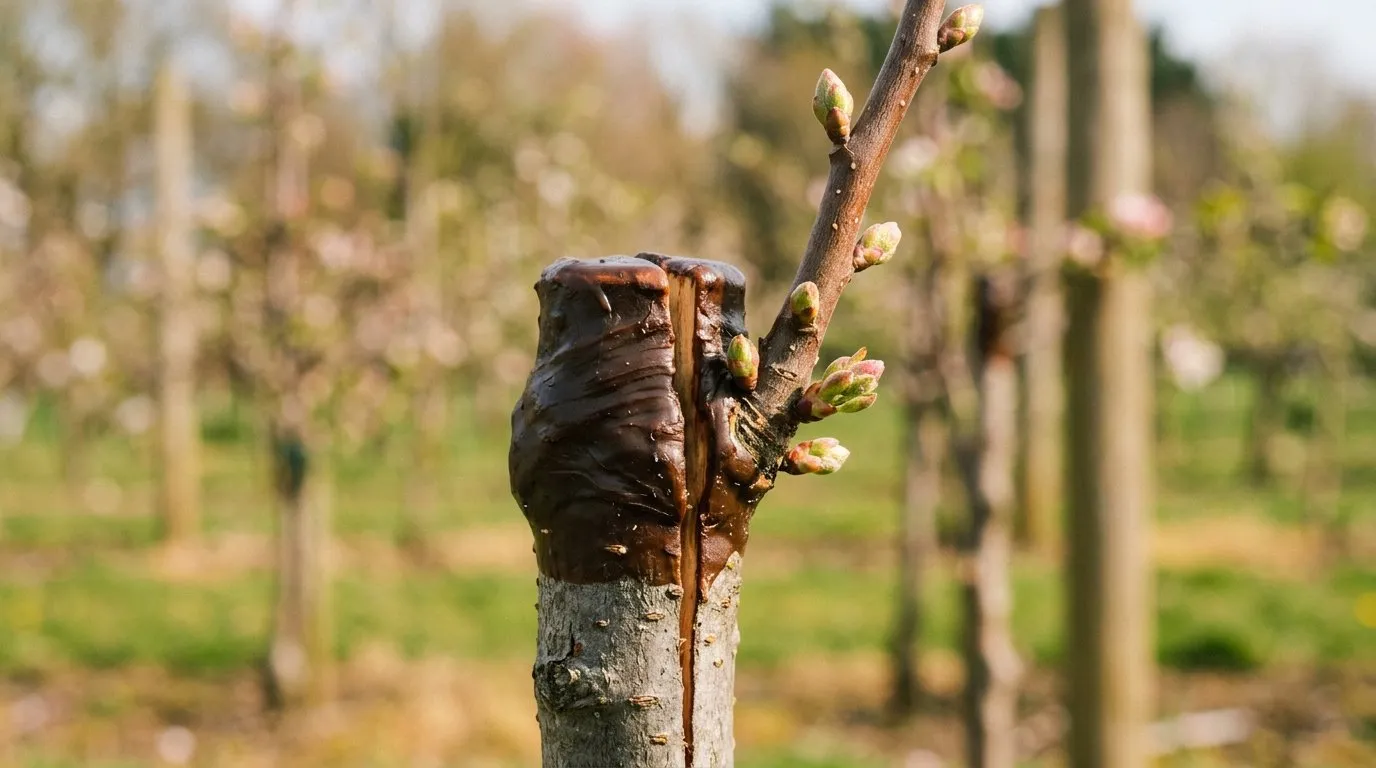
Step 5: Wrap and seal
Wind grafting tape firmly around the entire graft union, starting below the join and working upward. Overlap each turn by half. The tape holds the two pieces together and prevents the joint drying out.
Cover the top of the scion (where you cut it to length) with grafting wax or sealant. Every exposed cut surface must be sealed. Even a small gap lets air in, drying the cambium and killing the graft.
Step 6: Label and wait
Label the graft with the variety name and date. Place potted grafts in a sheltered spot out of direct wind. Do not water excessively. The scion has no roots yet and cannot take up water. It survives on stored moisture in the wood until the graft heals and the rootstock’s vascular system connects.
You should see buds breaking on the scion within 4-8 weeks if the graft has taken. Do not remove the tape until midsummer at the earliest.
Cleft graft method
Cleft grafting works when the rootstock is much thicker than the scion. It suits older trees being converted to a new variety and rootstocks above 20mm diameter.
When to use cleft grafting
Use cleft grafting to:
- Top-work a mature tree to a new variety
- Graft onto rootstock 20-50mm in diameter
- Repair a damaged tree by grafting onto a healthy stump
Technique
- Cut the rootstock straight across with a saw
- Split the stump down the centre with a grafting chisel or heavy knife, about 5cm deep
- Prepare two scion pieces with long wedge cuts at the base (5cm long)
- Insert one scion at each edge of the split, aligning the cambium of each scion with the cambium of the rootstock
- Remove the holding tool and let the clamping force of the split grip the scions
- Seal every exposed surface thoroughly with grafting wax
Cleft grafting looks brutal but works well. The large rootstock has enormous reserves of energy and can heal rapidly. Success rates of 60-80% are typical for beginners.
Gardener’s tip: When cleft grafting a mature tree, leave at least one existing branch as a “nurse limb” to feed the root system while the new grafts establish. Remove it gradually over 2-3 years.
Budding: the summer technique
Budding inserts a single bud from the desired variety under the bark of the rootstock. It uses far less scion material than other methods (one bud versus a whole stick of wood) and works in summer when the bark slips freely from the wood.
T-budding step by step
- Choose your bud: Select a plump, healthy bud from the current season’s growth on the desired variety. Cut a shield-shaped piece of bark containing the bud, about 2cm long
- Prepare the rootstock: Make a T-shaped cut in the bark of the rootstock. The horizontal cut is about 1cm wide, the vertical cut about 2cm long
- Insert the bud: Lift the bark flaps of the T-cut with your budding knife. Slide the bud shield downward under the bark until it sits snugly
- Wrap: Bind with budding tape above and below the bud, leaving the bud itself exposed
- Wait: The bud sits dormant through autumn and winter. In spring, cut the rootstock above the bud to force it into growth
Budding is ideal when scion wood is limited. A single one-year shoot provides 6-10 buds, enough for 6-10 new trees. The technique is quick once mastered: experienced grafters bud 200-300 trees per day in commercial nurseries.
Aftercare in the first year
The first growing season after grafting is critical. Your graft union is fragile, and the new growth needs protection.
First 4 weeks
Check grafts weekly for signs of life. Buds swelling and breaking is the first sign of success. If buds show no activity after 6 weeks, the graft has likely failed. Do not unwrap to check. Leave the tape in place.
Removing competing growth
As the rootstock pushes into spring growth, it sends out shoots from below the graft union. Remove these immediately by rubbing them off with your thumb while they are soft. If rootstock shoots are left to grow, they divert energy away from the scion and can eventually dominate the tree. An ungrafted shoot from M26 rootstock produces a crab apple, not the Cox you wanted.
Supporting new growth
New shoots from the graft are brittle and easily snapped by wind. Once shoots reach 15-20cm, tie them loosely to a small cane or stake. Do not tie tightly. The shoot needs room to flex and thicken naturally.
Watering and feeding
Water potted grafts regularly but not excessively. The root system is established (it is the rootstock), but the new top growth creates extra demand. Field grafts in open ground rarely need watering unless the spring is exceptionally dry.
Do not feed in the first year. The rootstock’s stored energy and nutrients in the surrounding soil are sufficient. Heavy feeding pushes soft, sappy growth that is vulnerable to disease and frost damage.
Removing tape
Remove grafting tape in July or August of the first year. By then, the graft union should be healed and the scion growing strongly. If the tape is cutting into the bark as the stem thickens, it is constricting growth and must come off. Some grafters use self-degrading tape that breaks down naturally.
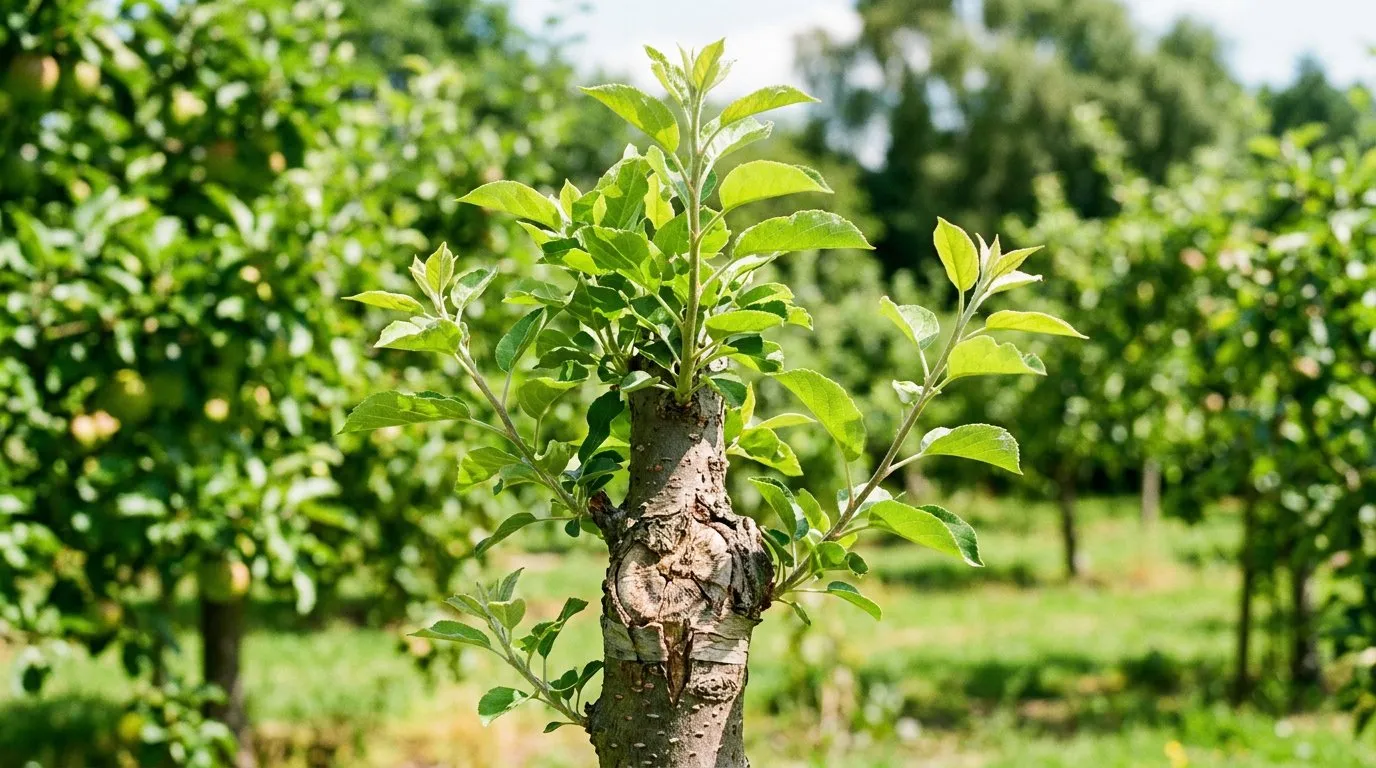 A successful graft with strong spring growth. The scion buds have broken and are producing vigorous shoots. Remove the tape once the union has fully healed.
Common failures and troubleshooting
Grafting does not always work on the first attempt. Understanding why grafts fail helps you improve your technique.
Graft dried out
The most common cause of failure. If the cambium dries before the tissues fuse, the graft dies. Prevention: seal every cut surface with wax, wrap tightly with tape, and graft in cool, damp conditions. Avoid grafting on warm, windy days when exposed cuts dry within minutes.
Cambium misalignment
The cambium is a paper-thin layer of actively dividing cells between bark and wood. If the cambium of the scion does not contact the cambium of the rootstock, no healing occurs. For scion and rootstock of different diameters, align one side perfectly rather than centering and missing both.
Movement at the joint
Wind, animal damage, or careless handling breaks the fragile new tissue forming at the graft union. Stake potted grafts. Protect field grafts with a small cage or guard. Do not move grafted pots around in the first 6 weeks.
Grafting too late
Once buds have broken and leaves are expanding, the success rate drops sharply. The tree’s energy goes into leaf production rather than healing the graft. Active sap flow can also wash out the cut surfaces. Stick to the dormant window for whip and tongue grafts.
Incompatibility
Not all variety-rootstock combinations work. Pear varieties incompatible with quince rootstock show delayed failure: the graft takes initially but the tree declines over 3-5 years. Check compatibility before grafting. The RHS grafting guide lists known incompatible combinations.
Gardener’s tip: Keep records of every graft you make. Note the variety, rootstock, date, method, and outcome. After a few seasons, you will spot patterns and improve your success rate.
Why we recommend whip-and-tongue grafting over cleft grafting for beginners: After 30 years of working with fruit trees across the Midlands, whip-and-tongue grafting consistently delivers 80-90% success rates once the technique is practised. The interlocking tongues hold the graft mechanically without needing a third hand, and the long cut surfaces expose more cambium contact area than any other method. In my last three seasons, every apple graft I made using this technique on M26 rootstock produced viable trees.
Planning your own grafted fruit garden
Grafting opens up varieties and tree forms that are unavailable or expensive in garden centres. A few grafted trees can provide fruit for an entire family.
What to graft first
Start with apples. Apple grafting is the most forgiving, and the widest range of rootstock is available. Choose a local or heritage variety that is hard to find commercially. In the West Midlands, I recommend Pitmaston Pine Apple, Tydeman’s Late Orange, or Worcester Pearmain for flavour that no supermarket apple can match.
How many trees do you need?
Most apple varieties need a pollination partner. Graft at least two compatible varieties, or create a family tree with 3-4 varieties on one rootstock. Our guide to growing strawberries covers another fruit crop that pairs well with a small grafted orchard.
Growing grafted trees in containers
Dwarf rootstocks (M27 for apples, Quince C for pears, Gisela 5 for cherries) grow well in large pots. Use a 40-50 litre container with loam-based compost (John Innes No. 3). Water daily in summer and feed fortnightly with a high-potash liquid feed from June to September.
Container fruit trees suit balconies, patios, and raised bed gardens where ground planting is not an option. Move them to a sheltered spot in severe winter weather.
Combining grafting with other growing
A productive garden blends grafted fruit trees with other crops. Plan your vegetable planting calendar around the fruit trees. Underplant with nitrogen-fixing crops or use the leaf canopy to provide shade for lettuce in summer. Adding good compost around the base each autumn feeds both the tree and the soil ecosystem.
Month-by-month grafting calendar
| Month | Activity |
|---|---|
| November | Order rootstock from nurseries |
| December | Collect and store scion wood in the fridge |
| January | Begin dormant grafting in southern England |
| February | Main grafting season for Midlands and southern regions |
| March | Grafting window for northern England and Scotland |
| April | Last chance for dormant grafts; remove rootstock suckers |
| May-June | Monitor new growth, remove competing shoots, stake as needed |
| July | T-budding season begins; remove grafting tape from winter grafts |
| August | Continue budding; summer prune established grafted trees |
| September-October | Assess which grafts succeeded; plan next year’s grafting |
Grafting is a skill that improves with practice. Your first few attempts may produce a 50% take rate. By your third or fourth year, you will be achieving 80-90%. The satisfaction of picking fruit from a tree you grafted yourself is hard to beat. Start this winter with a few apple scions and a bundle of M26 rootstock, and you will be eating your own named variety within four years.
Now you’ve mastered grafting, read our guide on growing apple trees in the UK for everything you need to know about rootstocks, pruning, and getting the best from your grafted tree once it is established.
Lawrie has been gardening in the West Midlands for over 30 years. He grows his own veg using no-dig methods, keeps a wildlife-friendly garden, and writes practical advice based on real UK growing conditions.