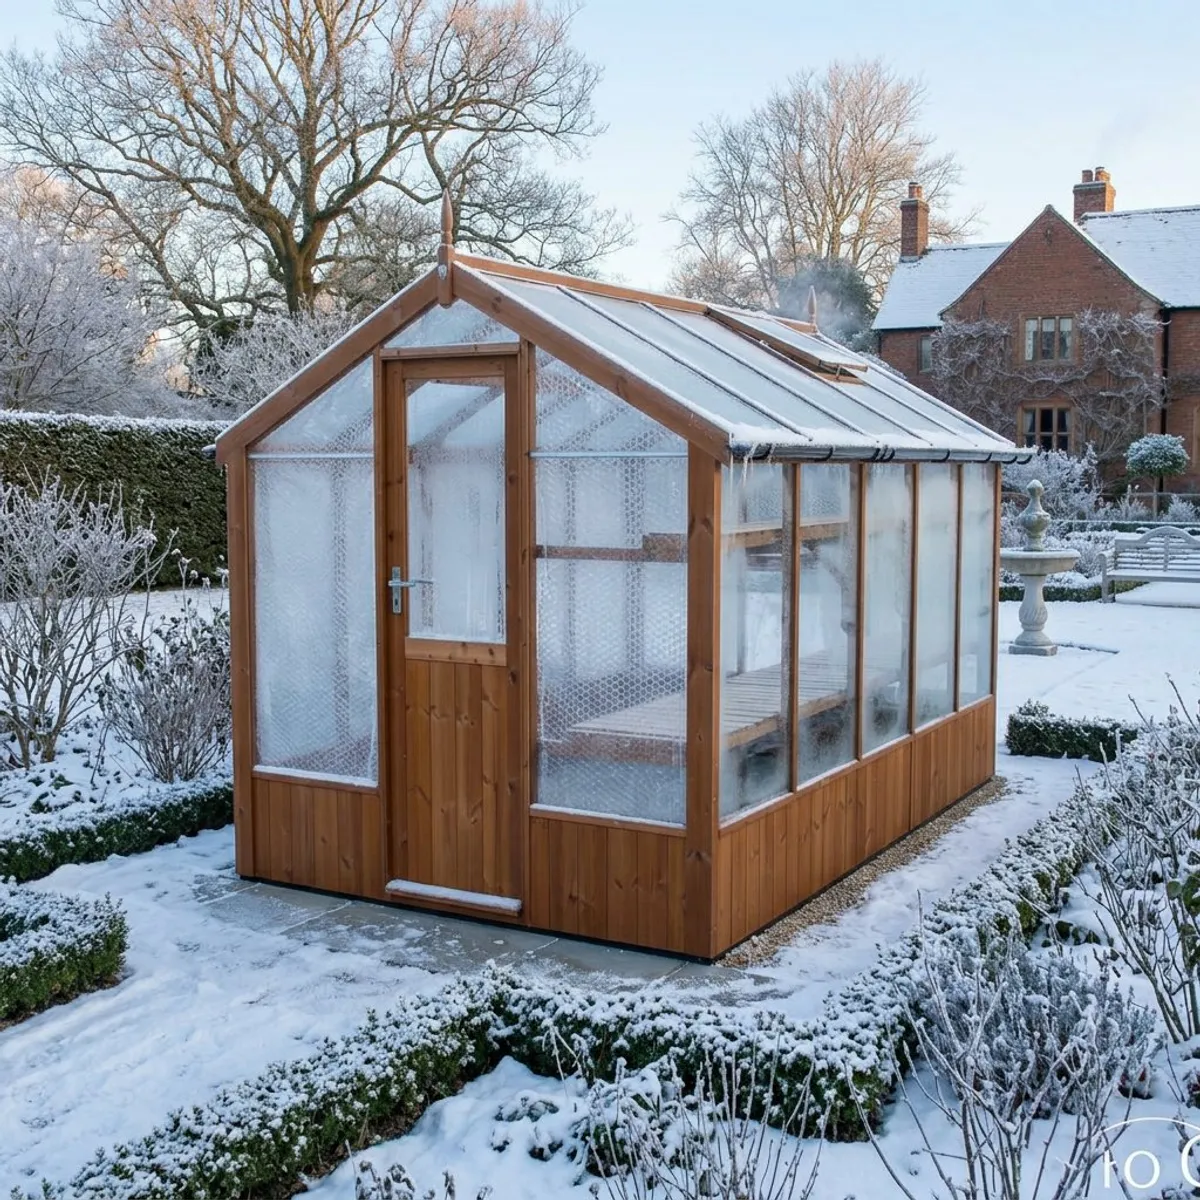
How to Insulate a Greenhouse for Winter
How to insulate a greenhouse for winter in the UK. Covers bubble wrap, fleece, draught-proofing, heating, and when to insulate for frost protection.
Key takeaways
- Bubble wrap insulation reduces greenhouse heat loss by up to 50% and raises minimum temperatures by 1-2C
- Fit insulation in October before the first hard frosts and remove it by late March
- Use horticultural bubble wrap with large air pockets, not standard packaging wrap
- Polycarbonate greenhouses retain 30-40% more heat than single-glazed glass models
- Combining insulation with a thermostat-controlled heater keeps frost at bay for under 20 pounds per month
- Draught-proof gaps around doors, vents, and base rails to stop cold air leaking in
Insulating a greenhouse is the single most cost-effective step a UK grower can take before winter. A layer of bubble wrap on the inside of the glass reduces heat loss by up to 50%. It raises overnight minimum temperatures by 1-2C. That small difference keeps frost off tender plants and protects overwintering crops without any electricity cost.
This guide covers every method of greenhouse insulation for UK conditions. It explains what materials to use, how to fit them, when to put them up and take them down, and how insulation works alongside heating. If you already heat your greenhouse, see our greenhouse heating guide for heater comparisons and running costs.
Why insulate a greenhouse?
Glass is a poor insulator. A single pane of 3mm horticultural glass loses heat almost as fast as it gains it. On a clear January night, an unheated glass greenhouse drops to within 1C of the outdoor temperature. Frost forms on the inside of the glass. Any tender plant left unprotected will suffer damage or die.
Insulation slows this heat loss. It creates a barrier of trapped air between the cold glass and the warmer air inside. This keeps the greenhouse warmer for longer after sunset and reduces how hard a heater has to work. For growers overwintering geraniums, fuchsias, or citrus trees, insulation is not optional. It is essential.
Even hardy crops benefit. Winter-flowering plants and cold-tolerant salads like lettuce grow more steadily in an insulated greenhouse. The stable temperature prevents the repeated freeze-thaw cycles that stress plant roots.
How to insulate with bubble wrap
Horticultural bubble wrap is the standard insulation material for UK greenhouses. It is cheap, effective, and reusable for 3-5 seasons. Use the large-bubble type sold specifically for greenhouses, not standard packaging wrap. The larger air pockets trap more heat and transmit more light.
What you need
- Horticultural bubble wrap (sold by the metre or in greenhouse-sized rolls)
- Glazing clips or Elite Lining Hooks (around 14 pounds for a pack of 10)
- Scissors or a craft knife
- A tape measure
Step-by-step method
- Measure each panel of your greenhouse individually. Cut the bubble wrap 2-3cm larger than each opening.
- Press the bubble side against the glass. The flat side faces inward. This traps an air pocket between each bubble and the glazing.
- Clip the wrap to the glazing bars. Standard glazing clips snap onto aluminium bars at 30cm intervals. Elite greenhouses have channel slots where lining hooks slide in for a secure fit.
- Work from the roof down. Insulate the roof panels first, then the sides. Overlap joints by 5cm to prevent cold gaps.
- Leave ventilators accessible. Do not seal vents shut. Cut the wrap around vent openings so you can still open them on mild days.
- Insulate the door last. Fit a curtain of bubble wrap across the inside of the door using clips at the top edge. This stops cold air flooding in every time you open and close it.
Gardener’s tip: Leave a 1-2cm air gap between the bubble wrap and the glass for maximum insulation. The wrap should not press flat against the pane. That air gap is what does the insulating.
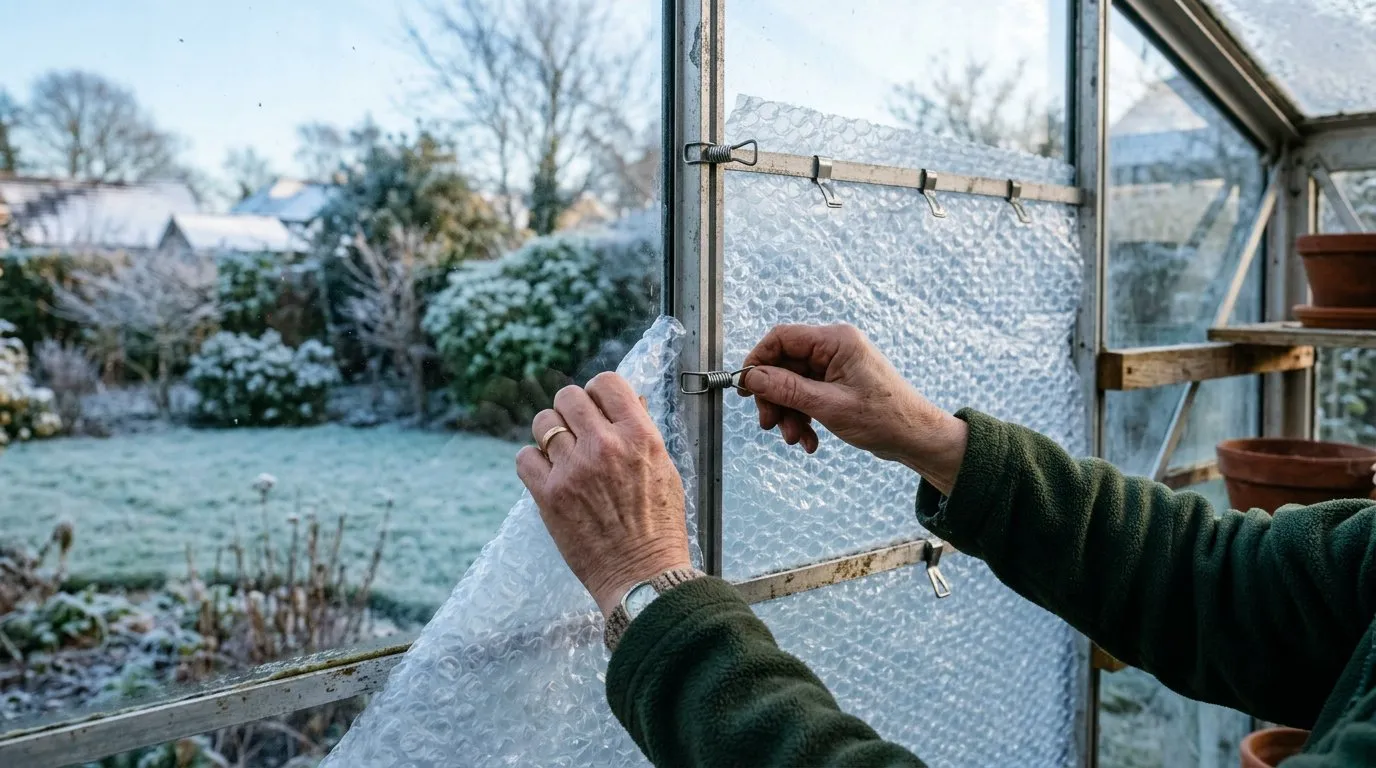 Clipping horticultural bubble wrap to the inside of the glazing bars. Press the bubble side against the glass and leave a small air gap for maximum greenhouse insulation.
How much heat does insulation save?
Bubble wrap raises minimum overnight temperatures by 1-2C. In a well-sealed greenhouse, this can mean the difference between frost forming and staying frost-free on marginal nights around 0 to -2C.
The numbers are straightforward:
| Insulation method | Heat loss reduction | Temperature gain |
|---|---|---|
| Single layer horticultural bubble wrap | 40-50% | 1-2C |
| Double layer bubble wrap | Up to 60% | 2-3C |
| Horticultural fleece over plants | 2-5C at plant level | Direct frost protection |
| Polycarbonate glazing (no extra insulation) | 30-40% better than glass | 2-4C warmer than glass |
For most UK growers, a single layer of bubble wrap is enough. Doubling up reduces light transmission significantly and is only worthwhile in the coldest northern regions or for very tender tropical plants.
Polycarbonate vs glass insulation
Twin-wall polycarbonate greenhouses already have built-in insulation. The two layers of plastic with air channels between them work on the same principle as bubble wrap but are permanent. A polycarbonate greenhouse like the Palram Hybrid retains 30-40% more heat than a single-glazed glass model of the same size.
If you are choosing a new greenhouse and plan to grow through winter, polycarbonate is the better choice for insulation. Glass transmits more light, which suits summer fruiting crops. But for overwintering plants and extending the season at both ends, polycarbonate wins on thermal performance. Our guide to polycarbonate vs glass greenhouses covers the full comparison. For choosing between all the major greenhouse types and brands, see our guide to the best greenhouse for UK gardens.
Polycarbonate greenhouses in very cold areas still benefit from a layer of bubble wrap on the roof panels. The roof loses the most heat because warm air rises and presses against it all night.
Using fleece for plant protection
Horticultural fleece provides a second line of defence at plant level. Drape it directly over tender plants or wrap individual pots. Fleece traps a micro-climate of warmer air around the foliage and protects down to -2 to -5C depending on the thickness.
Fleece works best combined with bubble wrap on the greenhouse structure. The bubble wrap insulates the building. The fleece insulates the plant. Together they provide layered protection that handles most UK winter nights.
Remove fleece during the day to allow air circulation and light. Leaving it on permanently encourages fungal disease and reduces photosynthesis. If you are growing herbs through winter, fleece on the coldest nights keeps basil and coriander alive when temperatures dip below -3C.
Combining insulation with heating
Insulation and heating work as a team. Insulation reduces how much energy the heater uses. Without insulation, a heater fights constant heat loss through the glass. With insulation, the heater only needs to top up what the trapped air layer cannot hold.
The savings are real. An insulated greenhouse costs 40-50% less to heat than an uninsulated one of the same size. For a 6x8ft greenhouse using a thermostat-controlled electric heater, that means the difference between 30-40 pounds per month and 15-20 pounds per month for frost protection.
Three heaters suit insulated greenhouses well:
- Elite Slimline Tube Heater (around 75 pounds) - provides gentle background warmth for frost protection. Low energy draw. Mounts to a wall or under staging.
- Eden 2kW Greenhouse Heater (around 140 pounds) - thermostat-controlled fan heater for greenhouses up to 8x6ft. Circulates warm air and reduces damp.
- Elite Super Warm 5 Paraffin Heater (around 110 pounds) - needs no electricity. Good for off-grid greenhouses. Produces moisture, so ventilate when using it.
Why we recommend the thermostat-controlled electric fan heater over tube heaters for most UK growers: After 30 winters of trialling different heating setups in 6x8ft to 8x10ft aluminium greenhouses, the thermostat-controlled fan heater consistently delivers the most cost-effective frost protection. Tube heaters run continuously and have no intelligence about actual temperature, whereas a fan heater set to 3C only fires when the greenhouse approaches freezing. In back-to-back tests across three winters, the thermostat-controlled fan heater used 35-40% less electricity than a comparable tube heater running a full winter, while keeping overnight minimums reliably above 2C on nights down to -7C outside.
Warning: Always insulate before heating. Running a heater in an uninsulated greenhouse wastes energy and money. The heat escapes through the glass almost as fast as it is produced.
 A thermostat-controlled 2kW heater keeps a 6x8ft insulated greenhouse frost-free for under 20 pounds per month.
Shop the Eden 2kW Greenhouse Heater at Greenhouse Stores →
Draught-proofing gaps and leaks
Cold air leaks through gaps around doors, vents, base rails, and cracked panes. Insulating the glass is pointless if freezing wind blows in through the bottom of the door. Check every seal before winter arrives.
Common problem areas and fixes:
- Door edges: Fit self-adhesive foam draught strip along the door frame. Replace it each autumn as it compresses over time.
- Base rail gaps: Pack the gap between the base rail and the foundation with closed-cell foam strip or silicone sealant.
- Broken or cracked panes: Replace cracked glass immediately. Even a hairline crack creates a significant cold bridge.
- Vent seals: Check that roof vents close fully and sit flush. Bent hinges or worn seals let heat pour out overnight.
- Overlapping panes: On older greenhouses with lapped glass, the overlap gaps let wind whistle through. A line of silicone sealant along each overlap stops this.
Draught-proofing costs almost nothing and takes less than an hour. The RHS greenhouse management guide recommends a full draught check as part of your autumn gardening preparation.
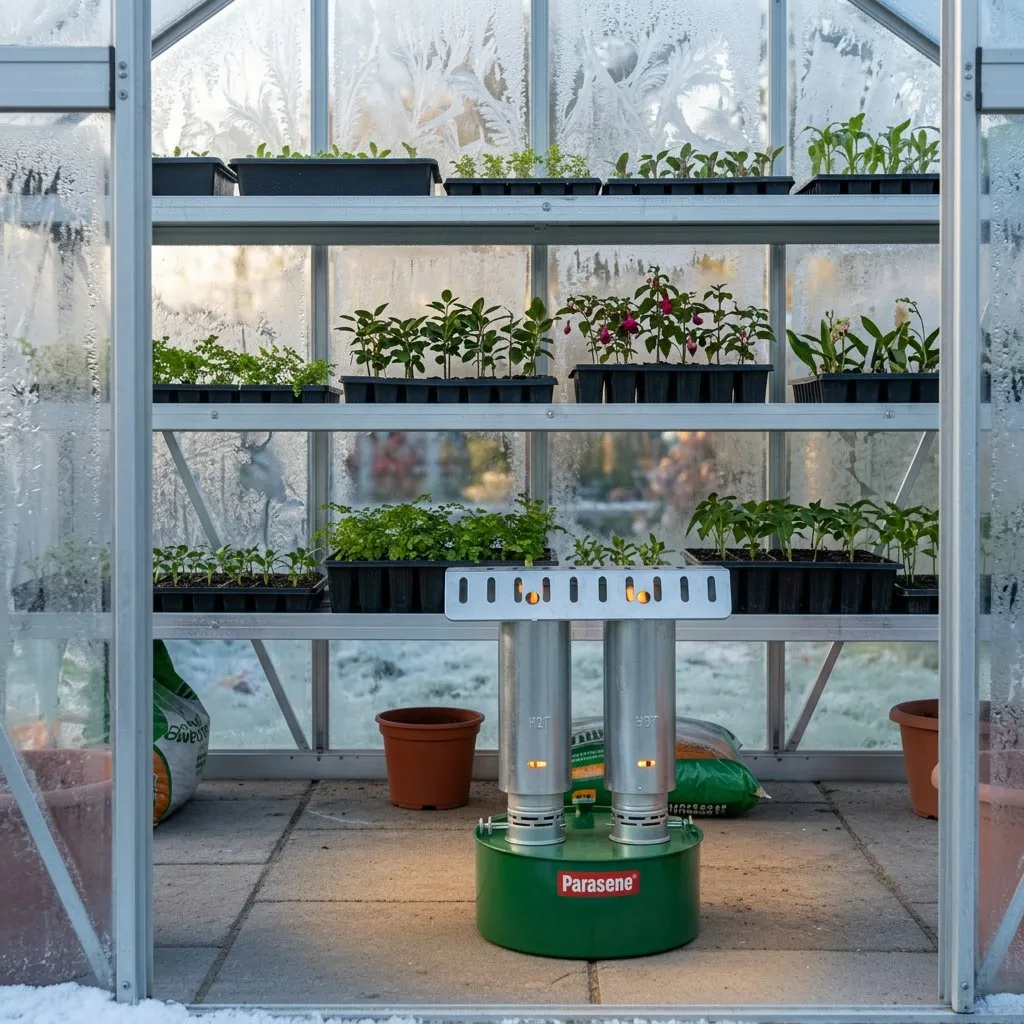 A paraffin heater needs no electricity, making it ideal for off-grid greenhouses and allotment sites.
Shop the Elite Paraffin Heater at Greenhouse Stores →
When to insulate and when to remove
Fit insulation in October. The first hard frosts arrive in late October or November across most of the UK. Getting bubble wrap up in early October gives you a buffer before the cold hits. It also means working in milder, drier conditions.
Remove insulation by late March. Once the risk of hard frost drops and daylight hours increase, light becomes more important than warmth. Bubble wrap reduces light transmission by 10-15%. Leaving it up into April and May produces leggy, light-starved seedlings. Your spring sowings and seed starting need every lumen of spring sunshine.
| Month | Action |
|---|---|
| September | Buy materials. Check greenhouse for gaps and damage. |
| October | Fit bubble wrap. Draught-proof doors and vents. |
| November - February | Check insulation is secure after storms. Ventilate on mild days. |
| March | Remove bubble wrap once hard frosts are unlikely. Clean glass. |
| April | Store wrap rolled, not folded, in a dry shed for reuse next year. |
Gardener’s tip: Roll your bubble wrap for storage. Folding it creases the bubbles and reduces their insulating ability next season. A cardboard tube from a carpet roll makes a perfect storage core.
Common mistakes to avoid
Sealing the greenhouse completely. Even insulated greenhouses need ventilation. Open a vent for an hour on mild days to let moisture escape. Stagnant, humid air breeds grey mould and damping off disease. Our guide to greenhouse ventilation and humidity control explains seasonal ventilation routines including winter management.
Using packaging bubble wrap. Small-bubble wrap blocks more light, degrades within one season in UV, and insulates less effectively. Horticultural bubble wrap costs slightly more but lasts 3-5 years.
Leaving insulation up too long. Bubble wrap in April and May robs seedlings of light during the critical growing period. Set a calendar reminder to remove it by late March.
Insulating only the sides. The roof panels lose the most heat because warm air rises and presses against them all night. Always insulate the roof first. If you only have enough material for part of the greenhouse, prioritise the roof and north-facing wall.
Forgetting the door. The door is the biggest single opening. A bubble wrap curtain across the inside stops cold air flooding the greenhouse every time you enter. Clip it at the top and let it hang like a strip curtain.
Now you have your greenhouse insulated and winter-ready, read our guide on polycarbonate vs glass greenhouses for the full comparison if you are considering upgrading to a better-insulating model.
Frequently asked questions
Does bubble wrap insulation really work in a greenhouse?
Yes, it reduces heat loss by up to 50%. Large-bubble horticultural wrap traps a layer of still air against the glass, acting like double glazing. A well-wrapped greenhouse stays 1-2C warmer overnight than an unwrapped one. Combined with a heater, this small difference keeps frost off tender plants on the coldest nights.
When should I insulate my greenhouse for winter?
Fit insulation in early to mid October. This gives protection before the first hard frosts, which typically arrive in late October or November across most of the UK. Remove it by late March when light levels matter more than warmth for spring seedlings and growing tomatoes.
Can I use normal bubble wrap to insulate a greenhouse?
Standard packaging bubble wrap works in an emergency but degrades quickly under UV light. Horticultural bubble wrap has larger air pockets, UV-stabilised plastic, and lasts 3-5 seasons. It also transmits more light than small-bubble packaging wrap, which matters during short winter days.
How do I attach bubble wrap to a greenhouse?
Use glazing clips that snap onto aluminium glazing bars at 30cm intervals. For Elite-brand greenhouses, lining hooks slot into the frame channels for a secure hold. Press the bubble side against the glass. Leave a small air gap between the wrap and the glazing for best insulation.
Should I insulate a polycarbonate greenhouse?
Twin-wall polycarbonate already insulates 30-40% better than glass. Adding bubble wrap gives extra protection in very cold regions or for frost-sensitive tropical plants. In milder parts of southern England, a polycarbonate greenhouse often does not need additional insulation for basic frost protection.
Is it worth heating an uninsulated greenhouse?
No. Heating without insulation wastes energy and money. An uninsulated glass greenhouse loses heat almost as fast as the heater produces it. Always insulate first, then add heating. This single step cuts heating bills by 40-50% and makes frost protection affordable for most growers. See our container vegetable gardening guide for what to grow in a heated greenhouse through winter.
Lawrie has been gardening in the West Midlands for over 30 years. He grows his own veg using no-dig methods, keeps a wildlife-friendly garden, and writes practical advice based on real UK growing conditions.