How to Lay a Patio: UK Step-by-Step
Step-by-step guide to laying a patio in the UK. Covers planning, materials, sub-base preparation, laying technique, jointing, drainage falls, and costs.
Key takeaways
- A compacted sub-base of 100mm MOT Type 1 hardcore is essential for a stable, long-lasting patio
- Set a drainage fall of 1:60 (roughly 17mm per metre) away from the house to prevent waterlogging
- Natural sandstone costs 30 to 60 pounds per m2; porcelain costs 40 to 100 pounds per m2
- Use a 10:1 semi-dry mortar mix for jointing natural stone, or a resin-based jointing compound for porcelain
- Most patios do not need planning permission if they use permeable materials or drain to a lawn area
- Allow 48 hours for mortar to cure before walking on a newly laid patio
A well-laid patio adds usable outdoor space and genuine value to a UK home. It provides a flat, clean surface for furniture, barbecues, and year-round use that a lawn cannot match in winter.
The difference between a patio that lasts 20 years and one that cracks within three comes down to preparation. A proper sub-base, correct mortar mix, and accurate drainage fall are the foundations of every successful patio. Skip any of these and you face pooling water, sinking slabs, and expensive repairs. This guide covers every stage from planning to jointing, with specific UK costs, materials, and legal requirements.
Planning your patio: size, position, and shape
Before buying a single slab, spend time on the planning stage. Decisions made now affect every step that follows.
Position is the first consideration. Most UK patios sit directly outside the back door for convenience. South-facing and west-facing positions receive the most afternoon and evening sun. A north-facing patio works if it is large enough to catch the sun as it moves across the garden. Consider how the patio relates to your garden lighting and any future landscaping.
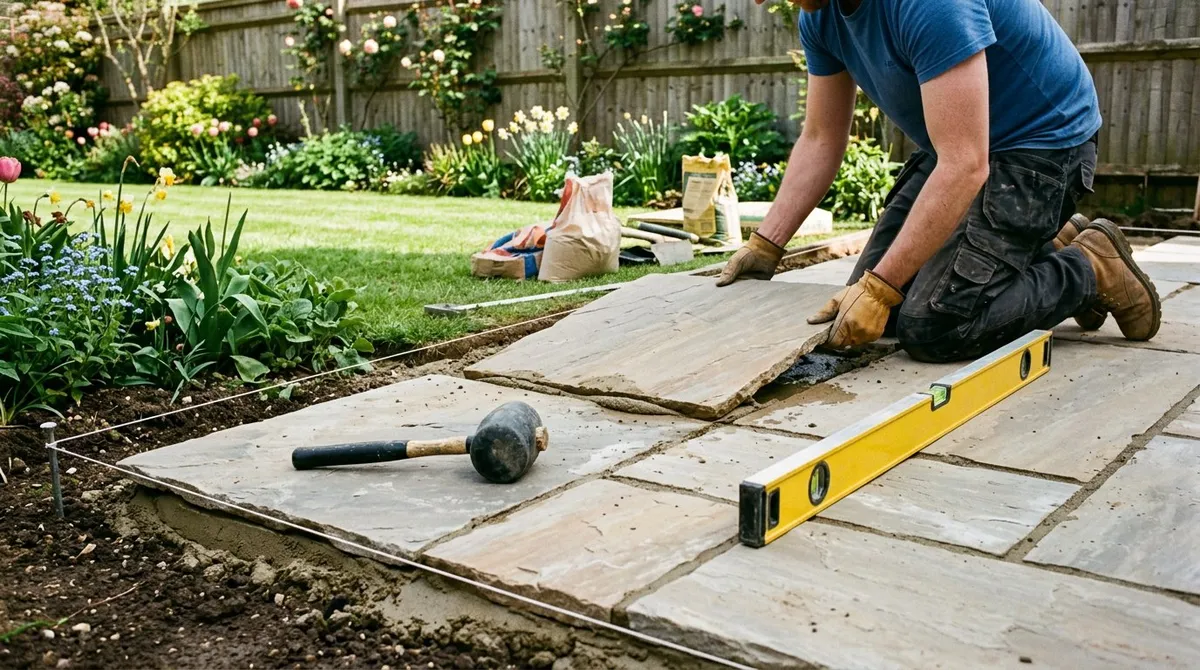
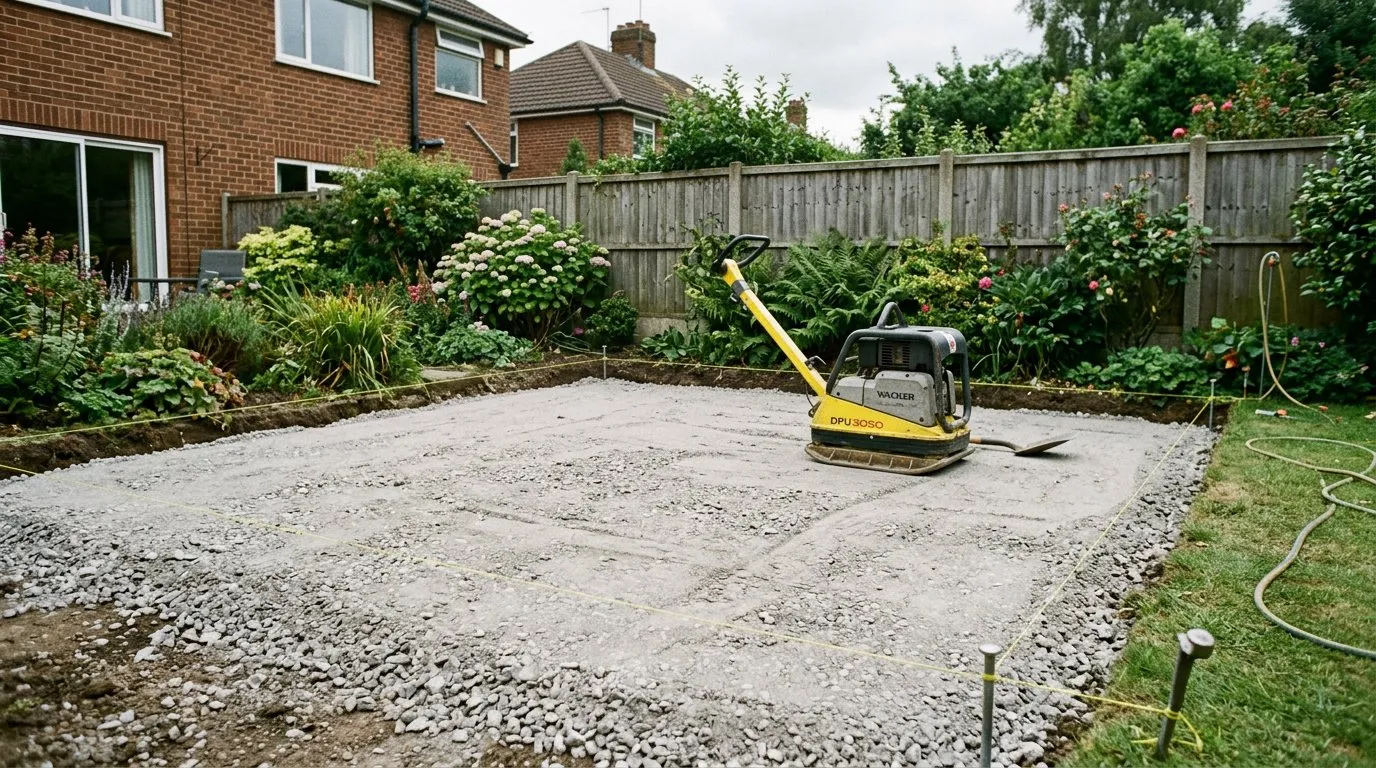 A compacted sub-base of 100mm MOT Type 1. This is the foundation that determines whether your patio lasts 3 years or 20.
Size depends on how you use the space. A table and four chairs needs a minimum of 3m x 3m (9m2). Add a barbecue area and you need 4m x 5m (20m2). The most common UK patio size is 3m x 5m (15m2), which suits most semi-detached and terraced gardens.
Shape affects both cost and laying difficulty. Rectangular patios are the simplest to lay and produce the least waste. Curved and irregular shapes require more cutting, more time, and 10-15% extra materials.
Compacted sub-base ready for the mortar bed. The string lines show the 1:60 drainage fall away from the house.
Choosing your patio materials
The material you choose affects cost, appearance, durability, and maintenance for the life of the patio. Each option suits different budgets and garden styles.
Patio materials comparison
| Material | Cost per m2 | Durability | Maintenance | Slip resistance | Best for |
|---|---|---|---|---|---|
| Concrete slabs | 15 to 30 | Good (20+ years) | Low | Good when textured | Budget patios, utility areas |
| Sandstone | 30 to 60 | Excellent (30+ years) | Moderate (annual clean) | Good (riven surface) | Traditional and cottage gardens |
| Limestone | 35 to 65 | Excellent (30+ years) | Moderate (stains easily) | Moderate | Contemporary, formal gardens |
| Porcelain | 40 to 100 | Excellent (30+ years) | Very low | Low when wet (needs treatment) | Modern gardens, low maintenance |
| Block paving | 25 to 50 | Excellent (25+ years) | Low to moderate | Good | Driveways, paths, curved patios |
Sandstone is the most popular natural stone for UK patios. Indian sandstone offers warm tones (buff, golden, grey, brown) at reasonable prices. Its riven surface provides natural grip in wet conditions. Expect to clean it annually to prevent algae and lichen.
Porcelain has surged in popularity. It absorbs almost no water (under 0.5%), resists staining, and barely needs cleaning. However, it is slippery when wet unless treated, and it requires a specific adhesive bed rather than standard mortar. Cutting porcelain demands a diamond wet saw.
Concrete slabs remain the practical budget choice. Modern concrete paving mimics natural stone finishes convincingly. It weathers less attractively than real stone but costs half the price.
Block paving uses smaller units that interlock, making it ideal for curved designs and areas with tree roots. Blocks can be individually lifted and replaced if damaged. It suits garden paths as well as patios.
Why we recommend Indian sandstone for first-time patio layers: After 30 years of laying and maintaining patios across UK gardens, Indian sandstone in the buff or golden tones consistently delivers the best balance of cost, durability, and forgiveness for inexperienced layers. Its natural riven surface hides minor level variations that would show badly on sawn or porcelain slabs. It cuts cleanly with an angle grinder, and its 22-25mm thickness works well with both the full mortar bed and five-spot method. Patios laid with Indian sandstone and a proper sub-base regularly reach 25-30 years without needing re-laying — the same material on a poor sub-base fails within two.
Gardener’s tip: Order 10% more slabs than your calculated area. Cutting waste, breakages during delivery, and future repairs all consume extra material. Keeping a few spare slabs in the garage means matching replacements years later is never a problem.
Tools and materials checklist
Gather everything before starting. Missing a single item mid-project causes delays and poor results.
Tools
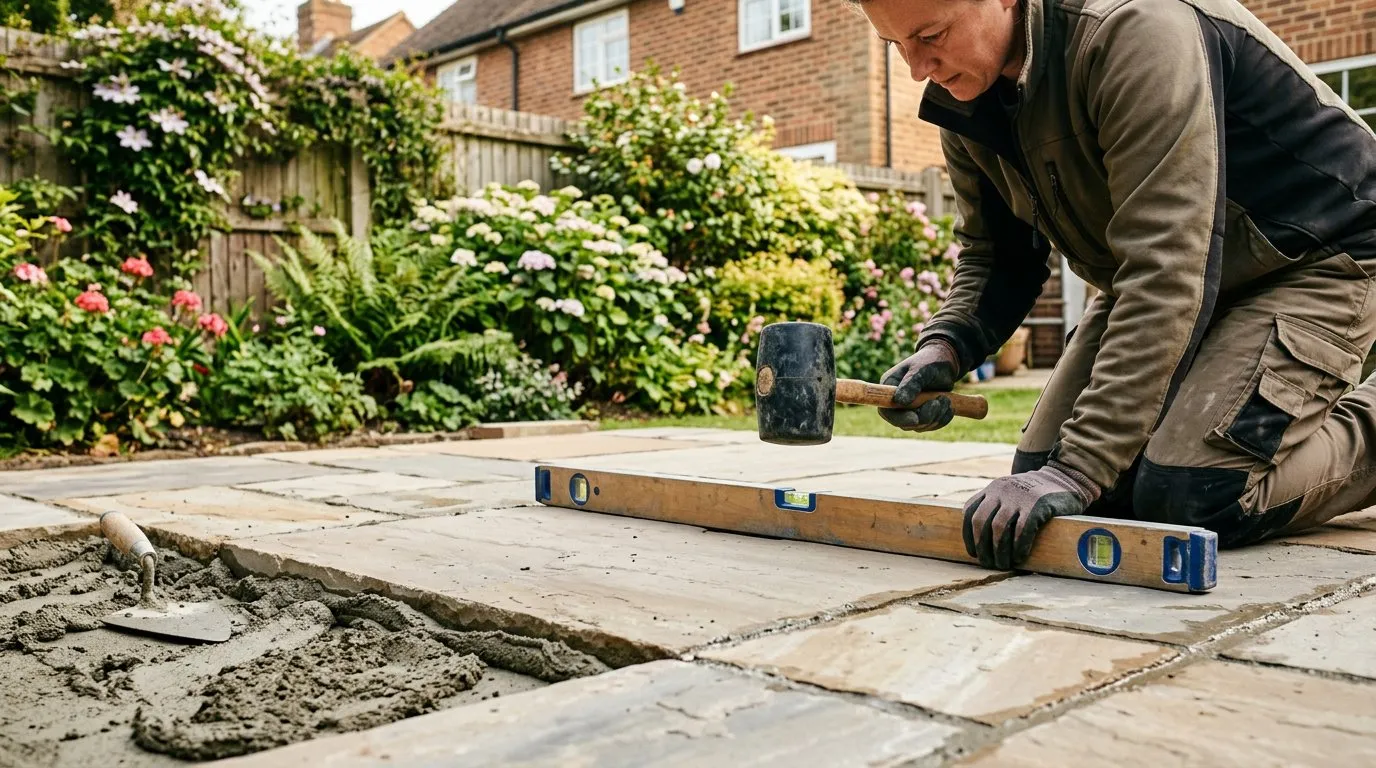 Tapping slabs into position on a full mortar bed. Check level across every slab before moving on.
| Tool | Purpose | Own or hire |
|---|---|---|
| Tape measure (5m+) | Measuring and marking out | Own |
| String line and pegs | Setting levels and falls | Own |
| Spirit level (1200mm) | Checking levels | Own |
| Spade and shovel | Excavation | Own |
| Wheelbarrow | Moving aggregate and mortar | Own |
| Plate compactor (whacker plate) | Compacting sub-base | Hire |
| Rubber mallet | Tapping slabs into position | Own |
| Brick bolster and club hammer | Cutting slabs (basic) | Own |
| Angle grinder with diamond blade | Cutting slabs (accurate) | Own or hire |
| Pointing trowel | Filling joints | Own |
| Bucket and mixing board | Mixing mortar | Own |
| Knee pads | Comfort during laying | Own |
Materials (for a 15m2 patio)
| Material | Quantity | Approximate cost |
|---|---|---|
| Paving slabs (your chosen material) | 15m2 + 10% extra | 225 to 1,650 depending on material |
| MOT Type 1 hardcore | 1.5 tonnes (100mm depth) | 40 to 60 |
| Sharp sand | 0.75 tonnes | 30 to 45 |
| Cement (25kg bags) | 6 to 8 bags | 30 to 45 |
| Jointing compound or mortar | As needed | 20 to 60 |
| Weed membrane (optional) | 15m2 | 10 to 20 |
Step-by-step: how to lay a patio
Follow these steps in order. Each stage builds on the previous one.
Step 1: Mark out the patio area
Drive wooden pegs into the ground at each corner of the patio. Run string lines between the pegs to define the edges. Use the 3-4-5 triangle method to check corners are square: measure 3m along one string, 4m along the adjacent string, and the diagonal between those two points should be exactly 5m.
Check the finished patio height against the house damp-proof course (DPC). The patio surface must sit at least 150mm below the DPC to prevent damp problems. This is a building regulations requirement, not optional.
Step 2: Excavate the area
Dig out the marked area to the required depth. For most patios, this is:
- 100mm sub-base + 30mm mortar bed + slab thickness (typically 20-30mm for concrete, 22-30mm for natural stone) = approximately 150-160mm total depth
Add the drainage fall to your calculations. The patio must slope away from the house at a gradient of 1:60. For a 3m-deep patio, that means the far edge sits 50mm lower than the house edge.
Remove all topsoil, roots, and organic matter. Topsoil compresses over time and causes slabs to sink. Dig down to firm subsoil. If the subsoil is soft clay, dig an extra 50mm and add more hardcore.
Step 3: Compact the sub-base
Spread MOT Type 1 hardcore across the excavated area to a depth of 100mm. This graded aggregate (a mix of stone dust and 40mm crushed stone) locks together when compacted, creating a stable foundation.
Compact in two layers. Spread 50mm, compact it with a plate compactor, then add another 50mm and compact again. Each pass of the compactor should overlap the previous one by half. The finished sub-base should feel rock-solid underfoot and show no movement when you walk on it.
Set your string lines to show the finished slab height, including the 1:60 fall. Use these as a constant reference during laying.
Laying sandstone slabs on a full mortar bed. Each slab is tapped down with a rubber mallet and checked against the string line.
Step 4: Prepare the mortar bed
Mix a mortar bed using 6 parts sharp sand to 1 part cement. The consistency should be firm but workable. Squeeze a handful: it should hold its shape without crumbling and without water dripping out.
Two methods for laying:
- Full mortar bed: Spread a consistent 30-40mm layer of mortar across the area you can lay within 30 minutes. This gives full support and is essential for porcelain and thin slabs.
- Five-spot method: Place five blobs of mortar (one at each corner and one in the centre) for each slab. This suits thicker natural stone slabs (30mm+) and uses less mortar. The slab must still make full contact with all five spots when tapped down.
The full mortar bed is the better method for most patios. It prevents hollow spots where slabs flex and crack under weight.
Step 5: Lay the slabs
Start from a corner nearest the house and work outwards. This keeps you off freshly laid slabs.
Place the first slab onto the mortar bed and tap it down with a rubber mallet until it sits at the correct height, checking against your string lines. Use the spirit level to confirm the slab is following the 1:60 fall in one direction and is level side-to-side.
Leave consistent joints between slabs. For natural stone, 10-15mm joints are standard. For sawn stone and porcelain, 3-5mm joints give a tighter, modern look.
Work in rows, checking each slab against its neighbours and against the string lines. Every third or fourth slab, re-check the overall fall with the spirit level across several slabs. Small errors accumulate quickly.
Gardener’s tip: If a slab sits too low, lift it, add more mortar, and re-lay. If too high, tap it down further or remove some mortar. Never force a slab down by standing on it, as this pushes mortar out sideways and creates voids underneath.
Step 6: Cut edge and corner slabs
Mark cuts on the slab face using a pencil and straight edge. For straight cuts, score the line with a bolster and club hammer, then snap. For precise cuts (around drain covers, corners, curves), use an angle grinder with a diamond cutting blade.
Always wear safety glasses, ear protection, and a dust mask when cutting. Stone dust is harmful and cuts throw fragments at speed. Cut outdoors, never in an enclosed space.
For porcelain slabs, only a diamond wet saw gives clean, chip-free cuts. Porcelain shatters unpredictably when scored and snapped.
Step 7: Joint the patio
Wait at least 24 hours after laying before jointing. This allows the mortar bed to firm up enough that the slabs will not shift when you work on the joints.
For natural stone (sandstone, limestone): Use a semi-dry mortar mix (10 parts sand to 1 part cement, just enough water to hold shape). Press it firmly into the joints with a pointing trowel, slightly recessing it below the slab surface. Brush off excess immediately. Clean any mortar smears with a damp sponge before they set.
For porcelain and sawn stone: Use a proprietary resin-based jointing compound. Brush it into the joints following the manufacturer’s instructions exactly. Resin joints flex slightly, which suits porcelain’s low porosity.
For block paving: Sweep kiln-dried sand into the joints and compact with the plate compactor. The vibration settles the sand deep into the joints. Top up and compact again until the joints are full.
Jointing sandstone slabs with a semi-dry mortar mix. The joint is pressed in firmly and recessed slightly below the slab surface.
Step 8: Seal and protect (optional)
Sealing is optional but extends the life and appearance of natural stone patios. A quality impregnating sealer soaks into the stone, repelling water and stains without changing the surface appearance.
Apply sealer on a dry day when the patio has fully cured (at least 4 weeks after laying). Do not apply in rain, frost, or direct hot sun. Reapply every 3 to 5 years. Porcelain does not need sealing due to its near-zero porosity.
Allow a full 48 hours after jointing before walking on the patio, and 7 days before placing heavy furniture.
Drainage: getting the fall right
Poor drainage is the second most common patio failure after inadequate sub-base. Standing water stains slabs, encourages algae, and in winter, freezing puddles lift and crack paving.
The 1:60 rule
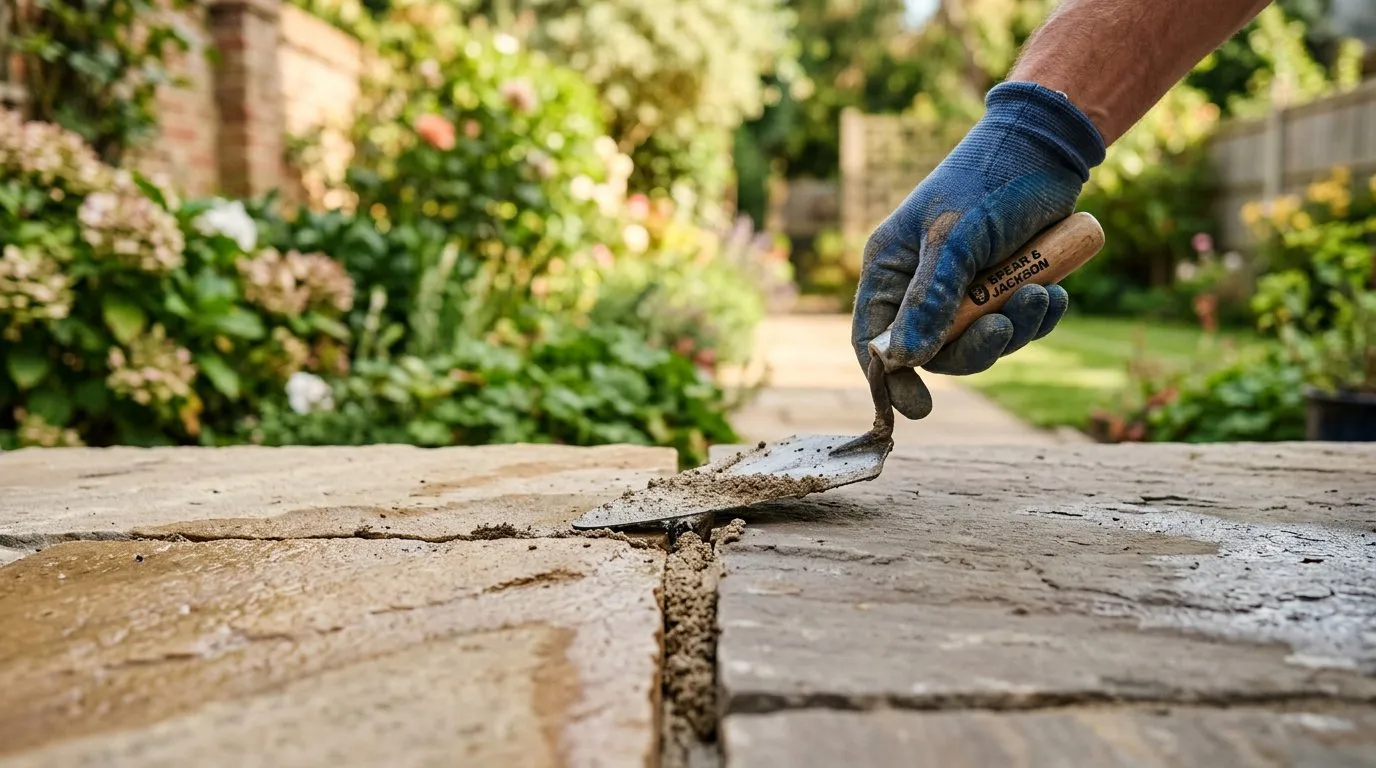 Pressing semi-dry mortar into joints. A firm, slightly damp mix holds its shape and cures stronger than a wet one.
Every patio must fall away from the house at a minimum gradient of 1:60. This means for every 1 metre of patio depth, the far edge drops 17mm. A 3m-deep patio falls 50mm. A 5m-deep patio falls 83mm.
Set this fall using string lines before you lay a single slab. Measure from the string to the sub-base at multiple points to confirm consistency.
Where does the water go?
Rainwater running off the patio must go somewhere:
- Onto a lawn or border: The simplest solution. Soil and grass absorb rainfall naturally. This satisfies permitted development requirements.
- Into a linear drain: Install a channel drain along the far edge of the patio if it meets a wall, fence, or hard surface. Connect this to the surface water drain.
- Into a soakaway: For larger patios or heavy clay gardens, a soakaway pit (typically 1m x 1m x 1m, filled with clean rubble or crated units) disperses water into the surrounding soil. Position it at least 5m from the house.
Never direct patio runoff towards the house, a neighbour’s property, or onto the public highway.
Budget calculator: what does a patio cost?
Use these figures to estimate your total cost. Prices are typical UK rates as of early 2026.
Materials cost per m2 (including sub-base and mortar)
| Patio material | Slabs per m2 | Sub-base and mortar per m2 | Total materials per m2 |
|---|---|---|---|
| Concrete slabs | 15 to 30 | 10 to 15 | 25 to 45 |
| Sandstone (Indian) | 30 to 60 | 10 to 15 | 40 to 75 |
| Limestone | 35 to 65 | 10 to 15 | 45 to 80 |
| Porcelain | 40 to 100 | 12 to 18 | 52 to 118 |
| Block paving | 25 to 50 | 10 to 15 | 35 to 65 |
Example: 15m2 patio total costs
| Cost element | DIY cost | Professional cost |
|---|---|---|
| Materials (sandstone) | 600 to 1,125 | 600 to 1,125 |
| Tool hire (compactor, saw) | 80 to 120 | Included |
| Skip hire (spoil removal) | 200 to 300 | Included |
| Labour | 0 (your time) | 450 to 900 |
| Total | 880 to 1,545 | 1,250 to 2,325 |
Professional patio installers charge 30 to 60 pounds per square metre for labour depending on your region, material complexity, and access. London and the South East sit at the top of that range. Getting three quotes and checking reviews is standard practice.
Legal requirements: permitted development
Most patios in England fall under permitted development rights, meaning you do not need planning permission.
You do not need planning permission if:
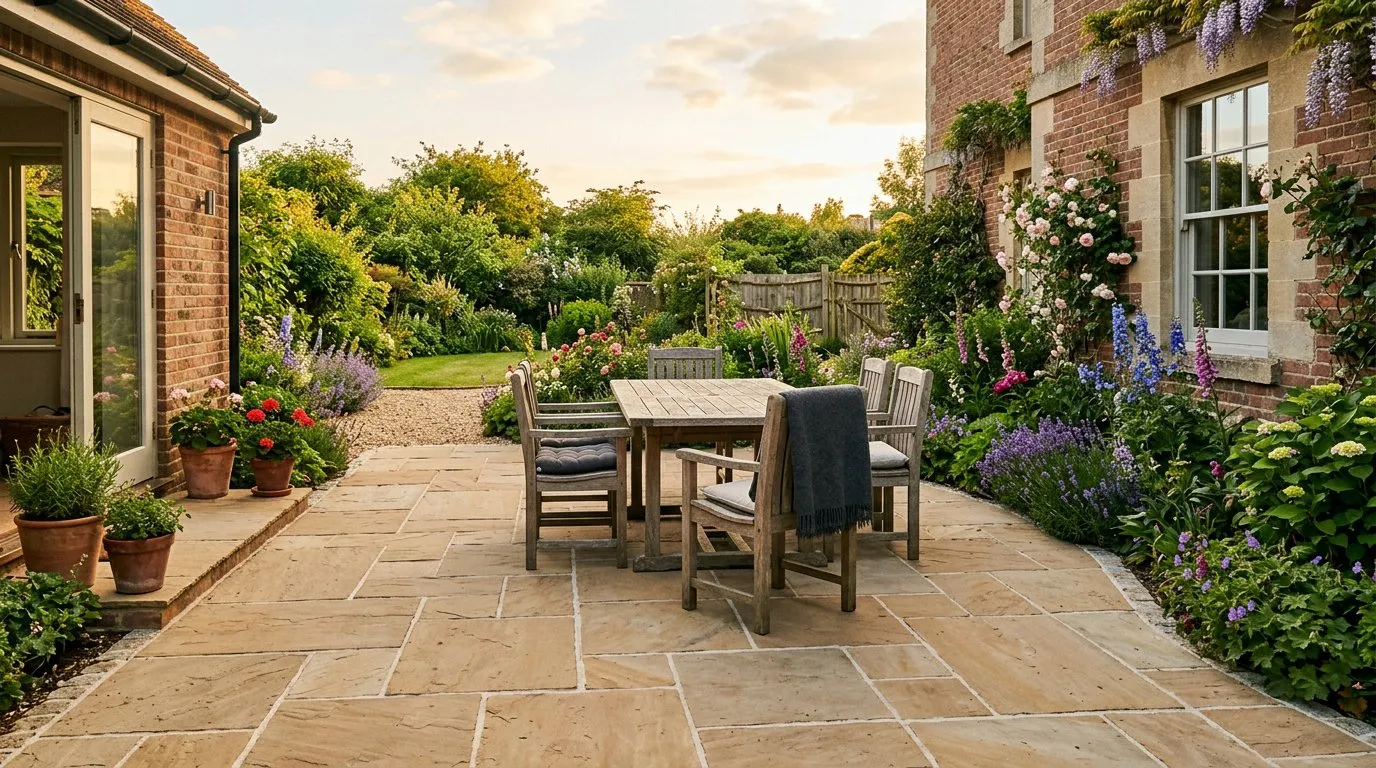 A completed sandstone patio with furniture in place. The 1:60 drainage fall keeps the surface dry after rain.
- The patio uses permeable paving (e.g. block paving with open joints, gravel, permeable resin-bound surfaces)
- Rainwater drains onto a permeable surface within your property (lawn, border, soakaway)
- The patio does not raise the ground level by more than 300mm above the original surface
You may need planning permission if:
- The patio is impermeable (solid mortar joints on solid sub-base) and exceeds 5m2 in area, with runoff directed towards the highway
- You live in a conservation area, listed building, or Area of Outstanding Natural Beauty (AONB) and the patio is at the front of the property
- The patio raises the ground level significantly
Building regulations do not usually apply to patios, but the DPC rule (patio surface at least 150mm below the damp-proof course) must always be respected. This is not negotiable.
Gardener’s tip: If in doubt, call your local council’s planning department before starting. A quick phone call can save considerable trouble. Most councils offer free informal advice on whether your project needs permission.
5 common mistakes when laying a patio
These are the errors that ruin patios. Every one is avoidable with proper preparation.
1. Skipping the sub-base. Laying slabs directly onto soil or sand is the single most common patio failure. Without compacted hardcore, slabs sink unevenly within the first year. There is no shortcut here.
2. Ignoring the drainage fall. A flat patio pools water after every rainfall. In winter, those pools freeze and lift slabs. The 1:60 fall takes 10 minutes to set up with string lines and saves years of problems.
3. Laying too close to the DPC. Patios built level with or above the damp-proof course channel rainwater into the house walls. Damp patches, mould, and structural damage follow. Always check the DPC height before finalising your patio level.
4. Using the wrong mortar mix. Too much cement creates a rigid, brittle bed that cracks as the ground moves. Too little cement creates a weak bed that crumbles. The 6:1 ratio (sand to cement) for the bed and 10:1 for jointing have been standard for decades because they work.
5. Rushing the jointing. Filling joints before the mortar bed has firmed leads to slabs shifting and joints cracking. Wait a full 24 hours after laying before jointing, and 48 hours before walking on the finished patio.
Completed sandstone patio with furniture in place. The subtle fall towards the lawn ensures rainwater drains away from the house.
Patio aftercare and maintenance
A properly laid patio needs minimal maintenance, but an annual clean and check prevents small problems becoming large ones.
Annual cleaning. Pressure wash or scrub with a patio cleaner once a year, ideally in spring. Our guide on how to clean a patio covers methods for every surface type. This removes algae, moss, and lichen that make the surface slippery. For natural stone, use a cleaner formulated for stone, not a general-purpose degreaser.
Joint maintenance. Check joints every autumn. Repoint any that have crumbled or washed out. Weeds growing through joints indicate gaps in the jointing. Pull the weeds, clean the joint, and re-fill with fresh mortar or jointing compound.
Slab replacement. If a slab cracks (rare with proper sub-base), chisel out the old mortar, lift the slab, re-lay the mortar bed, and set a replacement. This is why ordering 10% extra at the start pays off.
Weed prevention. Applying a weed-suppressing membrane beneath the sub-base reduces weed growth through joints. Polymeric sand or resin joints also resist weed growth better than cement mortar.
If your patio borders a lawn area, see our guide to laying turf for creating a clean transition edge between paving and grass.
Patio design inspiration
The practical steps above create a solid patio. The design choices make it a space you actually enjoy using.
Mixed materials add visual interest. Combine sandstone slabs with a brick border, or use contrasting slab colours to create a central feature or path. A simple border of darker slabs around a lighter centre field gives a designed look without complex cutting.
Integrate planting pockets by leaving out slabs in strategic positions and filling with soil. Low-growing herbs (thyme, chamomile) planted between pavers soften hard edges and release scent when walked on. See our guide to patio garden ideas for more planting approaches in paved spaces.
Consider levels. A stepped patio with a lower seating area and a raised dining section creates distinct zones in small gardens. Steps also solve tricky sloping sites where a single flat patio would need excessive excavation.
Lighting turns evening use. Recessed LED spotlights in the patio surface, low-level bollards at edges, or festoon lights overhead extend the usable hours from spring through autumn. Plan cable routes before laying slabs, as retrofitting lighting into a finished patio means lifting paving.
Now you have mastered the patio-laying process, read our guide on garden path ideas for the next step in connecting your new patio to the rest of the garden.
Frequently asked questions
Do I need planning permission to lay a patio in the UK?
Most domestic patios do not need planning permission. Under permitted development rights, you can pave your garden without permission if the surface is permeable or if rainwater drains onto a soft, absorbent surface like a lawn. Impermeable paving over 5m2 that drains onto the road may require permission. Check the Planning Portal or your local authority before starting.
How deep should a patio sub-base be?
A patio sub-base should be 100mm of compacted MOT Type 1 hardcore. For areas with heavy clay soil or poor drainage, increase this to 150mm. The sub-base provides stability and prevents the patio from sinking or shifting. Compact it in 50mm layers using a plate compactor or hand tamper.
What is the correct fall for patio drainage?
The standard drainage fall is 1:60, which means 17mm of drop for every metre of patio length. The fall must slope away from the house towards a lawn, border, or drain. Use a spirit level and shims to set this gradient on your string lines before laying any slabs.
How long does it take to lay a patio?
A 15m2 patio takes a competent DIYer 3 to 4 days. Day one covers excavation and sub-base. Day two is for the mortar bed and laying slabs. Day three is cutting, edge slabs, and adjustments. Day four is jointing and finishing. Allow 48 hours after jointing before walking on the patio.
Can I lay patio slabs on sand instead of mortar?
Sand-only beds are not recommended for slab patios. Slabs laid on sand shift, rock, and develop uneven surfaces within months. Sand beds suit only block paving, which locks together under edge restraints. For slab patios, always use a full mortar bed or five-spot mortar method on a compacted sub-base.
What is the cheapest patio material in the UK?
Concrete slabs are the cheapest patio material at 15 to 30 pounds per square metre. They come in a wide range of sizes, colours, and finishes including smooth, riven, and textured. Concrete lacks the character of natural stone but is durable, consistent, and widely available from any builders’ merchant.
How much does a patio cost per square metre in the UK?
Materials cost 15 to 100 pounds per square metre depending on the paving type. Concrete slabs cost 15 to 30, sandstone 30 to 60, limestone 35 to 65, porcelain 40 to 100, and block paving 25 to 50 pounds per m2. Add 10 to 15 pounds per m2 for sub-base aggregate, sand, and mortar. Professional installation adds 30 to 60 pounds per m2 for labour.
When is the best time of year to lay a patio?
Spring and early autumn are the best times to lay a patio in the UK. April to June and September to October offer mild temperatures that help mortar cure properly. Avoid laying in freezing conditions (below 3C), as frost damages wet mortar. Avoid midsummer heatwaves too, as mortar dries too quickly and loses strength.
Final thoughts
Laying a patio is one of the most rewarding DIY projects in the garden. A weekend of hard work produces a surface that lasts decades with minimal care. The process is not complicated, but it demands patience and precision at every stage.
The three rules that determine success are worth repeating: build a proper 100mm compacted sub-base, set the 1:60 drainage fall before you lay a single slab, and use the correct mortar ratios for both the bed and the joints. Get those right and the rest follows.
For related projects, see our guides on garden path ideas, patio garden ideas for small spaces, and small garden design. The Gov.uk guidance on permitted development for householders covers the legal position on hard surfaces in full.
Lawrie has been gardening in the West Midlands for over 30 years. He grows his own veg using no-dig methods, keeps a wildlife-friendly garden, and writes practical advice based on real UK growing conditions.