How to Scarify and Aerate Your Lawn
A practical guide to scarifying and aerating lawns in UK gardens. Covers timing, tools, techniques, recovery, overseeding, and a month-by-month calendar.
Key takeaways
- Scarify in September when grass is growing strongly and recovery is fastest
- Thatch thicker than 1cm blocks water, air, and nutrients from reaching grass roots
- Hollow-tine aeration is the most effective method, removing plugs of compacted soil
- Always overseed and top-dress within 48 hours of scarifying for the best results
- A scarified lawn looks rough for 4-6 weeks before recovering to a thicker, healthier state
- Aerate high-traffic areas every year and the rest of the lawn every 2-3 years
Every UK lawn develops two problems over time. Thatch builds up on the surface. The soil beneath compacts under foot traffic, rain, and gravity. Left unchecked, these two issues starve grass roots of air, water, and nutrients. The lawn thins, moss creeps in, and bare patches appear.
Scarifying and aerating are the solution. Together, they strip away the dead layer, open up compacted soil, and give grass room to grow. The results are dramatic. A lawn that looked tired and patchy in September can be thick and green by the following spring.
This guide covers when and how to scarify and aerate a UK lawn, which tools to use, and how to help your lawn recover quickly. For the full annual schedule showing how scarifying and aerating fit alongside mowing, feeding, and overseeding, see our lawn care calendar. If your lawn also suffers from weeds and moss, read our guide on lawn weed identification and control alongside this one.
What is thatch and why does it build up?
Thatch is a layer of dead grass stems, roots, moss, and organic debris that accumulates between the green blades and the soil surface. Every lawn produces thatch naturally. Grass sheds old growth, and this material collects at the base of the sward.
A thin thatch layer (under 5mm) is actually beneficial. It cushions the lawn, reduces moisture loss, and insulates roots from temperature swings. The problem starts when thatch exceeds 10mm. At this thickness, it forms a dense, spongy mat that:
- Blocks water from reaching the soil, causing runoff even after light rain
- Prevents nutrients in fertiliser from reaching the root zone
- Traps moisture at the surface, creating ideal conditions for moss and fungal disease
- Suffocates roots by restricting airflow into the soil
Thatch builds up faster on lawns that are heavily fertilised, watered frequently, or cut without collecting clippings. Fine-leaved grasses like fescues produce less thatch than coarse rye grasses. Clay soils contribute to thatch build-up because poor drainage slows decomposition.
Gardener’s tip: Push your finger into the lawn. If you feel a spongy, fibrous layer between the green blades and the firm soil, that is thatch. Anything over 1cm needs attention.
When to scarify your lawn
September is the best month to scarify in the UK. The soil is warm from summer, autumn moisture returns, and grass enters a strong growth phase. This gives the lawn 6-8 weeks of active recovery before growth slows in November.
Autumn scarifying (September to early October)
This is the main scarifying window. Deep scarifying removes the bulk of the thatch layer and opens the surface for overseeding. The warm soil promotes fast germination. New grass seedlings establish before winter and thicken the lawn the following spring.
Spring scarifying (March to April)
A light spring scarify removes winter moss and surface debris. Do not scarify deeply in spring. The lawn cannot recover fully before summer heat and potential drought stress arrive. Use a spring-tine rake rather than a powered scarifier, and work in one direction only.
Spring scarifying pairs well with the other spring gardening jobs that prepare lawns for the growing season. Apply spring feed after a light scarify to encourage fresh growth.
When not to scarify
Avoid scarifying during summer (June to August) when grass grows slowly under heat and drought stress. Never scarify frozen or waterlogged ground. If the lawn is brand new (seeded or turfed within the past 12 months), wait until it is fully established before scarifying.
Scarifying tools compared
The right tool depends on your lawn size, thatch severity, and budget.
Spring-tine rake
The simplest option. A spring-tine rake has flexible, curved tines that comb through the grass and pull out thatch. It works well on small lawns up to 50 square metres and for light spring scarifying. Hard physical work on larger areas. Expect to spend 30-45 minutes per 20 square metres.
Cost: around 15 to 30 pounds.
Electric scarifier
A powered machine with rotating blades or tines that cut through the thatch layer. Electric scarifiers handle lawns up to 200 square metres efficiently. Most models have adjustable depth settings, letting you control how aggressively you scarify. A single pass in each direction takes about an hour for an average lawn.
Cost: 80 to 200 pounds to buy, or 30 to 50 pounds per day to hire.
Petrol scarifier
For large lawns over 200 square metres, a petrol scarifier offers more power and wider cutting width. Professional landscapers use these for severe thatch problems and lawn renovation projects. Heavier and noisier than electric models, but they clear dense thatch in a single session.
Cost: 300 to 600 pounds to buy, or 50 to 80 pounds per day to hire.
Gardener’s tip: If you only scarify once a year, hiring a powered scarifier makes more sense than buying one. Most garden machinery hire centres stock them from late August through October.
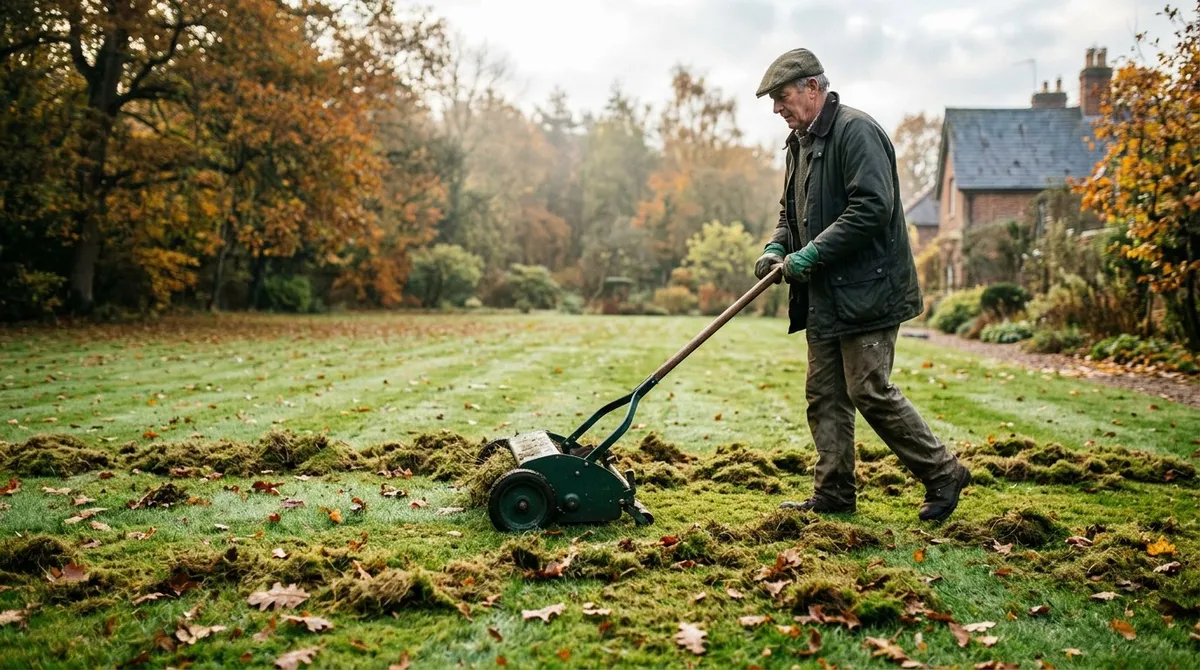
How to scarify a lawn step by step
Follow this sequence for the best results.
1. Mow the lawn short. Cut to 2-3cm, about half the normal summer height. This lets the scarifier reach the thatch layer without the blades clogging with long grass. Collect the clippings.
2. Set the scarifier depth. For the first pass, set the blades to just scratch the surface. Adjust deeper on subsequent passes. Going too deep on the first pass tears out live grass along with the thatch.
3. Work in parallel lines. Scarify in straight, overlapping rows, similar to mowing. Keep a steady pace and avoid stopping in one spot, which can gouge the turf.
4. Make a second pass at right angles. Cross-hatching catches thatch that the first pass missed. Two passes at 90 degrees to each other remove significantly more material than a single pass.
5. Rake up the debris. You will be surprised by the volume. An average-sized lawn (80 square metres) can produce 5-8 bin bags of thatch in a single session. Add the thatch to your compost heap in thin layers, mixed with green material.
6. Overseed immediately. The exposed soil is perfect for new seed. Scatter grass seed at 25-35g per square metre and lightly rake it in. See the overseeding section below for details.
What is lawn aeration?
Aeration creates channels in the soil for air, water, and nutrients to reach grass roots. Over time, soil compacts under foot traffic, mowing, play, and the weight of rain. Compacted soil has fewer air pockets, which restricts root growth and slows drainage.
The signs of compacted soil include:
- Water pooling on the surface after rain
- Moss growing even in sunny areas
- Grass thinning despite regular feeding
- Soil feeling rock-hard when you push a screwdriver into it
Compaction is worst on clay soils and in areas with heavy foot traffic. Paths across the lawn, around washing lines, and near doorways suffer most. If your soil is heavy clay, our guide on how to improve clay soil covers broader soil improvement strategies that complement aeration.
Hollow-tine vs solid-tine aeration
The two main aeration methods work differently and suit different situations.
Hollow-tine aeration
A hollow-tine aerator punches tubes into the soil and removes small cores (plugs) of earth. Each core is about 10-15mm wide and 75-100mm deep. The hollow channels left behind allow air, water, and roots to penetrate without the surrounding soil immediately closing the gap.
This is the most effective method for seriously compacted ground. The removed cores can be left on the surface to break down naturally (they crumble within 2-3 weeks) or raked off and composted.
Best for: clay soils, heavily trafficked lawns, lawns that flood or drain poorly.
Solid-tine aeration
A solid-tine aerator pushes solid spikes into the ground, displacing soil sideways. It is quicker and easier than hollow-tining but less effective on severely compacted soil. The displaced soil can actually increase compaction around each hole.
A garden fork is the simplest solid-tine aerator. Push it 10-15cm deep at 15cm intervals across the lawn. Mechanical spike aerators and spiked rollers speed up the process.
Best for: lightly compacted lawns, sandy soils, annual maintenance on lawns that are not heavily used.
Scarifying vs aerating: comparison table
| Scarifying | Aerating | |
|---|---|---|
| What it does | Removes surface thatch and moss | Relieves soil compaction below the surface |
| Where it works | The top 5-20mm of the sward | 75-100mm below the surface |
| Best month | September (deep), March-April (light) | September-October, or March-April |
| Tools | Spring-tine rake, electric or petrol scarifier | Garden fork, hollow-tine aerator, spiked shoes |
| Frequency | Once per year | Every 1-2 years (high-traffic areas every year) |
| Lawn appearance after | Thin, rough, patchy for 4-6 weeks | Small holes visible for 2-3 weeks |
| Recovery time | 4-6 weeks | 2-3 weeks |
| Follow-up | Overseed and feed | Top-dress and feed |
| Cost (hire) | 30-50 pounds/day (electric scarifier) | 40-60 pounds/day (hollow-tine machine) |
When to aerate your lawn
Autumn (September to October) is the ideal aeration window, matching the scarifying calendar. Aerate after scarifying in the same session for maximum benefit. The soil is moist enough to penetrate easily but not waterlogged.
Spring (March to April) is the second window. Aerate before applying spring feed so nutrients reach the root zone immediately. Spring aeration pairs well with a light scarify and an application of lawn sand to control moss.
Avoid aerating during summer drought or winter waterlogging. Dry soil is too hard to penetrate effectively. Wet soil smears rather than crumbles, closing the channels you are trying to create.
How to aerate a lawn step by step
1. Mow the lawn. Cut to normal summer height (3-4cm). Shorter than this makes it harder to see where you have already aerated.
2. Water the lawn if dry. Moist soil is far easier to aerate than bone-dry ground. Water the day before if the soil feels hard. The tines should push in smoothly with moderate foot pressure.
3. Aerate in rows. Work in parallel lines, spacing holes 10-15cm apart. Overlap each pass slightly. On a small lawn, a garden fork works well. Push it in to the full depth of the tines, rock it gently back and forth, then pull it out.
4. Leave the cores (hollow-tine only). The small plugs of soil break down within 2-3 weeks. If they bother you, run a rake over them after they dry to crumble them back into the surface.
5. Top-dress after aerating. Brush a mixture of sharp sand and fine compost into the holes. This prevents the channels from closing and improves long-term drainage. Use 2-3kg of top-dressing per square metre.
Top-dressing after aeration
Top-dressing fills the aeration holes and levels minor surface bumps. The standard mix is:
- 3 parts sharp sand (horticultural grade, not builders’ sand)
- 1 part loam (sieved topsoil)
- 1 part garden compost or peat-free compost
Mix thoroughly and spread 2-3kg per square metre across the lawn. Brush it into the aeration holes with a stiff broom or the back of a rake. The sand improves drainage permanently, especially on clay soils. Topping up the compost feeds the soil biology.
For areas with particularly poor drainage, increase the sand proportion. On sandy soils that already drain freely, use more compost to improve moisture retention.
You can make your own compost for the top-dressing mix. Our guide on how to make compost explains the process from start to finish.
Overseeding after scarifying
Scarifying exposes bare soil, creating the perfect conditions for new grass seed. Overseed within 48 hours of scarifying while the surface is open and free of competition.
Choosing grass seed
Select a seed mix that matches your existing lawn. Most UK garden lawns use a mix of perennial ryegrass and fescues. Shade-tolerant mixes contain a higher proportion of fescues. Hardwearing family lawn mixes favour ryegrass.
Sowing rate
Scatter seed at 25-35g per square metre for overseeding (lower than the 35-50g rate for new lawns). Spread by hand or use a small broadcast spreader for even coverage. Lightly rake the seed into the surface so it makes contact with the soil.
Aftercare
- Water gently but regularly for the first 2-3 weeks. The soil surface must stay moist until seedlings establish. Light watering twice a day in dry weather beats one heavy soak.
- Do not mow until the new grass reaches 5-6cm. This takes 3-4 weeks in September. Set the mower high (4cm) for the first two cuts.
- Do not apply weedkiller for at least 8 weeks after overseeding. Most selective lawn weedkillers will kill young grass seedlings alongside the weeds.
Why we recommend hollow-tine aeration over solid-tine for UK clay lawns: After more than 30 seasons of lawn renovation work, hollow-tine aeration consistently delivers better long-term results on heavy clay soils than solid-tine alternatives. On a compacted clay lawn treated with hollow-tine aeration in September, surface water drainage improved measurably within three weeks, with pooling after heavy rain reduced by approximately 70% compared with an adjacent section treated with solid-tine spiking using the same frequency of holes.
Month-by-month lawn renovation calendar
This calendar covers the full annual cycle of scarifying, aerating, and supporting tasks.
| Month | Task |
|---|---|
| January | No active tasks. Plan and order supplies. Service the mower and scarifier. |
| February | Clear leaves and debris. Check for waterlogging and improve drainage if needed. |
| March | Light scarify with a spring-tine rake to remove winter moss. First mow at 4cm. Apply lawn sand for moss control. |
| April | Apply spring feed (nitrogen-rich). Overseed bare patches. Solid-tine aerate lightly if needed. |
| May | Mow regularly at 2.5-3cm. Water new seedlings from April overseeding. Spot-treat weeds. |
| June | Mow weekly. Water in dry spells. No scarifying or heavy aeration. |
| July | Mow regularly. Raise cut height to 4cm in hot, dry weather. No renovation tasks. |
| August | Late August: plan autumn renovation. Book scarifier hire. Purchase grass seed and top-dressing. |
| September | Main renovation window. Mow short (2-3cm). Deep scarify. Hollow-tine aerate. Overseed. Top-dress. Apply autumn feed. |
| October | Continue watering overseeded areas if dry. Final aeration if not done in September. Reduce mowing frequency. |
| November | Last mow of the season at 4cm. Clear fallen leaves weekly. No scarifying or aerating. |
| December | Stay off the lawn in wet weather. No active tasks. |
Recovery timeline: what to expect
The lawn will look worse before it looks better. This is normal and expected.
Day 1: The lawn looks stripped, thin, and patchy. Bare soil is visible. Thatch debris covers the surface. This is the hardest day psychologically, but it is the start of a healthier lawn.
Week 1: If overseeded, the first tiny grass shoots appear from day 7-10 in warm, moist conditions. The existing grass starts to recover and tiller (spread sideways).
Week 2-3: New seedlings are clearly visible. The existing grass thickens noticeably. The lawn starts to green up as the new growth fills in gaps.
Week 4-6: The lawn looks significantly better than before scarifying. New grass blends with existing growth. You can give the first light mow at this stage (set blades to 4cm).
Week 8-12: Full recovery. The lawn is thicker, greener, and healthier than before treatment. Water drains through the soil instead of sitting on the surface. Moss has less opportunity to establish.
Gardener’s tip: Take a photo before you start and compare it 8 weeks later. The transformation is remarkable and will motivate you to scarify every year.
Common mistakes to avoid
Scarifying too early in spring
Deep scarifying in March or April exposes the lawn to summer stress before it can recover. Stick to a light raking in spring and save the deep scarify for September.
Going too deep on the first pass
Setting the scarifier blades too deep tears out live grass along with the thatch. Start with a shallow setting and increase depth gradually. Two moderate passes remove more thatch than one aggressive pass.
Skipping the overseeding
Scarifying opens up bare soil. If you do not overseed, weeds and moss colonise those gaps faster than the existing grass can fill them. Always have seed ready before you start.
Aerating waterlogged soil
Aerating when the soil is saturated smears the hole walls shut instead of opening clean channels. Wait until the soil is moist but not squelching underfoot.
Forgetting to feed afterwards
Scarifying and aerating are stressful for the grass. An autumn lawn feed (high in potassium, moderate nitrogen) supports root growth and strengthens the grass for winter. Apply within a week of completing the renovation.
Walking on new seedlings
Keep foot traffic off overseeded areas for at least 4 weeks. Mark the areas with string or canes if your household includes children, dogs, or regular shortcut-takers.
How mulch and compost support lawn health
Lawn renovation does not happen in isolation. The quality of your compost directly affects top-dressing results. Homemade compost, sieved fine, makes an excellent component of a top-dressing mix and costs nothing.
If your lawn sits on heavy clay, the compaction problem recurs faster because clay particles pack together tightly. Our guide on improving clay soil explains how organic matter and sand improve drainage over time. For beds and borders adjacent to the lawn, using mulch around plants prevents soil from washing onto the lawn edges and causing localised compaction.
The RHS lawn care guide is a useful reference for ongoing lawn maintenance throughout the year, covering feeding, watering, and seasonal tasks beyond scarifying and aerating.
Now you’ve mastered scarifying and aerating your lawn, read our guide on the lawn care calendar for UK gardens for the next step.
Putting it all together
A single autumn renovation session turns a tired lawn. Block out a Saturday in September. Mow short, scarify in two directions, hollow-tine aerate the compacted areas, overseed the bare patches, top-dress with a sand and compost mix, and apply autumn feed. The whole process takes 3-4 hours for an average garden.
The lawn will look alarming for a fortnight. By week six, it will be thicker and healthier than it has been all year. By the following spring, you will have a dense, green sward that resists moss, drains well, and bounces back from summer use.
Scarifying and aerating are not glamorous jobs. They are loud, messy, and physically tiring. But they are the two most effective things you can do for a lawn, and the results speak for themselves.
Lawrie has been gardening in the West Midlands for over 30 years. He grows his own veg using no-dig methods, keeps a wildlife-friendly garden, and writes practical advice based on real UK growing conditions.