How to Sow Seeds Indoors
Step-by-step guide to starting seeds indoors in the UK. Covers equipment, sowing technique, germination, pricking out, potting on, and hardening off.
Key takeaways
- Indoor sowing gives a 6-8 week head start on tender crops like tomatoes and peppers
- Use seed compost (not multipurpose) in clean trays or modules for best germination
- Most vegetable seeds germinate in 7-14 days at 18-21C
- Prick out seedlings when they develop their first pair of true leaves
- Harden off all indoor-raised plants for 10-14 days before planting outdoors
Starting seeds indoors is the best way to extend the UK growing season. It gives tender crops like tomatoes, peppers, and courgettes a 6-8 week head start before they go outdoors after the last frost. It also lets you grow crops that would never germinate in cold UK soil.
This guide covers every step: equipment, sowing technique, germination, pricking out, potting on, and hardening off. For a month-by-month breakdown of what to sow when, see our seed sowing calendar. If you have a greenhouse, our greenhouse growing calendar covers what to start under glass each month. For specific crop timing, see our guides on when to plant tomatoes and what to plant in March.
Equipment you need
You do not need expensive equipment. A windowsill, some pots, and compost are enough to start.
Essential equipment
| Item | Purpose | Cost |
|---|---|---|
| Seed trays or modules | Sowing and growing | £2-5 each |
| Seed compost | Low-nutrient growing medium for germination | £4-6 per bag |
| Multipurpose compost | Potting on once seedlings are established | £5-8 per bag |
| Watering can with fine rose | Gentle watering without disturbing seeds | £8-15 |
| Labels and waterproof pen | Identifying varieties and sowing dates | £2-3 |
| Clear plastic lids or cling film | Maintaining humidity during germination | Free-£5 |
Helpful extras
- Heated propagator (£15-40) - provides consistent bottom heat at 18-21C. Dramatically improves germination rates and speed.
- Grow lights (£20-50) - supplement natural light during short winter and early spring days. Prevent leggy seedlings.
- Vermiculite (£4-6 per bag) - lightweight covering for surface-sown seeds. Holds moisture without compacting.
- Modules or cell trays - individual cells reduce root disturbance when transplanting. Better than open trays for crops that resent root disturbance.
Why we recommend a heated propagator for early-season sowing: After 30 seasons of starting seeds on cold windowsills, switching to a heated propagator cut average germination time for tomatoes and peppers from 14-18 days down to 7-9 days. The consistent bottom heat at 20C makes the difference, particularly in March when UK homes cool overnight to well below the threshold peppers and aubergines need. A mid-range propagator pays for itself in its first season through higher germination rates alone.
Choosing compost
Seed compost is finer in texture and lower in nutrients than multipurpose compost. This matters because high nutrient levels burn the delicate roots of newly germinated seedlings. Use seed compost for sowing, then switch to multipurpose when potting on.
Avoid garden soil for indoor sowing. It contains weed seeds, disease organisms, and pests. It also compacts in containers, reducing drainage and air circulation around roots.
Gardener’s tip: Buy peat-free compost wherever possible. Modern peat-free seed composts perform as well as peat-based versions and are widely available. Peat extraction destroys valuable UK habitats.
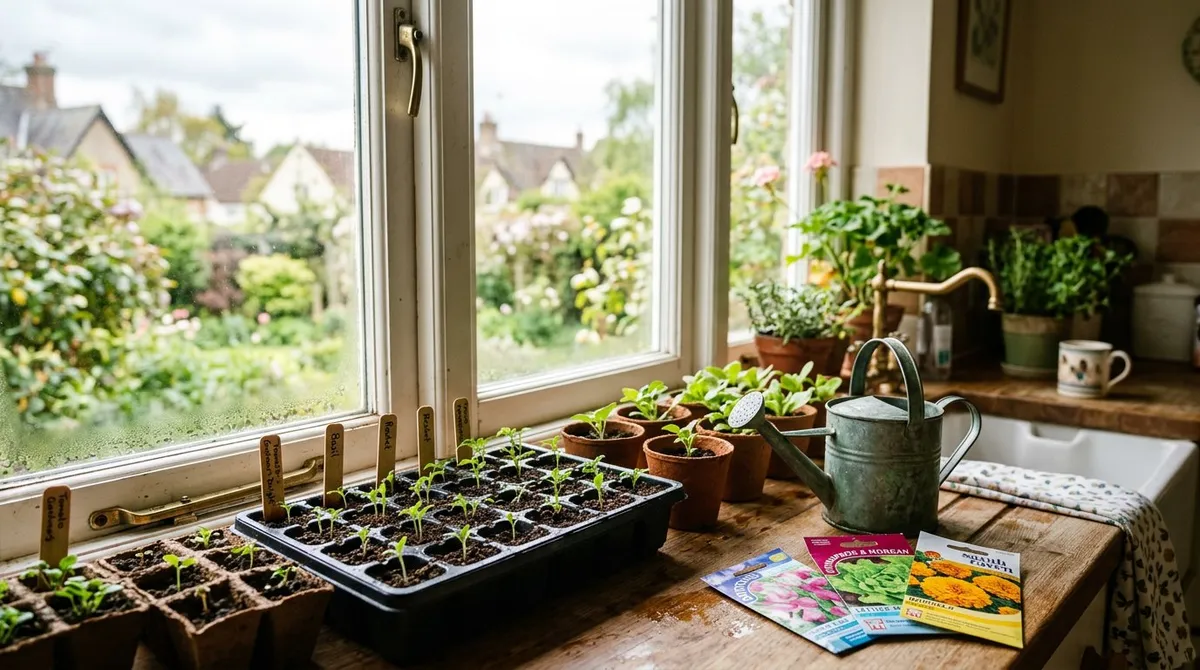
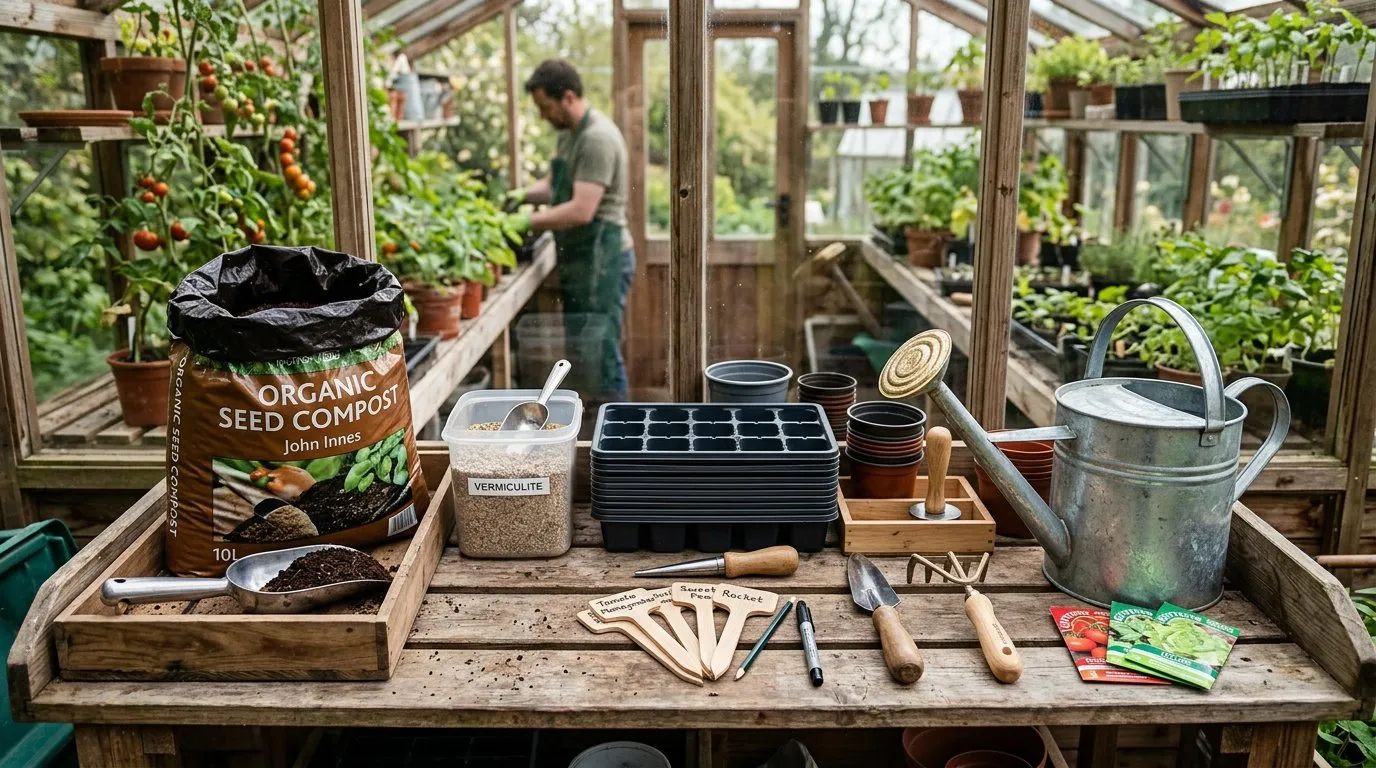 Everything needed for indoor seed sowing: seed compost, clean trays, labels, a dibber, and a fine-rose watering can.
When to start seeds indoors
The general rule is: sow 6-8 weeks before your planned planting-out date. For most UK gardeners, this means starting tender crops in early to mid-March for planting out in late May.
Germination temperature guide
| Crop | Germination temp | Days to germinate | Sow indoors from |
|---|---|---|---|
| Tomatoes | 18-21C | 7-14 | Late Feb-mid Mar |
| Peppers | 21-25C | 14-21 | Late Feb-early Mar |
| Chillies | 21-25C | 14-21 | January |
| Aubergines | 21-25C | 14-21 | Late Feb |
| Courgettes | 18-20C | 5-7 | April |
| Squash/pumpkins | 18-20C | 7-10 | April |
| Sweetcorn | 15-18C | 7-10 | Mid-April |
| Cucumbers | 21-25C | 5-7 | April |
| Runner beans | 12-15C | 7-14 | Mid-April |
| Lettuce | 12-15C | 5-10 | Feb-Mar |
| Kale | 15-18C | 5-10 | April-May |
| Brussels sprouts | 15-18C | 7-14 | Feb-March |
| Basil | 18-20C | 7-14 | March-April |
Do not sow too early. A tomato sown in January spends 16 weeks indoors before it can go outside. By that point, it is tall, leggy, pot-bound, and weakened. A March-sown tomato spends 8-10 weeks indoors and goes out as a sturdy, compact plant with its first flowers opening.
Step-by-step sowing technique
1. Fill containers with compost
Fill seed trays or modules to the top with seed compost. Firm gently with the base of another pot or a flat piece of wood. The surface should be level and about 1cm below the rim. This gap gives you room to water without overflow.
Do not compact the compost too firmly. Seeds need air spaces in the compost for root growth and oxygen exchange. A gentle firming is enough.
2. Water before sowing
Water the compost thoroughly before sowing, not after. Watering after sowing can wash small seeds too deep or disturb carefully placed seeds. Use a watering can with a fine rose. Allow the water to drain through.
The compost should be moist but not waterlogged. Squeeze a handful: it should hold together without dripping water.
3. Sow at the correct depth
The general rule: sow seeds at a depth of twice their diameter.
| Seed size | Sowing depth | Examples |
|---|---|---|
| Very small (dust-like) | Surface sow, do not cover | Begonia, lobelia |
| Small (1-2mm) | 2-4mm, light vermiculite covering | Lettuce, basil, tomatoes |
| Medium (3-5mm) | 5-10mm | Peppers, courgettes |
| Large (5mm+) | 10-20mm | Beans, sweetcorn, sunflowers |
Surface-sown seeds need light to germinate. Press them gently onto the compost surface and cover with a thin layer of vermiculite rather than compost. Vermiculite lets light through while keeping seeds moist.
4. Cover and label
Cover trays with clear plastic lids, clear polythene bags, or cling film. This maintains humidity and warmth during germination. Remove the cover as soon as seedlings emerge to prevent damping off.
Label everything with the variety name and sowing date. Use a waterproof pen on white plastic labels. This seems obvious but a tray of unlabelled seedlings is impossible to identify by May.
5. Provide warmth
Place trays in a warm position at the recommended germination temperature. Options:
- Heated propagator - the most reliable method. Set the thermostat and leave it.
- Warm windowsill - south-facing is best. Check temperatures with a thermometer. Windowsills can be cold at night.
- Airing cupboard - good warmth but no light. Move trays to a bright position immediately when seedlings emerge.
- On top of a fridge - surprisingly warm. The motor generates gentle heat.
Warning: Seeds need warmth to germinate, but seedlings need light immediately after emergence. If seeds germinate in a dark airing cupboard, move them to a bright windowsill within 24 hours. Left in darkness, they produce white, etiolated stems that never recover.
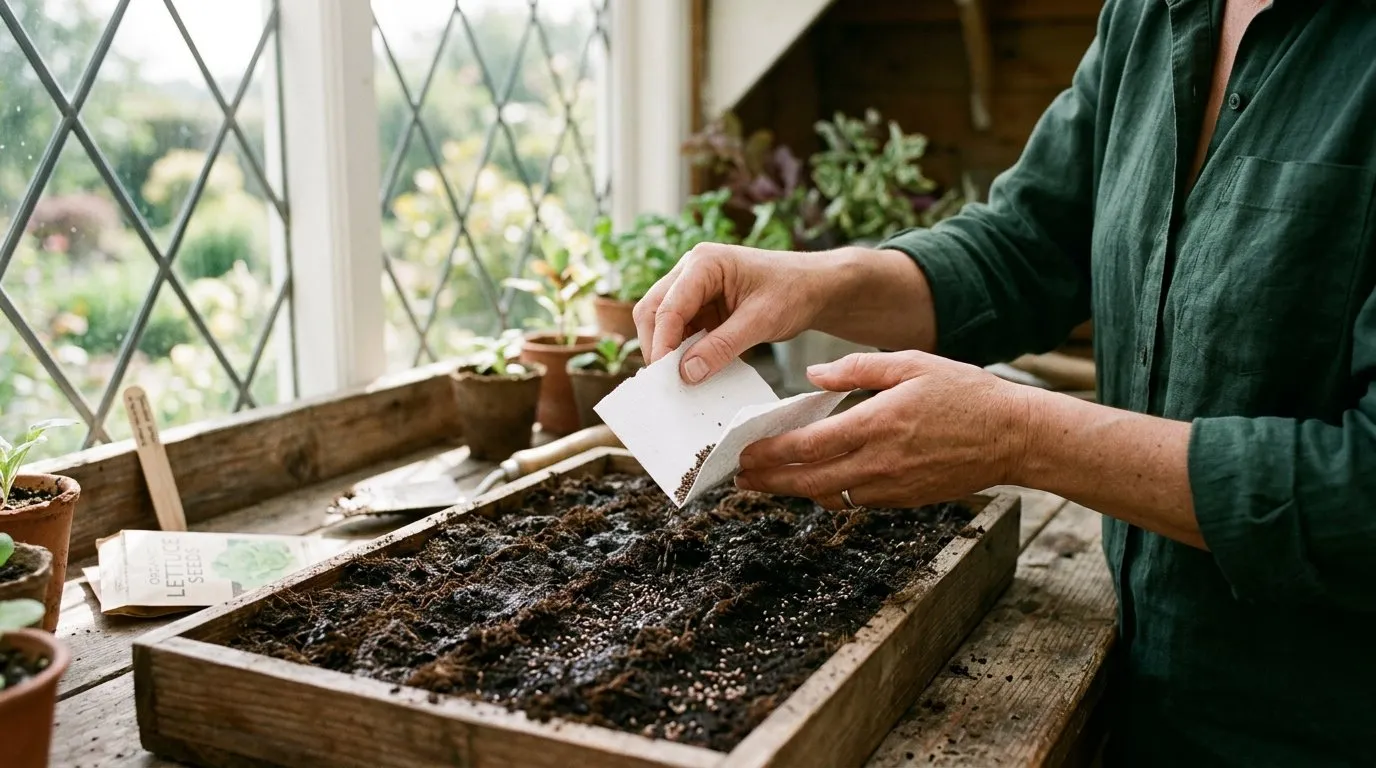 Distributing fine seeds evenly using folded paper. Tap gently to release seeds a few at a time across the compost surface.
After germination
Once seedlings emerge, the care routine changes. Temperature, light, and water all need adjusting.
Temperature
Lower the temperature by 3-5C after germination. Seeds need 18-21C to germinate, but seedlings grow best at 15-18C during the day and 12-15C at night. Constant warmth produces tall, thin, weak stems. Cooler nights encourage stocky, compact growth.
Remove trays from heated propagators after germination. Move to a bright windowsill or an unheated greenhouse with good light. The lower temperature strengthens stems.
Light
Light is the most critical factor for healthy seedlings. Insufficient light produces leggy seedlings: tall, thin, pale stems that stretch toward the nearest window. Leggy seedlings never fully recover.
Place trays on the brightest windowsill available. South-facing is ideal. Rotate trays 180 degrees every day so seedlings grow straight rather than leaning toward the light.
If natural light is insufficient (particularly in February and early March), use grow lights. LED grow lights are affordable (£20-50) and make a dramatic difference to seedling quality. Position lights 10-15cm above the seedling tops for 12-14 hours daily.
Watering
Water from below whenever possible. Stand trays in a shallow container of water for 20-30 minutes and let the compost draw moisture upward by capillary action. This avoids wetting the leaves and stems, which reduces the risk of damping off.
Damping off is a fungal disease that kills seedlings at the base. The stem collapses at soil level and the seedling topples over. It thrives in warm, humid, still conditions with wet foliage. Prevention is better than cure: good ventilation, watering from below, and not overcrowding trays.
If bottom watering is not practical, use a fine-rose watering can and water the compost surface gently. Avoid splashing the seedlings.
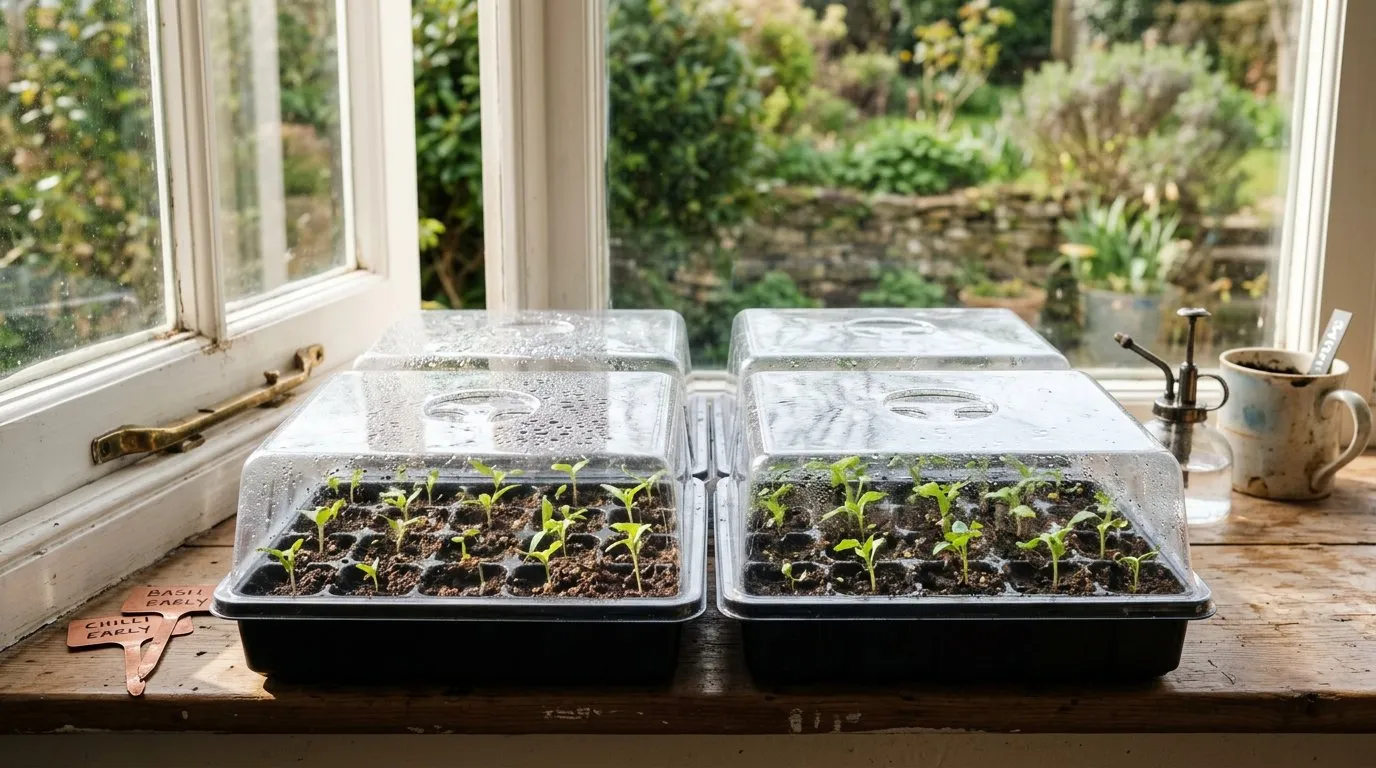 Seedlings emerging under a propagator lid. Remove the lid as soon as most seeds have germinated to prevent damping off.
Pricking out
Pricking out means moving seedlings from their original sowing container into individual pots. This gives each plant room to develop a strong root system.
When to prick out
Prick out when seedlings have their first pair of true leaves. These are the second set of leaves to appear. The first leaves (seed leaves or cotyledons) are small and rounded. True leaves are the first leaves that look like the mature plant.
For most crops, this is 2-4 weeks after sowing. Do not wait too long. Overcrowded seedlings compete for light and become leggy fast.
How to prick out
- Water the tray an hour before pricking out. Moist roots slide free more easily than dry ones.
- Fill 7-9cm pots with multipurpose compost (not seed compost). Make a hole in the centre with a pencil or dibber.
- Lift seedlings from below using a pencil, lollipop stick, or the tip of a kitchen knife. Hold seedlings by a leaf, never by the stem. A damaged leaf regrows. A damaged stem kills the plant.
- Lower the seedling into the hole. Bury it slightly deeper than before, up to the base of the seed leaves. This encourages the buried stem to produce additional roots.
- Firm gently around the base and water lightly.
Potting on
As seedlings grow, they outgrow their pots. Potting on means moving them into larger containers.
When to pot on
Pot on when roots fill the current pot. Check by turning the pot upside down and gently sliding out the root ball. If you see a dense mat of white roots circling the base, it is time to pot on. If the compost falls away and you see mainly compost with few roots, wait another week.
Pot on into a container one size larger than the current one. Do not go from a 7cm pot straight to a 2-litre pot. The excess compost stays cold and wet, which slows root growth. Gradual upsizing builds a dense, healthy root system.
Potting on sequence
| Stage | Pot size | When |
|---|---|---|
| Prick out | 7-9cm | When true leaves develop |
| First pot on | 12-15cm | When roots fill the 9cm pot |
| Final position | 20cm+ / grow bag / bed | When planting out after hardening off |
Hardening off
Hardening off is the process of gradually acclimatising indoor-raised plants to outdoor conditions. It is the most important and most commonly skipped step in the indoor sowing process.
Why hardening off matters
Indoor plants are accustomed to constant warmth, still air, and filtered light. Moving them directly outdoors exposes them to wind, temperature swings, direct UV light, and cold nights. The result is transplant shock: scorched leaves, stalled growth, and reduced yields.
A properly hardened plant shows no signs of shock after transplanting. It continues growing without interruption. The 10-14 days of hardening off is an investment that pays back all season.
Hardening off schedule
| Period | Action |
|---|---|
| Days 1-3 | Place outdoors in a sheltered, shaded spot for 2-3 hours. Bring indoors before evening. |
| Days 4-6 | Increase to 4-6 hours outdoors. Introduce some direct sunlight. |
| Days 7-9 | Leave out all day. Bring indoors only if frost is forecast or temperatures drop below 5C. |
| Days 10-12 | Leave outdoors day and night. Cover with fleece if cold. |
| Days 13-14 | Plant out into final position. Water thoroughly. |
A cold frame makes hardening off easier. Open the lid during the day, close at night. Gradually increase ventilation over the two-week period. Our cold frame gardening guide covers choosing, positioning, and using a cold frame year-round. If you do not have a cold frame, a sheltered spot against a south-facing wall works well.
Timing
Start hardening off two weeks before your planned planting-out date. For most UK gardeners planting out in late May, this means beginning the hardening-off process around 10-15 May.
Check weather forecasts daily during hardening off. If frost is predicted, bring plants indoors regardless of the schedule. One cold night can undo days of work.
For detailed planting-out timing, see our May planting guide and spring gardening jobs checklist.
Troubleshooting
Seeds not germinating
Check temperature first. Most failures are caused by temperatures too low for the crop. Use a propagator or move trays to a warmer position. Also check seed viability: old seed germinates poorly. Buy fresh seed each year for crops with short viability (parsnips, onions).
Damping off
White fungal growth at the base of seedlings, causing collapse. Caused by overwatering, poor ventilation, and overcrowding. Remove affected seedlings immediately. Improve air flow. Water from below. Do not overwater.
Leggy seedlings
Tall, thin, pale stems stretching toward light. Caused by insufficient light and excessive warmth. Move to the brightest position. Lower temperature. If severely leggy, sow again. Mildly leggy tomato seedlings can be rescued by burying the stem deeper when potting on.
White deposits on compost
Mineral deposits from tap water. Harmless in small amounts. Switch to rainwater if available. Scrape off heavy deposits. Does not affect plant growth.
Common mistakes
Sowing too many seeds too early
It is better to sow 20 seeds well than 200 badly. Start with a manageable number of crops and do them properly. You can always sow more in a fortnight.
Using garden soil instead of compost
Garden soil contains weed seeds, disease, and pests. It compacts in containers and drains poorly. Always use purpose-made seed compost for sowing and multipurpose compost for potting on.
Overwatering
The most common killer of indoor seedlings. Compost should be moist, not waterlogged. If the surface is constantly wet, you are watering too much. Let the surface dry slightly between waterings. Good drainage is essential.
Not providing enough light
A north-facing windowsill is not enough. Seedlings need the brightest position you can offer. South-facing windows, conservatories, or grow lights. Rotate trays daily. Short, dark winter days produce weak seedlings regardless of temperature.
Skipping hardening off
Moving plants straight from indoors to the garden causes transplant shock. Leaves scorch, growth stalls, and yields drop. The 10-14 day hardening-off period is non-negotiable for indoor-raised plants.
Now you have mastered indoor seed sowing, read our seed sowing calendar for a month-by-month guide to exactly what to start and when across the whole growing year.
Frequently asked questions
When should I start seeds indoors UK?
Start 6-8 weeks before your planned planting-out date. For most UK gardeners, this means early March for tender crops going out in late May. Slow growers like chillies and aubergines start in January. Fast growers like courgettes start in April.
What temperature do seeds need to germinate?
Most vegetable seeds germinate at 18-21C. Peppers and aubergines need 21-25C. Lettuce germinates best at 12-15C and actually goes dormant above 25C. A heated propagator provides consistent warmth. A warm south-facing windowsill works for most crops from March onwards.
Should I use seed compost or multipurpose?
Seed compost is best for sowing. It is finer in texture and lower in nutrients, which prevents root burn on tiny seedlings. Switch to multipurpose compost when potting on into larger containers. Multipurpose provides the nutrients growing plants need. Using multipurpose for sowing risks burning delicate roots.
Why are my seedlings tall and leggy?
Leggy seedlings are caused by insufficient light. They stretch toward the nearest light source, producing thin, weak stems. Move trays to the brightest windowsill and rotate daily. Lower the temperature after germination. Use grow lights if natural light is poor. In severe cases, sow again.
When should I prick out seedlings?
Prick out when seedlings develop their first pair of true leaves. These are the second set of leaves that appear, and they look like miniature versions of the mature plant’s foliage. Handle seedlings by the leaves, never the stem. A damaged leaf regrows; a crushed stem is fatal.
What is hardening off?
Hardening off acclimatises indoor plants to outdoor conditions over 10-14 days. Move plants outside for increasing periods each day, starting with 2-3 hours in a sheltered spot. By day 10-12, leave them out overnight. This prevents transplant shock when planting into the garden.
Lawrie has been gardening in the West Midlands for over 30 years. He grows his own veg using no-dig methods, keeps a wildlife-friendly garden, and writes practical advice based on real UK growing conditions.