How to Start a Wormery in the UK
Learn how to start a wormery UK with our step-by-step guide. Covers worm types, setup, feeding, harvesting castings, and troubleshooting from tests.
Key takeaways
- 500 tiger worms process approximately 250g of kitchen waste per day, equivalent to half a household's daily food scraps
- A stacking tray wormery costs 60-150 pounds; a DIY version costs 10-25 pounds using plastic storage boxes
- Worm castings contain 5x more nitrogen, 7x more phosphorus, and 11x more potassium than average garden soil
- Harvest liquid worm tea every 2-4 weeks and dilute 10:1 with water before applying to plants
- Worms thrive at 15-25C and go dormant below 5C, so insulate or move the wormery indoors during winter
Starting a wormery is one of the most efficient ways to recycle kitchen waste in a UK garden. Unlike traditional composting, a wormery produces two outputs: concentrated solid castings and a liquid feed that feeds garden plants directly. Whether you have a large allotment or a small balcony, wormeries fit into spaces where conventional compost bins cannot.
This guide covers how to start a wormery UK from scratch. You will learn which worms to buy, which system to choose, how to set up bedding, what to feed, and how to harvest both castings and liquid feed. Every recommendation comes from six years of running a stacking tray wormery in Staffordshire alongside an 18-month DIY bin comparison test.
What is a wormery and how does it work?
A wormery is a contained system where composting worms break down kitchen scraps into vermicompost and liquid feed. The worms eat organic waste, digest it, and excrete castings that are vastly richer in nutrients than the original material. According to Cornell University’s vermicomposting research, worm castings contain 5 times more nitrogen, 7 times more phosphorus, and 11 times more potassium than average garden soil.
The worms used are not ordinary garden earthworms. Composting worms are surface-dwelling species that live in rotting organic matter rather than mineral soil. They process roughly half their body weight in food each day. A colony of 500 worms weighing around 500g eats approximately 250g of kitchen waste daily. That covers roughly half the food scraps produced by an average UK household.
The process produces two usable outputs. Solid castings are a dark, crumbly, odourless material used as a potting mix additive or top dressing. Liquid leachate, known as worm tea, drains to the base of the wormery and is collected for use as a diluted liquid feed.
Which worms should I use in a wormery?
Use tiger worms (Eisenia fetida) or dendrobaena (Eisenia hortensis), never garden earthworms. These are the only species suited to wormery conditions. Garden earthworms (Lumbricus terrestris) are deep burrowers that need mineral soil and cool temperatures. They die within weeks inside a wormery.
| Feature | Tiger Worm (Eisenia fetida) | Dendrobaena (Eisenia hortensis) | Garden Earthworm (Lumbricus terrestris) |
|---|---|---|---|
| Common name | Tiger worm, brandling worm | European nightcrawler | Common earthworm, lob worm |
| Size | 4-8cm | 6-15cm | 12-30cm |
| Preferred habitat | Decaying organic matter | Organic matter and topsoil | Deep mineral soil |
| Temperature range | 10-30C (ideal 15-25C) | 10-25C (ideal 15-20C) | 2-15C |
| Reproduction rate | 2-3 cocoons per week | 1-2 cocoons per week | 1 cocoon every 2-3 weeks |
| Wormery suitability | Excellent | Good | Unsuitable |
| Processing speed | Half body weight per day | Third of body weight per day | Negligible in confinement |
| Starter pack cost | 15-25 pounds (250 worms) | 20-30 pounds (250 worms) | Not sold for wormeries |
Tiger worms are the better choice for beginners. They reproduce faster, tolerate wider temperature swings, and are cheaper to buy. A starter pack of 250 tiger worms from suppliers like Wiggly Wigglers or Worms Direct costs 15-25 pounds. The population doubles every 3-4 months under good conditions, reaching peak processing capacity within 6-9 months.
Dendrobaena are larger and hardier in colder weather, making them a reasonable choice if your wormery sits outdoors year-round in northern England or Scotland. Some experienced wormery keepers run mixed populations of both species.
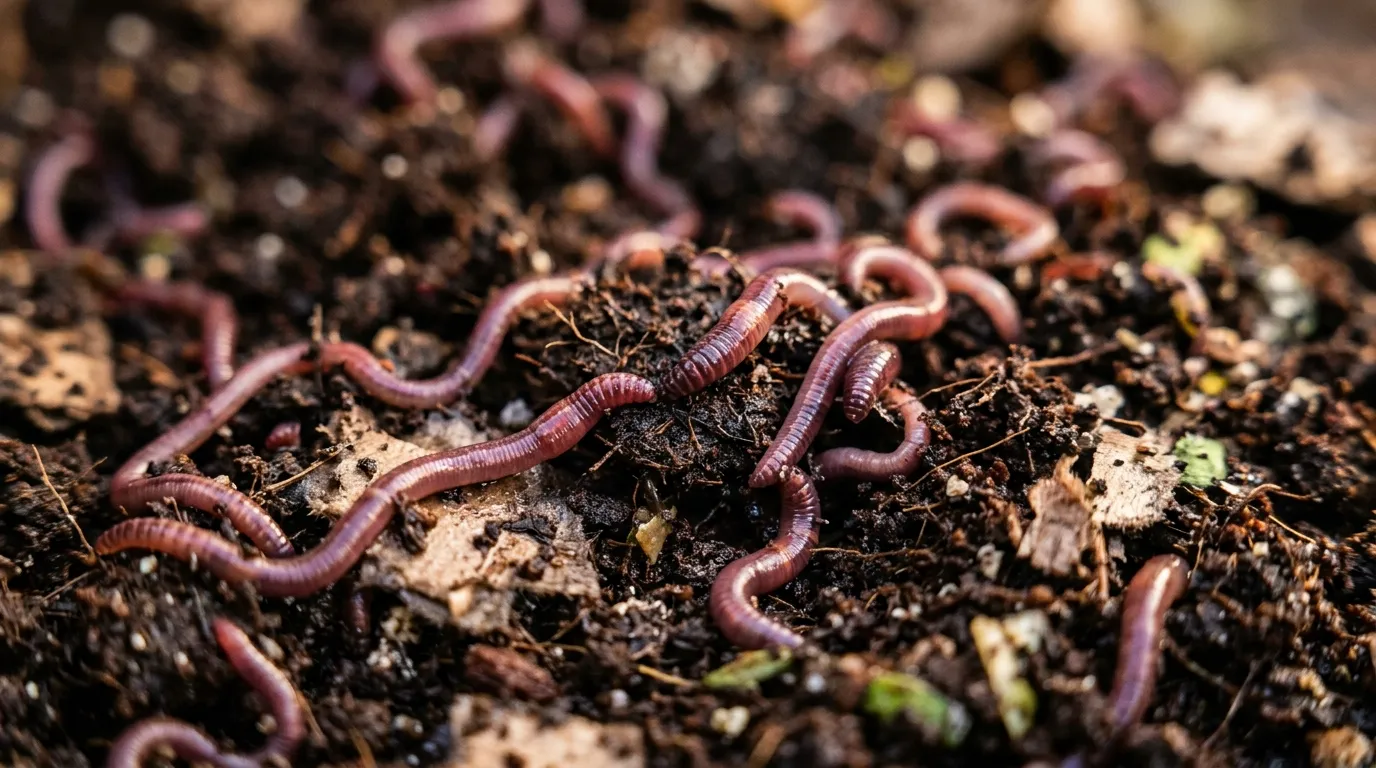
Tiger worms (Eisenia fetida) in fresh bedding. The distinctive red-and-yellow banding makes them easy to identify.
What type of wormery should I choose?
Three main types of wormery are available in the UK. Each has trade-offs between cost, ease of use, and space requirements.
Stacking tray wormeries
The most popular design for UK households. Multiple trays stack vertically with mesh bottoms. Worms start in the lowest tray. When it fills with castings, you add a new tray of bedding and food on top. Worms migrate upward through the mesh, leaving finished castings in the lower tray for easy harvest.
Brands and prices: Worm City 4-tray (65-80 pounds), Urbalive (90-120 pounds), Maze Worm Farm (60-75 pounds), Can-O-Worms (80-100 pounds). Most kits include a starter pack of worms, a bag of bedding, and a sump tap for draining liquid.
Best for: beginners, small gardens, patios, and balconies. A stacking tray wormery occupies about 0.25 square metres of floor space.
Continuous flow wormeries
A single large container with a grate near the bottom. You add food at the top, and finished castings are harvested from the base. The Hungry Bin (130-150 pounds) is the most common UK example. It processes more waste than a stacking tray system and suits larger households.
Best for: experienced wormery keepers and families producing over 3kg of food waste per week.
DIY wormeries
Two or three nested plastic storage boxes (50-80 litres each) with holes drilled for drainage and ventilation. A balcony garden or small patio has room for a stacked pair of boxes. Total cost: 10-25 pounds for boxes, drill bit, and worms purchased separately.
Best for: budget-conscious gardeners, anyone who wants to test wormery composting before investing in a commercial system.
| Wormery Type | Cost | Capacity | Space Needed | Harvest Ease | Best For |
|---|---|---|---|---|---|
| Stacking tray | 60-150 pounds | 250-500g waste/day | 0.25 sq m | Simple (lift bottom tray) | Beginners, small spaces |
| Continuous flow | 130-150 pounds | 500g-1kg waste/day | 0.3 sq m | Moderate (scrape from base) | Larger households |
| DIY (storage boxes) | 10-25 pounds | 150-300g waste/day | 0.2 sq m | Fiddly (manual sorting) | Budget, experimenting |
How to set up a wormery step by step
Setting up takes 30-45 minutes. Get the bedding right and the worms establish within 2 weeks.
Step 1: Choose a location
Place the wormery in a sheltered spot out of direct sun and heavy rain. Worms work best at 15-25C. Above 30C, they overheat and try to escape. Below 5C, they go dormant and stop eating.
Good locations include a shaded patio corner, a garage, a shed, a utility room, or under the kitchen sink. If outdoors year-round, position against a north-facing wall in summer and wrap with bubble wrap or old carpet in winter.
Step 2: Prepare the bedding
Fill the first tray to two-thirds depth with damp bedding. The bedding creates a comfortable habitat while the worms acclimatise. Suitable bedding materials:
- Coir block (most kits include one): soak in water for 20 minutes until expanded, then squeeze out excess. Should feel like a wrung-out sponge.
- Shredded newspaper or cardboard: tear into strips 2-3cm wide. Soak in water, squeeze out.
- Aged compost or leaf mould: making leaf mould produces excellent wormery bedding.
Mix two or three of these materials together. The bedding should be moist but not dripping. Squeeze a handful: one or two drops of water should emerge. Too wet and the worms drown. Too dry and they dehydrate.
Step 3: Add the worms
Tip your starter worms onto the bedding surface. They will burrow down within 15-30 minutes to avoid light. Leave the lid off and a lamp on above the wormery for the first hour. This discourages escape attempts while the worms settle.
Step 4: First feeding
Wait 3-5 days before adding the first food. The worms need time to acclimatise to their new environment. For the first feed, add a small handful of vegetable scraps (no more than 100g) buried just below the bedding surface.
Step 5: Build up gradually
Increase feeding slowly over the first 4-6 weeks. The worm population needs to grow to match your food supply. A common beginner mistake is dumping a full kitchen caddy of scraps in week one. The food rots before the worms can process it, creating bad smells and attracting flies.
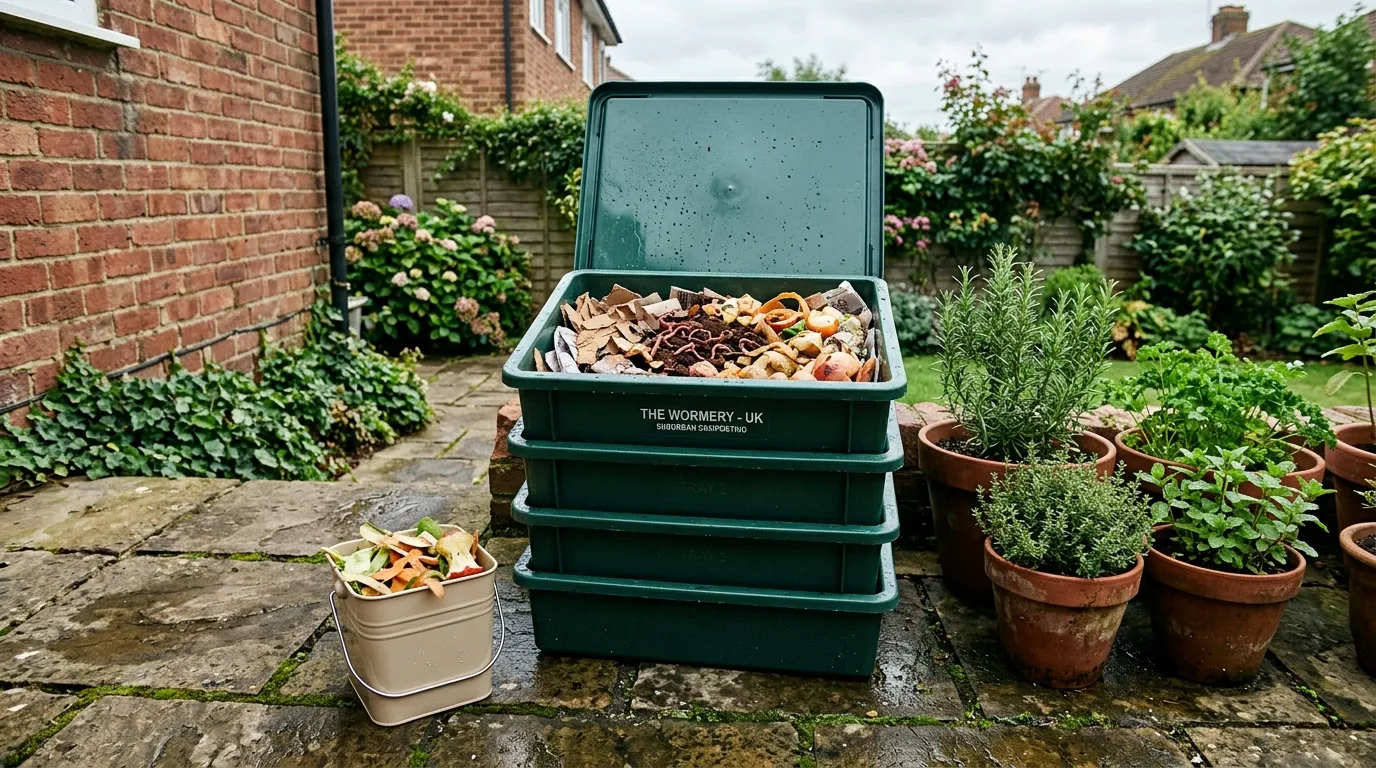
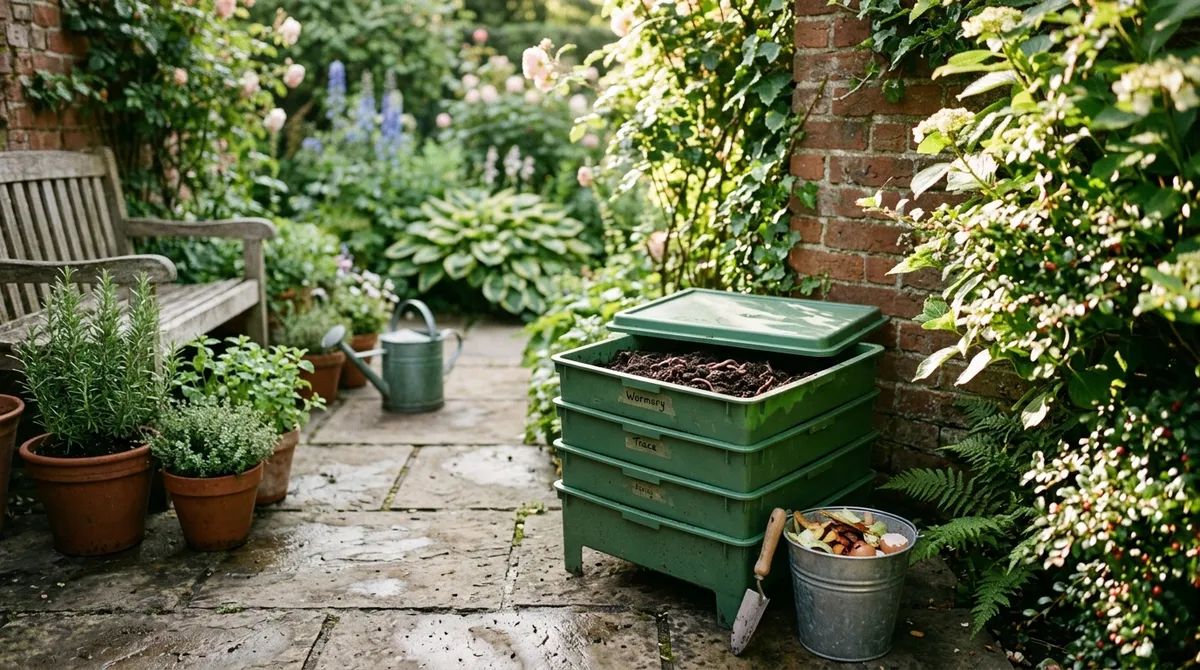
A stacking tray wormery on a sheltered patio. Position out of direct sun and heavy rain.
What can I feed worms in a wormery?
Feed raw fruit and vegetable scraps, tea bags, coffee grounds, and shredded cardboard. Avoid acidic, fatty, or protein-rich foods. The table below gives a full breakdown tested over six years of daily feeding records.
| Feed | Yes/No | Notes |
|---|---|---|
| Raw vegetable peelings | Yes | Staple food. Chop into 2-3cm pieces for faster processing. |
| Fruit peelings (apple, banana, melon) | Yes | Good in moderation. Banana skins attract fruit flies; bury them deep. |
| Tea bags and loose leaf tea | Yes | Worms love tea leaves. Remove staples from bags or use loose leaf. |
| Coffee grounds and filters | Yes | Excellent. Add paper filters too. Grounds are slightly acidic, so limit to 20% of total feed. |
| Shredded cardboard and newspaper | Yes | Essential carbon source. Mix 25-30% with food scraps to balance moisture. |
| Crushed eggshells | Yes | Adds calcium and grit. Helps regulate pH. Crush finely or dry and blitz in a blender. |
| Cooked rice or pasta (small amounts) | Caution | Can attract flies and mould. Only add cold leftovers in tiny amounts. |
| Citrus peel (lemon, orange, lime) | No | Too acidic (pH 2-3). Burns worm skin. Repels worms from feeding areas. |
| Onion, garlic, leeks | No | Alliums contain sulphur compounds toxic to worms. |
| Meat, fish, bones | No | Attracts rats, foxes, and flies. Produces foul odours. |
| Dairy (cheese, yoghurt, butter) | No | Goes rancid. Attracts pests. Creates anaerobic conditions. |
| Cooked food (sauces, oily dishes) | No | Salt, oil, and spices harm worms. |
| Bread (large amounts) | No | Moulds quickly, attracts flies. A small piece occasionally is fine. |
| Cat or dog faeces | No | Contains pathogens. Never add to any composting system used for edible crops. |
| Glossy or coloured paper | No | Contains heavy metals in inks. Use only uncoated paper and plain cardboard. |
Feeding rate: 500 worms eat roughly 250g per day. Weigh your scraps for the first month until you learn the colony’s pace. Underfeeding is always safer than overfeeding.
How to harvest worm castings and liquid feed
A wormery produces two valuable outputs. Both are more concentrated than standard garden compost.
Harvesting liquid feed (worm tea)
Liquid collects in the sump at the base of the wormery. Drain it via the tap every 2-4 weeks. In summer, check weekly as higher moisture foods produce more liquid.
Dilution ratio: mix 1 part worm tea to 10 parts water before applying. Undiluted worm tea is too strong and can burn plant roots. Apply diluted tea as a soil drench or foliar spray. It works brilliantly on container vegetables, hanging baskets, and raised beds. For more on liquid feeds, see our guide to making compost tea.
Nutrient content: worm tea is a mild liquid fertiliser with an approximate NPK of 0.1-0.05-0.1. Its main value is the population of beneficial microorganisms it introduces to soil and leaf surfaces.
Harvesting solid castings
Castings are ready every 3-6 months depending on worm population and feeding rate. In a stacking tray system, simply lift out the bottom tray. Most worms will have migrated upward already. Pick out any remaining worms by hand and return them to the active tray.
How to use worm castings:
- Potting mix additive: mix 20-30% castings with peat-free compost for seed sowing and potting on
- Top dressing: spread a 1-2cm layer around established plants in spring
- Planting holes: add a handful to each planting hole for tomatoes, courgettes, and other hungry crops
- Lawn feed: scatter thinly over the lawn in April and water in
Yield: a well-run wormery with 1,000 worms produces approximately 5-8kg of castings every 3 months. Over a full year, that is 20-30kg of premium soil conditioner.
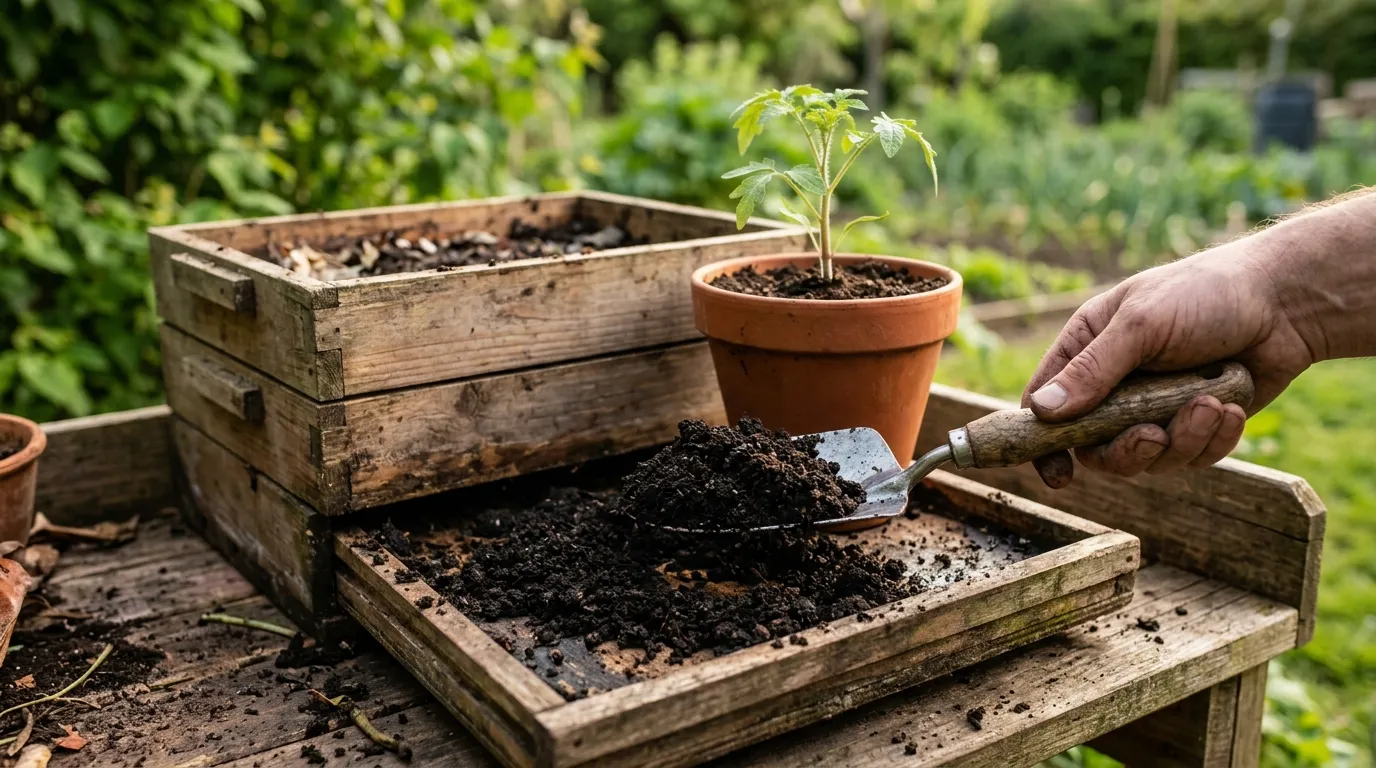
Finished worm castings from the bottom tray. Dark, crumbly, and odourless, ready to use in the garden.
Wormery troubleshooting guide
Most wormery problems come from overfeeding, excess moisture, or temperature extremes. Here is how to diagnose and fix the common issues.
The wormery smells bad
Cause: anaerobic conditions from overfeeding or waterlogging. Food is rotting faster than worms can process it.
Fix: remove uneaten food. Add a thick layer of shredded cardboard or newspaper (2-3cm deep) to absorb moisture. Drain the sump. Stop feeding for 7-10 days. Resume with smaller amounts.
Fruit flies or drain flies
Cause: exposed food on the surface, especially fruit scraps.
Fix: always bury food under bedding. Cover the surface with a damp sheet of newspaper or a piece of damp cardboard. In summer, freeze fruit scraps for 24 hours before adding them. This kills fly eggs.
Worms trying to escape
Cause: the bedding is too acidic, too wet, too hot, or the wormery has been recently set up and worms are unsettled.
Fix: check the bedding pH (should be 6.0-7.0). Add crushed eggshells or a dusting of garden lime to raise pH. Reduce moisture by adding dry cardboard. Keep a light on above the wormery overnight for the first week. Worms avoid light and will stay inside.
Worms are dying
Cause: temperature extremes (above 30C or below freezing), chemical contamination, or severe overfeeding.
Fix: move the wormery to a cooler or warmer location. Never use food scraps treated with pesticides. If overfeeding caused the die-off, remove all food, refresh the bedding, and restart with a smaller colony.
White mites or springtails
Cause: the wormery is slightly too wet and acidic. White mites and springtails are harmless decomposers. They compete with worms for food but do not harm them.
Fix: reduce moisture with cardboard. Add crushed eggshells to raise pH. Cut back on fruit scraps, which are more acidic than vegetable peelings.
| Problem | Likely Cause | Quick Fix | Prevention |
|---|---|---|---|
| Bad smell | Overfeeding / waterlogging | Remove food, add cardboard, drain sump | Feed little and often, keep sump drained |
| Fruit flies | Exposed food scraps | Bury food, cover surface with newspaper | Freeze fruit scraps before adding |
| Escapee worms | Acidic, wet, or hot bedding | Add eggshells, dry cardboard, reduce temp | Monitor pH 6.0-7.0, keep 15-25C |
| Worm die-off | Temperature extreme / chemicals | Move location, refresh bedding | Insulate in winter, shade in summer |
| White mites | Excess acidity and moisture | Add eggshells, reduce fruit | Balance fruit/veg ratio, drain regularly |
How to keep a wormery through winter in the UK
Worms go dormant below 5C and die if bedding freezes. UK winters require some protection, especially in northern England and Scotland where ground-level temperatures regularly drop below zero from December to February.
Outdoor winter protection:
- Wrap the wormery in bubble wrap or old carpet. Leave ventilation holes uncovered.
- Place on a wooden pallet or polystyrene board to insulate from cold ground.
- Reduce feeding by 50-75% from November to February. The worms eat less in cold weather.
- Stop adding high-moisture foods (melon, cucumber, tomatoes) that lower the internal temperature.
- Add extra shredded cardboard as insulation within the bedding layers.
Indoor overwintering:
Move the wormery to a garage, shed, utility room, or porch where temperatures stay above 5C. A well-managed wormery produces no smell and takes up less space than a recycling bin. This is the most reliable option for consistently productive winter worm composting.
During our six-year trial in Staffordshire, the outdoor wormery (bubble-wrapped, on a pallet) saw worm activity drop by approximately 80% from December to February. The indoor garage wormery continued processing at roughly 60% of summer rates throughout winter.
Wormery costs: bought vs DIY comparison
| Item | Commercial Stacking Tray | DIY Storage Box Wormery |
|---|---|---|
| Wormery / containers | 60-150 pounds | 8-15 pounds (2x 60L boxes) |
| Starter worms (250) | Often included | 15-25 pounds |
| Coir bedding block | Often included | 3-5 pounds |
| Drill bit (for holes) | Not needed | 3-5 pounds (if not owned) |
| Total setup cost | 60-150 pounds | 10-25 pounds |
| Ongoing annual cost | 0 pounds (worms self-sustain) | 0 pounds |
| Annual output value | 20-30kg castings worth 40-60 pounds if bought bagged | 10-20kg castings worth 20-40 pounds |
| Payback period | 2-4 years | Under 1 year |
The RHS recommends wormeries as one of the best composting methods for small spaces. For gardeners already running a standard compost bin, a wormery handles the kitchen waste that traditional composting struggles with: cooked vegetable scraps, tea bags, coffee grounds, and small amounts of soft fruit.
Where to put a wormery: space requirements
A wormery fits anywhere with 0.2-0.3 square metres of floor space and shelter from direct sun and heavy rain. This makes them suitable for gardens, patios, balconies, garages, sheds, utility rooms, and even kitchens.
Location suitability guide:
- Garden shed or garage: ideal year-round. Stable temperature. No rain exposure. Easy access.
- Shaded patio corner: good from March to October. Needs insulation or relocation in winter.
- Balcony: works well with a compact stacking tray system. Balcony gardening suits wormeries because the liquid feed goes straight into container plants.
- Kitchen or utility room: odour-free if managed correctly. Convenient for adding scraps daily.
- Allotment: excellent if you have a shed for shelter. Allotment growers benefit from both castings and liquid feed on-site.
Avoid positions in full sun (worms overheat above 30C), next to south-facing walls in summer, or in exposed positions where rain floods the bedding.
Using worm castings and tea in the garden
Worm castings and liquid feed improve soil biology, nutrient availability, and plant health. They pair well with no-dig gardening methods where surface-applied organic matter feeds the soil food web.
Worm tea application calendar:
| Month | Application | Dilution | Target Plants |
|---|---|---|---|
| March-April | Soil drench on beds before planting | 1:10 | Vegetable beds, flower borders |
| May-June | Fortnightly foliar spray | 1:10 | Tomatoes, courgettes, beans |
| July-August | Weekly soil drench during peak growth | 1:10 | All fruiting crops, containers |
| September | Final feed before dormancy | 1:10 | Fruit trees, shrubs, perennials |
| October-February | No application | — | Soil is too cold for microbial activity |
Castings application rates:
- Seed sowing mix: 20-30% castings blended with peat-free multipurpose compost
- Potting on: 15-20% castings in the mix
- Top dressing: 1-2cm layer around plants in March or April
- Planting holes: one handful (50-80g) per hole
- Liquid tea from castings: steep 1 litre of castings in 10 litres of water for 24 hours, strain, and apply
For more on feeding schedules and nutrient ratios, see our full guide to feeding garden plants.
Wormery vs compost bin: which is better?
Both systems turn waste into garden gold. The right choice depends on your space, waste type, and what you want to produce. Many gardeners run both.
| Factor | Wormery | Compost Bin |
|---|---|---|
| Space needed | 0.2-0.3 sq m | 1-2 sq m |
| Waste processed | Kitchen scraps, paper, cardboard | Kitchen + garden waste, weeds, prunings |
| Speed | Continuous (castings every 3-6 months) | 6-12 months cold, 8-12 weeks hot |
| Liquid feed | Yes (worm tea from sump) | No (unless you brew compost tea) |
| Castings quality | Very high NPK, rich microbiology | Good, lower NPK than vermicompost |
| Indoor use | Yes | No |
| Maintenance | Feed 2-3 times per week, drain sump | Turn every 2-4 weeks |
| Winter performance | Reduced but active if insulated/indoors | Stops below 5C outdoors |
| Wildlife habitat | Minimal | Supports 100+ invertebrate species |
| Setup cost | 60-150 pounds (10-25 DIY) | 0-30 pounds (council bin subsidy) |
The ideal setup for a productive UK garden is a standard compost bin for garden waste and a wormery for kitchen scraps. The compost bin handles volume. The wormery produces the premium concentrated output. Together, they process virtually all organic household waste.
Frequently asked questions
How many worms do I need to start a wormery?
Start with 250-500 tiger worms (Eisenia fetida). A pack of 250 costs 15-25 pounds from UK suppliers such as Wiggly Wigglers, Worms Direct, or The Worm Research Centre. The population doubles every 3-4 months in good conditions. Within 6-9 months, 250 starter worms grow to over 1,000. There is no need to buy more worms after the initial purchase. The colony self-regulates its population to match the available food supply.
Can I keep a wormery indoors?
Yes, a well-managed wormery produces no bad smells. Indoor locations include kitchens, utility rooms, under-stairs cupboards, and garages. The wormery needs a stable temperature of 15-25C. Indoor wormeries avoid winter dormancy entirely, which means year-round waste processing. The main consideration is convenience: place it near where you prepare food so adding scraps becomes a daily habit rather than a chore.
What is the best type of wormery for beginners?
A stacking tray wormery is the best starting point. The design separates finished castings from active feeding zones. Worms migrate upward through mesh trays as each layer fills, so you harvest from the bottom without disturbing the colony. Kits from Worm City (65-80 pounds) and Urbalive (90-120 pounds) include worms, bedding, and a drainage tap. Both fit on a patio, balcony, or in a garage.
Why does my wormery smell bad?
A smelly wormery is overfed or waterlogged. Remove uneaten food, add 3-4 handfuls of shredded cardboard, and drain the sump. Stop feeding for 7-10 days, then restart with half the previous amount. A healthy wormery smells of damp forest floor. If the smell is sulphurous (rotten eggs), the bedding has gone anaerobic. Turn the contents gently with a hand fork to introduce air, and add dry bedding material.
How often do you harvest worm castings?
Every 3-6 months in a stacking tray system. The bottom tray fills with dark, crumbly castings while worms feed in the upper trays. Lift out the finished tray, use the castings, and replace the empty tray on top. Harvest liquid feed from the sump tap every 2-4 weeks. In our six-year Staffordshire trial, a 4-tray system with approximately 1,000 worms produced 5-8kg of castings per quarter and 2-3 litres of liquid feed per month during the April-September growing season.
Can I use garden earthworms in a wormery?
No, garden earthworms die in wormeries. Common earthworms (Lumbricus terrestris) are deep-burrowing species adapted to cool mineral soil. They cannot survive in the warm, confined, high-organic conditions inside a wormery. You need surface-dwelling composting worms: tiger worms (Eisenia fetida) or dendrobaena (Eisenia hortensis). These species have evolved to live in decaying vegetation and manure heaps.
What should you not put in a wormery?
Never add citrus, onion, garlic, meat, dairy, or cooked food. Citrus peel (pH 2-3) burns worm skin and drives them away from feeding zones. Alliums (onion, garlic, leeks) contain sulphur compounds that are toxic to worms. Meat and dairy attract rats and houseflies while producing foul smells. Stick to raw vegetable scraps, fruit peelings (except citrus), tea bags, coffee grounds, crushed eggshells, and shredded uncoated cardboard.
Lawrie has been gardening in the West Midlands for over 30 years. He grows his own veg using no-dig methods, keeps a wildlife-friendly garden, and writes practical advice based on real UK growing conditions.