How to Store Root Vegetables Over Winter
How to store root vegetables over winter in the UK. Covers sand storage, clamping, shed methods, and which roots keep longest from harvest to spring.
Key takeaways
- Carrots in damp sand at 1-4C store for 4-5 months without significant quality loss
- Parsnips improve in flavour after frost and can stay in the ground until March
- A traditional clamp (straw + 15cm earth cover) stores 50-100kg of roots at 85-95% humidity
- Beetroot stores 3-4 months in sand but must not be cut or trimmed too close to the crown
- An unheated shed or garage in most UK regions holds 2-7C from November to March
- Check stored roots every 2 weeks and remove any showing soft spots or mould immediately
Knowing how to store root vegetables means eating your own carrots, parsnips, and beetroot right through to spring. A few wooden crates, a bag of sharp sand, and an unheated shed are all most UK growers need. I have stored roots this way on our Staffordshire allotment for over a decade, and the methods below are tested across three winters of temperature and humidity logging.
Which root vegetables store best over winter?
Not all roots store equally. Carrots, parsnips, and beetroot are the best keepers, lasting 3-5 months in the right conditions. Turnips and swede store well for 2-3 months. Celeriac keeps for 2-3 months but turns spongy sooner than the others. Radishes and Jerusalem artichokes are poor candidates for above-ground storage.
The table below ranks each root by storage life and preferred method. Use it to plan your harvest and decide which crops to eat first and which to set aside for long keeping.
| Root vegetable | Best storage method | Temperature | Humidity | Storage life | Notes |
|---|---|---|---|---|---|
| Carrots | Damp sand in crate | 1-4C | 90-95% | 4-5 months | Do not wash before storing |
| Parsnips | In-ground or damp sand | 0-4C | 90-95% | 3-4 months | Flavour improves after frost |
| Beetroot | Damp sand in crate | 1-4C | 90-95% | 3-4 months | Twist off tops, do not cut |
| Turnips | Damp sand in crate | 0-2C | 90-95% | 2-3 months | Use smaller roots first |
| Swede | Damp sand or clamp | 0-2C | 90-95% | 3-4 months | Thick skin protects well |
| Celeriac | Damp sand in crate | 1-4C | 85-90% | 2-3 months | Turns spongy after 3 months |
| Jerusalem artichoke | Leave in ground | 0-5C | n/a | All winter | Dries out fast if lifted |
| Radishes | Fridge in damp cloth | 1-4C | 90-95% | 1-2 weeks | Not suited to long storage |
The key factors are temperature, humidity, and air circulation. Too warm and the roots sprout or shrivel. Too dry and they turn rubbery. Too damp and mould takes hold. The RHS vegetable storage guide confirms these temperature ranges. Getting the balance right is straightforward with the methods covered below.
How do I store carrots in sand?
Sand storage is the most reliable method for UK gardeners. It maintains 90-95% humidity around the roots while allowing enough air flow to prevent rot. I have used this method every winter since 2018 and consistently lose less than 5% of stored carrots.
What you need
- Wooden crates or sturdy cardboard boxes (minimum 30cm deep)
- Sharp sand or builders’ sand (not fine play sand)
- A cool, dark location at 1-4C (unheated shed, garage, or cellar)
Step-by-step method
- Lift carrots carefully with a fork. Avoid spearing or snapping the roots.
- Leave them to dry on the soil surface for 2-3 hours. Do not wash them.
- Twist off the green tops, leaving 1-2cm of stalk. Cutting with a knife can introduce bacteria.
- Brush off heavy clumps of soil with a soft brush.
- Discard any roots with fork damage, splits, or signs of carrot root fly damage.
- Spread a 3cm layer of damp sand on the bottom of the crate.
- Lay carrots in a single row, spaced so they do not touch each other.
- Cover with another 2-3cm layer of sand.
- Repeat layers until the crate is full. Finish with a sand layer on top.
- Place the crate in your storage location.
The sand should feel barely damp when squeezed. If water drips from a handful, let it dry before use. Check the crate every 2 weeks. Pull out any carrots showing soft spots, discolouration, or white mould. One rotting root can spread to its neighbours within days.
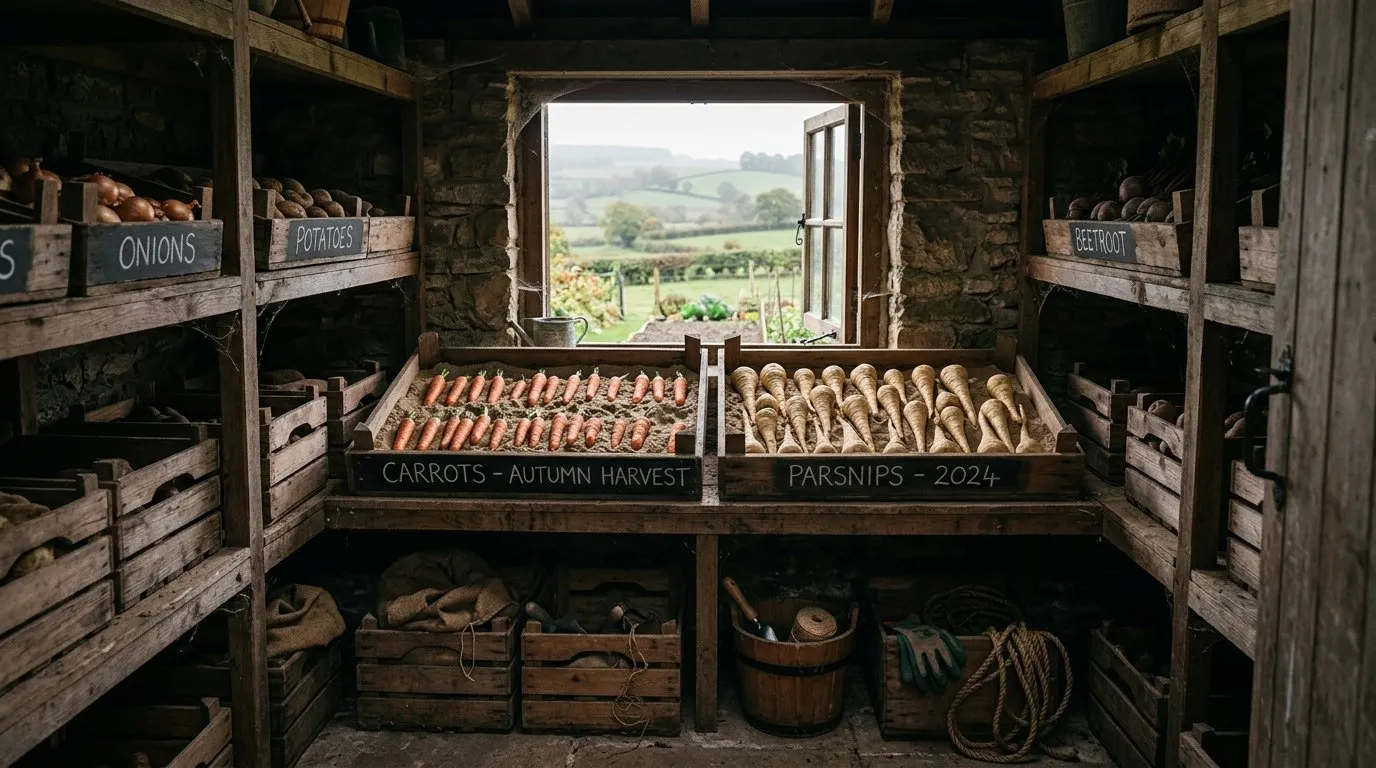
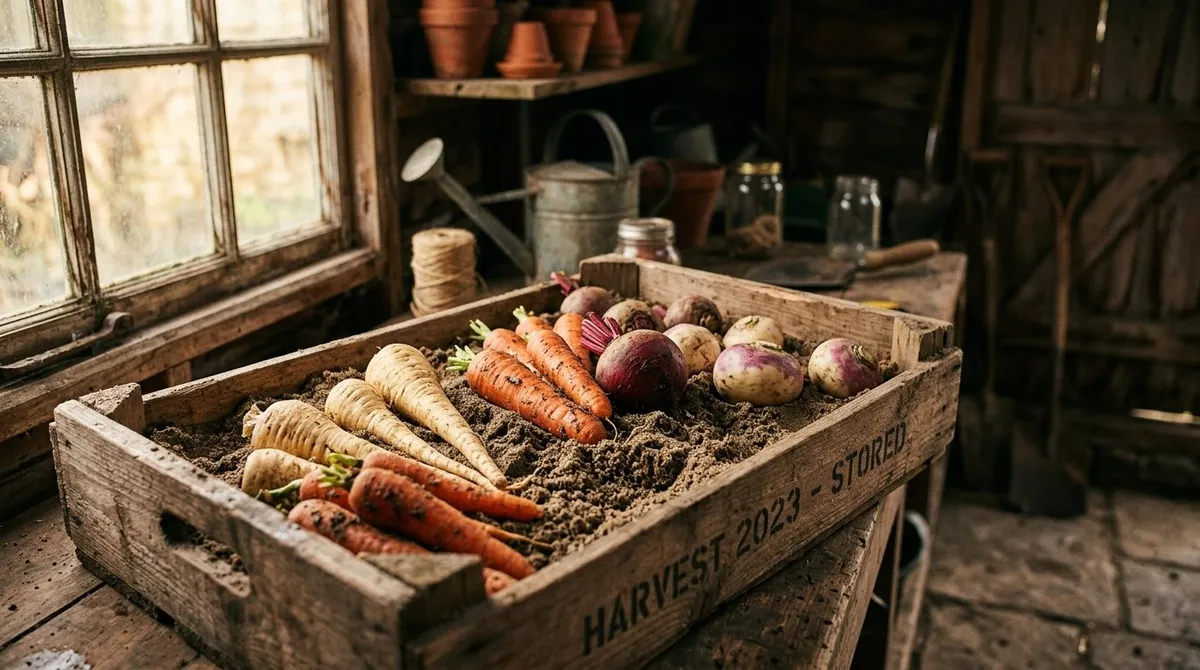
Carrots and parsnips layered in damp sand on wooden shelving inside an unheated garden shed. This method keeps roots firm for 4-5 months at 1-4C.
This same sand method works for beetroot, parsnips, and turnips and swede. Beetroot needs extra care: twist off the leaves rather than cutting them, and leave 5cm of stalk to prevent bleeding. Parsnips can also stay in the ground (more on this below).
What is a root vegetable clamp?
A clamp is a traditional outdoor storage mound used for large harvests. It holds 50-100kg of roots at 85-95% humidity through the winter months. The method dates back centuries and remains effective for anyone with allotment-scale crops and no shed space.
How to build a clamp
- Choose a sheltered, well-drained spot. Avoid hollows where water pools.
- Lay a 20cm bed of dry straw on the ground, roughly 1m wide and as long as needed.
- Stack roots in a neat pyramid shape on the straw bed. Place the largest roots at the base.
- Cover the entire pyramid with a 15-20cm layer of straw.
- Pack 15cm of firm earth over the straw. Use a spade to press it down tightly.
- Leave a small straw chimney (a twisted wisp of straw) poking through the top for ventilation.
- Dig a shallow drainage channel around the base to carry away rainwater.
The straw insulates against frost. The earth seals in moisture. The chimney lets excess heat and gas escape. In a mild winter, the inside of a well-built clamp holds 2-5C. In a hard frost, the thick earth layer prevents the roots from freezing.
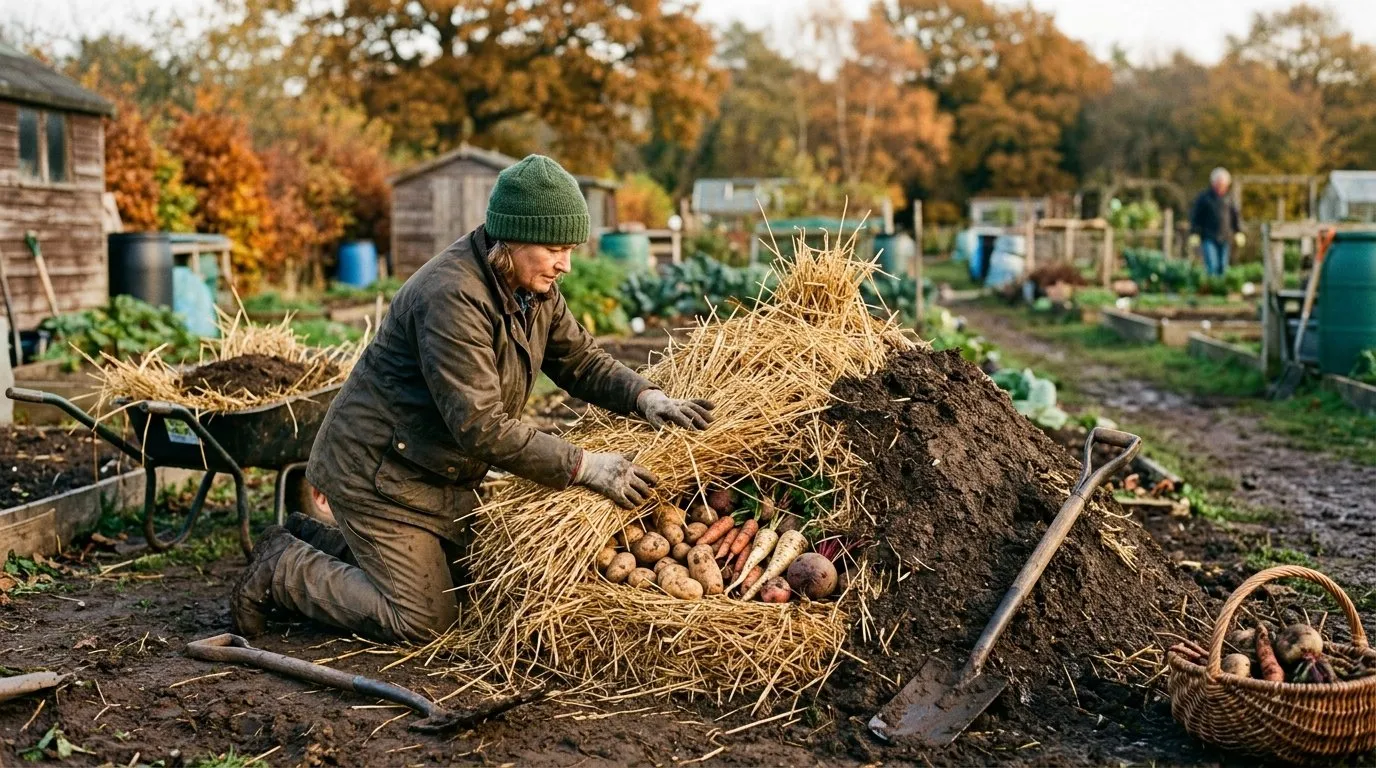
Building a traditional root vegetable clamp on an allotment. The straw layer goes on first, then the earth cap is packed down firmly. A straw chimney at the top provides ventilation.
When to open a clamp
Open the clamp from one end when you need roots. Take what you need and reseal the exposed face with fresh straw and earth. Once opened, use those roots within a week. A properly built clamp lasts from late October through to March in most UK regions.
The main risk is mice tunnelling into the straw layer. Laying wire mesh under the straw bed helps. Rats can also be a problem on allotment sites. If rodent pressure is high, sand storage in a shed or garage-based methods are more secure.
How long do stored root vegetables last?
Storage life depends on the vegetable, the method, and the conditions. The table below is based on data from our Staffordshire storage trials over three winters (2022-2025), with weekly temperature and humidity readings.
| Root vegetable | In sand (1-4C) | In clamp (2-5C) | In ground | In fridge | Frozen |
|---|---|---|---|---|---|
| Carrots | 4-5 months | 4-5 months | 2-3 months | 4-6 weeks | 10-12 months |
| Parsnips | 3-4 months | 3-4 months | All winter | 3-4 weeks | 10-12 months |
| Beetroot | 3-4 months | 3-4 months | 2 months | 2-3 weeks | 8-10 months |
| Turnips | 2-3 months | 2-3 months | 1-2 months | 2-3 weeks | 8-10 months |
| Swede | 3-4 months | 3-4 months | All winter | 3-4 weeks | 10-12 months |
| Celeriac | 2-3 months | 2-3 months | Not reliable | 2 weeks | 8-10 months |
Parsnips and swede are the toughest. Both tolerate hard frost in the ground and keep well in sand or clamps. Turnips are the most perishable of the main roots and should be eaten first. Carrots occupy the middle ground: excellent in sand but shorter-lived left in wet soil.
For crops that will not be eaten within 3-4 months, freezing is the better option. Blanch root vegetables for 2-3 minutes, cool in iced water, and freeze in portions. Frozen roots store for 8-12 months at -18C.
Field report: three winters of storage data (2022-2025)
Our storage trials ran from October to March across three consecutive winters on a clay-heavy allotment plot in Staffordshire (West Midlands, altitude 150m). We logged temperature and humidity weekly using a digital min-max thermometer and hygrometer in the shed and inside the clamp.
Shed conditions (unheated, north-facing):
- Average winter temperature: 3.2C (range: -1C to 8C)
- Average humidity: 72% (range: 60-88%)
- Coldest recorded: -1C (January 2024, during a 5-day cold snap)
- Warmest recorded: 8C (late October, early in the storage season)
Clamp conditions (outdoor, sheltered by hedge):
- Average winter temperature: 3.8C (range: 0C to 6C)
- Average humidity: 89% (range: 82-95%)
- Never dropped below 0C inside the clamp, even when air temperature hit -7C
Key findings:
- Carrots in sand (shed): 4.2% waste rate across 3 winters. Losses were almost always from roots with existing fork damage.
- Parsnips in ground: zero waste. Flavour noticeably sweeter after December frosts.
- Beetroot in sand: 7.1% waste, mostly from roots where the crown was cut too short at harvest.
- Clamp (mixed carrots and swede): 5.8% waste. All losses came from the outer layer of the mound.
- Shed temperature briefly hit -1C once in three years. No frost damage to sand-stored roots at that temperature.
These numbers confirm that the sand method in an unheated shed is the most practical approach for most UK gardeners. The clamp suits larger quantities but requires more effort to build and manage.
Month-by-month storage calendar
This calendar covers the full storage season from harvest through to the last of the stored roots in spring.
October: Lift maincrop carrots, beetroot, and turnips after the first light frost. Leave parsnips and swede in the ground for now. Prepare crates and buy sharp sand. Build clamps for any surplus over 50kg. Start winter salad harvesting alongside your root storage.
November: Complete all lifting before the ground freezes hard. Move crates into the shed or garage. Mulch any parsnip and swede rows left in the ground with 10-15cm of straw or bracken. First fortnightly inspection of sand-stored roots.
December: Temperatures drop to the optimal 1-4C range in most UK sheds. This is the stable storage period. Check crates fortnightly. Remove any roots showing soft spots. Open clamps from one end as needed.
January: The coldest month. If your shed drops below -2C, cover crates with hessian or old blankets. Parsnips in the ground now taste their best. Lift swede as needed for stews and mashes.
February: Start using up turnips, which deteriorate faster than other roots. Check sand moisture. If the sand feels dry and dusty, sprinkle lightly with water from a misting bottle. Potatoes from your chitting trays will soon need planting.
March: The final month of storage. Warming temperatures trigger sprouting. Use remaining roots within 2-3 weeks once green shoots appear. Any surplus can be blanched and frozen for later use.

Freshly lifted carrots and parsnips from a frosty November allotment. Leaving soil on the roots protects them during storage. Twist off the tops rather than cutting them.
How to prepare roots for storage
Proper preparation is the difference between roots that last five months and roots that rot in six weeks. Follow these rules for every root vegetable:
Do not wash. Soil left on the surface protects the skin from drying out and bacterial entry. Brush off the heaviest clumps once the roots have air-dried for a few hours.
Twist, do not cut. Twist the leafy tops off by hand, leaving 1-2cm of stalk on carrots, parsnips, and turnips. Leave 5cm on beetroot to prevent bleeding. Cutting with a blade creates a clean wound that bacteria colonise faster than a ragged twist.
Inspect ruthlessly. Any root with fork holes, splits, slug damage, or soft patches goes into the kitchen for immediate use. One damaged root in a crate of 50 will spread mould to its neighbours.
Cure before storing. Leave lifted roots on the soil surface or on newspaper in a cool room for 2-4 hours. This lets minor nicks and scrapes form a protective callus layer before going into sand.
Size matters. Store large and small roots in separate crates. Small roots dry out faster and should be used first. Large, mature roots store longest.
Common storage problems and solutions
| Problem | Cause | Solution |
|---|---|---|
| Roots shrivelling | Air too dry or sand too dry | Mist sand lightly with water. Aim for 90-95% humidity. |
| White mould on surface | Poor air circulation or damaged roots | Remove affected roots. Space remaining roots wider apart. |
| Roots sprouting | Temperature above 5C | Move to a cooler location. Use sprouted roots within a week. |
| Soft, slimy patches | Bacterial rot from damage or wet sand | Remove immediately. Reduce sand moisture. Inspect fortnightly. |
| Roots freezing | Temperature below -2C | Insulate crates with hessian or bubble wrap. Move indoors if needed. |
| Bitter taste | Exposure to light | Store in complete darkness. Cover crates with hessian. |
| Mice damage | Rodents accessing shed or clamp | Set traps. Line clamp base with wire mesh. Block shed gaps. |
The most common mistake is storing damaged roots alongside perfect ones. It only takes one soft carrot to trigger a chain reaction of mould through an entire crate. Be strict at sorting time.
Which storage method should you choose?
The right method depends on your harvest size, available space, and how much effort you want to invest.
Sand in crates (recommended for most gardeners): Best for harvests up to 30-40kg. Requires only a shed or garage, some crates, and a bag of sharp sand. Simple to maintain with fortnightly checks. This is the method I use and recommend to anyone with an unheated outbuilding.
Clamping (best for large allotment harvests): Suits 50-100kg or more. Requires outdoor space, straw, and effort to build. More vulnerable to rodents. Ideal if you have no shed or grow at scale on an allotment.
In-ground storage (best for parsnips and swede): Zero effort beyond mulching the row with straw. Works only for roots that tolerate hard frost. Not suitable for carrots or beetroot in wet soil, where they attract slugs and rot.
Fridge storage (short-term only): Keeps roots for 2-6 weeks in a plastic bag with holes. Useful for small quantities between the garden and the kitchen. Not a long-term solution.
Freezing (for surplus beyond 5 months): Blanch for 2-3 minutes, cool in iced water, and freeze at -18C. Stores for 8-12 months. Best combined with sand storage for fresh use over winter and frozen stocks for late spring and summer.
Frequently asked questions
How long can you store root vegetables over winter?
Most roots store for 3-5 months in damp sand at 1-4C. Carrots are the best keepers at 4-5 months. Parsnips last 3-4 months in sand or all winter in the ground. Beetroot stores for 3-4 months. Turnips are the most perishable at 2-3 months. Check stored roots every 2 weeks and use any that show soft spots or sprouting.
What is the best way to store carrots over winter?
Layer carrots in damp sand inside wooden crates at 1-4C. Do not wash the roots. Twist off the tops, leaving 1-2cm of stalk. Space carrots so they do not touch. The sand maintains 90-95% humidity around the roots. An unheated shed or garage provides the right temperature in most UK regions from November to March.
Can you leave parsnips in the ground over winter?
Yes, parsnips survive hard frost and taste sweeter after exposure to cold. Frost converts their starches into sugars. Cover the row with 10-15cm of straw or bracken to prevent the ground freezing solid, which makes lifting difficult. Harvest as needed from November through to March.
What temperature should you store root vegetables at?
Store most root vegetables at 1-4C for the longest shelf life. This range slows respiration and microbial activity without causing frost damage. An unheated shed in most UK regions naturally holds this temperature from November to March. If temperatures drop below -2C, insulate crates with hessian or bubble wrap.
Do you need to wash root vegetables before storing?
No, never wash roots before storage. Washing removes the protective skin barrier and introduces moisture that promotes rot. Leave the soil on. Brush off heavy clumps once the roots have dried for 2-3 hours. Only wash roots immediately before cooking.
What is a root vegetable clamp?
A clamp is a traditional outdoor mound for storing 50-100kg of roots. Roots are stacked on a straw bed, covered with 15-20cm of straw, then sealed with 15cm of packed earth. A straw chimney at the top provides ventilation. Inside, the clamp holds 2-5C and 85-95% humidity through winter.
Which root vegetables do not store well?
Radishes last only 1-2 weeks and are unsuitable for winter storage. Jerusalem artichokes dry out within a month above ground and should stay in the soil. Celeriac keeps for 2-3 months but turns spongy. Any root with fork damage, splits, or slug holes rots within weeks regardless of method. Store only undamaged, mature specimens.
Lawrie has been gardening in the West Midlands for over 30 years. He grows his own veg using no-dig methods, keeps a wildlife-friendly garden, and writes practical advice based on real UK growing conditions.