Seed Saving for Beginners UK
A practical seed saving guide for UK gardens. Covers easy crops, wet and dry extraction methods, storage, viability testing, and legal basics.
Key takeaways
- Start with self-pollinating crops: tomatoes, beans, peas, and lettuce give reliable results
- Open-pollinated and heritage varieties produce true-to-type seed, F1 hybrids do not
- Dry extraction works for beans, peas, and most flowers; wet extraction suits tomatoes and cucumbers
- Seeds must be fully dry (below 8% moisture) before storage to prevent mould and rot
- Airtight containers stored at 5-10C keep most vegetable seeds viable for 3-10 years
- Garden Organic's Heritage Seed Library preserves hundreds of UK varieties free to members
Seed saving starts with a simple fact: every seed packet you buy costs £2-4. Over a season, seed purchases for a full vegetable garden add up to £50-100 or more. Yet every tomato plant you grow produces enough seed for hundreds of plants next year. Every bean pod left on the vine contains next season’s crop. You are already growing your seed supply. You just need to collect it.
Seed saving is one of the oldest skills in gardening. Gardeners in the UK have been doing it for centuries, selecting the best performers and passing seed along to neighbours. This guide covers the practical techniques you need to start saving your own seed, beginning with the easiest crops and building up to more advanced methods.
Why save your own seeds?
Saving seed from your garden preserves varieties adapted to your local soil and climate. A tomato variety grown in the same West Midlands garden for five years gradually adapts to the rainfall, temperature patterns, and day length of that specific spot.
The financial savings are substantial. A single tomato plant produces hundreds of seeds. One runner bean plant gives you enough seed for a 3-metre row. After the first year of saving, your annual seed costs can drop by 50-80%.
There are other benefits beyond money:
- Self-sufficiency — you become independent of seed companies and annual supply chains
- Variety preservation — many heritage varieties are no longer commercially available
- Selection — you can choose seed from your best-performing plants, gradually improving your stock
- Connection — saving seed links you to every generation of gardeners who came before
- Swapping — saved seed is the currency of gardening communities across the UK
The Heritage Seed Library run by Garden Organic maintains over 800 varieties of vegetable seed that are no longer commercially available. Membership gives you access to these varieties, many of which were saved by individual gardeners over decades.
Understanding open-pollinated vs F1 hybrids
Open-pollinated varieties produce offspring identical to the parent plant. F1 hybrids do not. This is the single most important concept in seed saving.
Open-pollinated (OP) varieties have been grown and selected over many generations. When you save seed from an OP tomato, the plants you grow next year will be the same variety with the same characteristics. Heritage, heirloom, and traditional varieties are all open-pollinated.
F1 hybrids are the result of crossing two specific parent lines. The first generation (F1) is uniform and often vigorous. But seed saved from F1 plants produces a random mix of traits from those parent lines. Some plants may revert to one parent, others to the other, and most will be somewhere in between. The results are unpredictable and usually disappointing.
| Feature | Open-pollinated | F1 hybrid |
|---|---|---|
| Seed saving | Reliable, true-to-type | Unreliable, mixed offspring |
| Seed cost | Free once established | Buy new seed each year |
| Variety age | Often decades or centuries old | Bred in recent decades |
| Vigour | Good, consistent | Often higher in first generation |
| Availability | Specialist catalogues, seed swaps | Garden centres, mainstream catalogues |
| Adaptability | Improves over generations in your garden | Fixed traits, no adaptation |
Rule of thumb: if the seed packet says F1, do not save seed from those plants. Look for varieties labelled as open-pollinated, heritage, or heirloom.
The easiest crops to start with
Begin with self-pollinating crops that need no isolation or special treatment. These four crops are where every beginner should start. You will have reliable, true-to-type seed with minimal effort.
Tomatoes
Tomatoes are the single best crop for beginner seed savers. They self-pollinate (the flower fertilises itself before it opens), so cross-pollination is extremely rare even when different varieties grow side by side. See our tomato growing guide for cultivation advice.
Choose your best-tasting, healthiest plant. Pick a fully ripe fruit from the second or third truss, when the plant is in full production. Cut the tomato in half and squeeze the seeds and gel into a glass jar.
Beans
Runner beans and French beans are wonderfully easy to save. Simply leave the pods on the plant until they turn brown and papery. The seeds inside should be hard and dry. Pick the pods, shell out the seeds, and spread them on a plate to finish drying for a week. Our runner bean guide covers growing in detail.
Runner beans can cross-pollinate via bees, so grow only one variety if you want pure seed. French beans self-pollinate and rarely cross, making them even simpler.
Peas
Peas self-pollinate before the flower opens, making them almost foolproof for seed saving. Leave pods on the plant until they turn yellow and start to rattle when shaken. Pick them, shell the seeds, and dry them indoors for two weeks. See our pea growing guide for variety recommendations.
Lettuce
Lettuce self-pollinates and produces abundant seed. Let one or two plants bolt (run to flower) in summer. Once the small dandelion-like seed heads form, cut the stems and shake them into a paper bag. Each plant produces hundreds of seeds. Our lettuce growing guide has more on varieties suited to UK conditions.
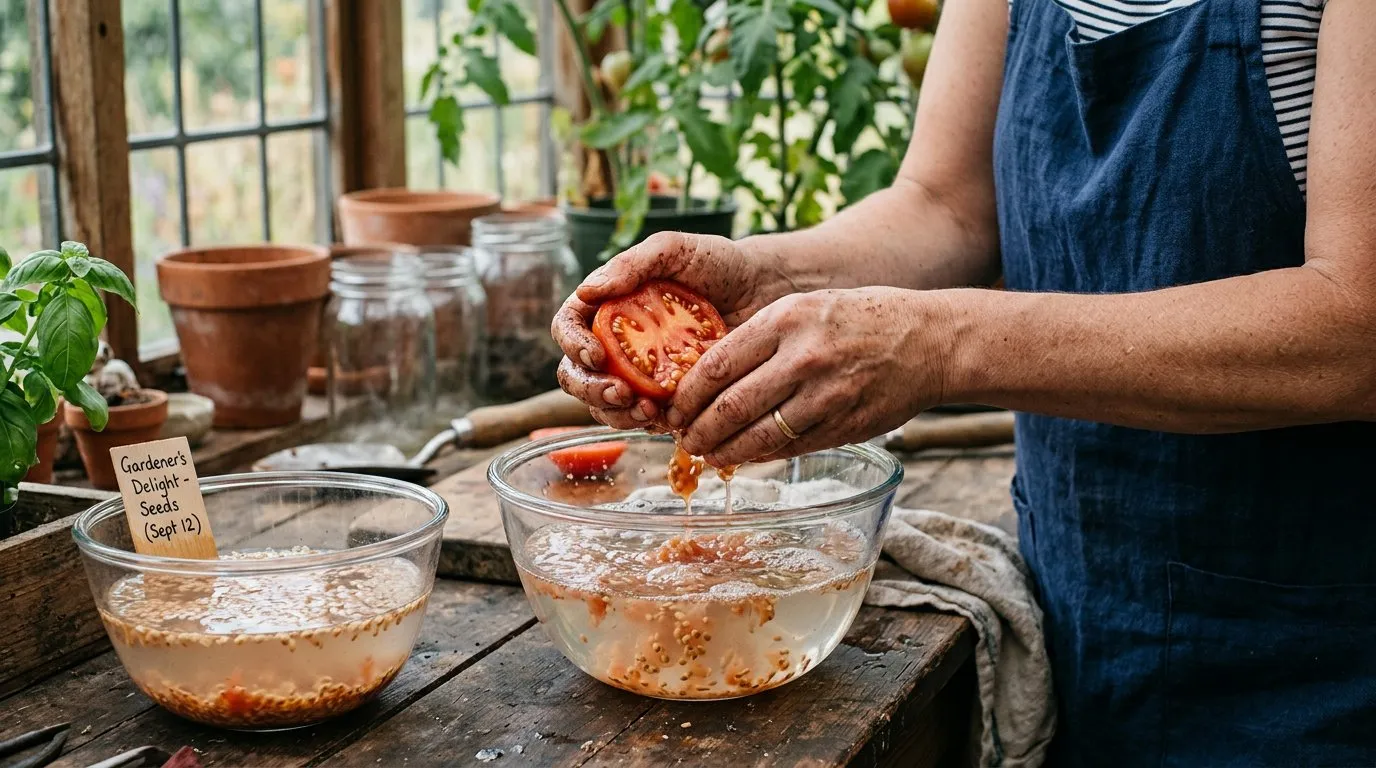 Squeezing tomato seeds and gel into a jar for fermentation. Leave for 2-3 days until a white mould appears on the surface.
Wet extraction method
Wet extraction is used for seeds embedded in moist fruit, primarily tomatoes and cucumbers. The gel coating around these seeds contains germination inhibitors that must be removed before storage.
How to ferment tomato seeds
- Cut a ripe tomato in half and squeeze the seeds and gel into a clean glass jar
- Add a splash of water (about the same volume as the seed mixture)
- Cover loosely with a cloth or paper towel and leave at room temperature
- Stir once daily. After 2-3 days, a white mould forms on the surface
- Add water to the jar and stir vigorously. Viable seeds sink to the bottom
- Pour off the mould, pulp, and floating seeds (these are empty)
- Rinse the good seeds through a fine sieve under running water
- Spread seeds on a ceramic plate or glass surface to dry. Not paper towel, which sticks to the seeds
- Dry at room temperature for 7-10 days, stirring daily to prevent clumping
The fermentation process breaks down the gel coating and kills some seed-borne diseases including bacterial canker. It takes 2-3 days in warm weather, up to 5 days in cooler conditions. Do not leave it longer than 5 days or the seeds may start to germinate in the jar.
Cucumber and melon seeds
The same wet extraction process works for cucumbers, melons, and other cucurbits. Let the fruit fully ripen on the plant (cucumbers turn yellow and soft), scoop out the seeds, and ferment as above. Cucurbits cross-pollinate freely via insects, so grow only one variety of each type if saving seed.
Dry extraction method
Dry extraction is simpler and covers the majority of garden crops including beans, peas, onions, herbs, and flowers. The seeds develop inside pods, capsules, or seed heads that dry naturally on the plant.
General principles
- Let seeds mature fully on the plant before collecting
- Harvest on a dry day, ideally in the afternoon when morning dew has evaporated
- Spread seeds on plates or trays in a warm, airy room to finish drying
- Allow 2-3 weeks of indoor drying before packaging for storage
- Remove chaff by gently blowing across the seeds or sifting through a colander
Specific crop instructions
Beans and peas: Leave pods on the plant until they are completely dry and brown. The seeds should rattle inside. If wet autumn weather threatens, cut the entire plant and hang it upside down in a shed to finish drying.
Lettuce: Cut the seed heads when fluffy white tufts appear (like small dandelion clocks). Shake into a paper bag. Separate seed from chaff by rubbing between your fingers over a sieve.
Calendula and marigold: Wait until seed heads are dry and brown on the plant. Pick individual seeds by hand. They are large and easy to handle. Calendula seeds look like curved caterpillars.
Herbs (dill, coriander, fennel): Cut seed heads when they turn brown but before they shatter and drop. Place upside down in a paper bag to catch falling seeds as they finish drying.
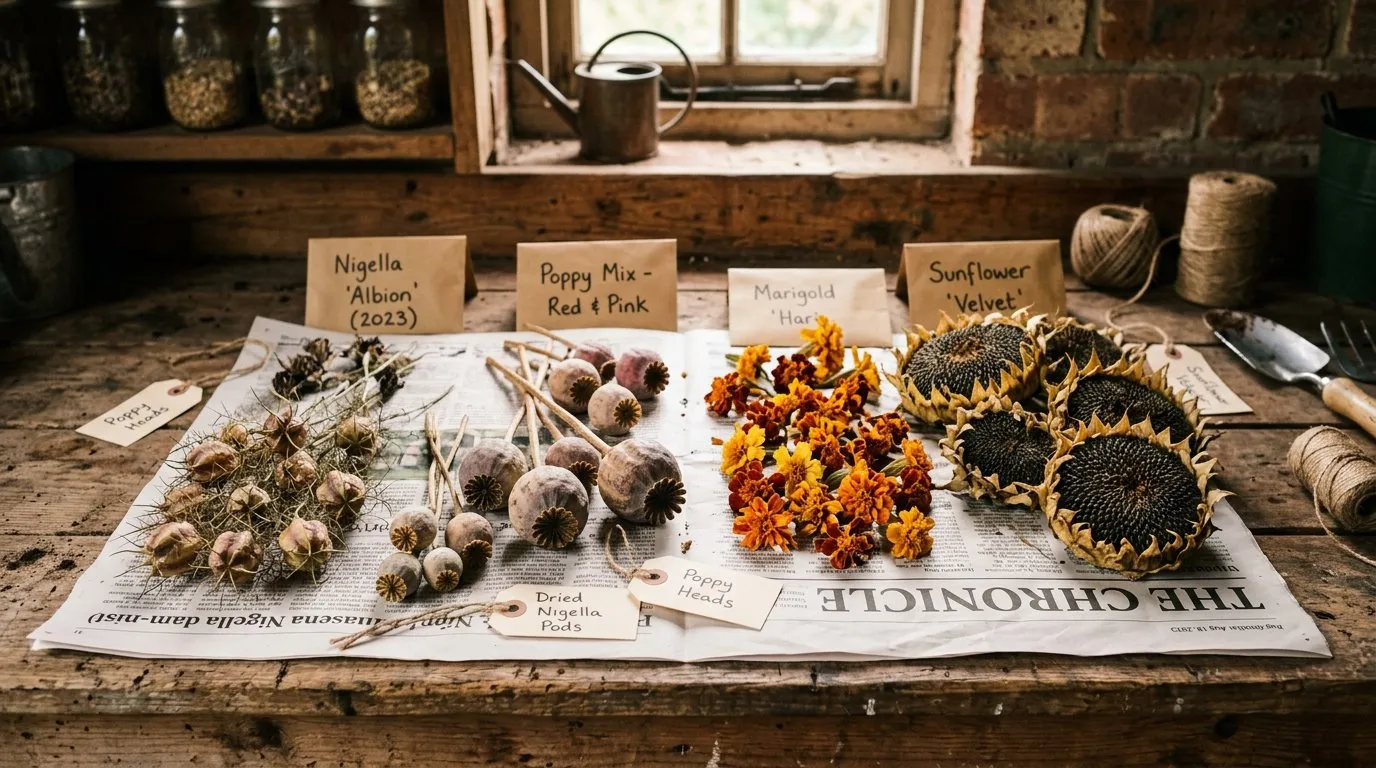 Dried seed heads ready for collection. From left: calendula, nigella, lettuce, and dill. Harvest on dry afternoons for best results.
Drying and storing seeds properly
Seeds must be thoroughly dry before storage. The target is below 8% moisture content. Seeds stored with too much moisture develop mould, rot, or germinate prematurely. This is the step where most beginners make mistakes.
How to dry seeds
Spread seeds in a single layer on ceramic plates, glass dishes, or fine mesh screens. Do not use paper towel (small seeds stick permanently) or newspaper (ink may transfer). Place in a warm, dry room with good air circulation. An airing cupboard works well. A sunny windowsill is too hot and can damage the seed embryo.
Stir or turn the seeds once daily to ensure even drying. Most seeds are dry enough after 7-14 days at room temperature. To test, try to bend a bean seed. If it snaps cleanly rather than bending, it is dry enough. For small seeds, press your fingernail into the surface. If it dents rather than cracking, dry for longer.
The silica gel trick
Adding a small sachet of silica gel to your seed containers absorbs residual moisture. Save the packets from shoe boxes, vitamin bottles, and electronic packaging. Replace them annually as they become saturated. This simple addition can extend seed viability by 1-2 years.
Storage containers and conditions
| Storage method | Temperature | Expected viability |
|---|---|---|
| Paper envelope at room temperature | 18-22C | 1-2 years |
| Glass jar with silica gel, cool room | 10-15C | 3-5 years |
| Airtight container in fridge | 4-6C | 5-10 years |
| Vacuum-sealed bag in freezer | -18C | 10+ years |
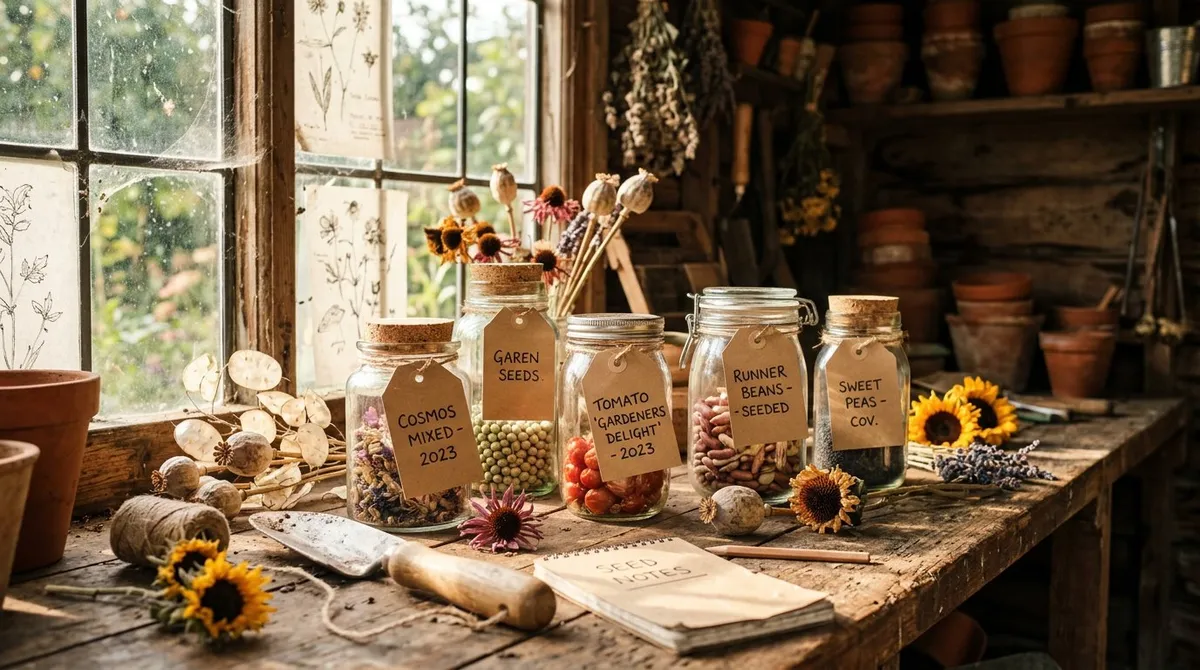
For most home gardeners, glass jars with tight-fitting lids stored in a cool, dark cupboard give excellent results. Label every container with the variety name, date saved, and parent plant notes. I use small jam jars and keep them in a cardboard box in the spare bedroom, which stays at around 12C through winter.
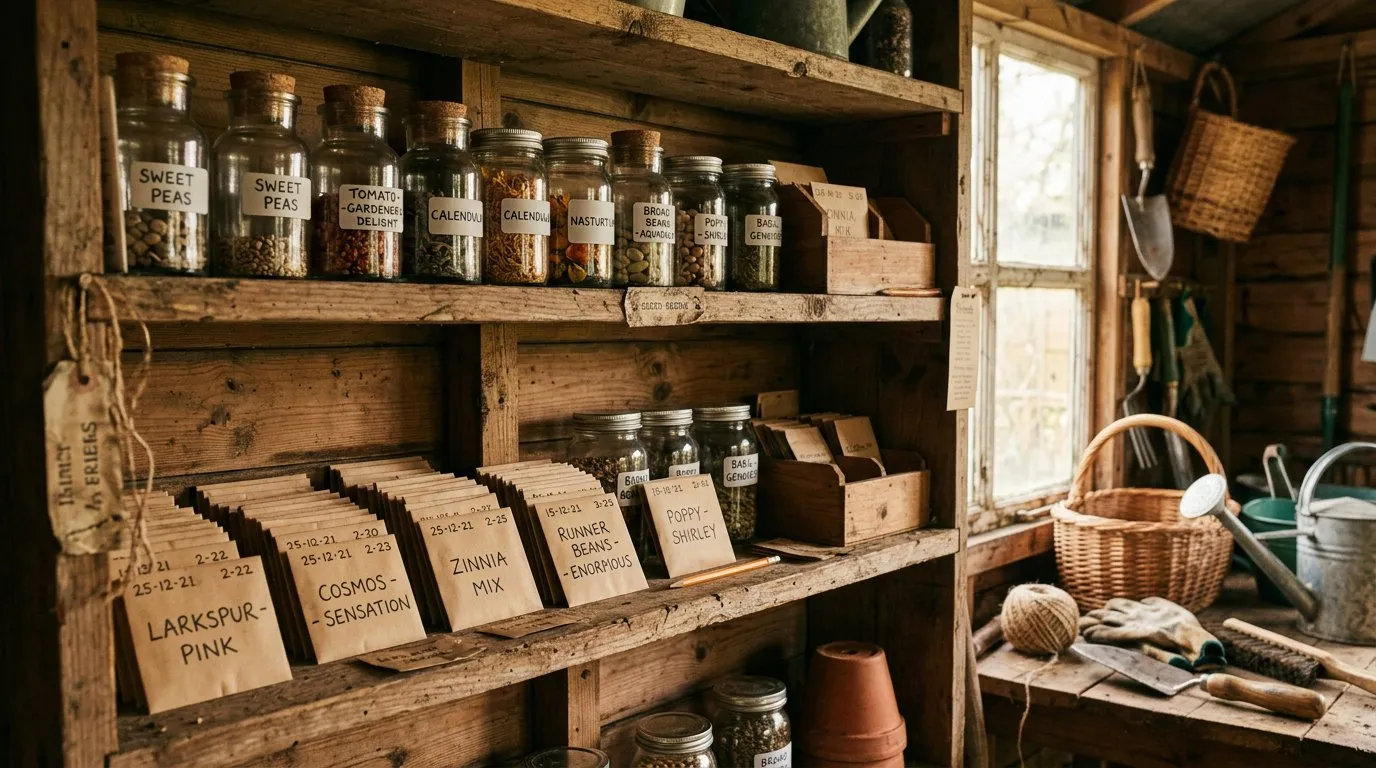 Labelled seed jars stored in a cool, dark cupboard. Include variety name, date saved, and any notes about the parent plant.
Testing seed viability
Test germination before relying on old seed. Even properly stored seeds lose viability over time. Some species decline faster than others.
The paper towel germination test
- Count out 10 seeds from your saved stock
- Dampen a sheet of kitchen paper towel (moist, not dripping)
- Space the seeds evenly across one half of the towel
- Fold the other half over the top
- Place inside a sealed plastic bag or food container
- Keep at room temperature (18-22C) for 7-14 days
- Count how many seeds have germinated
Interpreting results:
- 8-10 germinated: excellent viability, sow as normal
- 5-7 germinated: reasonable viability, sow 50% more thickly to compensate
- Below 5: poor viability, discard and use fresh seed
Typical seed longevity
| Crop | Expected viability (years) | Notes |
|---|---|---|
| Tomato | 5-10 | Among the longest-lived vegetable seeds |
| Bean | 3-5 | Stores well in cool, dry conditions |
| Pea | 3-4 | Quality drops noticeably after year three |
| Lettuce | 3-5 | Germinates poorly in heat even when fresh |
| Cucumber | 5-8 | Old seed sometimes produces more female flowers |
| Carrot | 2-3 | Loses viability relatively quickly |
| Parsnip | 1-2 | Always use fresh seed for best results |
| Onion | 1-2 | Buy or save fresh seed annually |
| Sweetcorn | 2-3 | Large seeds store easily |
| Calendula | 3-5 | Hardy and reliable in storage |
Parsnip and onion seeds are worth mentioning specifically. Both lose viability so quickly that seed saving is less practical for these crops unless you can sow the following spring. Our seed sowing calendar lists optimum sowing times for all common UK vegetables.
Building a seed bank
A seed bank is simply an organised collection of saved seed from your garden. Over several years, you build up a reliable supply of varieties proven to grow well in your specific conditions.
Starting your collection
Begin with 3-4 easy crops in your first year. Tomatoes, runner beans, lettuce, and calendula make a good starting set. Save seed from your healthiest, most productive plants. Label everything clearly and store in a cool, dark place.
In your second year, add peas, French beans, and a couple of herb varieties. By year three, you should have enough saved seed to dramatically reduce your annual seed purchases.
Record keeping
Good records are essential. For each saved variety, note:
- Variety name — be precise, not just “tomato” but “Gardener’s Delight”
- Year saved — write this on every container
- Parent plant notes — was it the best producer? Most disease-resistant? Best flavour?
- Germination test results — test each batch annually and record the percentage
- Any problems — poor germination, off-type plants, disease issues
A simple notebook works well. Some growers use a spreadsheet. The format matters less than doing it consistently.
Seed swaps and sharing
Seed swaps are a long-standing tradition in UK gardening communities. Local gardening clubs, allotment societies, and organisations like Garden Organic hold regular seed swap events where you can exchange saved varieties with other growers.
Online communities and forums also facilitate seed swapping. This is where you find varieties not available commercially, adapted to specific regions and growing conditions. A broad bean variety that has been grown on a Staffordshire allotment for 30 years is likely to perform better in the West Midlands than something bred in the Netherlands.
Legal aspects of seed saving in the UK
Saving seed from your own garden for personal use is entirely legal in the UK. You can also give away or swap saved seed freely. The only restriction applies to commercial sale.
Under the Plant Varieties Act 1997, certain registered varieties are protected by Plant Breeders’ Rights (PBR). You cannot sell seed of a PBR-protected variety without a licence. However, this restriction applies only to commercial sale. Home gardeners saving and sharing seed are not affected.
Heritage and open-pollinated varieties have no PBR protection. You can save, share, swap, and even sell seed of these varieties without restriction. This is another strong reason to grow open-pollinated varieties in your garden.
EU seed marketing regulations previously restricted which varieties could be commercially sold, requiring official listing and certification. Post-Brexit, UK rules remain similar but the government has signalled interest in simplifying regulations for heritage and amateur varieties. For home gardeners, the practical position is simple: save whatever you like from your own garden.
Advanced seed saving techniques
Once you are confident with self-pollinating crops, you can move on to insect-pollinated and wind-pollinated species. These require more care to maintain variety purity.
Isolation distances
Cross-pollinating crops need physical distance between varieties to prevent insect or wind transfer of pollen.
| Crop | Pollination type | Minimum isolation distance |
|---|---|---|
| Sweetcorn | Wind | 400m or stagger flowering by 2 weeks |
| Courgette/squash | Insect | 400m or hand-pollinate |
| Carrot | Insect | 500m (also crosses with wild carrot) |
| Beetroot | Wind | 1km+ (crosses with chard and wild beet) |
| Brassicas | Insect | 1km (all brassicas cross with each other) |
For most allotment and garden growers, maintaining these distances is impractical. The alternative is to grow only one variety of each cross-pollinating crop, or to use physical barriers.
Hand pollination
For courgettes and squash, hand pollination gives pure seed without isolation distance. Identify a female flower (it has a small fruit behind the petals) the evening before it opens. Tape it shut with masking tape. Next morning, pick a male flower from the same variety, peel back the petals, and dab the pollen onto the female flower’s stigma. Re-tape the female flower shut. Mark the fruit with a twist-tie so you know to save seed from it.
Biennial crops
Some vegetables need two growing seasons to produce seed. Carrots, parsnips, beetroot, onions, leeks, and brassicas all flower in their second year. To save seed from these, you must overwinter the plant and let it flower the following spring.
For root crops, lift the roots in autumn, store in damp sand in a cool place, and replant in spring. For brassicas, leave the plant in the ground over winter (protecting with fleece in cold areas) and it will send up flower stalks the following May.
Your first seed saving calendar
Planning seed saving alongside your regular growing calendar ensures you allocate the right plants for seed production. Mark which plants you will save seed from at planting time, and give them labels so you do not accidentally harvest them for eating.
| Month | Seed saving activity |
|---|---|
| March-April | Plant designated seed-saving varieties, label clearly |
| June | Let best lettuce plants bolt for seed |
| July-August | Ferment tomato seeds as fruits ripen |
| August | Leave best bean and pea pods on the plant to dry |
| September | Collect dried seed heads from herbs and flowers |
| October | Test germination of this year’s saved seed |
| November | Package, label, and store all dried seed |
| January-February | Order open-pollinated seeds to fill gaps in your collection |
Our vegetable planting calendar will help you plan the growing side alongside your seed saving schedule.
Getting the most from saved seed
Saved seed performs best when you practise positive selection over several years. This means saving seed only from plants that show the traits you want: disease resistance, flavour, early maturity, heavy cropping, or tolerance of your local conditions.
Over 3-5 generations, your saved varieties become measurably better adapted to your specific garden. A tomato variety that you have selected for early ripening over four years will ripen earlier than the same variety from a seed catalogue. This process is called landrace development, and it is how all traditional varieties were created.
Start by marking your three best plants of each variety with a twist-tie or label at the peak of the growing season. Save seed only from those individuals. Over time, your personal seed stock will outperform any commercial packet.
Seed saving is a skill that rewards patience. Start with the easy crops this year, keep good records, and build your collection gradually. Within three seasons, you will have a garden stocked with varieties proven to thrive in your soil, your climate, and under your care. That is something no seed catalogue can offer.
Why we recommend ‘Gardener’s Delight’ tomato as the best first seed-saving variety: After 30 years of saving seed from dozens of tomato varieties, ‘Gardener’s Delight’ consistently delivers the highest germination rates from saved seed — typically 85-95% even after 5 years of properly stored stock. Its small fruits produce abundant seed per plant (often 500+ viable seeds from a single fruit), the gel coating releases cleanly during fermentation in 48 hours rather than the 72-96 hours needed for beefsteak types, and the variety is reliably open-pollinated with no risk of F1 confusion. It is the ideal variety to learn the full wet extraction process before moving on to larger or rarer types.
Now you’ve mastered seed saving, read our guide on the seed sowing calendar for the next step in planning when to sow your saved seeds each year.
Lawrie has been gardening in the West Midlands for over 30 years. He grows his own veg using no-dig methods, keeps a wildlife-friendly garden, and writes practical advice based on real UK growing conditions.