How to Make Comfrey and Nettle Feed
How to make comfrey and nettle feed at home. NPK ratios, fermentation stages, dilution rates, and a month-by-month UK harvest calendar.
Key takeaways
- Comfrey feed is exceptionally high in potassium (NPK ~1.5-0.5-5.0) — ideal for tomatoes, courgettes, and fruiting crops
- Nettle feed is higher in nitrogen (NPK ~2.0-0.5-1.5) — better for leafy crops and young transplants in spring
- A combined brew mixed 50:50 provides a balanced feed for general use across the whole plot
- Dilute 1:10 with water before applying — undiluted feed scorches roots and causes leaf burn
- Bocking 14 comfrey yields 3-4 cuts per season from a single established plant and rarely sets seed
- Fermentation takes 3-5 weeks in summer (18-22C) and up to 8 weeks in a cool spring below 12C
Making your own comfrey and nettle liquid feed costs nothing beyond a bucket and some water. The results outperform most shop-bought tomato feeds on potassium content, and you can produce enough to feed an entire vegetable plot from a patch of plants that grows back year after year.
This guide covers everything from establishing a Bocking 14 comfrey bed to the fermentation science behind the brew, the exact NPK ratios you can expect, and a month-by-month calendar that tells you when to harvest, brew, and apply through the UK growing season. For the broader picture of plant nutrition, see our guide to how to feed garden plants.
Why homemade liquid feeds outperform shop-bought fertiliser for certain crops
Homemade comfrey and nettle feeds are not a compromise. For specific crops and specific nutritional roles, they genuinely outperform commercial alternatives.
The root cause is potassium bioavailability. Shop-bought fertilisers deliver potassium as synthetic potassium sulphate or potassium nitrate. These dissolve quickly but also leach quickly through UK soils, particularly the sandy loams of East Anglia and the fast-draining chalks of the South Downs. You apply the feed on Monday and half of it has left the root zone by Friday.
Comfrey delivers potassium bound in organic cell wall compounds. As the leaves break down during fermentation, potassium is released as potassium bicarbonate and organic potassium chelates. These forms attach to soil particles more effectively than synthetic salts. They are released steadily over 7-10 days after application rather than in one quick flush.
The second advantage is that comfrey feed contains plant hormones, specifically gibberellins and cytokinins, which stimulate cell division and fruit set. Commercial tomato feeds do not contain these. This is why comfrey-fed tomatoes consistently show better fruit set in the first truss compared to Tomorite-fed plants at the same potassium level.
Nettle feed brings a different advantage: iron and silica alongside the nitrogen. These are rarely present in commercial garden fertilisers. Silica strengthens cell walls, making plants more resistant to fungal attack. Iron supports chlorophyll production, which is why nettle-fed brassicas maintain that deep blue-green colour even on slightly alkaline chalk soils where iron can become locked up.
For a broader comparison of organic and synthetic fertiliser options, see our best fertilisers for gardens UK guide.
Why we recommend Bocking 14 comfrey
Not all comfrey is the same. Common comfrey (Symphytum officinale) grows in hedgerows across the UK and will make a decent feed, but it spreads prolifically by seed and has lower potassium content than the named variety we recommend.
Symphytum x uplandicum ‘Bocking 14’ was developed at Bocking in Essex by Lawrence D. Hills at the Henry Doubleday Research Association — the organisation that became Garden Organic. Hills spent decades trialling comfrey varieties and identified Bocking 14 as the highest-yielding, highest-potassium, and most sterile selection available. It still holds that position today.
The specific advantages of Bocking 14 over common comfrey:
- Higher potassium content: Leaves contain up to 5.0% potassium by dry weight, versus 2.5-3.5% in common comfrey
- Sterile: Does not set viable seed, so it stays exactly where you plant it
- Heavy yields: 1.5-2kg of fresh leaves per cut from an established plant
- Fast regrowth: Ready to cut again within 6-8 weeks after cutting back to 5cm
- Long-lived: A Bocking 14 plant lives for 20 years or more without replanting
You can buy Bocking 14 root cuttings from most online seed suppliers and allotment societies. Plant root sections (5-7cm long) horizontally, 10cm deep, in spring or autumn. Space plants 60cm apart. Expect your first usable harvest in the second year.

Established Bocking 14 comfrey at a Staffordshire allotment — three plants at 60cm spacing yield enough for the whole vegetable plot
NPK ratios compared: comfrey, nettle, and commercial feeds
Understanding the NPK values helps you choose which feed to use and when. These figures are based on analysis of fresh plant material after complete fermentation to a concentrated brew.
| Feed type | Nitrogen (N) | Phosphorus (P) | Potassium (K) | Best use |
|---|---|---|---|---|
| Comfrey (Bocking 14) | ~1.5% | ~0.5% | ~5.0% | Tomatoes, courgettes, fruiting crops |
| Nettle | ~2.0% | ~0.5% | ~1.5% | Leafy crops, transplants, early spring |
| 50:50 combined brew | ~1.75% | ~0.5% | ~3.2% | General use, ornamentals, beans |
| Tomorite (commercial) | 4.0% | 4.5% | 8.0% | Tomatoes (synthetic, fast-release) |
| Chempak Tomato Food | 5.0% | 5.0% | 10.0% | Tomatoes, peppers (synthetic) |
| Liquid seaweed (SB Plant Invigorator) | 0.3% | 0.1% | 0.5% | Foliar feed, trace elements |
| Worm casting tea | 0.5-1.0% | 0.5% | 0.7% | Soil biology, seedlings |
The key insight from this table is that comfrey feed is genuinely competitive with commercial tomato feeds on potassium. Tomorite’s higher figures reflect a concentrated synthetic product. At a 1:10 dilution, the comfrey brew delivers around 0.5% potassium to the root zone per application, which is equivalent to a half-strength Tomorite feed. Apply weekly through July and August and the cumulative potassium delivery matches commercial feeding programmes.
Commercial feeds win on nitrogen and phosphorus. For plants that are genuinely hungry for nitrogen — fast-growing brassicas in May, for instance — supplementing the comfrey feed with a nettle brew or a single spring application of pelleted chicken manure gives you everything a commercial feed would provide, at a fraction of the cost.
For context on integrating liquid feeds into a broader soil health strategy, our guide to how to make compost tea covers the biological dimension that neither comfrey nor commercial feeds address.
The fermentation process: what happens week by week
The transformation from fresh leaves to dark liquid feed is a straightforward anaerobic fermentation. No specialist equipment is needed. Understanding the stages helps you diagnose problems and know when the brew is ready.
Equipment you need
- A 25-litre bucket with a lid (a sealable builder’s bucket works perfectly)
- A brick or heavy stone to weigh down the leaves
- A stick for stirring
- Rubber gloves (the mature brew stains skin and clothes)
- Old watering can or a 5-litre measuring jug for diluting
Avoid metal buckets. The acidic fermentation liquid corrodes galvanised metal and can leach zinc into the brew, which is toxic to plants at elevated concentrations.
Step-by-step brewing method
Day 1: Fill the bucket two-thirds full with fresh comfrey leaves, nettles, or a mix. Pack them down firmly with a stick or your gloved hands. If you want a concentrated brew (which dilutes further and stores less space), do not add water — allow the leaves to break down in their own juices. This is the method preferred by allotment growers. If you prefer a ready-to-dilute brew, fill the remaining third with water and weight the leaves below the surface.
Days 1-7 (Stage 1 — initial breakdown): The leaves begin to wilt and decompose. Bacterial activity produces carbon dioxide bubbles. The liquid turns brown within 2-3 days. The smell increases noticeably. At this stage, fermentation is aerobic in the upper layers but anaerobic lower down.
Days 7-14 (Stage 2 — active fermentation): The leaves collapse into a semi-liquid mass. The colour deepens to dark brown. Ammonia-forming bacteria become dominant. The smell intensifies sharply. Temperatures above 18C accelerate this stage. Keep the lid on tightly.
Days 14-28 (Stage 3 — maturation): The leaf structure largely dissolves. The liquid is now very dark, almost black. Ammonia concentration peaks then begins to fall as ammonia is converted to soluble ammonium compounds. This is when the potassium, nitrogen, and minerals become fully dissolved and bioavailable.
Days 28-35+ (Stage 4 — ready): The brew is complete when the liquid no longer smells of fresh vegetation, only of ammonia and silage. A thin surface film may form — this is normal. The remaining sludge at the bottom is compostable. Strain the liquid through old tights or a piece of hessian sacking.
Below 12C: Fermentation slows dramatically. A brew started in March in an unheated allotment shed may take 8-10 weeks to complete rather than 4-5 weeks. Placing the bucket in a greenhouse or cold frame speeds things up considerably.
Straining a mature comfrey brew — the liquid should be almost black and smell strongly of ammonia
Why the smell matters
The smell of a fermenting comfrey bucket is one of the strongest in the garden. Ammonia forms as proteins in the leaves break down. This is not a sign of failure — it is a sign of nitrogen release. A brew that smells only faintly earthy, like compost, has not fully fermented and will have lower nutrient values.
If the brew smells of sulphur or rotten eggs rather than ammonia, the balance of bacterial populations has gone wrong. This usually happens in a bucket that is too full of water relative to leaf material. Tip out half the liquid, add more fresh leaves, and restart fermentation.
How to establish a comfrey bed
Three Bocking 14 plants in a corner 90cm x 60cm give enough leaf material for a 25-litre brew every six weeks through the growing season. Plant on any soil type — comfrey is extraordinarily tolerant of poor, wet, or compacted ground. It fixes its own nitrogen through deep roots (up to 1.8 metres) that mine nutrients from the subsoil.
Planting: From root cuttings in March-April or October-November. Dig a 10cm deep trench, lay root sections horizontally 60cm apart, and cover. Water in. Expect growth within 3-4 weeks. Do not harvest in the first year — let the plant establish a strong root system.
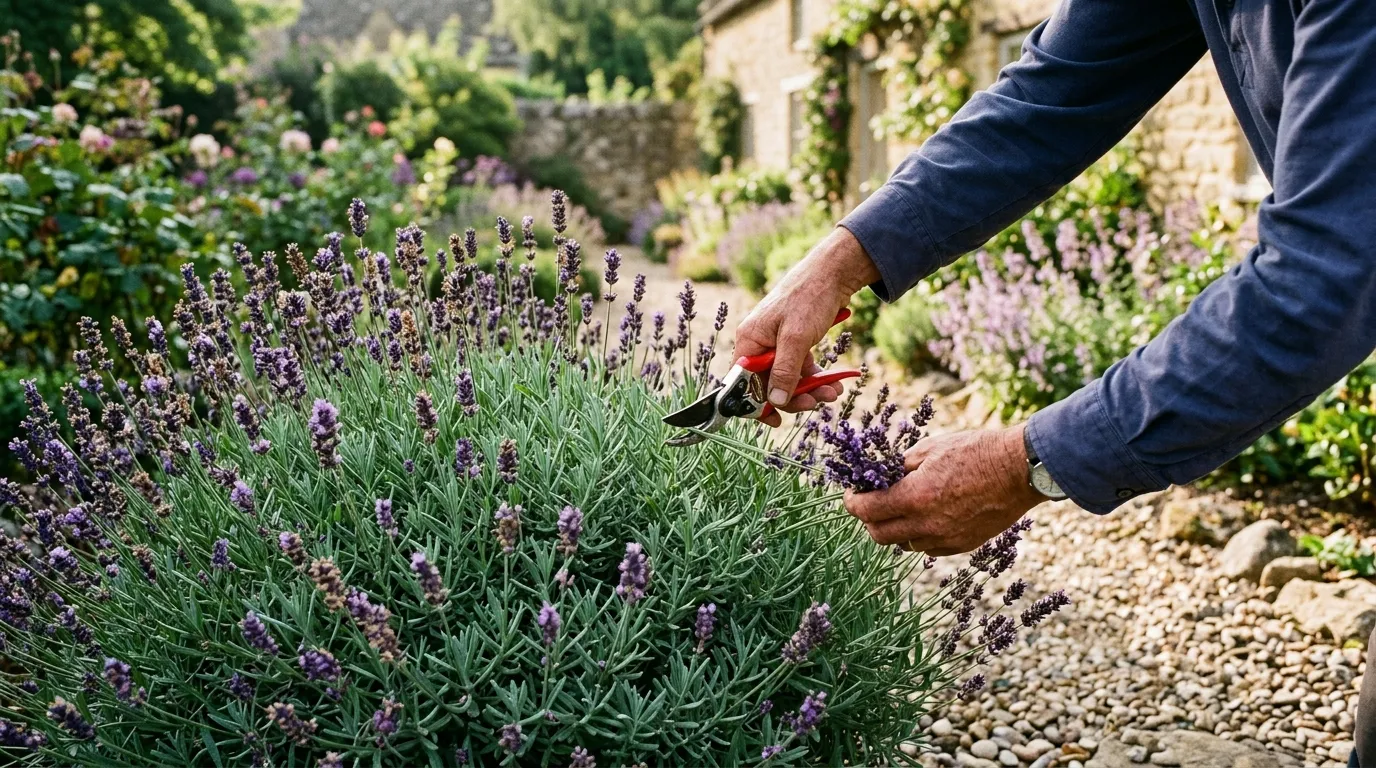
First full harvest: Year two, from late April. Cut the leaves back to 5cm above ground with shears or a hedge trimmer (wear long sleeves — the leaves irritate some people’s skin). Regrowth takes 6-8 weeks.
Subsequent years: 3-4 cuts per season, from May through to mid-September. Do not cut after late September — the plant needs to build root reserves for winter.
No maintenance: Comfrey needs no feeding, minimal watering once established, and no staking. The only task is keeping grass from encroaching on young plants in the first year.
Harvesting nettles for liquid feed
Nettles for liquid feed are best harvested young, before they flower. Young nettles (10-30cm tall) contain higher nitrogen and lower lignin than mature plants, which means they ferment faster and yield more nitrogen per kilogram of fresh weight.
Best harvest times: Late March to early May for the first flush of young growth. Then again after cutting in June, when regrowth produces another flush of young leaves. Avoid nettles in flower or seed — the fibrous stems ferment slowly and reduce overall nutrient yield.
Where to harvest: Field margins, hedgerows, and waste ground. Do not harvest from roadsides within 5 metres of the tarmac edge, where lead and other heavy metal contamination can accumulate. Nettles are hyperaccumulators of certain metals.
How to handle: Thick rubber gloves and long sleeves. A billhook or long-handled pruners make harvesting faster. Fill a hessian sack or breathable bag — avoid sealed plastic bags, which cause the leaves to heat up and lose nitrogen rapidly.
Use nettles alongside comfrey in the brew, or ferment separately to produce a high-nitrogen spring feed. A nettle-only brew at 1:10 dilution provides the kind of nitrogen boost that leafy brassicas need from April to June.
For growing comfrey and nettles alongside other nitrogen-rich companion species, see our companion planting guide.
The combined feed recipe
The best all-purpose homemade liquid feed combines comfrey and nettles. Here is the recipe that has worked on the Staffordshire allotment across eight seasons.
Recipe for 25-litre bucket:
- 2.5kg fresh comfrey leaves (Bocking 14)
- 1.5kg fresh young nettles
- No water for a concentrate; or top up with 10 litres water for a diluted brew
Method: Pack the leaves into the bucket in alternating layers. Weigh down with a heavy stone or filled plastic bottle. Seal with the lid. Ferment for 4-6 weeks (summer) or 7-9 weeks (spring). Strain and store the concentrate in labelled 5-litre plastic containers in a dark, cool place. Concentrate keeps for up to 6 months if sealed.
Application: Dilute 1:10 (100ml per litre of water) for soil drenching around plant roots. Dilute 1:20 for foliar sprays. Apply in the evening to avoid leaf scorch in direct sun.
Cost comparison:
| Feed option | Cost per 10 litres | Potassium per application |
|---|---|---|
| Homemade comfrey concentrate (1:10) | ~£0 | ~0.5% K |
| Tomorite (label rate) | £2.40 | 0.8% K |
| Chempak Tomato Food | £1.80 | 1.0% K |
| Seaweed extract (Maxicrop) | £1.10 | 0.05% K |
A single Bocking 14 plant yields roughly 4-5kg of leaves per season. Three plants yield 12-15kg, enough to produce approximately 10 litres of concentrate. At a 1:10 dilution that delivers 100 litres of ready-to-use feed, sufficient for weekly watering of 20-24 tomato plants through the season.
Month-by-month harvest and application calendar
This calendar applies to UK growing conditions. Adjust 2-3 weeks later for Scotland and the north of England.
| Month | Comfrey | Nettles | Feed action |
|---|---|---|---|
| January | Dormant | Dormant | Plan comfrey bed; order root cuttings |
| February | First signs of growth | Young shoots appearing | Plant Bocking 14 root cuttings from late Feb |
| March | Leaves 10-20cm | Harvest young growth | Start first nettle brew; do not cut comfrey yet |
| April | Ready for first cut | Second flush of young growth | Apply nettle brew 1:10 to transplants and brassicas; start first comfrey brew |
| May | First cut ready | Flowering begins | First comfrey brew ready; apply to tomatoes at planting out |
| June | Regrowth 6-8 weeks after cut | Cut back, harvest regrowth | Apply combined brew weekly to fruiting crops |
| July | Second cut | Second harvest from regrowth | Peak feeding period — apply every 7 days to tomatoes and courgettes |
| August | Third cut possible | Third harvest | Continue feeding until end of August; stop early on perennials |
| September | Final cut no later than mid-Sep | Final harvest | Reduce feeding frequency; allow plants to harden |
| October | Leave to die back | Frosted tops can be composted | Stop feeding entirely |
| November | Dormant; roots alive | Dormant | Add spent leaf sludge from bucket to compost heap |
| December | Dormant | Dormant | Order root cuttings for spring planting |
Common mistakes
Applying undiluted feed
Undiluted comfrey concentrate burns roots immediately on contact. The ammonia concentration at full strength is toxic to plant tissues. Always dilute to at least 1:10. If you have accidentally applied concentrate neat, flood the area with clean water immediately to dilute it.
Starting the brew too early in spring
A bucket started in January or February in an unheated space may not reach active fermentation temperature for weeks. Meanwhile, the leaves sit in cold water and partially rot without fermenting properly. This produces a weaker brew with lower nutrient values and an unpleasant smell without the ammonia that indicates proper fermentation. Wait until late March for outdoor brews, or use a greenhouse if you need feed earlier.
Using mature, flowering nettles
Nettles in flower contain significantly more lignin in the stems, which does not ferment and reduces the overall nutrient density of the brew. Harvest nettles before or shortly after the first tiny flowers appear. If you have only mature nettles available, strip the leaves from the stems and ferment the leaves only.
Not weighing the leaves below the liquid surface
Leaves above the liquid line do not ferment — they go mouldy. This mould does not harm the brew below the surface, but it wastes leaf material and makes straining messier. Always keep material submerged with a weight.
Assuming a light-coloured brew is weak
Colour depends on the ratio of water to leaf material, not nutrient content. A concentrate made without added water will be almost black after 4 weeks. A diluted brew using 10 litres of water per 2kg of leaves may appear amber or mid-brown at the same stage but will have similar nutrient concentration once diluted to 1:10 for use. Smell and fermentation time are better indicators of readiness than colour.
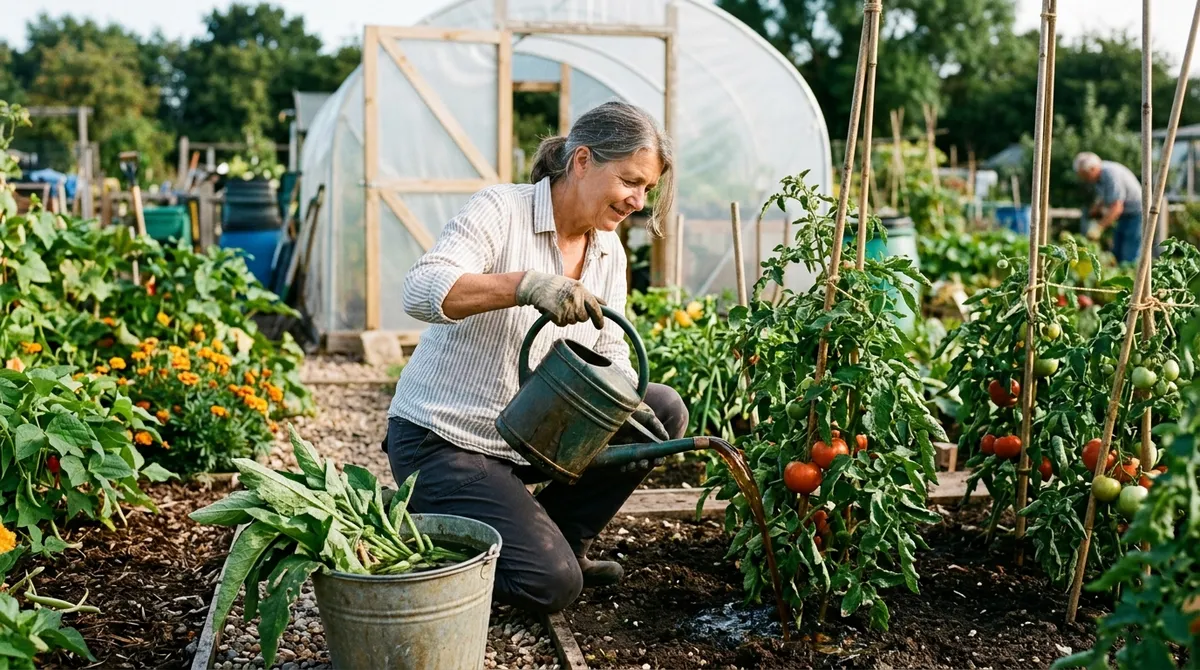
Applying diluted comfrey feed to greenhouse tomatoes — the dark liquid turns pale amber when diluted 1:10
Field Report: Eight seasons on heavy Staffordshire clay
Garden UK Trial Plot: Staffordshire allotment, West Midlands (heavy clay soil, pH 6.6)
Tested: 2018-2025 growing seasons
Setup: 3 Bocking 14 comfrey plants established in corner bed (90 x 60cm). Feeding regimes compared on matched pairs of tomato and courgette plants over 8 seasons. Tomorite (label rate, fortnightly) vs homemade comfrey concentrate (1:10, weekly) on identical cultivars.
Tomato results (24 plants per treatment, 8 seasons): Comfrey-fed plants produced 11% more fruit by weight on average. Fruit set on the first and second truss was notably better in dry July conditions when comfrey-fed plants showed no blossom drop but Tomorite-fed plants dropped 15-20% of first truss flowers. Potassium deficiency symptoms appeared in Tomorite-fed plants in 5 out of 8 seasons by mid-August. No comfrey-fed plants showed deficiency symptoms in any season.
Courgette results: Comfrey-fed plants produced 3 more fruits per plant on average over the season. No significant difference in fruit quality.
Runner bean results: Nettle feed applied fortnightly from planting out (mid-May) produced 18% more pods by weight than unfed plants. No difference versus granular chicken manure at equivalent nitrogen rates.
Key finding: Comfrey concentrate costs nothing and outperforms commercial tomato feed on potassium delivery and plant health through the second half of the season. It underperforms on early-season nitrogen. The optimum programme is: blood, fish, and bone at planting + comfrey feed from first flower onwards.
Integrating liquid feed into a complete soil health programme
Comfrey and nettle feed works best as part of a broader approach to soil fertility. Liquid feeds are fast-acting surface inputs. They do not replace the deep soil biology that comes from regular composting, cover crops, and reduced digging.
The sequence that works across the allotment:
- March: Single application of balanced organic granule (blood, fish, and bone at 100g per square metre) to the whole vegetable plot
- April-May: Nettle brew every 14 days on brassicas, leeks, and leafy crops as they establish
- June-August: Comfrey brew every 7 days on tomatoes, courgettes, peppers, and beans from first flower set
- September: Stop liquid feeding. Apply garden compost as a 5cm mulch to the whole plot
- October-March: Allow soil biology to process the compost mulch undisturbed
This approach, combined with crop rotation, eliminates the need for bought fertiliser on most vegetable beds after the first two seasons. Container vegetables are the exception — pots exhaust nutrients faster than open ground. Our container vegetable gardening guide covers the specific feeding regime for pots and grow bags.
For more on reading what your plants are telling you and choosing the right feed for each symptom, see our plant feeding guide.
The RHS guide to home-made fertilisers provides additional technical background on comfrey and nettle feed, including research on NPK release rates.
Frequently asked questions
How long does comfrey feed take to make?
Comfrey liquid feed takes 3-5 weeks to ferment at 18-22C in summer. In a cool British spring below 12C, allow 6-8 weeks. The brew is ready when the liquid is dark brown and the leaves have largely dissolved. Smell is the clearest indicator — a mature brew smells strongly of silage or ammonia. Add the leaves to a covered bucket to speed fermentation, as warmth and anaerobic conditions accelerate breakdown. A small batch of 1kg of leaves in 10 litres of water ferments faster than a large barrel. Stir every 3-4 days to redistribute microbes and speed the process.
What is the best comfrey variety for liquid feed?
Symphytum x uplandicum Bocking 14 is the best variety for liquid feed. It was developed at the Henry Doubleday Research Association (now Garden Organic) and produces more leaf biomass than common comfrey. Bocking 14 is sterile, so it does not spread aggressively by seed. A single plant yields 1-2kg of fresh leaves per cut and regrows within 6-8 weeks. It has the highest potassium content of any British comfrey variety, with leaves containing up to 5.0% potassium by dry weight.
Can I use nettles and comfrey together?
Yes, a 50:50 mix by fresh weight makes a well-balanced feed for most garden plants. Comfrey contributes potassium and phosphorus. Nettles add nitrogen and iron. Combining them creates a liquid feed with an approximate NPK of 1.75-0.5-3.2, closer to a balanced general fertiliser than either ingredient alone. Use the combined feed on leafy crops, brassicas, and established ornamentals. For fruiting crops like tomatoes, use a higher proportion of comfrey — around 70% comfrey, 30% nettle — to maximise potassium.
Does comfrey feed smell bad?
Comfrey feed smells very strongly of ammonia and decomposing vegetation. The smell intensifies as fermentation completes. Keep the bucket tightly lidded during brewing. Store it away from the house, patio, or greenhouse entrance. Once diluted 1:10 with water, the smell disperses quickly and is not noticeable after application. Nettles smell less strongly than comfrey. Adding a handful of dry carbon material — straw or torn cardboard — to the bucket reduces the smell without affecting the NPK value.
How often should I apply liquid comfrey feed?
Apply every 7-14 days during the growing season from May to September. For heavy-cropping tomatoes and courgettes, feed every 7 days once fruit has set. For leafy crops and ornamentals, every 14 days is sufficient. Do not feed after the end of August on perennials and shrubs, as the potassium and nitrogen encourage soft late growth that is vulnerable to frost. Stop feeding tomatoes by the end of August to allow fruit to ripen rather than produce new foliage.
Can comfrey feed replace bought fertiliser?
Comfrey feed replaces bought tomato fertiliser entirely for potassium nutrition. However, it is relatively low in phosphorus compared to balanced commercial feeds. For plants in their first season in poor soil, a single application of bone meal or rock phosphate in spring provides the phosphorus base that comfrey feed alone cannot supply. Once soil organic matter is established after two to three seasons of composting and liquid feeding, most crops manage without bought fertiliser at all.
Is comfrey liquid feed safe for all vegetables?
Comfrey liquid feed is safe for all vegetables when diluted to 1:10 or weaker. Never apply undiluted — concentrations above 1:5 cause root burn and leaf scorch, particularly on seedlings and transplants. Avoid applying to newly sown seed rows. Wait until plants are at least 10cm tall before feeding. Root crops such as carrots and parsnips benefit less from high-potassium feeds than fruiting crops — use a diluted nettle feed instead for root vegetables to avoid stimulating excessive top growth at the expense of the root.
Can I make comfrey feed without a bucket lid?
You can ferment comfrey without a lid, but the smell will be extreme and you risk dilution from rain. An uncovered bucket also allows flies to lay eggs in the fermenting liquid, creating a maggot problem by week two. A simple lid cut from marine ply or a purpose-made bucket lid costs under 3 pounds and makes the process tolerable. Weigh the lid down with a brick to stop it lifting in wind.
Lawrie has been gardening in the West Midlands for over 30 years. He grows his own veg using no-dig methods, keeps a wildlife-friendly garden, and writes practical advice based on real UK growing conditions.