How to Grow Microgreens UK: Beginners
Grow microgreens at home in the UK. Best varieties, growing method, harvesting times and nutrition data from 4 years of indoor growing trials.
Key takeaways
- Microgreens are ready to harvest in 7-21 days depending on variety — faster than any other crop
- Startup cost is under 10 pounds: seed trays, compost and a packet of seeds
- Pea shoots, radish, sunflower and broccoli are the four easiest varieties for beginners
- Grow year-round on a windowsill at 15-22C with no garden space needed
- Microgreens contain 4-40 times more nutrients than mature plants according to USDA research
Microgreens are the fastest crop you can grow. Seed to plate in as little as 7 days, on a windowsill, with no garden and no experience needed. A 10-pound investment in trays, compost and seeds produces fresh greens every week of the year.
These are not sprouts. Microgreens are young seedlings harvested after the first true leaves appear, typically 3-8cm tall. They have concentrated flavour and, according to USDA research, 4-40 times more nutrients per gram than the mature plant.
After 4 years of growing 20+ varieties on a kitchen windowsill and in an unheated greenhouse, I have narrowed down the best varieties for UK conditions and the method that produces consistent results with minimal effort.
The best microgreens for UK beginners
Start with these four varieties. They germinate reliably, grow fast and taste good enough to convert anyone who thinks microgreens are a gimmick.
Pea shoots
The single best starter microgreen. Soak dried marrowfat peas (from the supermarket, 50p per bag) for 12 hours, spread on compost, and harvest in 10-14 days. Sweet, crunchy and familiar. Pea shoots are the only common microgreen that regrows after cutting, giving a second harvest 7-10 days later.
Key tip: Use dried marrowfat peas, not garden pea seed. They cost a fraction of the price and germinate just as well.
Radish
The fastest microgreen at 7-10 days from sowing. Spicy, peppery flavour that livens up sandwiches and salads. Any radish variety works, but China Rose and Red Rambo produce the most colourful stems.
Key tip: Do not soak radish seeds. They germinate in 24 hours without soaking and are prone to rotting if too wet.
Sunflower
Large seeds produce thick, crunchy stems with a nutty flavour. Harvest at 8-12 days when the first true leaves appear. Sunflower microgreens have more substance than most varieties and work as a salad base rather than just a garnish.
Key tip: Soak seeds for 8-12 hours before sowing. Remove any unsprouted seeds after 3 days to prevent mould.
Broccoli
Mild, slightly peppery flavour. Ready in 10-14 days. Broccoli microgreens are the nutritional powerhouse of the group, containing high levels of sulforaphane, a compound linked to anti-inflammatory benefits.
Key tip: Broccoli seeds are tiny. Sow densely (seeds almost touching) for a thick, harvestable mat of greens.
| Variety | Soak | Days to harvest | Flavour | Regrows | Difficulty |
|---|---|---|---|---|---|
| Pea shoots | Yes (12 hours) | 10-14 | Sweet, fresh | Yes (once) | Very easy |
| Radish | No | 7-10 | Spicy, peppery | No | Very easy |
| Sunflower | Yes (8-12 hours) | 8-12 | Nutty, crunchy | No | Easy |
| Broccoli | No | 10-14 | Mild, peppery | No | Easy |
| Mustard | No | 8-12 | Hot, wasabi-like | No | Easy |
| Beetroot | Yes (8 hours) | 14-21 | Earthy, sweet | No | Moderate |
| Basil | No | 14-21 | Aromatic, sweet | No | Moderate |
| Coriander | Yes (12 hours) | 14-21 | Fresh, citrus | No | Moderate |
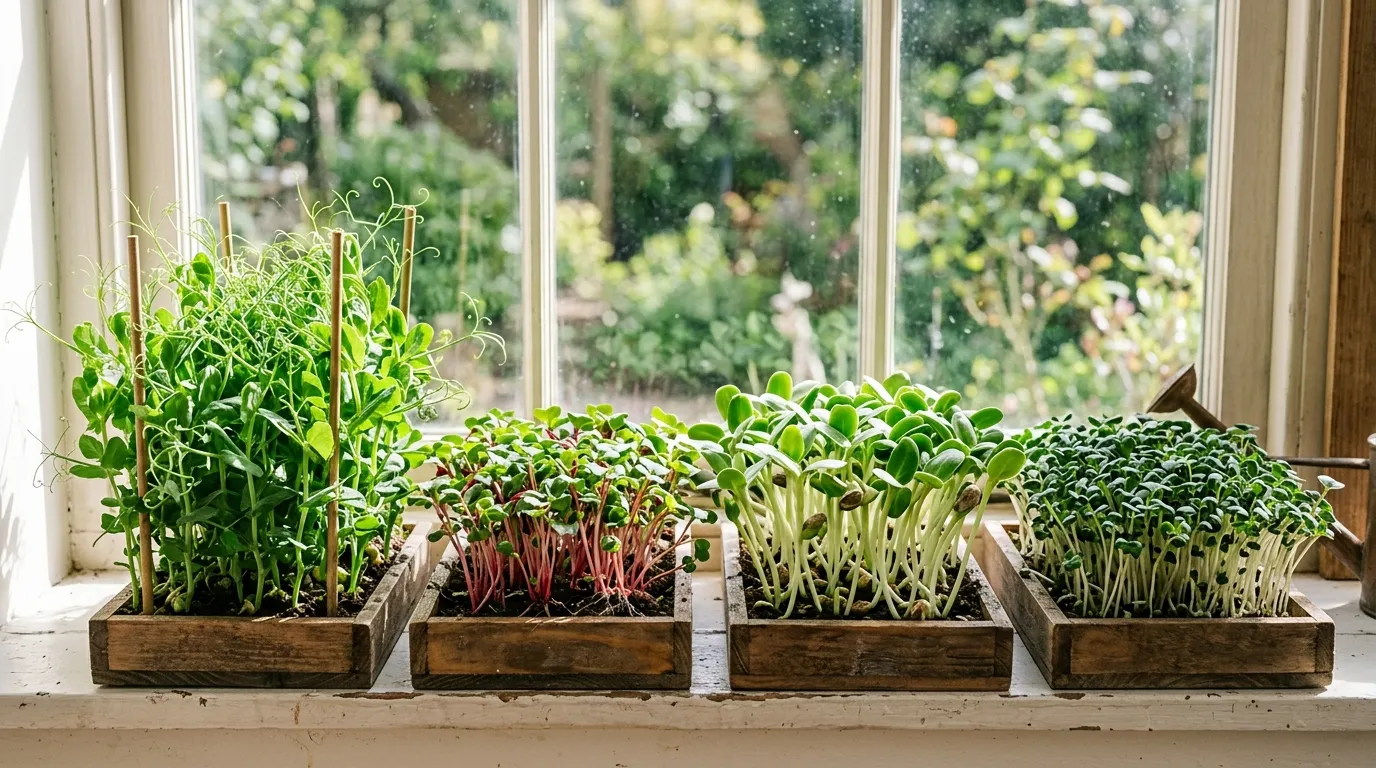
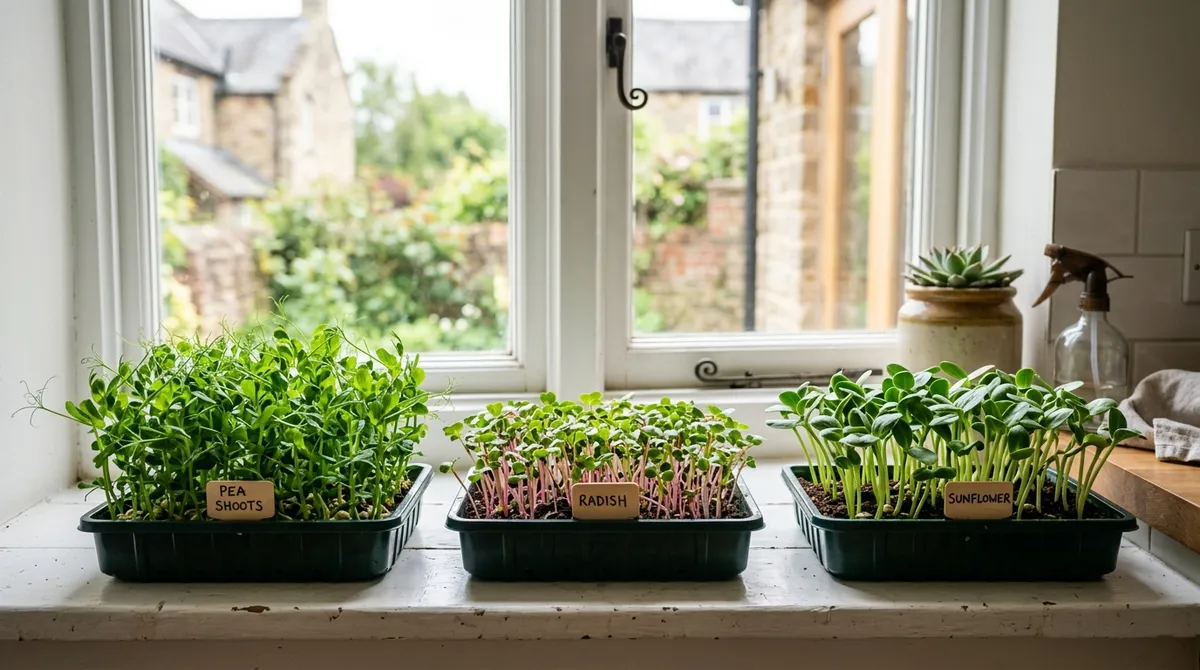
Four microgreen varieties at harvest stage: pea shoots, radish, sunflower and broccoli. Each tray was sown on a different day to stagger the harvest.
What you need to get started
The equipment list is short and cheap. You probably have most of it already.
Seed trays: Standard 20cm x 15cm seed trays with drainage holes. Mushroom punnets, takeaway containers (with holes punched in the base) and even baking trays all work. Depth of 3-5cm is enough.
Growing medium: Multipurpose compost (peat-free works well), coco coir or purpose-made microgreen mats. Compost produces the sturdiest greens. Coco coir is cleaner for kitchen use. Mats are the most convenient but cost more per tray.
Seeds: Buy microgreen seed mixes or individual varieties from seed suppliers. Supermarket dried peas and lentils work for those specific varieties. A 100g packet of microgreen seed costs 2-4 pounds and sows 10-15 trays.
Light: A bright windowsill providing 4-6 hours of light per day. South or east-facing is best. In winter (November to February), a basic LED grow light panel (15-20 pounds) compensates for the low daylight hours.
Temperature: 15-22C is the ideal range. A heated kitchen is perfect year-round. An unheated greenhouse works from April to October.
| Item | Cost | Lasts |
|---|---|---|
| 5 seed trays | 3-5 pounds | 10+ sowings each |
| Multipurpose compost (10L) | 3-4 pounds | 20+ trays |
| Seed packet (100g) | 2-4 pounds | 10-15 trays |
| LED grow light (optional) | 15-20 pounds | Years |
| Total startup | 8-13 pounds | — |
Step-by-step growing method
This is the method I use for all varieties. It works on compost, coco coir and growing mats.
Day 0 — Sow:
- Fill the tray to 2-3cm depth with damp compost (not soaking wet)
- Level and lightly press the surface
- Scatter seeds densely — aim for seeds almost touching but not piled on top of each other
- Press seeds gently into the surface. Do not cover with compost (microgreens need light to grow)
- Mist with a spray bottle until evenly damp
- Cover with a second tray or cling film to create a dark, humid environment
Days 1-3 — Germination (blackout phase): Keep covered in a warm spot (18-22C). Check daily and mist if the surface looks dry. Seeds should germinate within 1-3 days depending on variety.
Days 3-5 — Uncover: Once seeds have sprouted and reached 1-2cm tall, remove the cover. Move to a bright windowsill. The pale yellow seedlings will green up within 24-48 hours once exposed to light.
Days 5 to harvest — Grow on: Keep the compost damp but not waterlogged. Water from below (pour water into the saucer and let it wick up) to avoid disturbing seedlings and reduce mould risk. Turn the tray 180 degrees every 2 days so stems grow straight rather than leaning toward the light.
Harvest: Cut with clean scissors just above the compost surface when the first true leaves appear. This is typically 3-8cm tall depending on variety. Harvest in the morning for the crispest texture.
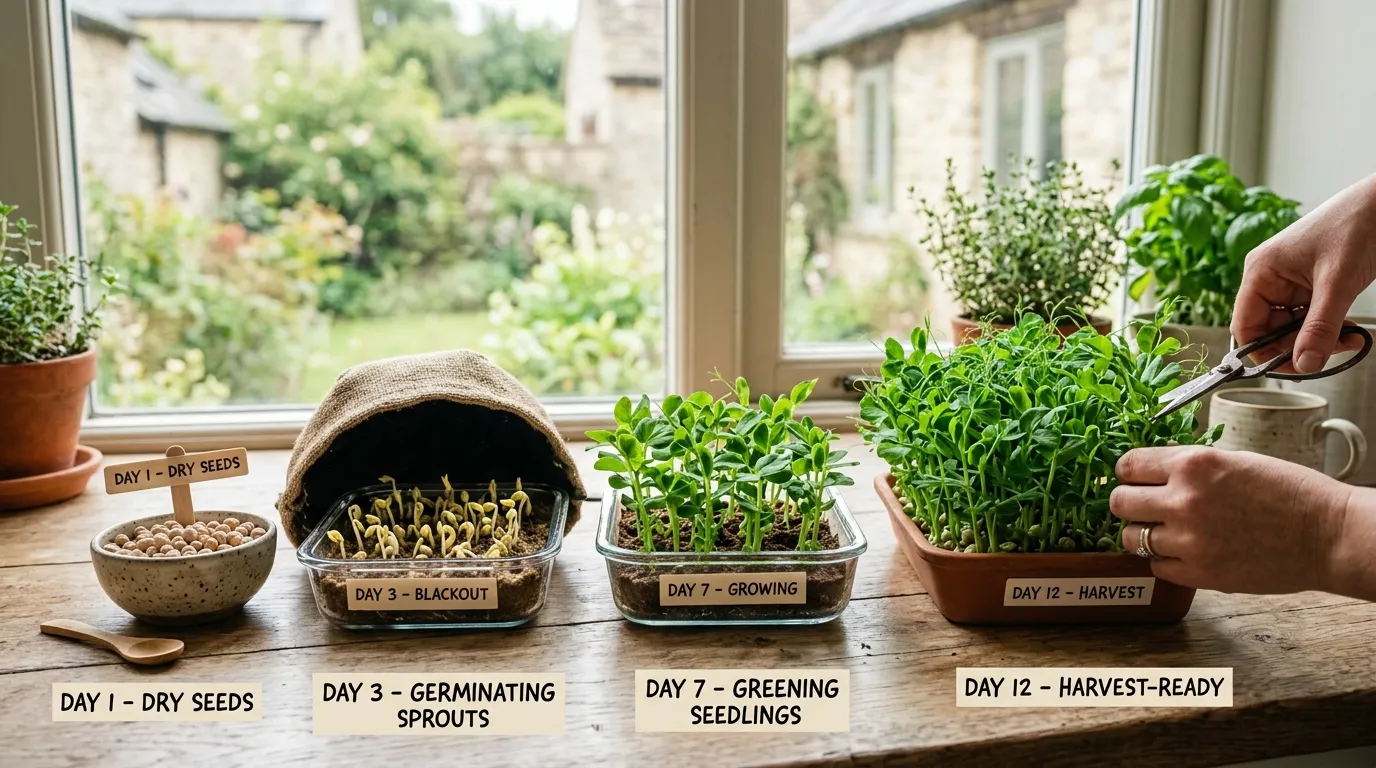
The microgreen growing process: dry seeds, day 3 germination under blackout, day 7 greening on the windowsill, day 12 pea shoots ready to cut.
Setting up a continuous supply
The key to year-round microgreens is staggered sowing. Instead of sowing one large batch, sow a new tray every 3-5 days. This means you always have trays at different stages of growth, with one reaching harvest every few days.
My rotation: Six trays, one sown every 3 days. By the time the sixth tray is sown, the first is ready to harvest and the empty tray goes back into rotation. This produces enough fresh microgreens for daily use with about 5 minutes of work per day.
Space needed: Six standard seed trays fit on a 60cm windowsill. That is the entire growing operation.
Seasonal adjustment: In summer (May to September), growth is faster and a 3-day sowing interval works well. In winter (November to February), growth slows and a 5-day interval is better unless you use supplementary lighting.
Troubleshooting common problems
Mould (white fuzzy growth): The most common problem. Caused by poor air circulation, overwatering or sowing too densely. Fix: improve ventilation (remove covers earlier, use a small fan), water from below only, reduce seed density slightly. A light misting of diluted hydrogen peroxide (3%, available from chemists) kills mould without harming seedlings.
Leggy, pale stems: Insufficient light. Move to a brighter position or add a grow light. Leggy microgreens are still edible but lack the compact, crunchy texture of well-lit greens.
Seeds not germinating: Too cold (below 12C) or seeds too old. Check the temperature and use fresh seed. Some varieties (beetroot, coriander) need soaking before sowing to soften their hard seed coat.
Uneven growth: Uneven watering or uneven light. Water consistently and rotate the tray regularly. Level the compost surface before sowing to prevent seeds pooling in low spots.
Sour smell: Overwatering has caused anaerobic conditions. Tip out any standing water, improve drainage and increase air flow. If severe, compost the tray and start fresh.
Microgreens versus sprouts
Microgreens and sprouts are different crops grown in different ways. Sprouts are germinated seeds eaten whole (root, seed and shoot) after 2-5 days in water. Microgreens are grown in soil or a growing medium and harvested as young plants after the first leaves develop.
The food safety difference matters. Sprouts are grown in warm, wet conditions with no soil, which creates an ideal environment for bacteria including E. coli and Salmonella. Microgreens grown in compost with good air circulation have a much lower food safety risk.
Nutritionally, microgreens have the edge. The USDA study that analysed 25 microgreen varieties found higher concentrations of vitamins C, E and K compared with both sprouts and mature plants.
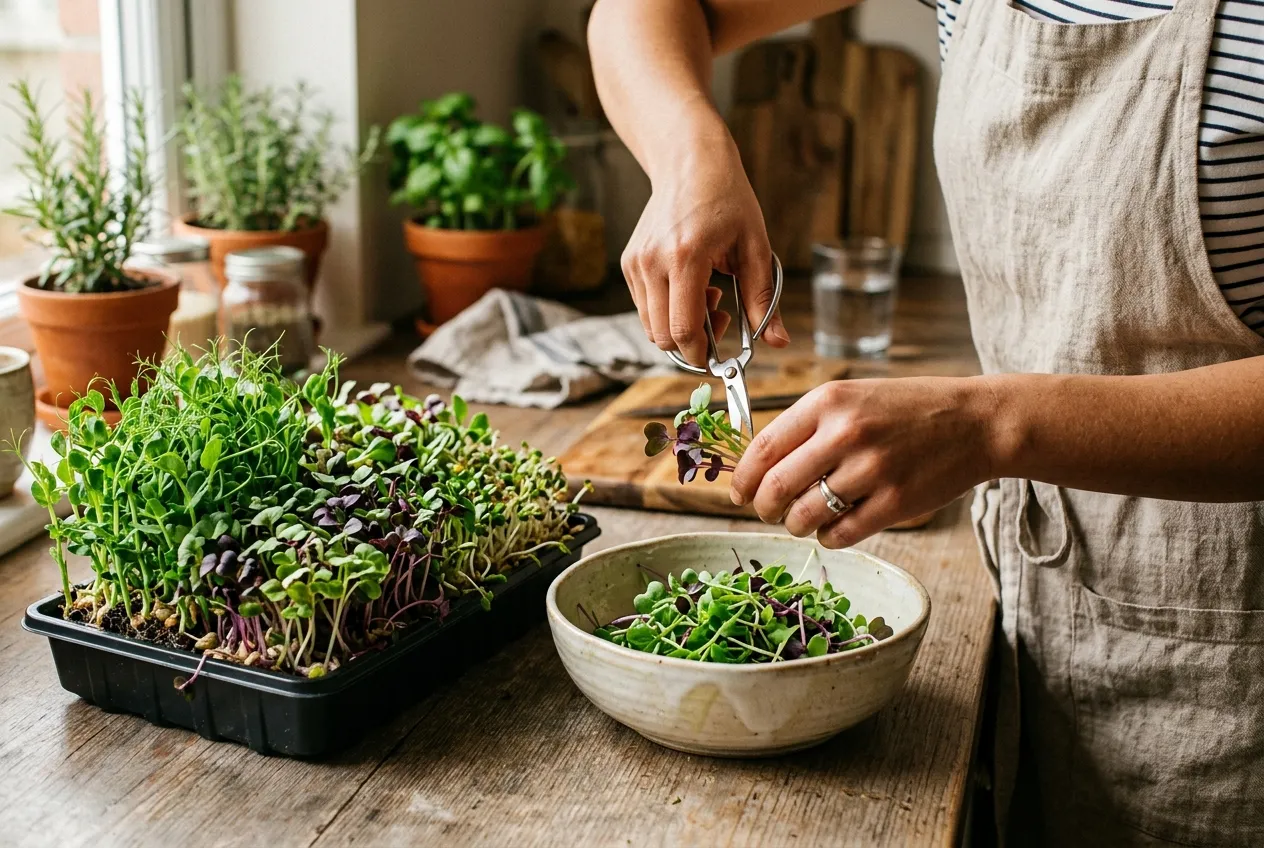
Harvesting pea shoot microgreens with clean scissors. Cut just above the compost surface when the first true leaves have fully opened.
Using microgreens in the kitchen
Microgreens are best eaten raw. Heat destroys the delicate texture and reduces the nutritional value. Add them to finished dishes rather than cooking them.
Best uses:
- Scattered over salads for flavour and texture
- On top of soups, stir-fries and curries just before serving
- In sandwiches and wraps as a peppery alternative to lettuce
- Mixed into smoothies (sunflower and pea shoots work best)
- As a garnish on any plate where you want colour and freshness
Storage: Harvest and eat immediately for the best flavour. If you need to store them, wrap loosely in damp kitchen paper inside a sealed container in the fridge. They keep for 3-5 days but lose crunch after day two.
Growing microgreens with children
Microgreens are one of the best gardening projects for children. The seeds are large enough for small hands, results appear within days (keeping attention spans engaged) and the harvest is something they actually want to eat.
Pea shoots and sunflower microgreens are the best choices for children. Large seeds are easy to handle, germination is visible within 48 hours and the harvest is substantial enough to feel like a real achievement.
Use clear containers (glass jars on their side, or clear plastic boxes) so children can watch the roots develop. Label each tray with the sowing date and variety for a simple science project.
Related reading
- How to grow lettuce UK
- Greenhouse growing calendar UK
- How to start a vegetable garden UK
- Gardening with children UK
- How to grow herbs UK
Lawrie has been gardening in the West Midlands for over 30 years. He grows his own veg using no-dig methods, keeps a wildlife-friendly garden, and writes practical advice based on real UK growing conditions.