How to Write a Planting Plan: A UK Step-by-Step
Write a UK planting plan like a pro. Layer methodology, drift sizes, plant-spacing rules, and how to translate a sketch into an ordered buying list.
Key takeaways
- A planting plan has four layers: structural (15-20%), middle (40-50%), filler (25-30%), ground cover (10-15%)
- Drifts use odd numbers: 3, 5, 7, 9, 11 - even numbers look unnatural
- Plant spacing equals 2/3 of the mature plant spread
- Structural plants go first - they create the year-round bones of the planting
- Repeat plants through the border for visual rhythm - the same plant in 3 places
- A 5m by 2m border typically needs 30-50 plants in total
- Always include 30% evergreens for winter structure
Most UK borders fail because the gardener bought plants before planning what to do with them. A trip to the garden centre, a few impulse buys, plant where there’s space, repeat. Within three years the result is a tangle of mismatched heights, gappy seasons, and plants that look fine alone but wrong together.
A planting plan fixes this by forcing the design decisions to happen before the plants arrive. It is not architecture - it is choreography. Where each plant goes, why it goes there, and what it does for the border across all four seasons. This guide is the methodology I learned from studying SGLD member gardens, the Beth Chatto plant lists, and Piet Oudolf’s published plans, then tested across three of my own borders.
For broader context on UK garden design, our garden design principles guide covers the layout-and-structure side of the discipline.
What a planting plan is for
A planting plan answers six questions before a single plant is bought.
- What does the border do? Year-round structure, summer colour, evening scent, wildlife support, screening. Most borders try to do too much. Pick two or three primary roles.
- What goes where? The position of every plant relative to others, with mature spread accounted for.
- How many of each? Quantities calculated from spacing and bed area.
- What flowers when? Bloom times distributed across spring, summer, autumn (and winter where possible).
- What looks good with what? Colour palette, leaf texture, scale relationships.
- What if it fails? A clear plan for replacement plants and adjustments after year 1.
A border without these answers is a shopping list. A border with these answers is a designed planting.
The brief: deciding what the border is for
Before any drawing happens, write the brief. Five questions, five sentences each.
1. The role. What is this border for? Summer colour? Year-round screen? Wildlife support? Evening scent? Cut flowers?
2. The audience. Who sees it most? From a kitchen window? While walking the dog? When entertaining in the garden?
3. The constraints. What aspect (north, south, east, west)? What soil (clay, sand, chalk)? What moisture (dry, average, damp, boggy)? Existing trees or features?
4. The maintenance level. How many hours per year are you willing to spend? Low (cut once a year, mulch, leave alone) or high (deadhead, stake, divide)?
5. The constraints you cannot change. Existing established plants, trees, buildings, paths, services running underground, sun and shade patterns through the year.
Write each answer down. The brief is the reference for every later decision. When tempted by an off-brief plant at the nursery, the written brief is what stops the impulse buy.
For more on garden brief and the design process, our working with a garden designer process UK guide covers what professional designers do at this stage.
The site survey: knowing what you are working with
The second pre-planning step. Five things to record.
1. Aspect. Stand in the border at midday in summer. Where is the sun? How long does the bed get direct sunlight? Mark sun-hours on the plan: <2 hrs is deep shade, 2-4 is partial shade, 4-6 is light shade, 6+ is full sun.
2. Soil type. Test in three places along the border. Take a small handful of moist soil and squeeze. Heavy clay holds a tight ball. Loam crumbles easily. Sand falls through your fingers. Dig a 30cm hole - is it dark and friable, or pale and stony, or sticky and impervious?
3. Soil moisture. Same dig. After 24 hours of rain, is the bed wet or dry? Some borders are dry shade (under trees) - the hardest condition. Others are damp shade (north-facing under deciduous canopy) - one of the most rewarding conditions.
4. Soil pH. A £5 test kit shows whether your soil is acid (5-6.5), neutral (6.5-7.5), or alkaline (7.5+). This determines what acid-lovers (rhododendron, camellia, blueberry) will or will not work.
5. Existing plants and features. Map any existing trees, shrubs, or perennials that will stay. Allow for their mature spread - a young birch tree in a border becomes a major shade-caster within a decade. If the border is being cut fresh out of lawn, our guide on how to make a flowerbed in a lawn covers marking and lifting the turf before any planting begins.
For deeper soil testing, see our soil testing pH adjustment UK guide.
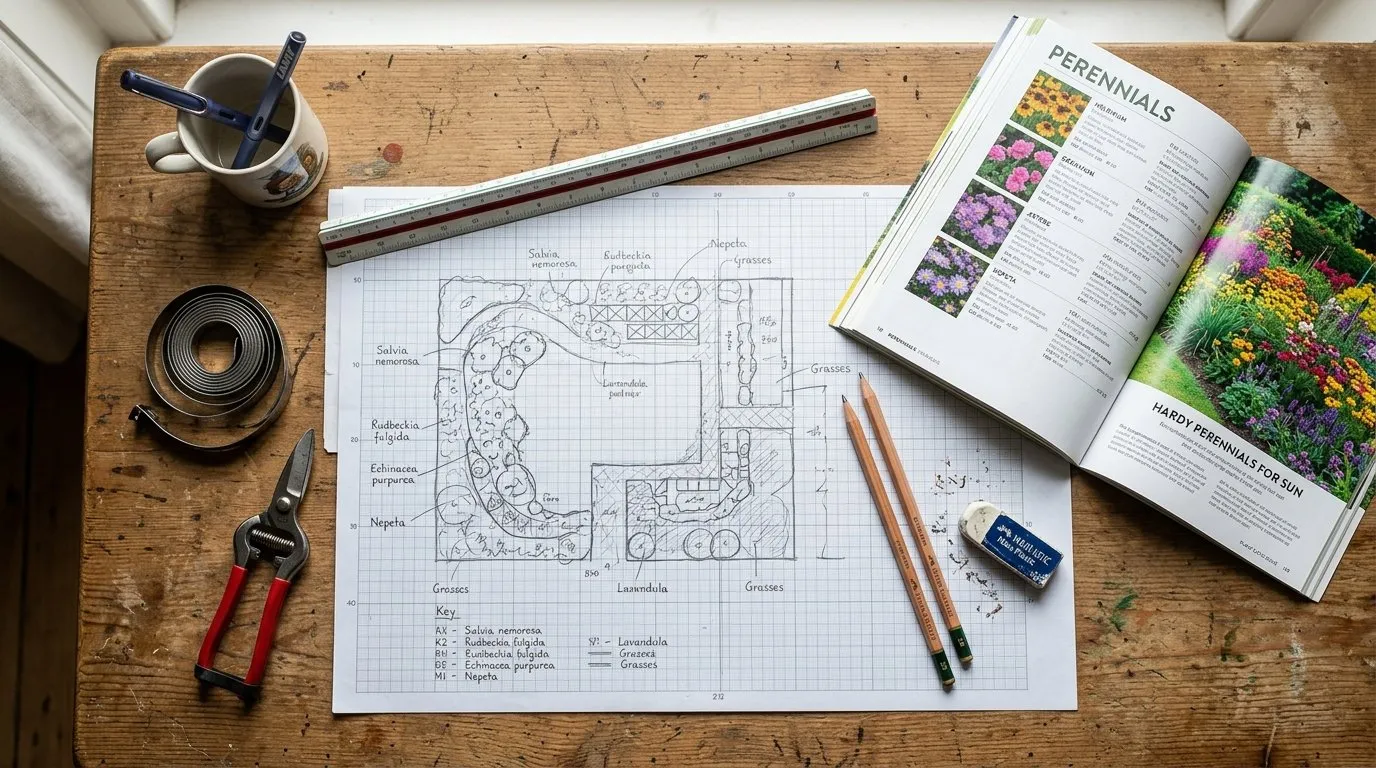 The basic kit for writing a planting plan: graph paper (A3 or A2 ideal), 5mm or 10mm grid, soft pencils, eraser, scale ruler, plant catalogues open to perennials and shrubs. Pen and paper still beats software for the first sketches - the speed of revision is critical at this stage.
The four-layer system
Most UK garden designers work with a four-layer planting structure. Each layer plays a distinct role.
| Layer | Share of plants | Function | Examples |
|---|---|---|---|
| Structural | 15-20% | Year-round bones, evergreen presence | Box, yew, multi-stem birch, holly |
| Middle | 40-50% | Seasonal interest, height variation | Hydrangea, salvia, geranium, eryngium |
| Filler | 25-30% | Long-flowering, weave between others | Astrantia, alchemilla, persicaria, hardy geraniums |
| Ground cover | 10-15% | Suppress weeds, soften edges | Heuchera, lamium, brunnera, ajuga |
A border that has all four layers looks finished from the first day. A border that misses one feels incomplete.
Common failures:
- Too few structural plants → border looks empty in winter
- Too many structural plants → border feels static
- Missing filler layer → gaps between perennials
- Missing ground cover → weeds dominate the front edge
The 30% evergreen rule (across structural and ground cover combined) is the threshold for winter interest. Below that, the border looks bare in January.
Step 1: Place the structural layer
The structural layer goes first. These are the plants that define the border’s year-round shape.
What counts as structural:
- Multi-stem trees (birch, amelanchier, sorbus)
- Architectural shrubs (clipped box, yew, taxus, ilex crenata)
- Strong-form perennials (phormium, kniphofia, eryngium, agave)
- Topiary or shaped evergreens (Cloud-pruned Chamaecyparis, clipped balls)
- Ornamental grasses with strong winter form (Calamagrostis, Stipa gigantea)
Positioning principles:
- One major focal point per 3-5m of border length
- Place focal points 2/3 of the way along the bed (not centred - asymmetry reads as naturalistic)
- Repeat the same form 2-3 times along the border for rhythm
- Vary heights in zigzag (not gradient) for natural movement
Common structural arrangements for a 5m border:
- 3 multi-stem birches at 2m spacing (drift)
- 2 large box balls + 1 multi-stem amelanchier (anchor + accent)
- 5 clipped yew columns (formal repetition)
- 1 large evergreen (laurel, holly) + 2 ornamental grasses
Structural plants are the most expensive in the plan - £30-200 per plant for established specimens. Order from specialist nurseries like Hampton Court Castle Nursery or Architectural Plants.
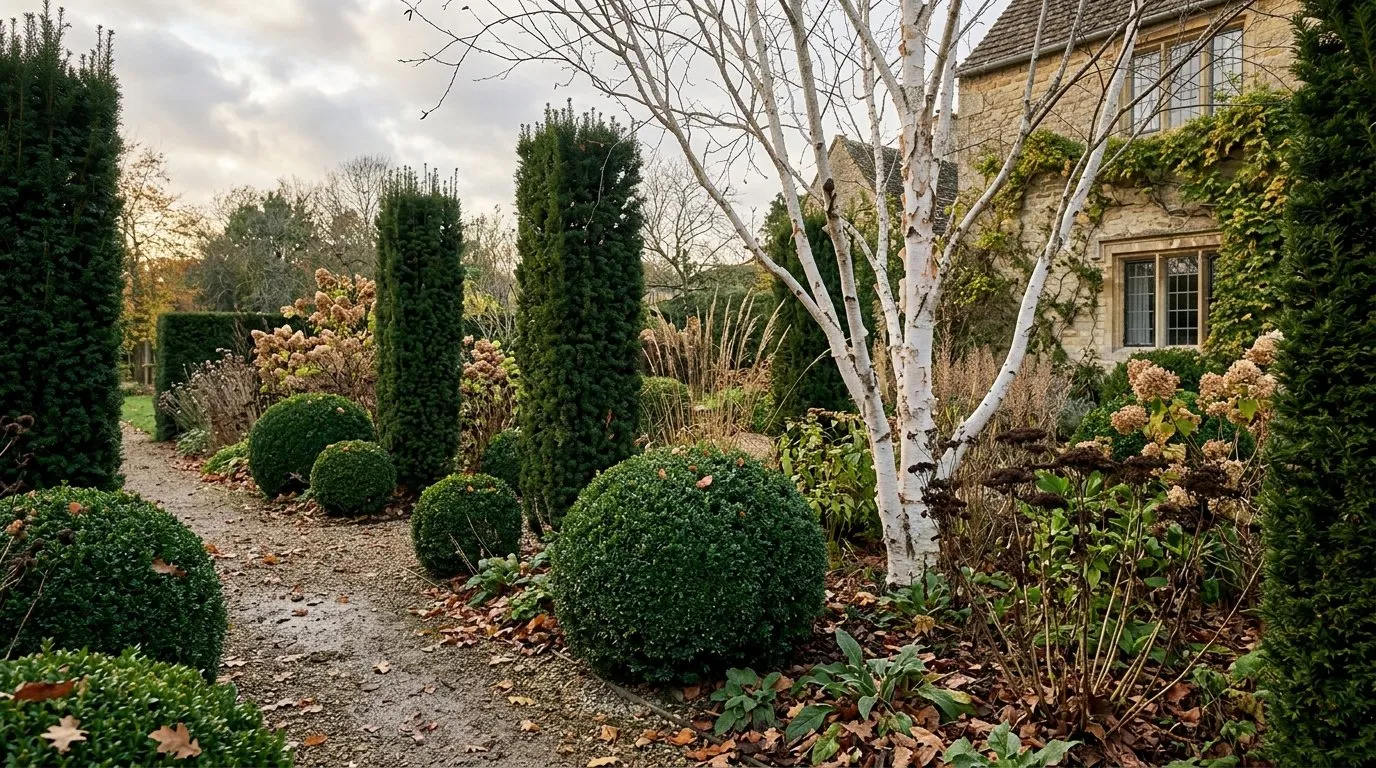 The structural layer creates the bones of the border. Multi-stem birches, clipped box balls, and yew columns provide year-round architecture. Position one major focal point per 3-5 metres of border length and repeat 2-3 times for rhythm. Asymmetry (off-centre positioning) reads as natural; perfect symmetry reads as formal.
Step 2: Build the middle layer
With structure in place, the middle layer fills the bulk of the border. This is where seasonal interest lives.
What goes in the middle layer:
- Mid-height shrubs (hydrangea, philadelphus, deutzia, choisya)
- Tall perennials (echinacea, helenium, eupatorium, persicaria, kniphofia)
- Late-summer grasses (Miscanthus, Panicum, Pennisetum)
- Mid-height seasonal flower plants (delphinium, digitalis, verbascum)
Positioning principles:
- Fill 40-50% of the planting area
- Plant in drifts of odd numbers: 3, 5, 7, 9, 11
- Place taller plants at the back, shorter at the front (with breaks - not strict gradient)
- Repeat the same plant in 3 separate drifts along the border for rhythm
Drift size guidance:
- Drift of 3: small accent or specimen group
- Drift of 5: standard middle-layer drift
- Drift of 7: substantial middle-layer drift
- Drift of 9-11: dominant middle-layer block (used sparingly)
Spacing:
- 1m+ shrubs: spaced at 2/3 of mature spread
- 60cm-1m perennials: 40-50cm centres
- Smaller perennials: 30-40cm centres
Bloom-time mapping:
Distribute bloom times across the seasons. A typical UK middle layer might include:
- Spring: hellebores, brunnera, hardy geraniums (early types)
- Early summer: peonies, bearded iris, alliums (late tulips)
- Midsummer: roses, foxgloves, salvias
- Late summer: phlox, helenium, echinacea
- Autumn: sedum, ornamental grasses, asters
The aim is at least one plant flowering at any point from March to October, with the peak in June-July when most UK borders look their best.
Step 3: Add the filler layer
Filler plants weave through the middle layer, smoothing transitions and providing long flowering periods.
What goes in the filler layer:
- Long-flowering perennials (astrantia, alchemilla, hardy geraniums, persicaria)
- Self-seeding biennials (digitalis, verbascum, lunaria)
- Tall feathery grasses (Stipa tenuissima, Deschampsia)
- Spring and summer bulbs (allium, narcissus, lilium)
Positioning principles:
- 25-30% of planting area
- Plant in larger drifts (7-11) than the middle layer
- Position to thread between structural and middle plantings, softening hard transitions
- Repeat one or two filler species across the entire border for visual continuity
The ‘matrix’ approach:
Piet Oudolf-style matrix planting uses fewer species but in larger quantities. A typical matrix might be:
- 60% Deschampsia cespitosa (grass matrix)
- 20% mixed perennials in drifts (echinacea, eryngium, salvia)
- 20% structural specimens (box balls, multi-stem birch)
Matrix planting works well for naturalistic gardens but requires patience - it looks sparse for the first 2 years.
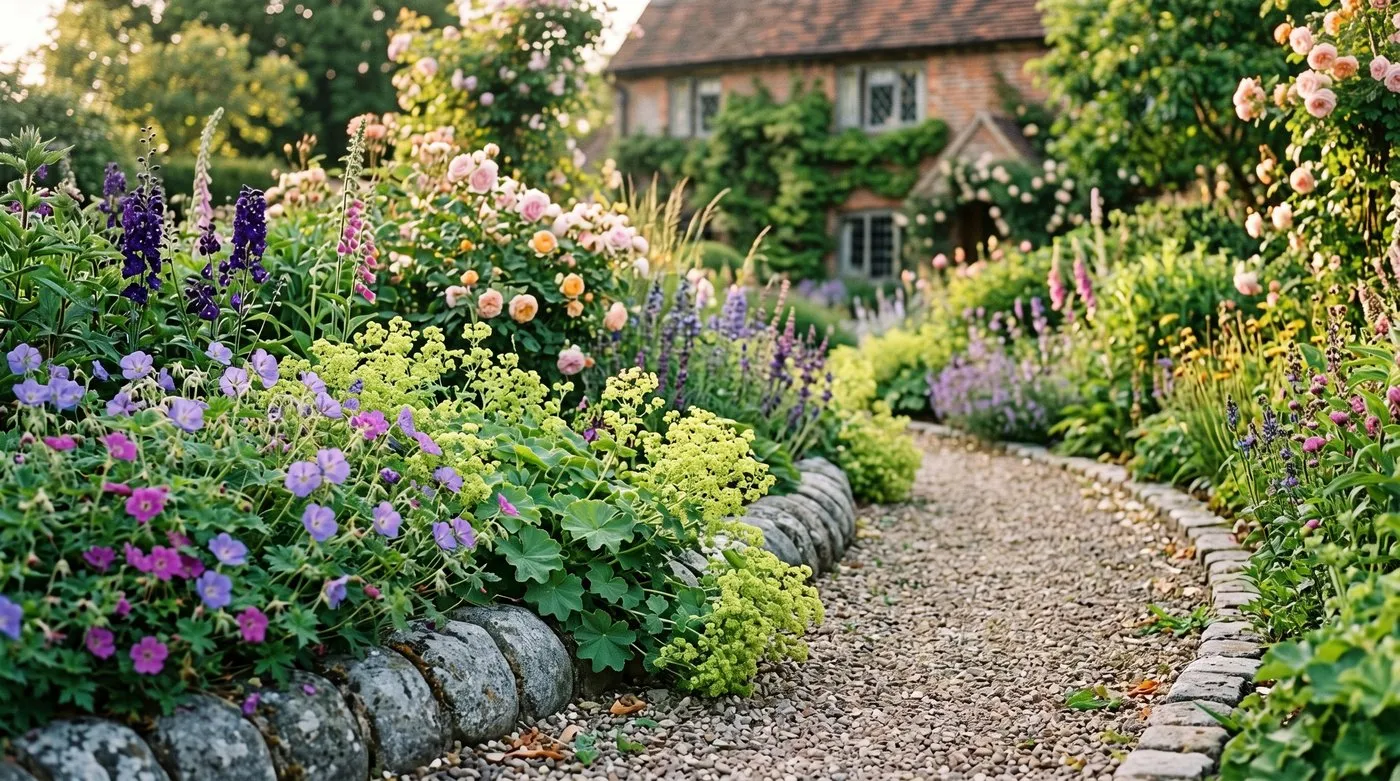
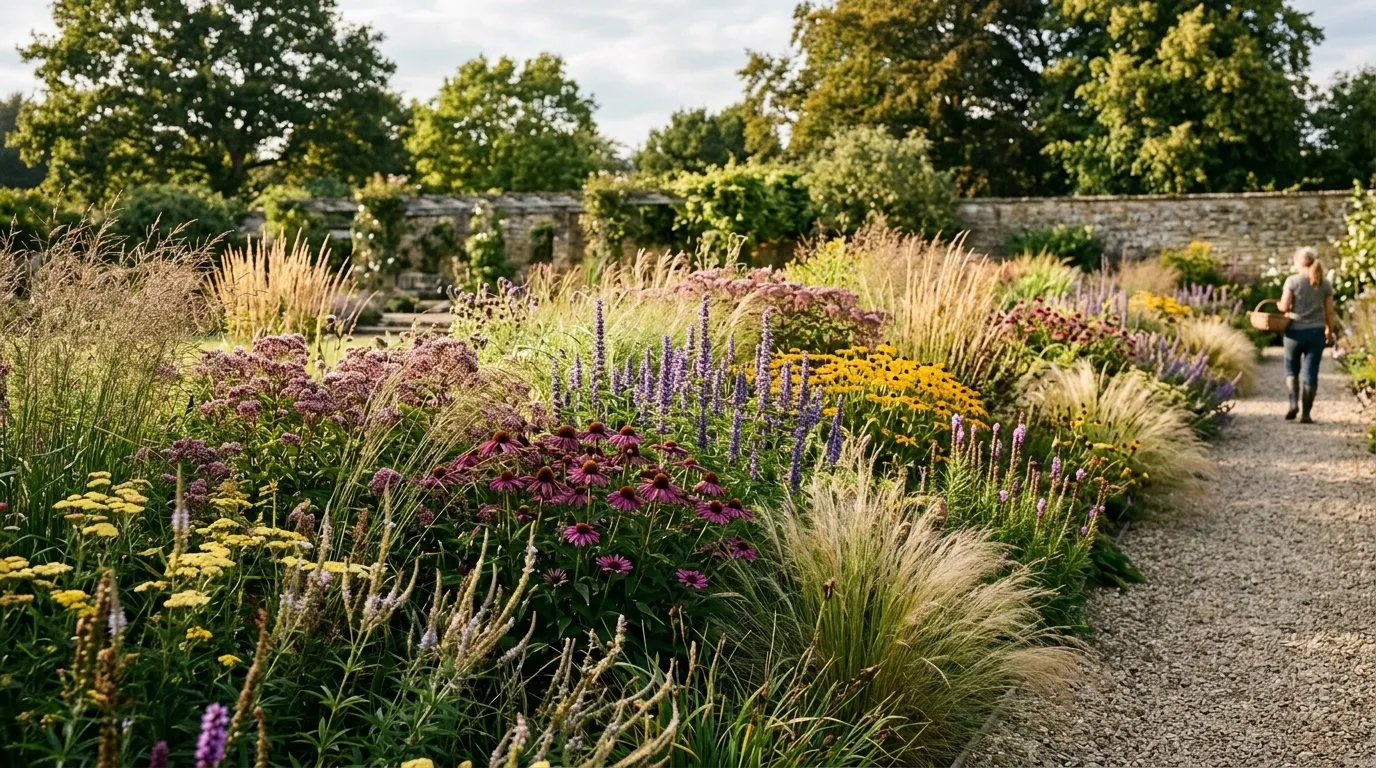 Matrix planting uses a single grass species woven through the border with perennials in drifts at intervals. The Piet Oudolf approach popularised this in the UK in the 2000s. It looks sparse for 2-3 years then transforms into a self-supporting naturalistic planting that needs minimal maintenance.
Step 4: Place the ground cover
The smallest layer but the most overlooked.
What goes in the ground cover layer:
- Low evergreens (heuchera, lamium, ajuga, vinca)
- Spring ephemerals (cyclamen coum, anemone blanda, bulb plants)
- Carpeting perennials (alchemilla mollis, geranium macrorrhizum)
- Edge softeners (catmint, low geraniums, alpines)
Positioning principles:
- 10-15% of planting area
- Concentrated at the front 30cm of the border
- Repeat 1-2 species along the entire border edge for rhythm
- Avoid aggressive spreaders (Vinca minor, Lysimachia clethroides) unless in contained spaces
Rules of thumb:
- One ground cover species per 2m of border edge as the dominant
- Plant 30cm apart for fast cover
- Combine with spring bulbs - the bulbs come up through the ground cover and disappear back
For shade beds particularly, ground cover does triple duty: weed suppression, edge softening, and establishment of the lowest visual layer. Heuchera, brunnera, lamium, and hardy ferns are the workhorses for shaded planting.
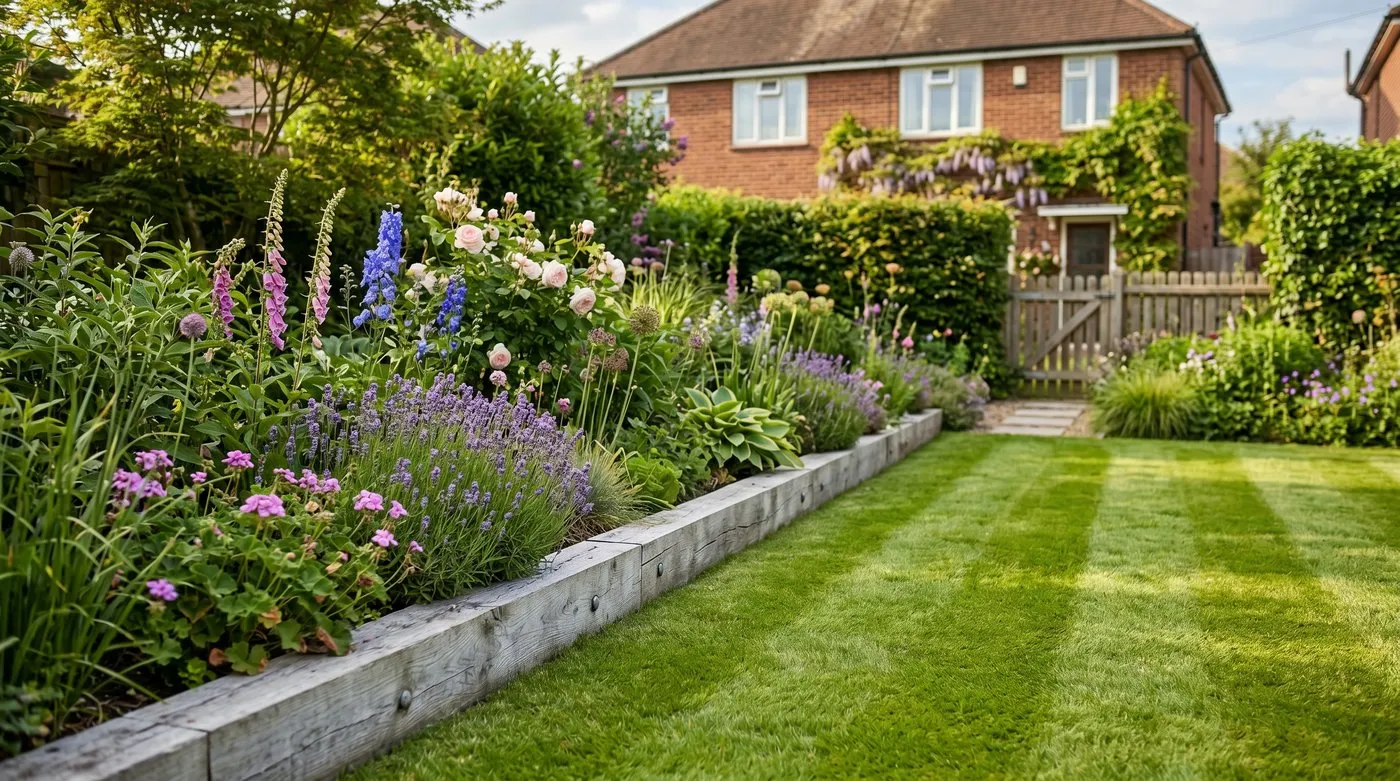
 Classic drift planting uses odd-numbered groups (3, 5, 7, 9, 11) of perennials flowing through the border. Position drifts so the eye moves from one to the next without abrupt transitions. The aim is asymmetric rhythm - the same plant repeated in three places along the border with different drift sizes each time.
Step 5: Repeat and rhythm
Repetition is what separates a designed border from an accumulated one. Three principles.
1. Repeat the same plant in 3+ places. Not just 1 group of 5, but 3 groups of 5 distributed along the border. The eye registers repetition as intentional. Single specimens read as random.
2. Vary the size of repetitions. A drift of 5, then 3, then 7 of the same plant looks more natural than three drifts of identical size. Asymmetry within repetition.
3. Use 3-5 ‘thread’ species. Plants that appear in every part of the border in small quantities. These visually link the whole planting. Common UK threads: Stipa tenuissima, Astrantia major, Geranium ‘Rozanne’, hardy geranium ‘Mavis Simpson’.
A 5m border typically has:
- 3-5 structural specimens (each one or in small drifts)
- 8-12 middle-layer species in drifts of 5-7
- 4-6 filler species in larger drifts
- 2-3 ground cover species
Total: 25-40 distinct plant choices. The drift counts then determine the total plant order.
Step 6: Calculate quantities
The mathematical step. Plant counts come from area and spacing.
Spacing rule: Plant centres are roughly 2/3 of mature plant spread.
| Mature spread | Spacing centres | Plants per sq m |
|---|---|---|
| 30cm | 20cm | 25 |
| 40cm | 27cm | 14 |
| 50cm | 33cm | 9 |
| 60cm | 40cm | 6 |
| 80cm | 53cm | 3.5 |
| 100cm | 67cm | 2.2 |
Calculation: For each species, multiply your intended drift area by plants per sq m. Round to the next odd number.
Example for a 5m x 2m (10 sq m) border:
- Structural: 3 multi-stem birches at 2m spacing = 3 trees
- Middle layer: 8 species in drifts averaging 1 sq m each = 8 sq m total = 50-70 plants
- Filler: 4 species in drifts averaging 1.5 sq m each = 6 sq m total = 35-50 plants
- Ground cover: 2 species along 5m of front edge at 30cm spacing = 35-40 plants
Total: 130-180 plants for a 10 sq m border. This sounds high but is realistic for a fully-planted modern UK border.
Always order 10% extra for failures and replacements. A 130-plant order should have 145 plants.
For budget control, our garden designer cost UK guide covers what plant supply costs typically run.
Translating the plan into a buying list
The final document. Plant species, quantities, supplier, cost.
Format:
| Botanical name | Common name | Quantity | Pot size | Supplier | Unit cost | Total |
|---|---|---|---|---|---|---|
| Betula utilis var jacquemontii | Himalayan birch | 3 | 12L | Crocus | £75 | £225 |
| Buxus sempervirens (clipped ball) | Box ball 50cm | 4 | 12L | Architectural Plants | £85 | £340 |
| Astrantia major ‘Roma’ | Masterwort | 7 | 1L | Hardy’s Cottage Plants | £8 | £56 |
| Geranium ‘Rozanne’ | Cranesbill | 9 | 1L | Crocus | £9 | £81 |
| … | … | … | … | … | … | … |
Sourcing tips:
- Specialist nurseries beat garden centres on rare cultivars and named varieties
- Bareroot perennials (October-March) are 30-50% cheaper than container plants
- Mail-order in autumn often has better stock than spring buying
- Bulk discounts at 20+ plants are worth asking about
Reliable UK plant suppliers:
- Crocus (national, online)
- Beth Chatto Gardens (Essex, mail order, dry-shade specialists)
- Hardy’s Cottage Plants (Hampshire, perennials)
- Architectural Plants (West Sussex, structural)
- Bluebell Cottage Gardens (Cheshire, perennials)
- Burncoose Nurseries (Cornwall, mail order)
A typical 10 sq m border in 2026 prices: £400-1,000 in plants depending on size and rarity. Budget for 12-month establishment time and minor adjustments after year 1.
Common planning mistakes
After three borders of my own and study of two dozen others:
Mistake 1: Buying plants before planning. Symptom: mismatched scale, gappy seasons, no rhythm. Fix: start with the brief and the plan; shop last.
Mistake 2: Not enough structural plants. Symptom: border looks empty in winter. Fix: aim for 15-20% structural, including 30% evergreen across all layers.
Mistake 3: Missing the filler layer. Symptom: gaps between perennials, weeds in those gaps. Fix: add 25-30% filler-layer plants.
Mistake 4: Even-numbered drifts. Symptom: planting feels static, mathematical. Fix: convert to odd numbers (3, 5, 7).
Mistake 5: One-of-everything syndrome. Symptom: 30 different species, no repetition, looks like a plant collection rather than a designed border. Fix: limit to 12-18 species in larger drifts with strong repetition.
Mistake 6: Ignoring mature spread. Symptom: overcrowded by year 3, half the plants suppressed. Fix: space at 2/3 of mature spread and accept gappy first 2 years.
Mistake 7: Forgetting the audience. Symptom: design that looks good close up but anonymous from 5m. Fix: design for the viewing distance - bigger blocks, stronger contrasts, fewer species.
For broader design principles, our using colour in garden design UK covers the colour-palette decisions that overlay the layer structure.
What a finished plan looks like
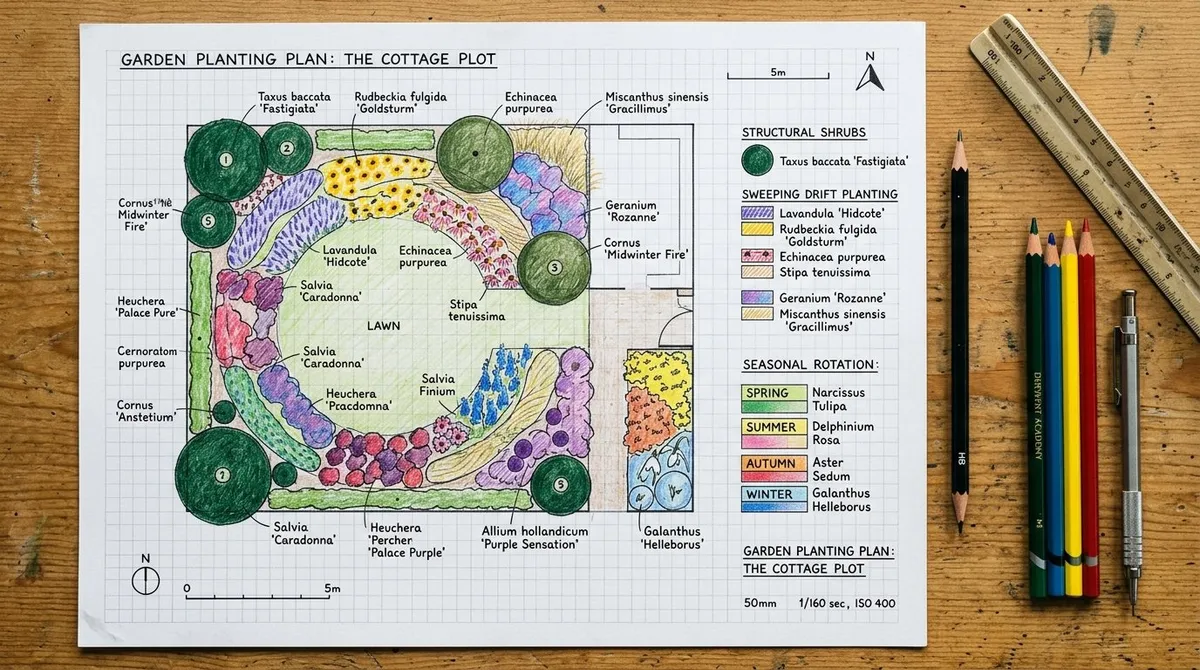
The result of the six steps is a single A2 sheet showing:
- Bed outline to scale (1cm = 50cm typical)
- Each plant marked with a circle showing mature spread
- Plant codes (BIR for Betula, BUX for Buxus, etc.) keyed to a list
- Seasonal interest annotations (when each drift flowers)
- Plant counts and spacing notes
- Source list with quantities and prices
This single sheet contains every decision needed to plant the border. With it in hand, the actual planting becomes a one-day exercise: dig hole, drop in plant, repeat.
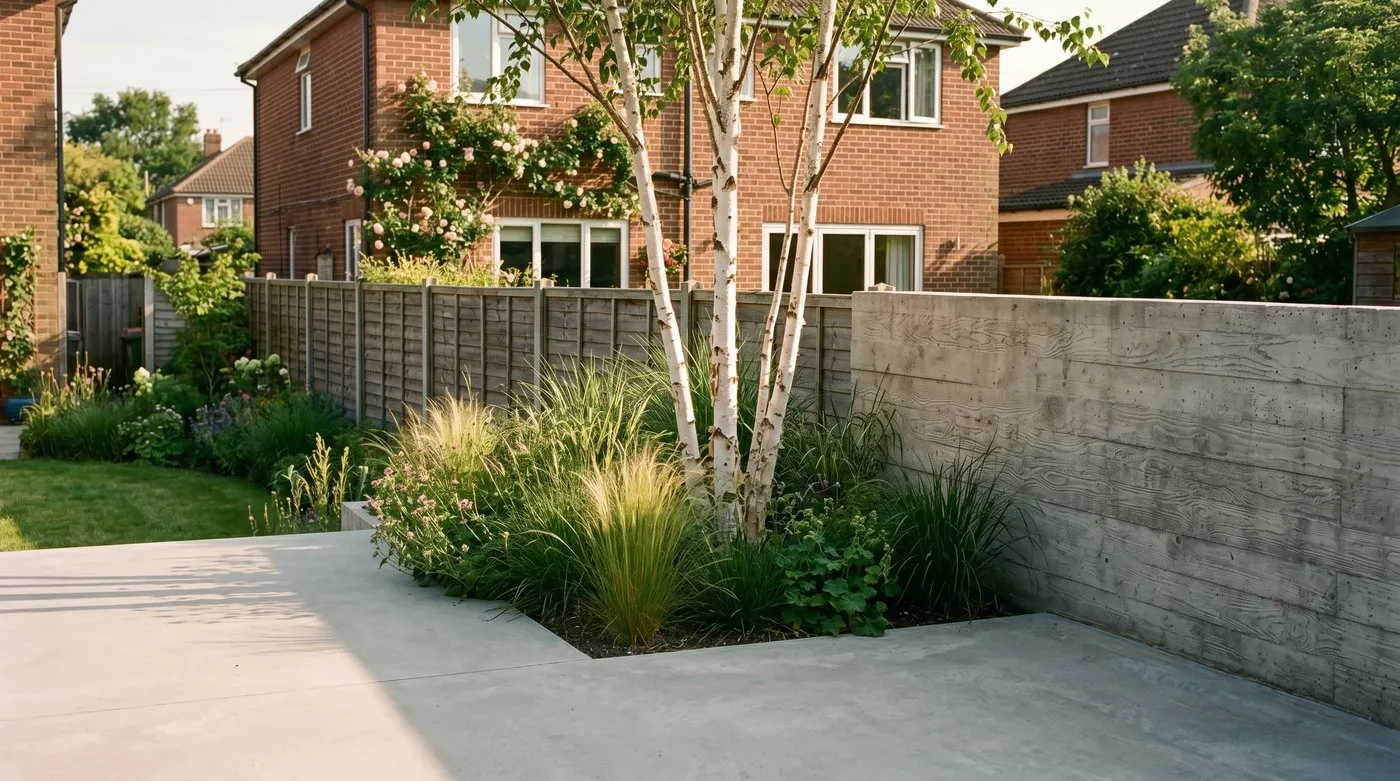
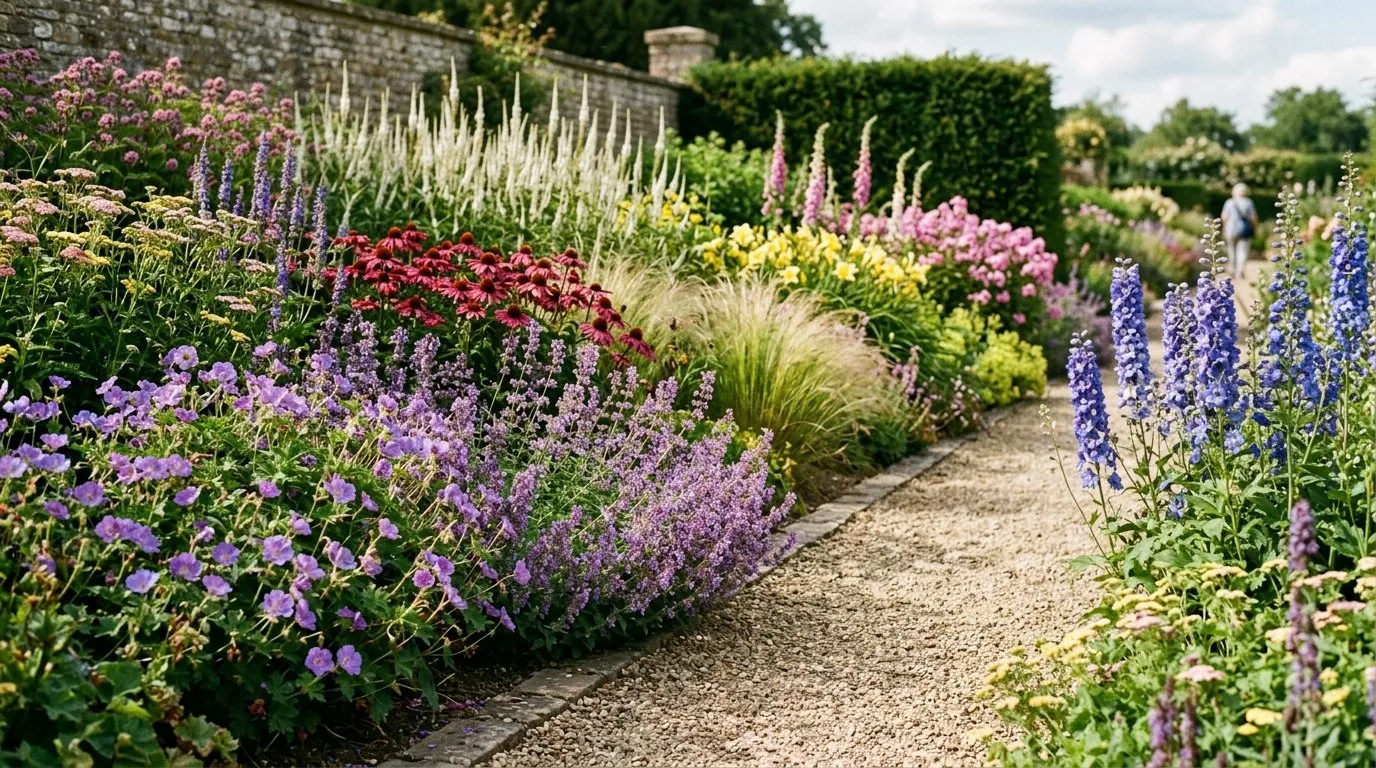
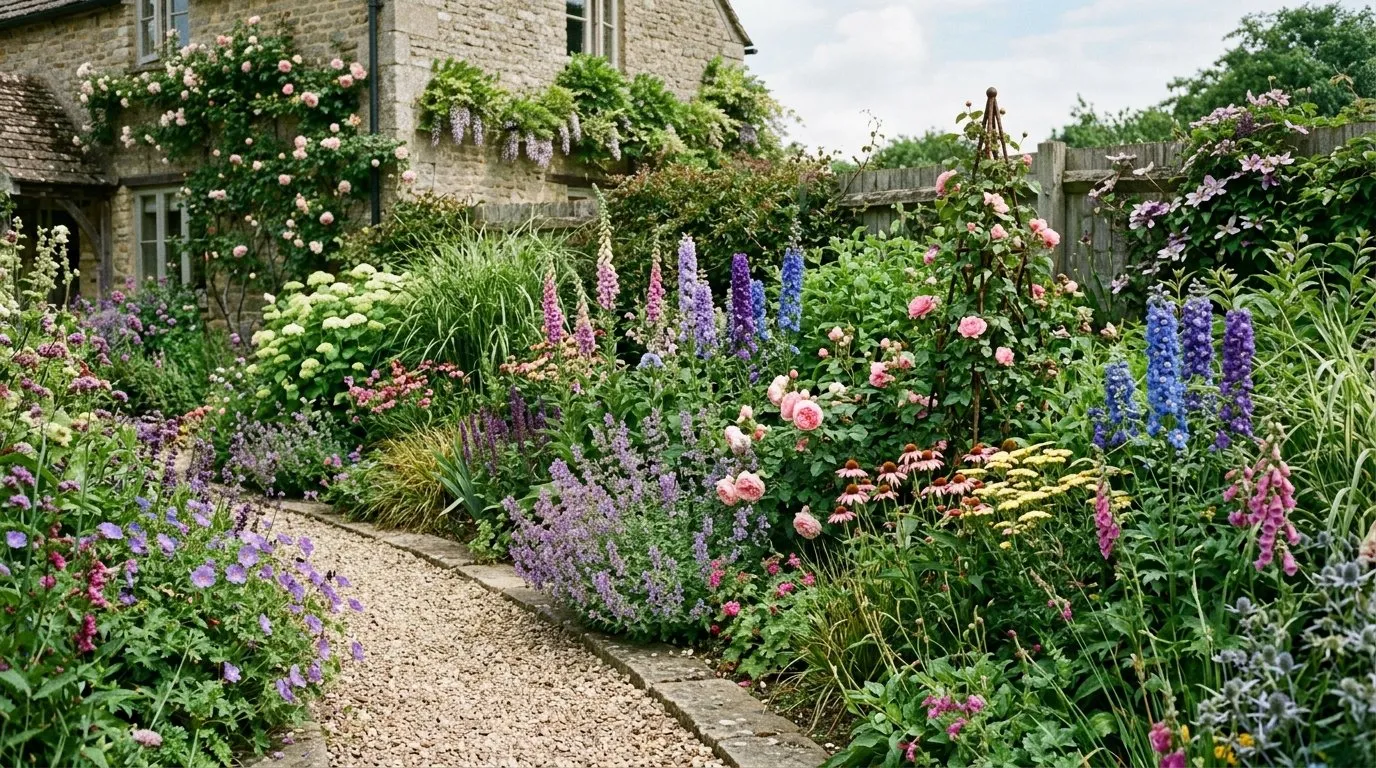 A border two years after the planting plan was implemented. Structural multi-stem birches and box balls hold the bones; mid-layer perennials and grasses fill the bulk; filler astrantia and geraniums weave through; ground cover heuchera and lamium soften the front edge. The whole reads as designed because the plan came first.
Tools and software
Most professional UK designers still use pencil and paper for early sketches. Digital tools come in at the production stage.
Hand tools:
- A2 graph paper (5mm or 10mm grid)
- 2B and 4B pencils
- Soft eraser
- Scale ruler (1:20 or 1:50)
- Coloured pencils for layer-coding
Digital tools:
- Garden Planner Pro (Mac/PC)
- SmartDraw (web)
- Garden Planner from Marshalls (free, basic)
- AutoCAD or Vectorworks (professional designers)
For most amateur planning, hand-drawing is faster and cheaper. Digital is worth the investment if you are designing multiple gardens or want a permanent archive.
For our take on the tools, see best garden design apps and software UK once it is published.
Quick checklist
Before drawing your first planting plan:
- Brief written: role, audience, constraints, maintenance level ✓
- Site survey complete: aspect, soil, moisture, pH, existing plants ✓
- Layer percentages decided: 15-20% structural, 40-50% middle, 25-30% filler, 10-15% ground cover ✓
- 30%+ evergreens for winter interest ✓
- Drifts in odd numbers (3, 5, 7, 9, 11) ✓
- Plant spacing at 2/3 of mature spread ✓
- Same plant repeated in 3+ places along the border ✓
- 12-18 distinct species (not 30+) ✓
- 10% extra plants ordered for failures ✓
- Bloom times distributed March-October ✓
Done in this order, the plan delivers a designed border instead of an accumulated one. The first year still looks gappy. Year two starts to fill out. Year three is when the plan pays back - structure visible in winter, seasonal waves through spring and summer, autumn colour, and a planting that feels intentional from any angle.
Related articles
Lawrie has been gardening in the West Midlands for over 30 years. He grows his own veg using no-dig methods, keeps a wildlife-friendly garden, and writes practical advice based on real UK growing conditions.