Working with a Garden Designer: UK Process
What to expect when working with a UK garden designer: brief, survey, sketch, plan and build stages with timelines, fees and questions to ask.
Key takeaways
- The full design process splits into five stages: brief, survey, concept, detailed plan, planting plan
- Design-only work takes 4-8 weeks; design plus build takes 4-9 months total
- You sign off and pay for each stage before the next starts, mirroring the RIBA model
- Expect 2-3 site visits and 2 rounds of revisions included as standard per stage
- The brief meeting is the most important: clear briefs save thousands in revision fees
- Spring and summer are busiest; autumn and winter bookings get faster turnaround

Working with a garden designer in the UK is a five-stage process that starts with a one-page brief and ends with a contractor walking your land with a planting plan. The structure is consistent across the industry because it mirrors the RIBA stages used by architects: each stage produces a deliverable, you sign off, and only then does the next stage start. This guide walks through what happens at each meeting, what you receive, and how to make the process pay back.
The advice draws on watching design commissions across the Midlands and Cotswolds since 2018, plus interviews with practice owners including Heartwood Garden Design whose published “garden design process” page is one of the clearer client-facing explainers.
The five-stage UK garden design process
Every reputable UK designer uses some version of the same five stages. Names vary slightly between practices but the structure is identical.
| Stage | Timeline | What you do | What you receive |
|---|---|---|---|
| 1. Brief | Week 1 | Brief meeting at home | Written brief document |
| 2. Survey | Week 2 | Site survey day | Measured drawing, soil and level data |
| 3. Concept | Weeks 3-5 | Review sketches, give feedback | 1-2 layout options sketched |
| 4. Detailed plan | Weeks 6-7 | Final review and sign-off | 1:50 scaled working drawing |
| 5. Planting plan | Week 8 | Contractor handover meeting | Planting schedule, contractor brief |
The five stages run 4-8 weeks total for design-only work. Add 12-32 weeks of build time after the contractor brief, and the full design-plus-build commission lands at 4-9 months from first phone call to first planted shrub.
 The brief meeting is the most important hour of the entire process. Clear briefs save thousands in revision fees later.
Stage 1: the brief meeting (week 1)
The brief meeting happens at your home. It runs 1.5-2 hours, longer if the property has unusual features. The designer arrives with a notebook and camera and walks the garden with you to understand how you currently use it - and how you want to use it.
What the designer asks
The questions cluster around five themes. A good designer asks all of them; a great designer goes deeper on the one or two that matter most for your project.
Household and lifestyle: How many people live here? Ages? Pets? Are children expected? Do you work from home? How often do you eat outside? How often do you entertain? Do you have visiting grandchildren? What do you do in the garden when nobody is watching?
Maintenance: How many hours per week can you commit to the garden? Do you enjoy gardening or want it to be self-managing? Do you mow your own lawn? Do you have a gardener already?
Practical constraints: Who owns each boundary? Are there overhead cables, drains, manhole covers? Any tree preservation orders? Conservation area? Any neighbours’ overhanging trees? Where does access for builders come from?
Aesthetic preferences: What three gardens do you love and why? What do you dislike about your current garden? Indoor or outdoor person? Formal or informal taste? Plant-led or paving-led?
Budget and timeline: What is your total budget including build and planting? What is your absolute ceiling? Are you in a rush or flexible? Do you need the work done before a specific event?
What you should bring to the meeting
Walk into the brief meeting prepared. The clients who get the best concept designs always do these four things:
- Write a one-page brief in advance. Cover household, use, maintenance hours, and budget. One page only. The discipline of fitting it on one page forces clarity.
- Bring three reference photos of gardens you love and one of a garden you dislike. The dislike photo is more useful than the loves - it tells the designer exactly what to avoid.
- Make a “keep list”. Mature trees, existing sheds, the patio you put in three years ago, anything you do not want demolished.
- Have your house deeds or Land Registry title plan handy. Boundary ownership matters more than people realise. The plan costs £3 from GOV.UK if you do not have it.
What you receive
Within 1-2 weeks of the meeting, the designer sends a written brief document. It runs 4-8 pages and includes:
- A statement of the project scope and exclusions
- A constraints list (planning, neighbours, access, services)
- A wish list grouped into “must have” and “nice to have”
- A maintenance hours target
- A budget range with a stated ceiling
- A timeline outlining the five stages with target dates
You read it carefully. If anything is missing or wrong, you flag it now. Once you sign off, this brief becomes the contractual reference for what was agreed - revisions outside the brief are charged separately.
Stage 2: the site survey (week 2)
The survey is a half-day on site, usually a weekday morning. The designer brings a measuring wheel, a laser level, a soil pH kit, a clinometer for slopes, and a camera. You do not need to be present for the whole survey but it helps to be there for the first hour to walk the boundaries together.
What gets measured
A proper UK garden survey captures:
- Boundary positions and lengths to within 50mm
- Levels at 5-metre intervals for sloping sites
- Manhole cover positions and orientations
- Drain runs (where visible) and gully positions
- Service routes (gas, water, electricity) where known
- Tree positions, canopy spreads and trunk diameters
- Existing structures: sheds, patios, walls, fences
- Mature shrubs to be retained
- Aspect (sun mapping) at three times of day if multiple visits
- Soil pH in 3-4 spots
- Drainage test holes in 1-3 spots
Soil and drainage tests are critical and often skipped by faster designers. Both directly determine which plants survive and where patios can sit safely. If your designer skips these, ask for them in writing as a chargeable add-on. Our guide on how to improve clay soil covers what the drainage test results actually mean for design decisions.
 A typical site survey runs 3-4 hours for a 100-200m² plot. Soil and drainage tests are the most commonly skipped steps.
What you receive
After the survey, the designer produces a measured drawing at 1:50 or 1:100 scale showing every measured element. You receive this as a digital PDF. It is not a design - it is the accurate base on top of which the design will be drawn.
The measured drawing is also useful in its own right. Some clients commission only stages 1 and 2 to get an accurate plan they can DIY-design from. Stage 1 plus 2 typically costs 25% of the full design fee.
Stage 3: concept design (weeks 3-5)
This is where the garden takes shape on paper. The designer takes the brief and the survey and produces 1-2 concept sketches showing different layout options. Hand-drawn or computer-generated, usually rendered in light colour.
What concept sketches actually look like
A concept sketch shows the layout without committing to specific materials or planting. It marks zones (dining, lawn, planting beds, paths, storage) at the right size and position. It indicates the layout style (formal, cottage, contemporary) without specifying species. It shows sight lines and key views from the house.
The sketch deliberately leaves detail out. The point at this stage is to test the layout against your brief: does the dining zone catch the afternoon sun? Does the lawn fit the children’s play needs? Does the path flow naturally from the back door?
How to give useful feedback
The concept review is a 60-90 minute meeting. Bring a print of the sketches and walk through them with the designer. Three rules for useful feedback:
Compare against the brief, not your taste. “This works for our brief because the dining zone gets afternoon sun” is more useful than “I like it”. Equally, “this does not solve the children’s play issue I flagged” is more useful than “I am not sure”.
Group your feedback. Designers expect two rounds of revision. Make each round count. Drip-feeding single comments over a fortnight burns through the revision allowance and frustrates the designer.
Ask “what would happen if…” questions. “What would happen if we moved the dining zone to the south corner?” tests alternatives without committing. These conversations often produce the best final design.
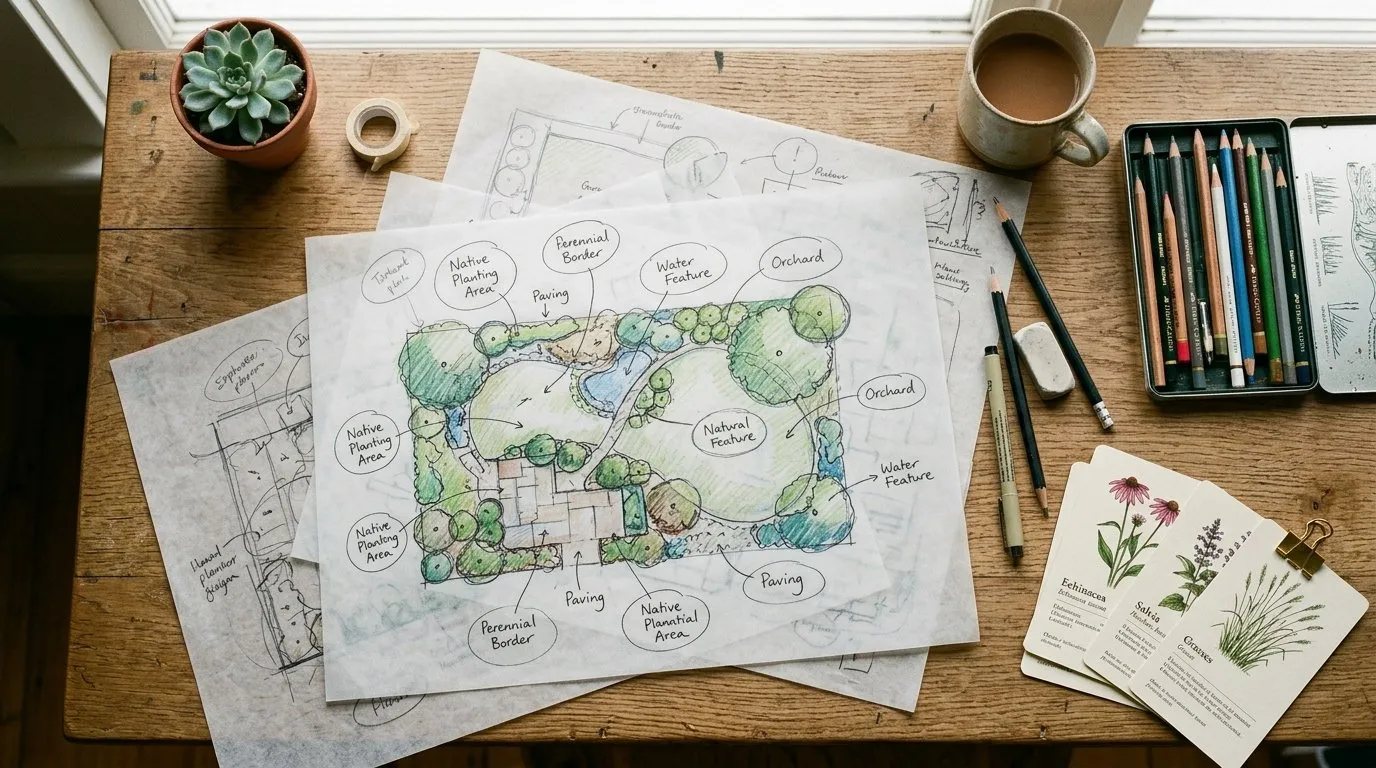 Concept sketches focus on zone layout and sight lines, not materials or specific planting. Detail comes in the next stage.
Choosing between options
If the designer offers two concept options, pick one fully rather than mixing both. Layout decisions are interconnected - moving the dining zone changes the path route which changes the planting bed shapes. A hybrid usually loses the strengths of both options.
The concept review also covers materials in broad strokes: paving type, fence treatment, screening method, lighting approach. You do not pick exact products yet - you pick categories. Detail comes at stage 4.
Stage 4: the detailed plan (weeks 6-7)
The detailed plan is the contract document the contractor will price from. It is a 1:50 or 1:100 scaled drawing showing every element accurately positioned, every material specified by name and dimension, every level marked, and every lighting position noted.
What the detailed plan includes
A complete UK garden detailed plan should contain:
- A scaled site plan with every element dimensioned
- A section drawing if the garden has level changes greater than 300mm
- An elevation drawing if there are walls, screens, pergolas or built structures
- A materials schedule listing every product by manufacturer code, dimension and quantity
- Setting-out points for the contractor to peg the design on site
- Details of any drainage or irrigation specification
- Lighting positions with circuit diagrams if external lighting is included
- Notes on construction sequence and protection of existing features
This is the document that lets two different contractors price the same project to within 5%. Without this level of detail, contractor pricing varies by 30%+ and the homeowner cannot tell whether they are getting good value.
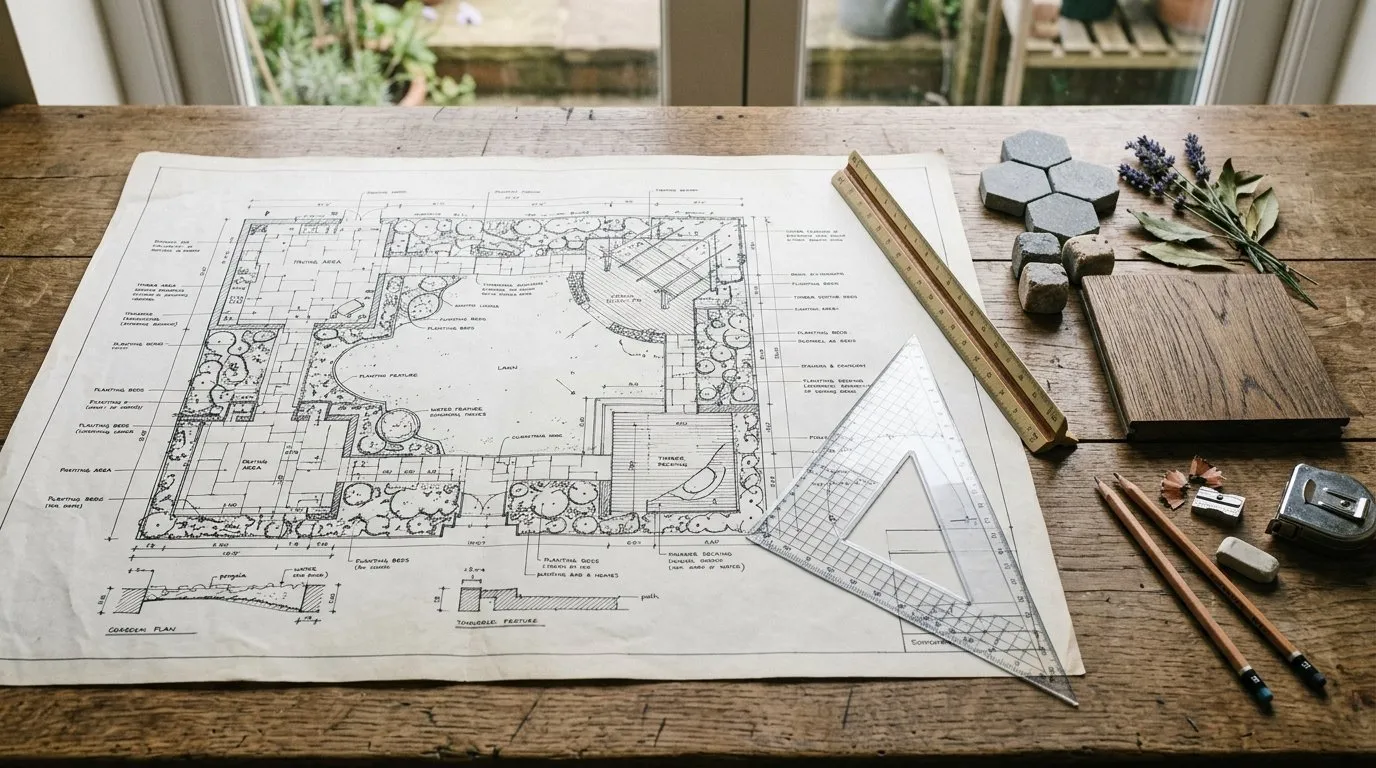 The detailed plan is the document a contractor prices from. The materials schedule on the side is just as important as the drawing itself.
Sign-off and limits of revision
You get one round of revisions on the detailed plan as standard. Use it to fix specifics - a paving size, a fence height, a step location. Wholesale layout changes at this stage push the project back to stage 3 and trigger additional fees.
After sign-off, the detailed plan is locked. Changes after this point are charged at hourly rates plus contractor variation costs. This is why thorough engagement at the concept stage saves money later.
Stage 5: planting plan and contractor handover (week 8)
The final stage produces the planting plan and hands the project to the contractor.
The planting plan
The planting plan is a separate scaled drawing showing every plant by Latin name, quantity, and pot size. It uses circles or shapes proportional to the plant’s mature spread. The plan is accompanied by a planting schedule - a table listing every plant with totals, suggested suppliers and substitutions where the primary choice may be unavailable.
A typical 100-200m² UK garden planting plan specifies 150-250 plants across 25-40 species. It includes:
- 5-10 structural shrubs or small trees forming the backbone
- 3-7 specimen plants positioned as focal points
- 60-100 perennials in groups of 3, 5 or 7
- 30-50 grasses and ferns for movement and texture
- 50-80 spring bulbs for early colour
- Optional ground cover for shade-bearing borders
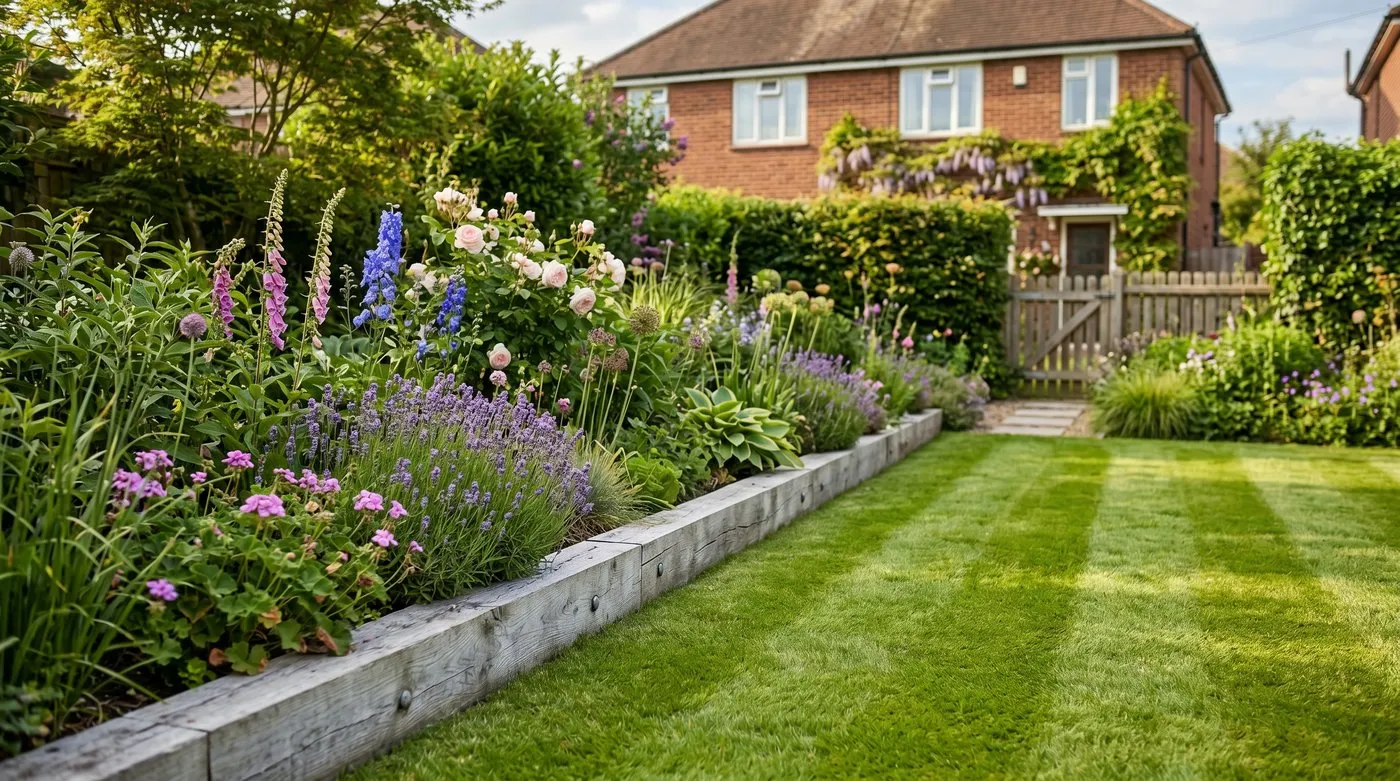
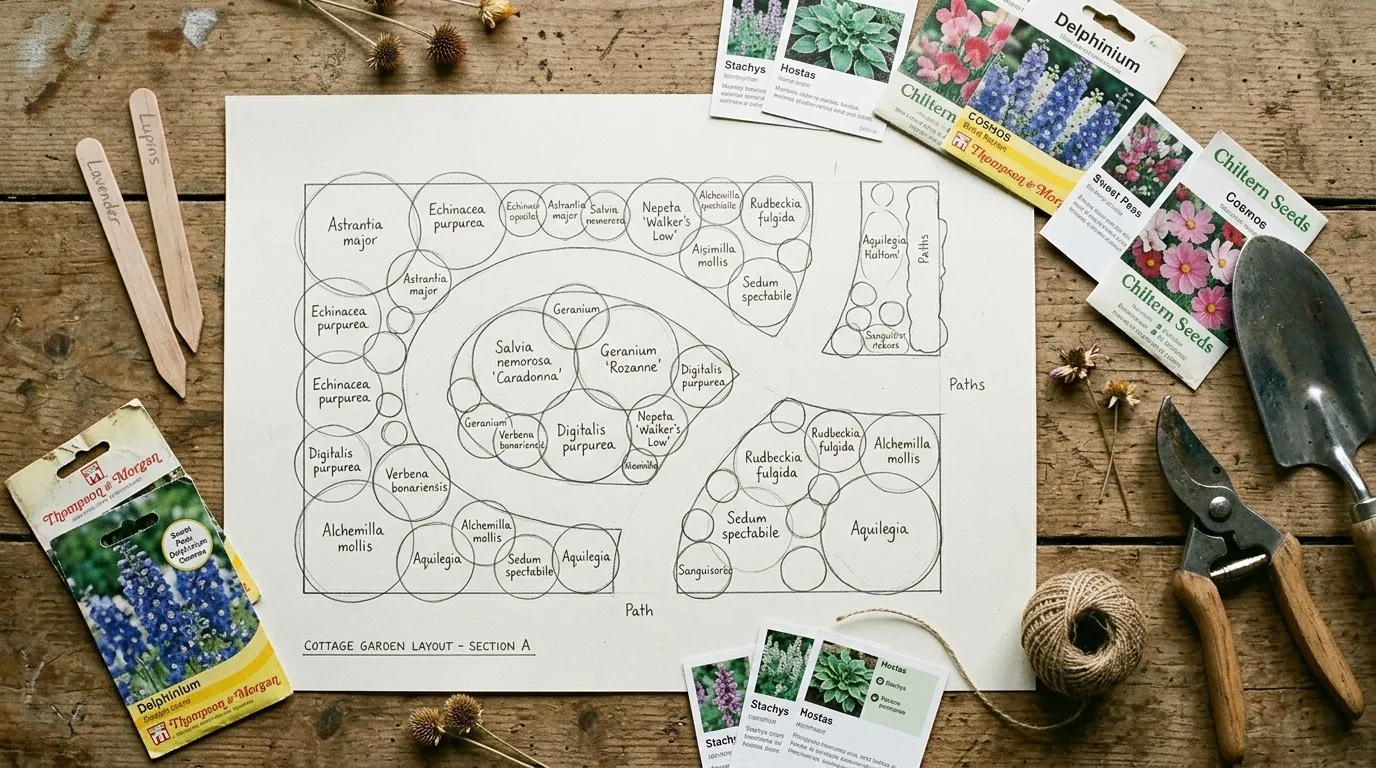 A typical planting plan annotates every plant by Latin name, quantity and pot size. The accompanying schedule lets you price plants from multiple nurseries.
For more on building a planting plan that works in UK conditions, see our guides on garden design principles for beginners and using colour in garden design for practical structure and colour rules.
The contractor handover
The handover meeting is held on site with you, the designer and the chosen contractor. It runs 1-2 hours. The designer walks the contractor through the drawings, points out the critical setting-out details, and answers technical questions.
After the handover, the designer’s contractual involvement usually ends - though most offer optional site visits during the build at hourly rates. These visits catch contractor errors before they become permanent. Three to five visits across a 12-week build is typical, totalling £400-£1,200 in additional fees.
Lawrie’s tip: I have observed handover meetings where the contractor and designer disagree on something fundamental - usually around drainage or footing depths. This is the meeting where you want to spot disagreements, not the day after the patio is laid. Push every technical question into the open at handover. A good designer welcomes the scrutiny because it surfaces problems while they are still cheap to fix.
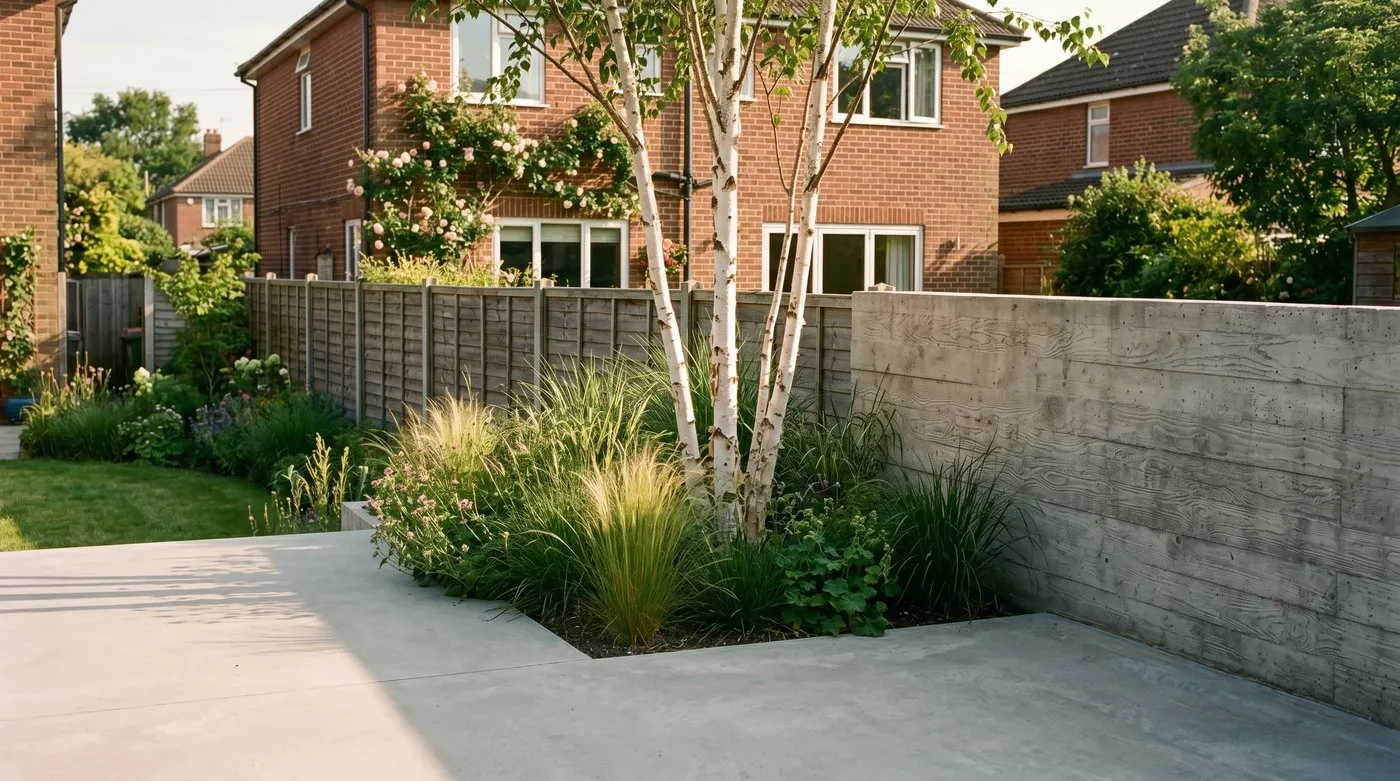
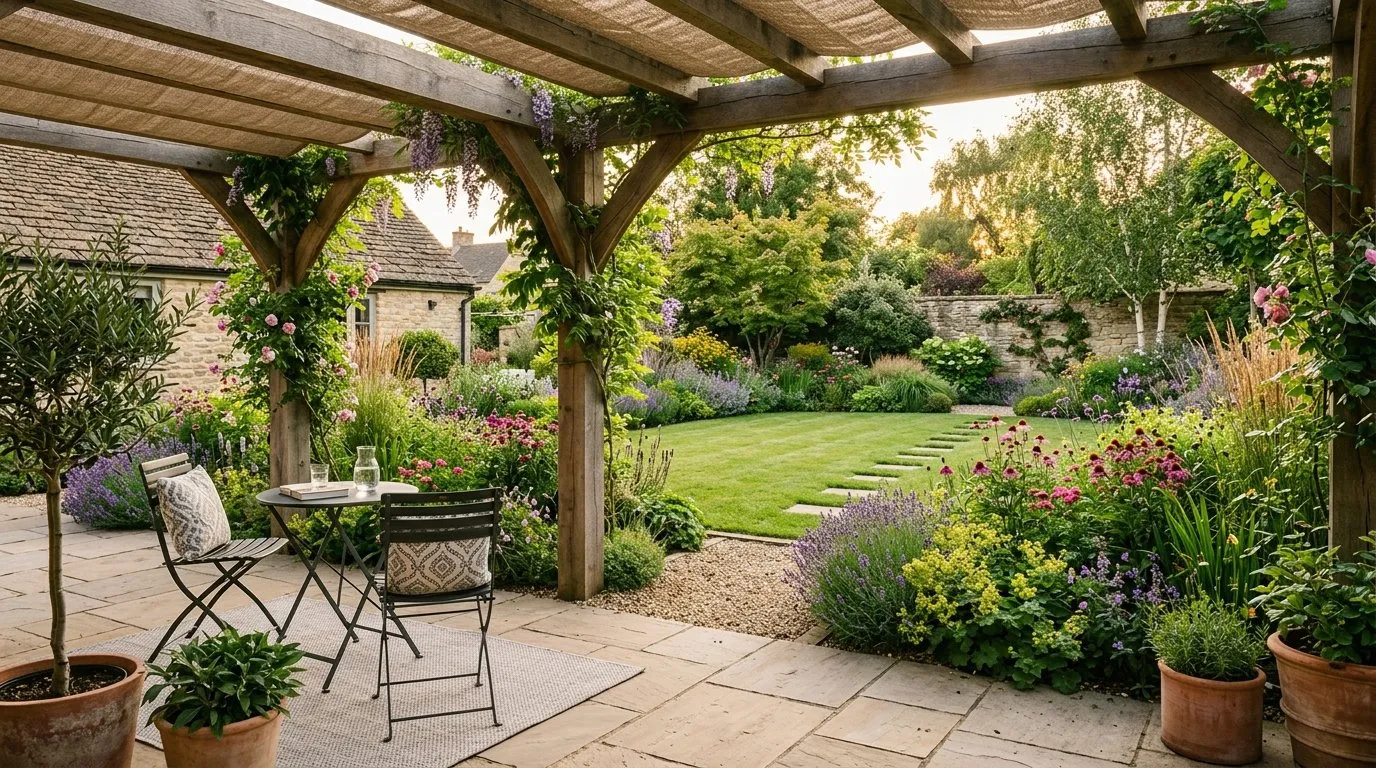 A completed garden built from a detailed plan. Accurate plans produce accurate builds - the gap between drawing and reality should be measured in millimetres, not metres.
What happens during the build
After handover, the contractor works through the build in three phases:
Hard surfacing phase (weeks 1-6): Excavation, drainage, foundations, paving, walls, structures, fences, irrigation pipes. This is the dirtiest, loudest phase and the most disruptive to the household.
Structures and fixtures phase (weeks 5-8): Pergolas, screens, raised beds, lighting installation, water features, outdoor kitchens. Often overlapping with the end of the surfacing phase.
Planting phase (weeks 9-12): Topsoil delivery, soil amendment, planting in the order specified by the designer (trees first, shrubs second, perennials third, bulbs and ground cover last). This is the calmest phase and often the most satisfying to watch.
The plant guide in our planting guides for UK gardens section of Garden UK covers each major plant type’s planting requirements if you want to understand what the contractor is doing in your beds.
Aftercare and the first 18 months
The first 18 months after a build are when most plant failures happen. A new garden looks structurally finished on day one but biologically takes 12-24 months to establish.
Some designers offer a post-build aftercare package: 2-4 site visits over the first year to check plant establishment, prune as needed, replace failures under warranty, and re-stake any wind-rocked specimens. This typically costs £200-£600 for the year and saves the cost of replacing 5-10% of plants that fail without intervention.
If the designer does not offer this, ask your contractor about a maintenance package or hire a local gardener for monthly visits in year one. Establishment-year care is the single highest-leverage cost on the entire project after the design fee itself.
Common process pitfalls and how to avoid them
Five things go wrong on UK garden design commissions more often than any others:
-
The brief is too vague. Spend the time on a one-page written brief before stage one even starts. Vague briefs produce vague concepts and expensive revision cycles.
-
The survey is rushed. Push back on any survey under 3 hours for a 100-200m² plot. Drainage and soil tests are the most commonly skipped steps and the most damaging when wrong.
-
Concept revisions drag on. Two rounds of revisions is the standard contract. Drip-feeding feedback over weeks burns through the revision allowance and produces a worse final concept than batched feedback over 48 hours.
-
Detailed plan changes after sign-off. These cost real money. Sign off the concept stage thoroughly so the detailed plan is mostly a tightening exercise rather than a redesign.
-
No contractor handover meeting. This is the most damaging skip. Without the designer-contractor handover meeting, technical disagreements only surface after the patio is laid - by which time fixing them costs 5-10x more than catching them at handover.
For the financial side - what each stage costs and the headline numbers behind RIBA-style fees - read our companion garden designer cost guide. For the wider context on how to plan a garden including the DIY route, our how to design a garden from scratch guide covers everything you can do without a designer. For style direction, see garden design trends 2026 and modern mixed border design.
The single best preparation for working with a UK garden designer is the one-page brief, three reference photos and an honest budget ceiling. Walk into stage one with all three and the rest of the process runs itself.
Lawrie has been gardening in the West Midlands for over 30 years. He grows his own veg using no-dig methods, keeps a wildlife-friendly garden, and writes practical advice based on real UK growing conditions.