Growing in Grow Bags UK
Complete guide to growing vegetables in grow bags in the UK. Covers setup, best crops, watering, feeding, ring culture and grow bags vs raised beds.
Key takeaways
- A standard 40-litre grow bag supports 2-3 tomato plants or 4-6 salad crops
- Place grow bags on any sunny surface: patio, balcony, driveway, or greenhouse floor
- Water twice daily in hot weather because the shallow compost dries out fast
- Feed weekly with liquid tomato fertiliser once the first fruits begin to set
- Grow bags eliminate soil-borne disease problems like tomato blight and clubroot
- Premium grow bags (60-75 litres) give significantly better results than budget 35-litre bags
Grow bags are the simplest way to grow vegetables when you have no garden bed, no allotment, and no raised bed. A flat plastic bag filled with compost, laid on any sunny surface, produces tomatoes, peppers, courgettes, salad, herbs, and soft fruit from June to October. No digging. No soil preparation. No soil-borne diseases. Just compost, sun, and water.
I use grow bags every year on my patio and in my greenhouse. They are cheap, disposable, and solve the problem of contaminated or exhausted soil that plagues permanent growing beds. This guide covers everything from choosing the right grow bag to harvesting the final crop. The RHS container growing guide confirms that container growing, including grow bags, produces excellent results for home gardeners.
What are grow bags and why use them?
A grow bag is a sealed plastic bag filled with a pre-mixed growing medium, typically 35-75 litres of compost. You lay it flat, cut openings in the top, plant into the compost, and grow.
Advantages of grow bags
No garden needed. Grow bags sit on patios, balconies, driveways, flat roofs, and greenhouse floors. If you have a sunny spot and access to water, you can grow food.
No soil-borne disease. Fresh compost means no accumulated pathogens. Tomato blight, clubroot, onion white rot, and other soil-borne problems cannot build up because you start with clean compost each year. This is a major advantage over permanent beds where the same crops have grown for years.
Cheap and accessible. A standard grow bag costs two to four pounds from any garden centre. Premium bags cost five to eight pounds. Either is cheaper than building a raised bed or buying large pots.
Warm roots. The black plastic absorbs solar heat, warming the compost 2-4C above soil temperature. Warm roots mean faster growth, earlier cropping, and better performance for heat-loving crops like tomatoes and peppers.
Disposable. At the end of the season, empty the spent compost onto borders or the compost heap. Recycle the plastic bag. Start fresh next year with no maintenance.
Disadvantages
Drying out. The shallow compost depth (10-15cm in a standard bag) means grow bags dry out rapidly. In hot weather, you may need to water twice daily. This is the single biggest challenge.
Limited root space. The shallow depth restricts root development. Deep-rooted crops like carrots and parsnips cannot grow in standard grow bags. Fruiting crops like tomatoes need supplementary feeding because the limited compost volume runs out of nutrients within 4-6 weeks.
Wind instability. Tall plants in grow bags are top-heavy. A grow bag with a 150cm tomato plant catches wind like a sail. Support structures must be anchored independently of the grow bag.
Choosing the right grow bag
Not all grow bags are equal. The volume, compost quality, and brand make a real difference to results.
Standard vs premium grow bags
| Feature | Standard (35-40L) | Premium (60-75L) |
|---|---|---|
| Price | Two to four pounds | Five to eight pounds |
| Compost depth | 10-12cm | 15-20cm |
| Nutrient content | 4-6 weeks supply | 6-8 weeks supply |
| Water retention | Poor | Better (added water-retaining granules) |
| Perlite/drainage | Often none | Usually included |
| Plants supported | 2 tomatoes or 4 lettuce | 3 tomatoes or 6 lettuce |
Premium bags are worth the extra cost for tomatoes and peppers. The deeper compost holds more water (reducing your workload), roots have more room to develop, and the better growing medium produces noticeably stronger plants. For salad crops and herbs, standard bags are fine.
Making your own grow bags
Buy reusable fabric grow bags (five to ten pounds for a pack of 5) and fill with your own compost. This gives you full control over the growing medium.
A good homemade mix:
- 70% peat-free multipurpose compost
- 20% perlite or vermiculite (for drainage and aeration)
- 10% well-rotted garden compost or worm castings
- 1 tablespoon of slow-release fertiliser per 10 litres
This produces a richer, better-draining growing medium than most shop-bought bags. The reusable fabric bags also provide better aeration to roots and are less likely to waterlog.
Setting up grow bags
Proper setup prevents most of the common problems.
Positioning
Place grow bags on a flat, sunny surface that receives at least 6 hours of direct sunlight daily. South-facing patios, greenhouse floors, and sheltered balconies are ideal. Grow bags on hard surfaces (paving, concrete, decking) warm up faster than those on soil.
Raise bags 5-10cm off the ground on bricks or a wooden pallet. This improves drainage and prevents the base sitting in standing water after rain.
Drainage
Cut 4-6 small slits (2cm long) in the underside of the bag before positioning. Without drainage holes, the bag becomes a sealed pool after heavy rain. Waterlogged compost drowns roots within 48 hours.
Some gardeners cut large rectangular openings in the top and small slits in the base. Others cut the entire top off and fold the edges down to create an open tray. The open-tray method gives maximum access for watering and planting but dries out faster.
Planting holes
Cut X-shaped slits in the top of the bag where each plant will go. Make the slits large enough to insert a plant (typically 10-15cm across). Space slits evenly: 2 holes for tomatoes, 3 for peppers, 4-6 for lettuce.
Remove a handful of compost from each hole. Plant the seedling at the same depth it was growing in its pot. Firm the compost around the stem. Water in thoroughly.
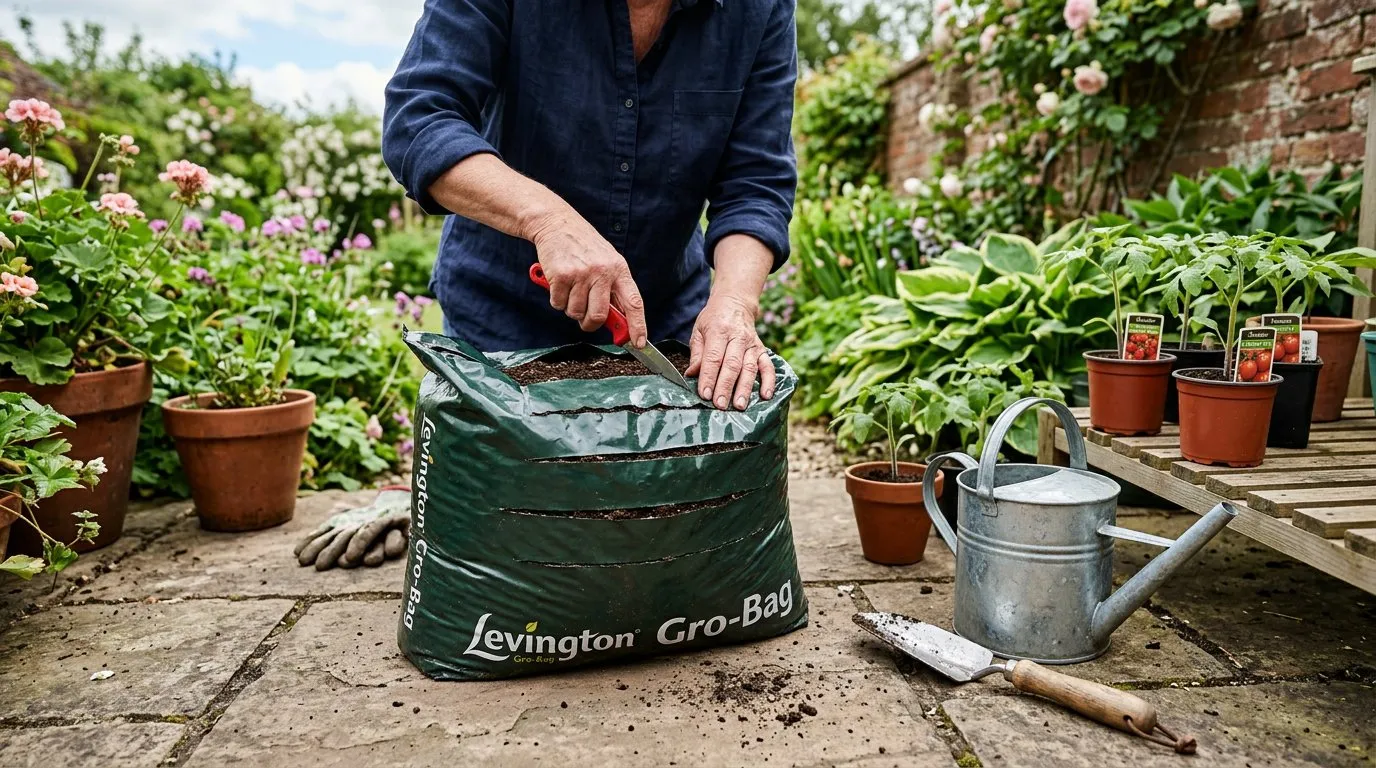 Preparing grow bags. Cut drainage slits underneath and X-shaped planting holes on top. Spacing depends on the crop: 2-3 holes for tomatoes, 4-6 for salad.
Best crops for grow bags
Some crops thrive in grow bags. Others struggle with the limited depth and volume. Match your crop choice to the grow bag’s strengths.
Tomatoes
The classic grow bag crop. Plant 2-3 cordon (indeterminate) tomato plants per standard bag, or 3-4 per premium bag. Cordon varieties need staking. Use a grow bag frame (a wire frame that sits over the bag and supports canes) or anchor canes to a wall or fence behind the bag.
Bush (determinate) varieties like Tumbling Tom and Vilma need no staking and spill attractively over the edges. They produce smaller fruit but require less attention.
Feed weekly with liquid tomato fertiliser from the first truss setting fruit. Our full tomato guide covers varieties, pruning, and common problems in detail.
Peppers and chillies
Excellent grow bag crops. Plant 2-3 plants per standard bag. Peppers and chillies love the warm root temperatures that black plastic provides. Compact varieties like Apache (chilli) and Mohawk (pepper) suit grow bags perfectly.
Feed with tomato fertiliser from first flower set. Peppers need less water than tomatoes but still check daily.
Courgettes
Plant 1-2 per standard bag. Courgettes are hungry, thirsty plants that quickly exhaust a standard grow bag. Premium bags give better results. Our courgette guide covers the full growing method.
Feed twice weekly once fruiting starts. Pick courgettes at 15-20cm long. Left to grow larger, they divert energy from new fruit production and drain the limited compost resources faster.
Cucumbers
Plant 1-2 per bag. Outdoor varieties (such as Marketmore and Crystal Lemon) work well in grow bags on a sunny, sheltered patio. Our cucumber guide explains training and harvesting.
Cucumbers need consistent moisture. In grow bags, this means watering every day without fail. Irregular watering causes bitter fruit and misshapen growth.
Salad and lettuce
Plant 4-6 per standard bag. Cut-and-come-again varieties provide multiple harvests from a single planting. Our lettuce guide covers variety selection.
Salad crops are the easiest grow bag option. They have shallow roots that suit the limited depth, low nutrient demands, and quick turnaround (harvest within 4-6 weeks of planting). Succession sow every 3 weeks for continuous supply.
Strawberries
Plant 6-8 per standard bag. Strawberries have shallow root systems that match grow bag depth perfectly. Everbearing varieties like Mara des Bois fruit from June to October. Position the bag where developing fruit can hang over the edge, keeping it clean and off the compost surface.
Herbs
A single grow bag supports a mixed herb planting: 2 basil, 2 parsley, 1 coriander, and 1 dill. Or dedicate a bag to a single herb. Mediterranean herbs (rosemary, thyme, sage) prefer free-draining compost, so add extra perlite if using a grow bag.
Crops that do NOT suit grow bags
| Crop | Why not |
|---|---|
| Carrots and parsnips | Need 20-30cm depth for root development |
| Potatoes | Need 30-40cm depth for earthing up |
| Sweetcorn | Too tall and top-heavy; wind blows them over |
| Runner beans | Too vigorous; exhaust compost quickly; too tall for stability |
| Brassicas (cabbage, broccoli) | Need deep rooting for stability; long season exhausts nutrients |
Watering grow bags
Watering is the most important and most demanding aspect of grow bag growing. Get it right and crops thrive. Get it wrong and everything fails.
Why grow bags dry out so fast
A standard grow bag is 10-12cm deep. That is roughly 35-40 litres of compost supporting 2-3 large plants with extensive leaf area transpiring water in direct sun and wind. On a hot July day, a tomato plant transpires 2-3 litres of water. Three plants in one bag need 6-9 litres per day.
The compost in a standard grow bag holds approximately 10-15 litres of available water when saturated. Simple maths: on a hot day, the entire water supply is exhausted by early afternoon.
Watering schedule
| Weather | Watering frequency | Amount per bag |
|---|---|---|
| Cool and cloudy (below 18C) | Once daily, morning | 2-3 litres |
| Warm and sunny (18-25C) | Once or twice daily | 4-6 litres |
| Hot (above 25C) | Twice daily, morning and evening | 6-10 litres |
| Greenhouse in summer | Twice daily minimum | 8-10 litres |
Watering technique
Water slowly and evenly across the entire surface of the bag. Do not pour water in a single spot. The compost in grow bags often develops hydrophobic patches that repel water. Slow, gentle watering allows moisture to penetrate the whole bag.
If water runs off the surface without soaking in, the compost has dried too much. Push a pencil through the compost surface in several spots to create channels. Water slowly until it drains from the base. Add a few drops of washing-up liquid to a watering can (it acts as a wetting agent) if hydrophobic compost is a persistent problem.
Reducing watering workload
Drip irrigation: A simple drip irrigation system with a timer costs twenty to thirty pounds and waters grow bags automatically. Run a dripper to each planting position. Set the timer for 15-20 minutes twice daily in summer.
Grow bag trays: Plastic trays that sit beneath the grow bag act as a water reservoir. The compost wicks moisture up from the tray. This extends the time between watering by several hours. Trays cost three to five pounds each.
Mulching: Cover the exposed compost surface with a 2cm layer of bark chips, straw, or gravel. This reduces surface evaporation by 30-40%.
Water-retaining granules: Mix into the compost at planting time. They absorb water and release it slowly as the compost dries. Already included in premium grow bags.
Feeding grow bags
The compost in a new grow bag contains 4-8 weeks of nutrients. After that, the plants are running on empty unless you feed them.
When to start feeding
Fruiting crops (tomatoes, peppers, courgettes, cucumbers): Start feeding when the first fruits begin to set. Before that, the plant needs to establish roots and foliage, and excess feed at this stage produces leafy growth at the expense of fruit.
Salad and herbs: Feed every 2 weeks from 3 weeks after planting. A balanced liquid feed (not tomato feed) is best.
Strawberries: Feed with a high-potash liquid feed (tomato feed works) fortnightly from flowering until the end of fruiting.
What to feed
| Feed type | NPK ratio | Best for | How to use |
|---|---|---|---|
| Liquid tomato feed | High potash (4-5-8) | Tomatoes, peppers, courgettes, strawberries | Dilute and water weekly |
| Balanced liquid feed | Equal NPK (7-7-7) | Salad, herbs, leafy crops | Dilute and water fortnightly |
| Slow-release granules | Varies | All crops at planting time | Mix into compost, lasts 3-4 months |
| Homemade comfrey feed | High potash | Fruiting crops | Dilute 1:10 and water weekly |
Gardener’s tip: Comfrey feed is free and excellent for grow bag crops. Stuff a bucket with comfrey leaves, fill with water, cover, and leave for 4-6 weeks. The resulting brown liquid dilutes 1:10 and provides potassium, phosphorus, and trace elements. It smells terrible, but plants love it.
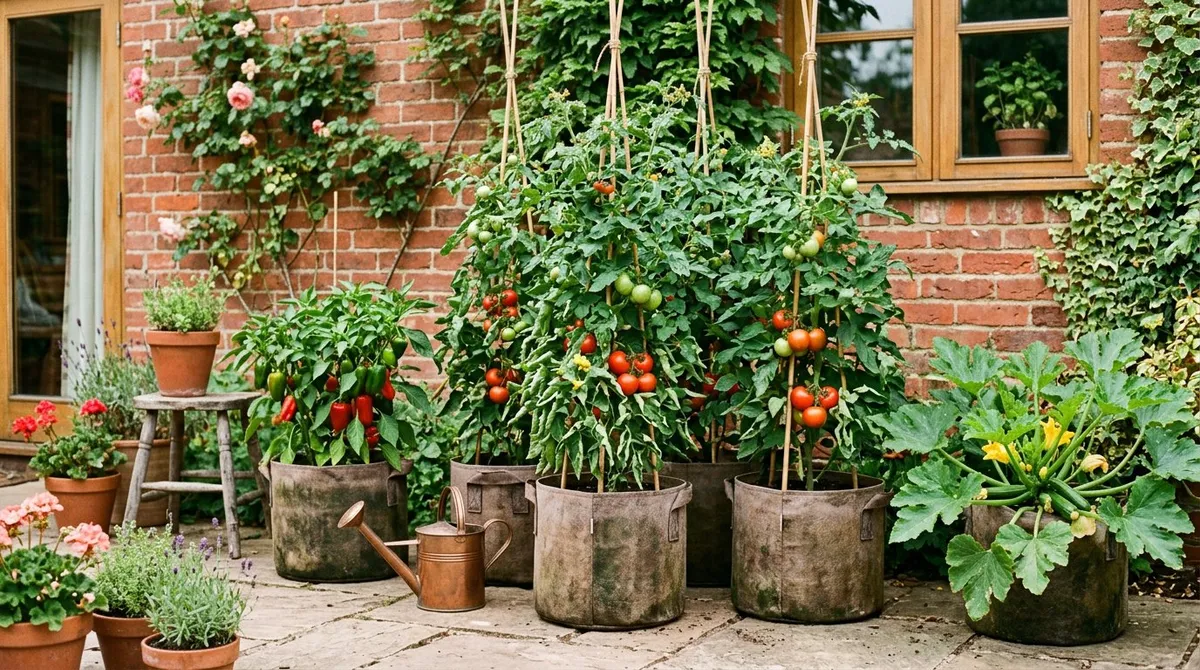
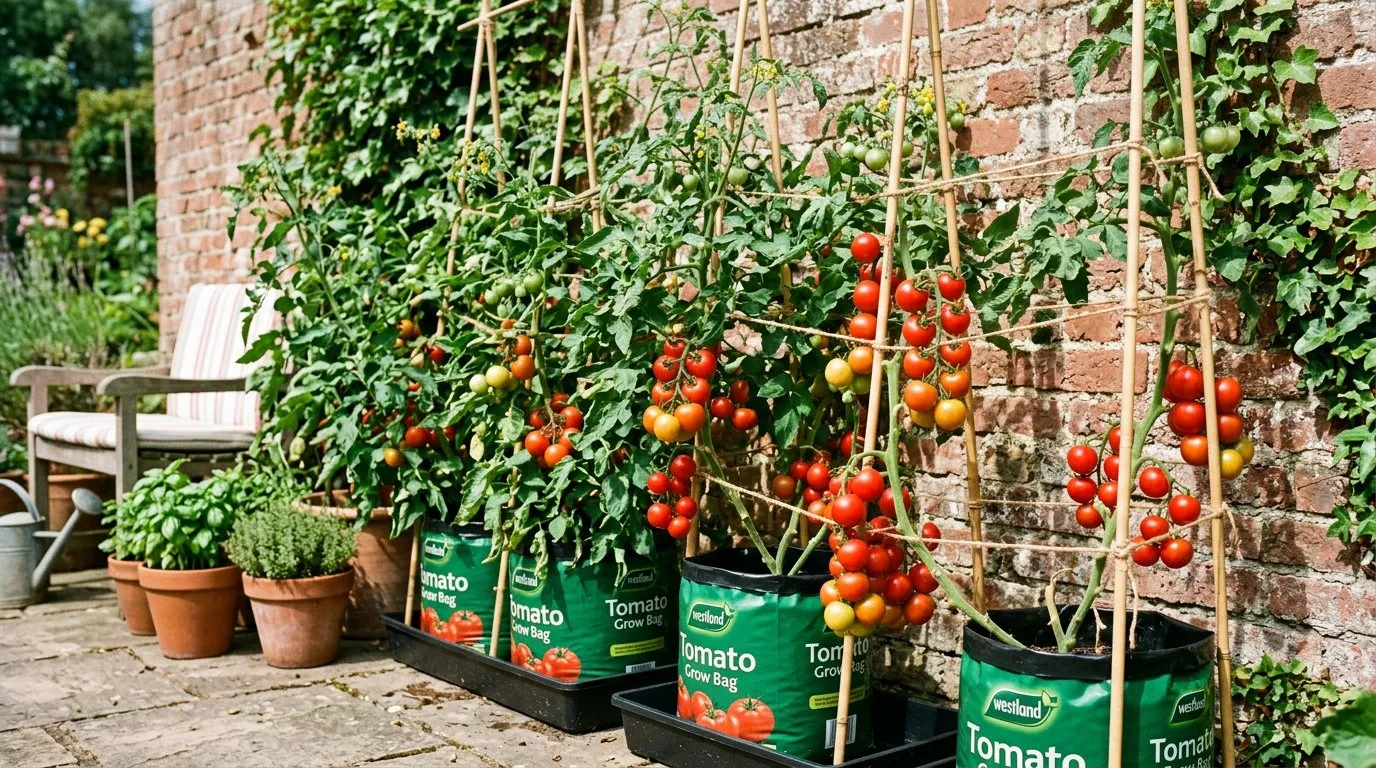 Tomatoes thriving in grow bags on a south-facing patio. Cordon varieties need cane support. Feed weekly with tomato fertiliser once the first truss sets fruit.
Ring culture in grow bags
Ring culture is a technique that dramatically improves tomato and pepper growing in grow bags. It combines a grow bag for root feeding with a bottomless pot for watering.
How ring culture works
- Place the grow bag in position. Cut drainage slits in the base
- Stand bottomless pots (15-20cm diameter ring culture pots) on the surface of the bag
- Plant one seedling in each ring pot, filling around it with multipurpose compost
- The plant develops two root systems: feeding roots in the grow bag and water-absorbing roots in the ring pot
- Water only through the ring pot. Feed through the grow bag surface
Why it works
The ring pot increases the total compost volume per plant. Watering through the ring delivers moisture directly to the root ball. Feeding through the grow bag surface delivers nutrients to the lower feeding roots. The separation of watering and feeding zones produces healthier, higher-yielding plants.
You can buy purpose-made ring culture pots for two to three pounds each. Alternatively, cut the bottom off a 2-litre plastic pot. The result is the same.
Why we recommend ring culture for greenhouse tomatoes: After more than 30 seasons of growing tomatoes under glass, ring culture consistently outperforms standard grow bag planting. Tomato plants grown using ring culture produce 20-30% more fruit than those planted directly into a standard bag, because the separated watering and feeding zones allow each root system to specialise without competing for the same resources.
Grow bags vs pots vs raised beds
Each container growing method has strengths and weaknesses. The best choice depends on your space, budget, and the crops you want to grow.
| Factor | Grow bags | Large pots (20-40L) | Raised beds |
|---|---|---|---|
| Cost | Two to eight pounds each | Five to twenty pounds each | Fifty to two hundred pounds |
| Compost depth | 10-20cm | 20-40cm | 20-50cm |
| Drying out | Very fast | Moderate | Slow |
| Soil disease | None (fresh compost) | Low (if refilled) | Builds over years |
| Root space | Limited | Good | Excellent |
| Crop range | Fruiting crops and salad | Most crops | All crops |
| Portability | Very portable | Portable when empty | Permanent |
| Lifespan | One to two seasons | 5-15 years | 10-20 years |
For tomatoes and peppers on a patio: Grow bags with ring culture pots give the best results for the lowest cost.
For a wider range of crops including root vegetables: Raised beds provide the depth and volume that grow bags cannot match.
For balconies and small spaces: A mix of grow bags (for tomatoes and salad) and pots (for herbs and deeper-rooted crops) maximises production in minimal space.
Reusing grow bags
Grow bags give acceptable results for a second season if refreshed properly.
How to refresh a grow bag for year two
- At the end of the season, remove all plant material and roots
- Break up compacted compost with a hand fork
- Mix in 25-30% fresh multipurpose compost
- Add 1 tablespoon of slow-release fertiliser per bag
- Top up with fresh compost to restore the original level
Crop rotation in grow bags
Never grow the same crop family in reused compost. If year one was tomatoes, year two should be salad, herbs, or beans. Tomato compost carries risk of blight spores and root disease.
| Year 1 crop | Year 2 options |
|---|---|
| Tomatoes or peppers | Lettuce, herbs, beans |
| Courgettes or cucumbers | Tomatoes, peppers |
| Salad or herbs | Any crop |
After two seasons, the compost is exhausted. Empty it onto garden borders, into the compost heap, or use as a mulch around established shrubs. Do not grow in it a third time.
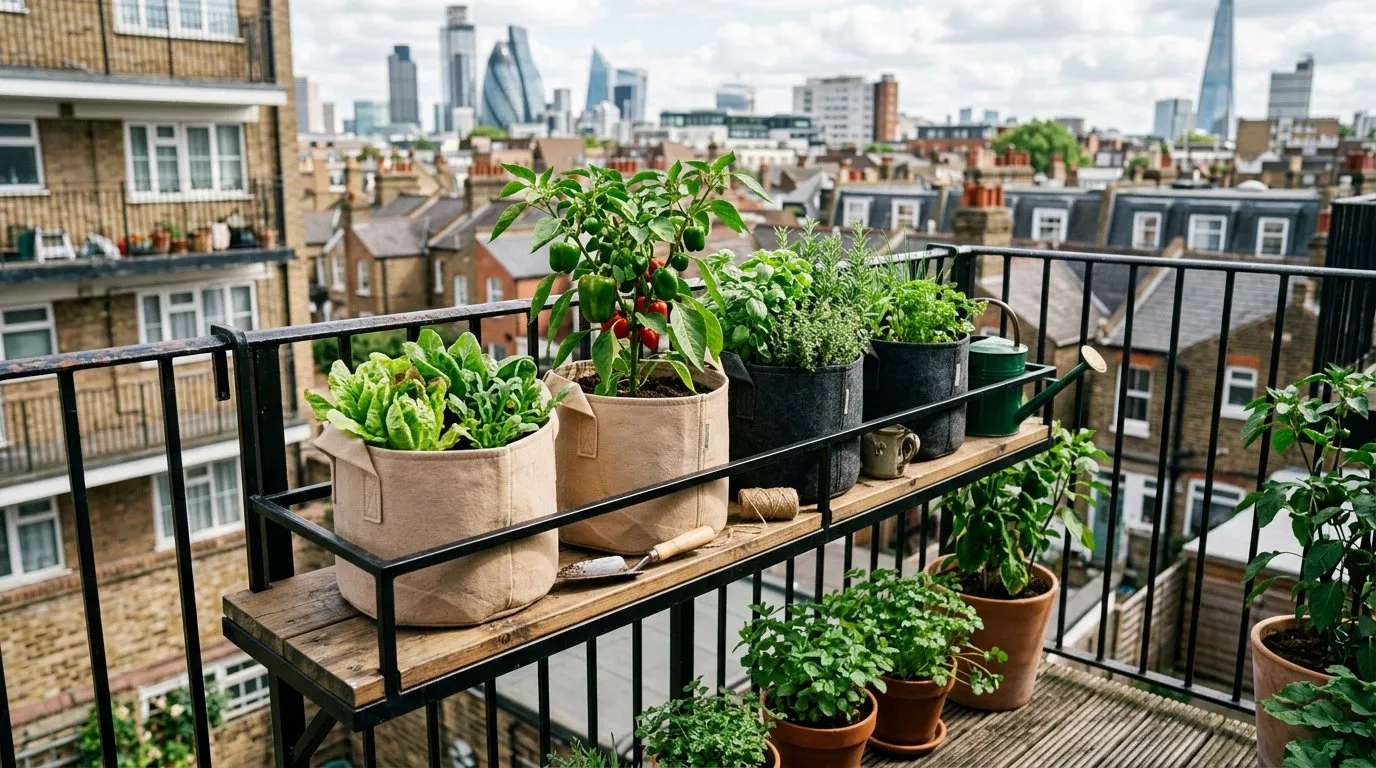 Grow bags on a balcony. Even a small outdoor space produces fresh salad, herbs, and cherry tomatoes through the summer months.
Troubleshooting common grow bag problems
Plants wilting in the afternoon
The most common problem. Compost has dried out. Water thoroughly morning and evening in hot weather. Add a grow bag tray as a water reservoir underneath. Mulch the compost surface to reduce evaporation.
Blossom end rot on tomatoes
A dark, sunken patch at the bottom of the fruit. Caused by calcium deficiency, which is triggered by irregular watering rather than lack of calcium in the compost. Water consistently every day. Grow bag trays and drip irrigation prevent the fluctuations that cause this problem.
Yellow lower leaves
Usually nitrogen deficiency. The limited compost volume runs out of nitrogen by midsummer. Start feeding with a balanced liquid feed. If you have been using only tomato feed (high potash, low nitrogen), alternate with a balanced feed every other week.
Fungus gnats (tiny black flies)
Small flies around the compost surface. Harmless to established plants but a nuisance. They breed in wet compost. Allow the top 1cm to dry between waterings. Yellow sticky traps catch adults. Cover the compost surface with a 1cm layer of horticultural grit.
Root-bound plants
In standard grow bags, vigorous crops like tomatoes and courgettes become root-bound by August. The entire compost volume is filled with roots and cannot hold water. Switch to premium (larger) bags next year. For this year, water more frequently and feed weekly.
Month-by-month grow bag calendar
| Month | Activity |
|---|---|
| April | Buy grow bags. Set up in greenhouse for early planting |
| May | Plant tomatoes and peppers in greenhouse bags. Outdoor bags: wait until after last frost |
| Late May | Plant outdoor grow bags with tomatoes, peppers, courgettes after hardening off |
| June | Begin weekly feeding as first fruits set. Water daily. Plant salad and herb bags |
| July | Peak watering demand. Twice daily in hot weather. Continue feeding |
| August | Harvest tomatoes, peppers, courgettes, cucumbers. Maintain feeding and watering |
| September | Harvest continues. Reduce watering as days shorten. Plant autumn salad in refreshed bags |
| October | Clear spent summer crops. Compost or refresh bags for next year |
Now you’ve mastered growing in grow bags, read our guide on growing tomatoes in the UK for the next step.
Grow bags are not glamorous. They are not beautiful garden features. But they produce food reliably, cheaply, and in places where no other growing method works. A sunny patio with six grow bags feeds a family salad crops, tomatoes, peppers, and herbs from June to October for under thirty pounds. For new gardeners, renters, and anyone without a garden bed, grow bags are the fastest route from seed to harvest.
Lawrie has been gardening in the West Midlands for over 30 years. He grows his own veg using no-dig methods, keeps a wildlife-friendly garden, and writes practical advice based on real UK growing conditions.