How to Train Fruit Trees: Espalier
Learn how to train fruit trees using espalier, fan, cordon, and step-over forms. UK pruning guide with rootstock advice, wire setup, and seasonal calendar.
Key takeaways
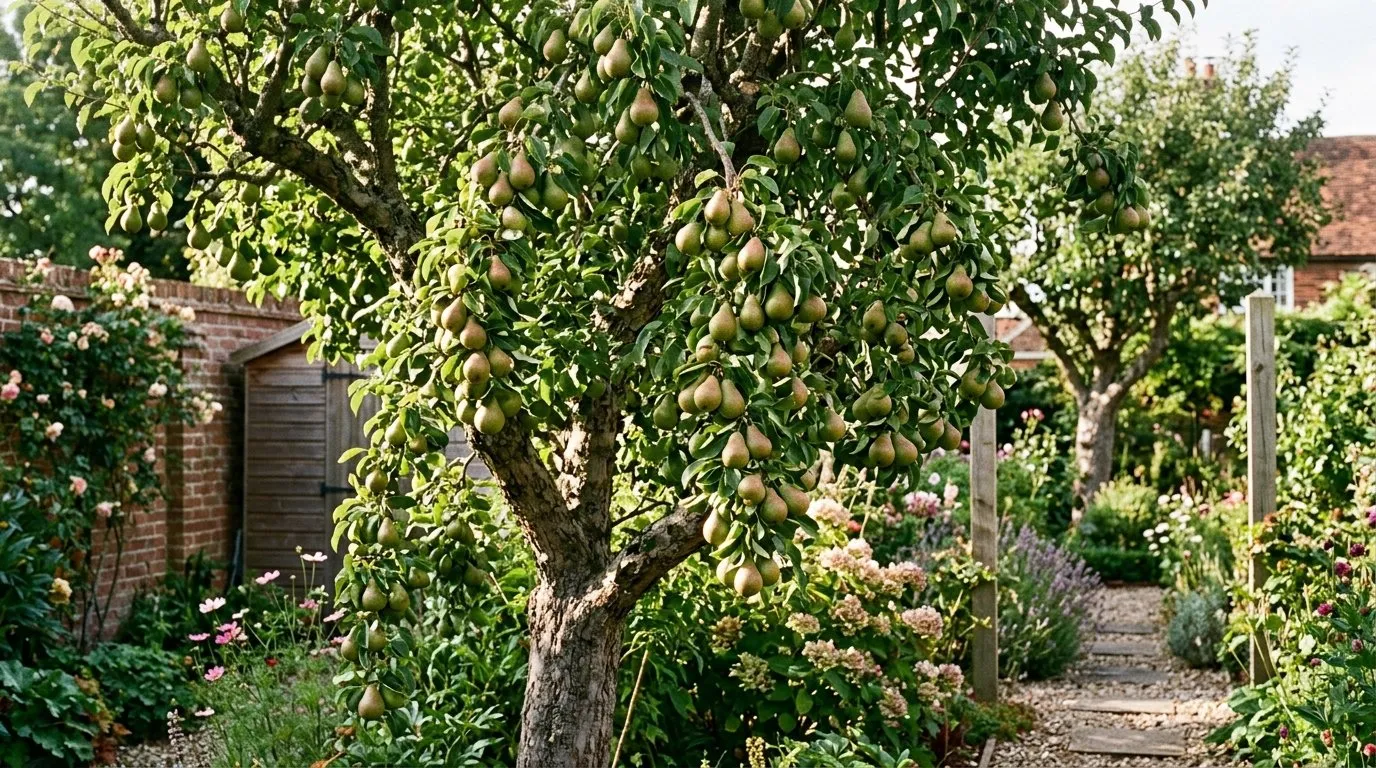
- Espalier training suits apples and pears best, producing 15-25kg of fruit annually on 3-5 horizontal tiers
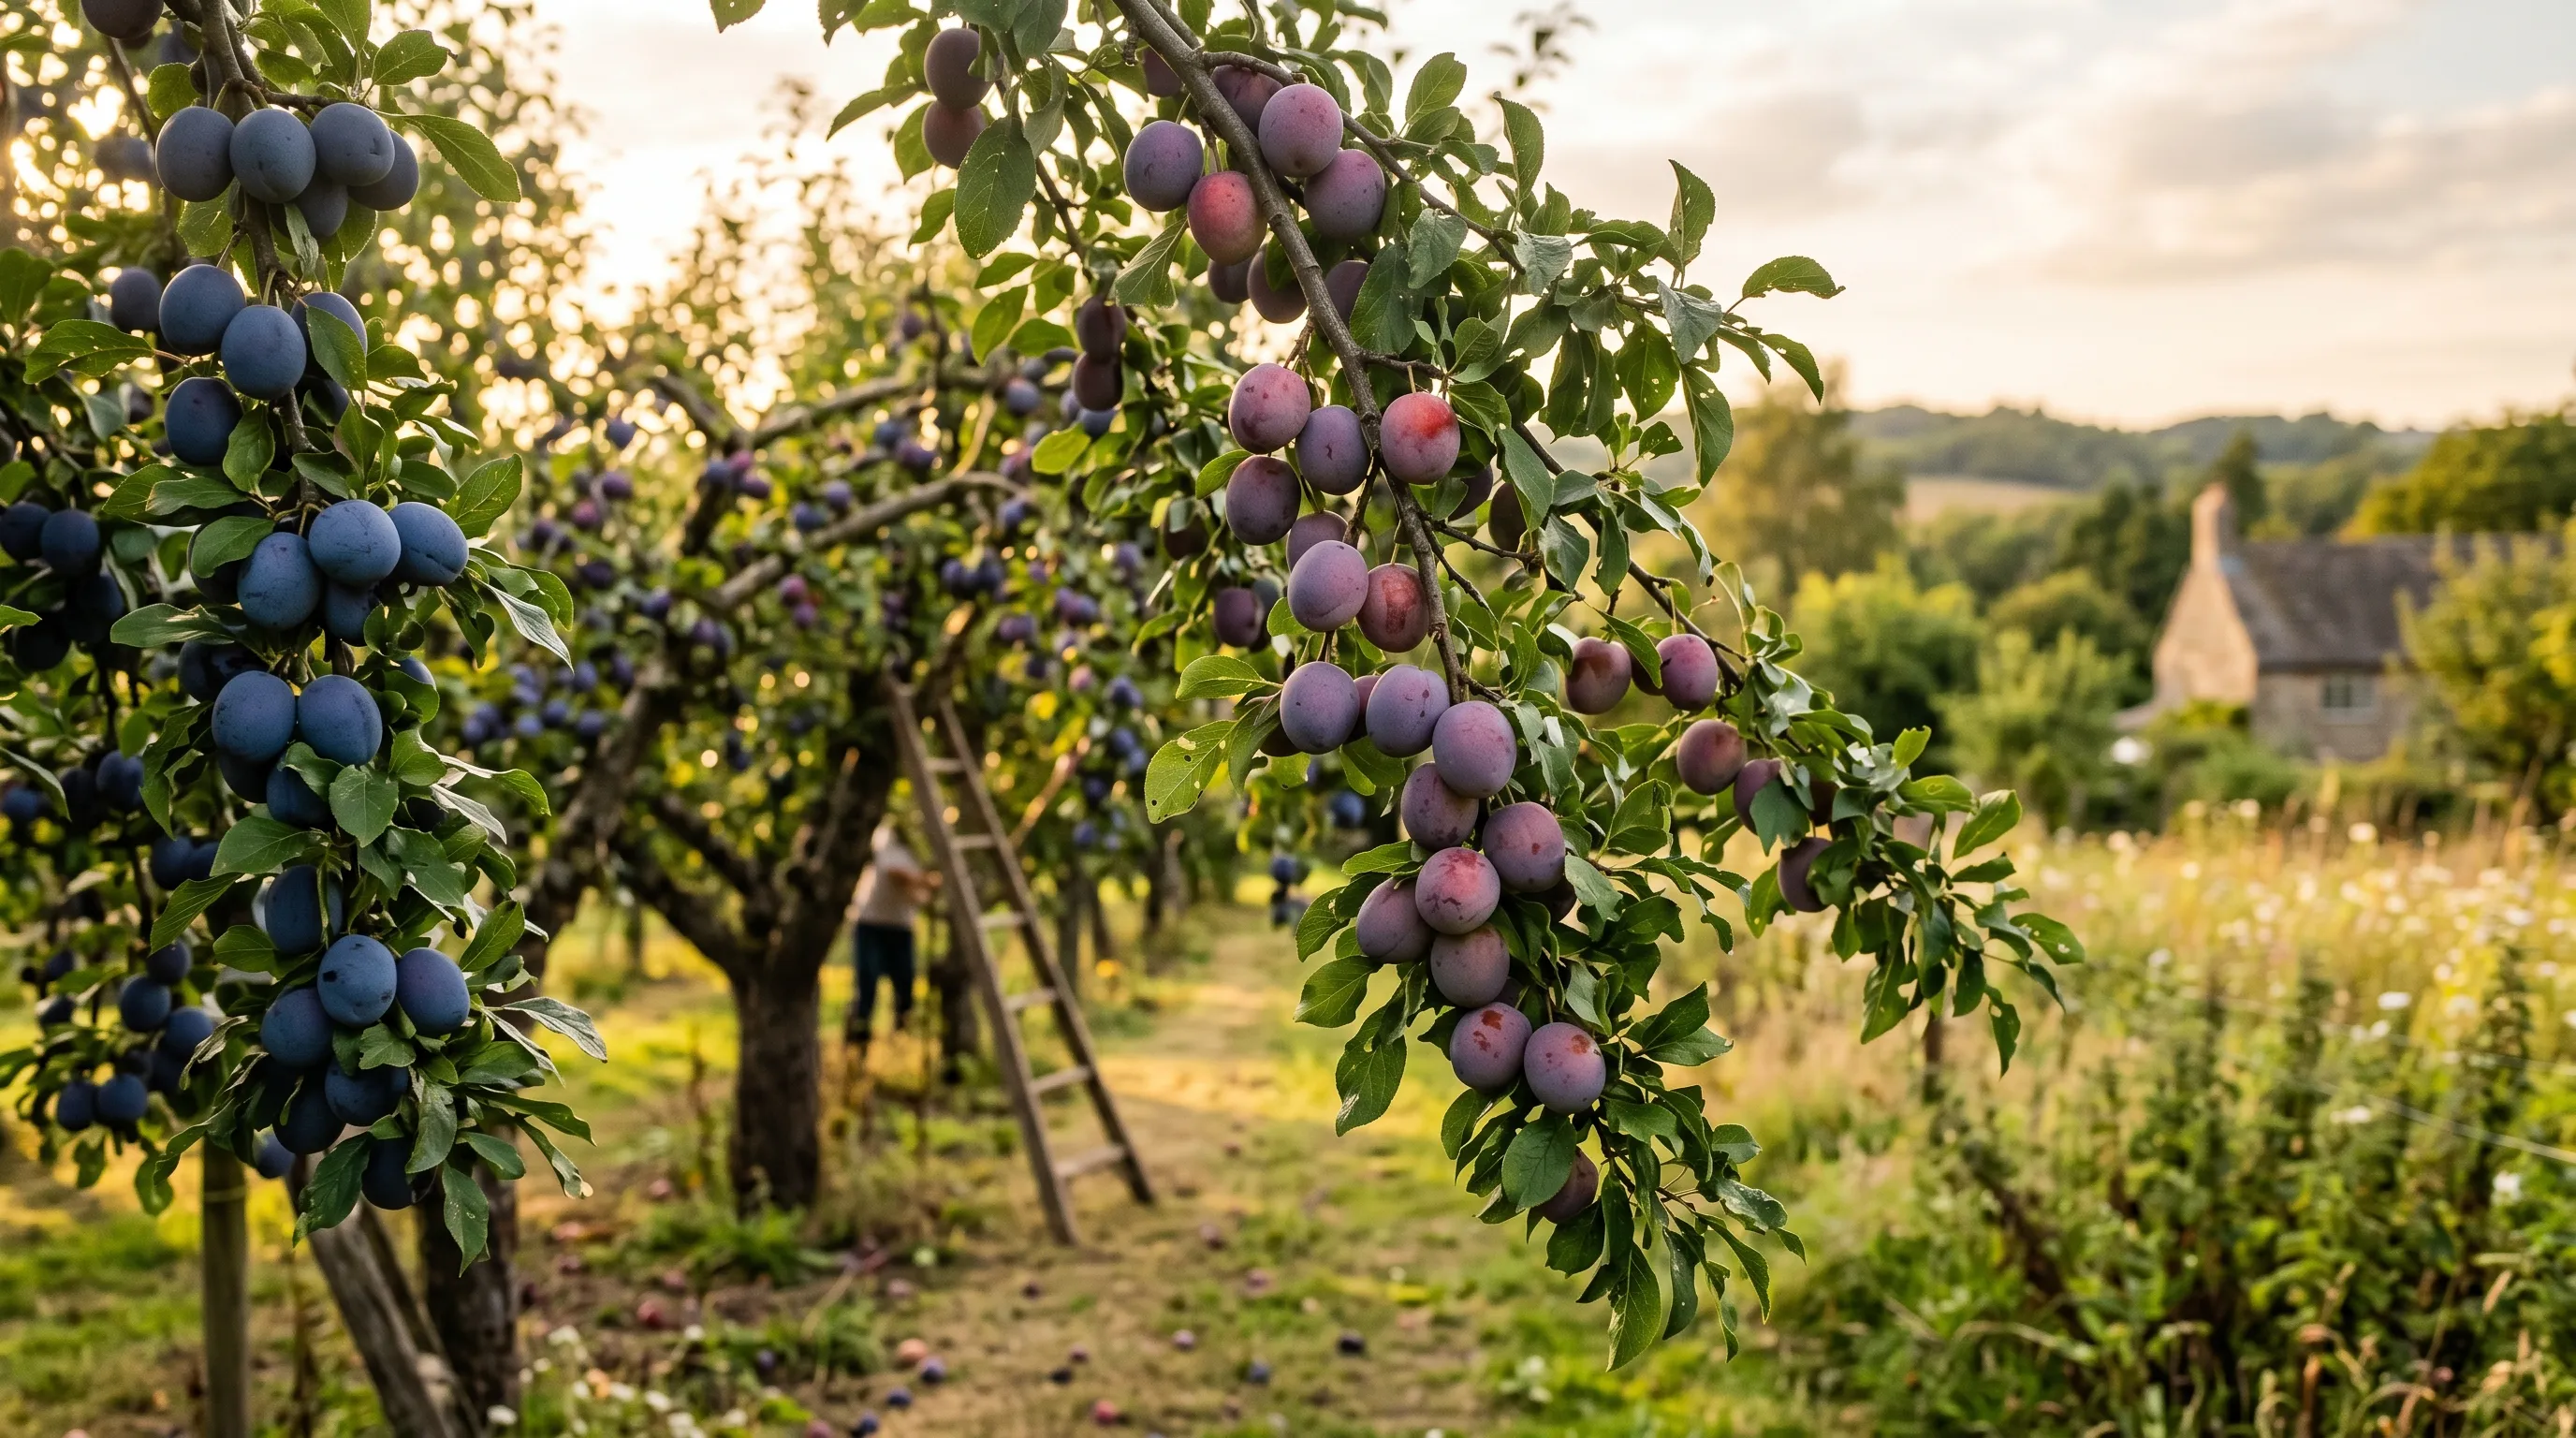
- Fan training is the method for stone fruit like cherries, plums, peaches, and figs on any wall aspect
- Cordons planted at 45 degrees and spaced 75cm apart give maximum yield in minimum space
- Set up horizontal galvanised wires at 40-60cm intervals, held 10-15cm from the wall with vine eyes
- Formative training takes 3-5 years of winter pruning to build the permanent framework
- Use the Modified Lorette System for summer maintenance pruning once the framework is established
Training fruit trees into flat, structured forms is one of the most productive and visually striking techniques in British gardening. A single espaliered apple tree against a warm brick wall can yield 15-25kg of fruit each year while occupying no more ground space than a fence panel. The practice dates back to medieval monastery gardens, where monks trained fruit along south-facing walls to extend the growing season and protect blossom from late frosts.
This guide covers every major training form used in UK gardens: espalier, fan, cordon, and step-over. You will find practical advice on wire systems, rootstock selection, pruning methods, and a month-by-month calendar to keep your trained trees productive for decades. Whether you are growing apples, pears, or stone fruit, training against a wall or fence makes the most of every square metre.
What is a trained fruit tree?
A trained fruit tree is any tree grown in a controlled, two-dimensional form rather than allowed to develop a natural round canopy. The tree is tied to a system of horizontal wires attached to a wall, fence, or freestanding posts. Branches are guided into a specific pattern during the first 3-5 years. Once the framework is established, annual pruning maintains the shape and encourages heavy fruiting.
Trained forms work because restricting growth redirects the tree’s energy from producing wood into producing fruit buds. A trained tree on a south-facing wall also benefits from radiated warmth, advancing ripening by 2-3 weeks compared to the same variety grown as a freestanding tree. This is especially valuable in cooler parts of the UK.
The four main training forms each suit different fruit types, wall sizes, and garden situations. Choosing the right form before planting saves years of rework.
Training forms compared
Before choosing a form, consider your available space, wall aspect, and which fruit you want to grow. The table below compares all five training forms at a glance.
| Training form | Best fruit | Wall space needed | Typical yield | Time to establish | Difficulty |
|---|---|---|---|---|---|
| Espalier | Apples, pears | 3-5m wide, 2-3m tall | 15-25kg | 4-5 years | Moderate |
| Fan | Cherries, plums, peaches, figs | 3-4m wide, 2-2.5m tall | 10-15kg | 3-4 years | Moderate |
| Cordon (single oblique) | Apples, pears | 75cm wide, 2m tall | 5-10kg | 2-3 years | Easy |
| Double/triple cordon | Apples, pears | 1.5-2m wide, 2m tall | 10-20kg | 3-4 years | Moderate |
| Step-over | Apples, pears | 1.5-3m wide, 30-45cm tall | 2-4kg | 2-3 years | Easy |
Gardener’s tip: Start with a single oblique cordon if you are new to fruit tree training. It is the simplest form, produces fruit quickly, and teaches you the pruning principles that apply to all other forms.
Espalier training
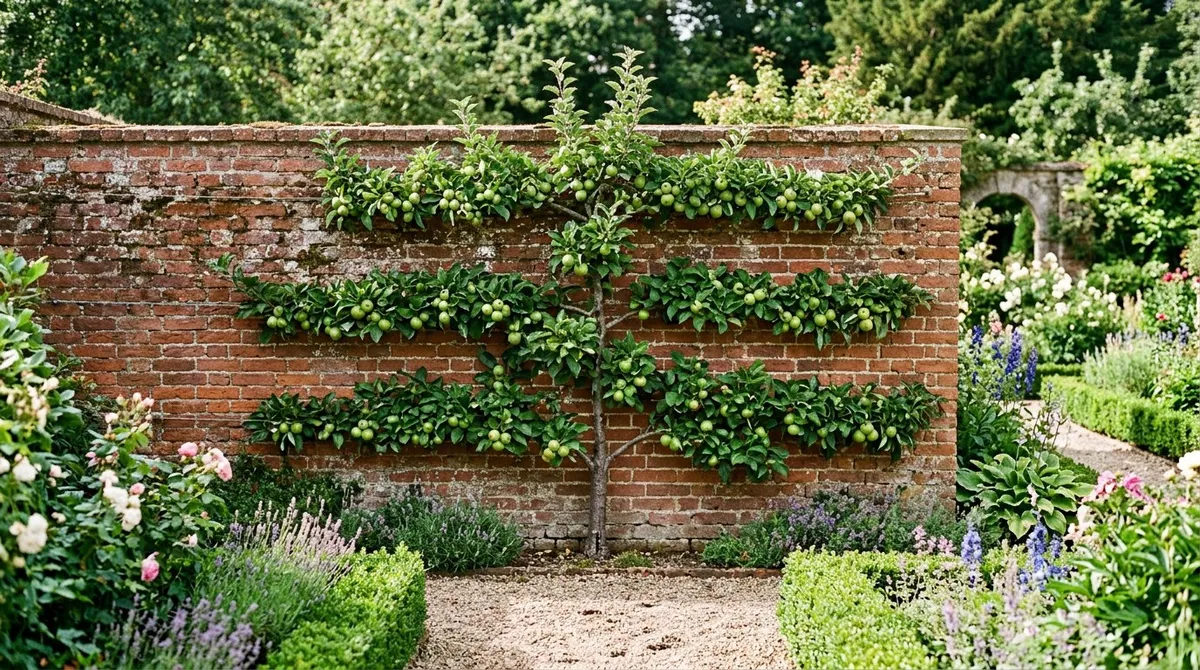
Espalier is the classic trained form: a central vertical trunk with horizontal branches (called tiers) extending evenly on each side. The tiers are tied to horizontal wires spaced 40-60cm apart. A mature espalier typically has 3-5 tiers, creating an elegant ladder pattern against a wall or fence.
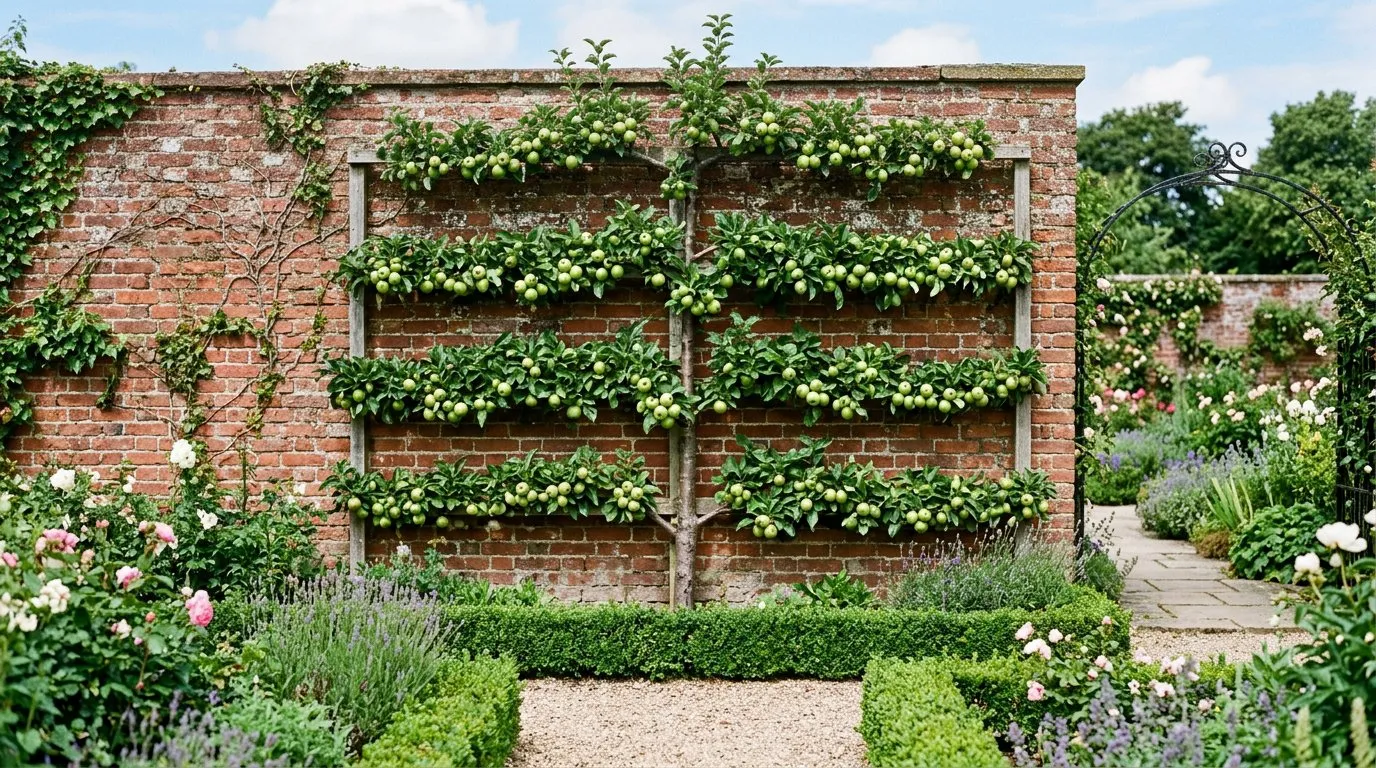 A four-tier espalier apple tree. Each horizontal tier is trained on a separate wire.
Espalier training works best for apples and pears because these fruit on short spurs that develop along older wood. The rigid horizontal structure encourages spur formation along each tier. A south or west-facing wall is ideal, providing warmth and shelter for reliable cropping.
How to create an espalier
Begin with a maiden whip (an unbranched one-year-old tree) planted in winter, 15-20cm from the wall. Cut the maiden whip to a bud just above the first wire (typically 40-50cm from the ground) in the first winter.
Year one: Three buds will grow from the cut point. Train the strongest vertical shoot upward as the new leader. Train the two strongest side shoots at 45 degrees to bamboo canes during summer, then lower them to horizontal and tie to the first wire in autumn. Lowering them gradually prevents the branch snapping.
Year two: Cut the central leader to a bud just above the second wire in winter. Repeat the process: grow a new leader and two new side shoots for the second tier. Allow the first tier to extend along the wires. Remove any other shoots growing from the trunk.
Years three to five: Add one new tier each winter until you reach the top wire. Once the final tier is in place, cut away the central leader. The framework is now complete. Each tier should extend 1.5-2.5m on each side of the trunk.
Best rootstocks for espalier
| Rootstock | Final size | Spacing | Best for |
|---|---|---|---|
| M27 | 1.2-1.8m | 1.5m | Step-overs only |
| M9 | 2-2.5m | 2.5-3m | Small walls, 2-3 tier espalier |
| M26 | 2.5-3.5m | 3.5-4.5m | Standard 3-5 tier espalier |
| MM106 | 3.5-5m | 4.5-5.5m | Large walls, freestanding posts |
M26 is the standard choice for most garden espaliers. It produces a manageable tree that fills a typical 3.6m fence panel with 3-4 tiers. M9 suits smaller spaces but needs fertile soil and permanent staking.
Why we recommend M26 rootstock for UK garden espaliers: After 30 years of training fruit trees on walls ranging from compact courtyard plots to half-acre kitchen gardens, M26 consistently delivers the best balance of vigour and control. On M9 we see stress-related fruit drop in dry summers unless irrigation is in place. M26 trees on fertile soil sustain a 3-4 tier espalier at 3.6m wide, yielding 15-25kg annually, without outgrowing the space within a decade.
Fan training
Fan training spreads branches in a radiating pattern from a short trunk, like the ribs of an open fan. This form suits stone fruit including cherries, plums, peaches, apricots, and figs. Unlike espalier, fan-trained trees produce fruit along the length of younger wood rather than on fixed spurs.
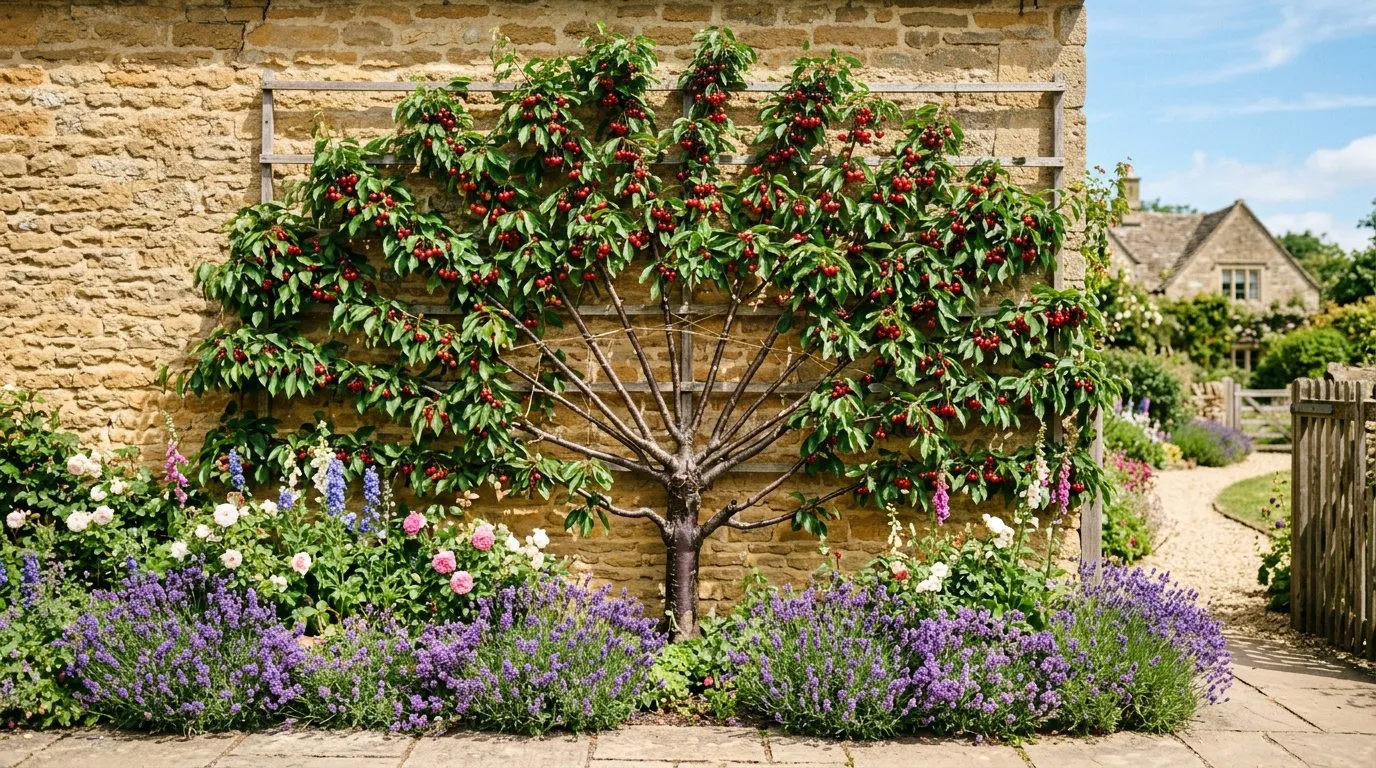 A fan-trained cherry. Fan form suits stone fruit that cannot be trained as cordons.
Fans work on any wall aspect. South-facing walls suit peaches and apricots. West-facing suits plums and gages. East-facing suits cherries. Even a north-facing wall supports a Morello cherry or a cooking plum.
Creating a fan framework
Start with a feathered maiden (a one-year tree with side branches) planted 15-20cm from the wall.
Year one: Select two strong side branches at 30-40cm from the ground, one on each side. Remove the central leader and all other branches. Tie the two selected branches to canes at 45 degrees to the horizontal.
Year two: Each arm produces 3-4 new shoots. Select four on each side that are evenly spaced. Tie these to canes radiating outward from the trunk at different angles. Remove any shoots growing directly toward or away from the wall.
Year three onward: Continue filling the fan shape with well-spaced branches. The mature fan should have 8-12 main ribs with fruiting laterals between them. A fan needs 3-4m of wall width and 2-2.5m of height to develop fully.
Warning: Never prune stone fruit in winter. Open wounds between November and February allow silver leaf fungus (Chondrostereum purpureum) to enter. All pruning of cherries, plums, and peaches must happen between June and August when the tree can seal wounds quickly.
Cordon training
A cordon is a single stem grown at a 45-degree angle, bearing short fruiting spurs along its length. Cordons are the most space-efficient form. Plant them just 75cm apart and you can fit eight different apple varieties along a 6m fence. Each cordon produces 5-10kg of fruit annually.
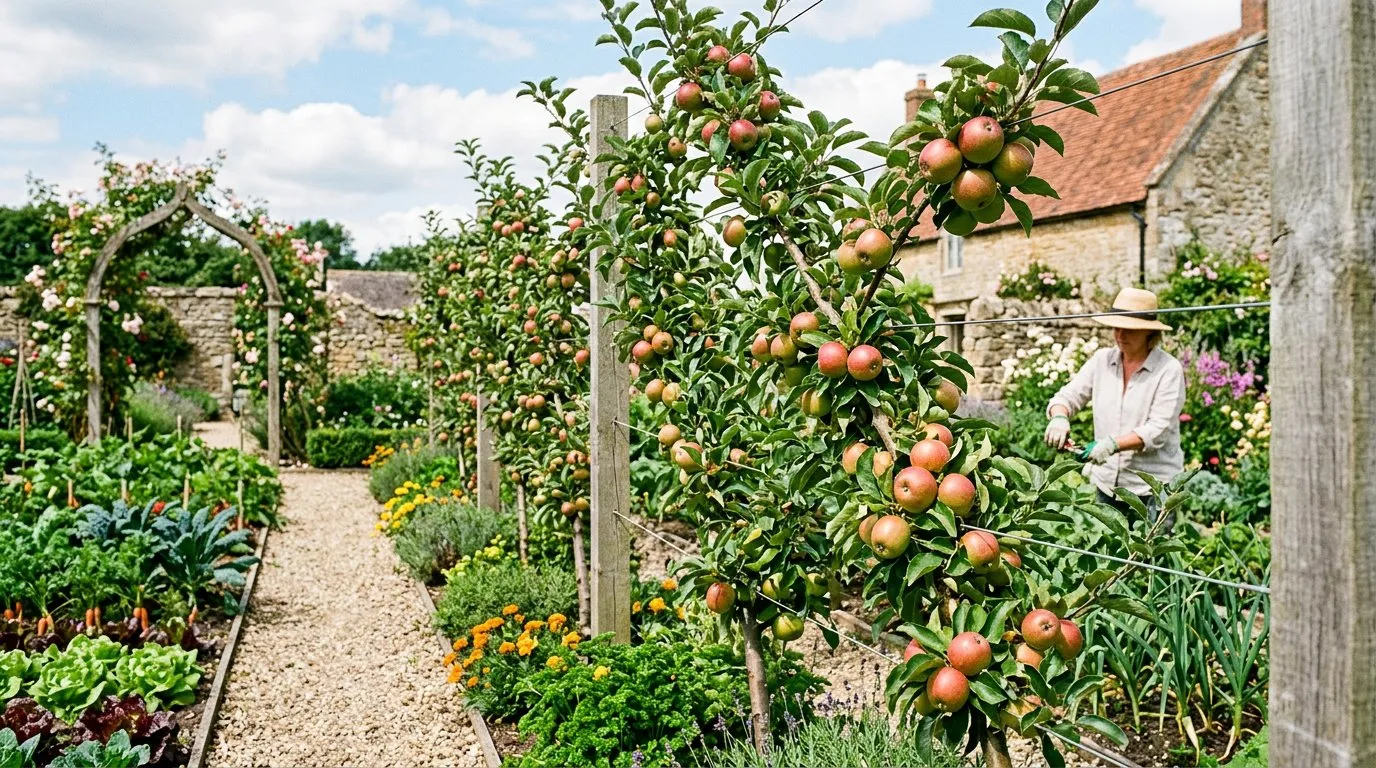 Oblique cordons at 45 degrees. The most space-efficient way to grow apples and pears.
Single oblique cordons suit apples and pears on M9 or M26 rootstock. The angled stem slows sap flow, which reduces excessive shoot growth and encourages earlier and heavier fruiting compared to a vertical tree.
Planting and training a cordon
Plant bare-root maidens in winter at 45 degrees, leaning toward the north in a north-south row (or leaning in the direction of least sun). Tie the main stem to a bamboo cane, and tie the cane to the horizontal wire system.
Space plants 75cm apart with rows 1.8m apart if planting in multiple rows. Prune any existing side shoots to 3-4 buds at planting. Allow the leader to extend until it reaches the top wire (about 2m). Then cut it back to a weak lateral each May to restrict height.
Double and triple cordons
A double cordon (U-cordon) has two vertical arms from a short horizontal branch. A triple cordon (candelabra) adds a third central vertical stem. These produce more fruit per tree at the cost of wider spacing (1.2-2m between plants).
Double cordons are useful when you want two varieties for pollination in a tight space. The two arms provide enough spur wood to crop heavily from the second year after planting.
Step-over training
A step-over is a single-tier espalier grown at knee height, typically 30-45cm from the ground. Step-overs use the ultra-dwarfing M27 rootstock, which restricts the tree to just 1.2-1.8m of total growth. They make beautiful, productive edging for paths and vegetable beds.
Each step-over arm extends 75cm-1.5m from the central trunk, giving a total span of 1.5-3m. Yields are modest at 2-4kg per tree, but the fruit quality is excellent because every apple receives full sunlight.
Creating a step-over
Plant a maiden whip on M27 rootstock in winter. Set a single horizontal wire at 30-40cm height between two posts. Cut the maiden to a bud just above the wire in late winter. Train two shoots horizontally along the wire, one in each direction. Tie them down gradually over the summer to avoid snapping.
By the second winter, the horizontal arms are established. Remove any upward-growing shoots. Summer prune side shoots using the Modified Lorette System (see pruning section below). Step-overs on M27 need fertile, well-watered soil and permanent support because the rootstock produces a weak root system.
Gardener’s tip: Step-overs look striking bordering a kitchen garden or lining a path. Plant dessert apple varieties like ‘Fiesta’, ‘Sunset’, or ‘James Grieve’ for fruit you can pick and eat straight from the tree.
Setting up a wire support system
Every trained fruit tree needs a strong, permanent wire system. Flimsy supports lead to sagging branches, poor training, and broken ties. Install the wires before planting.
Wall-mounted wires
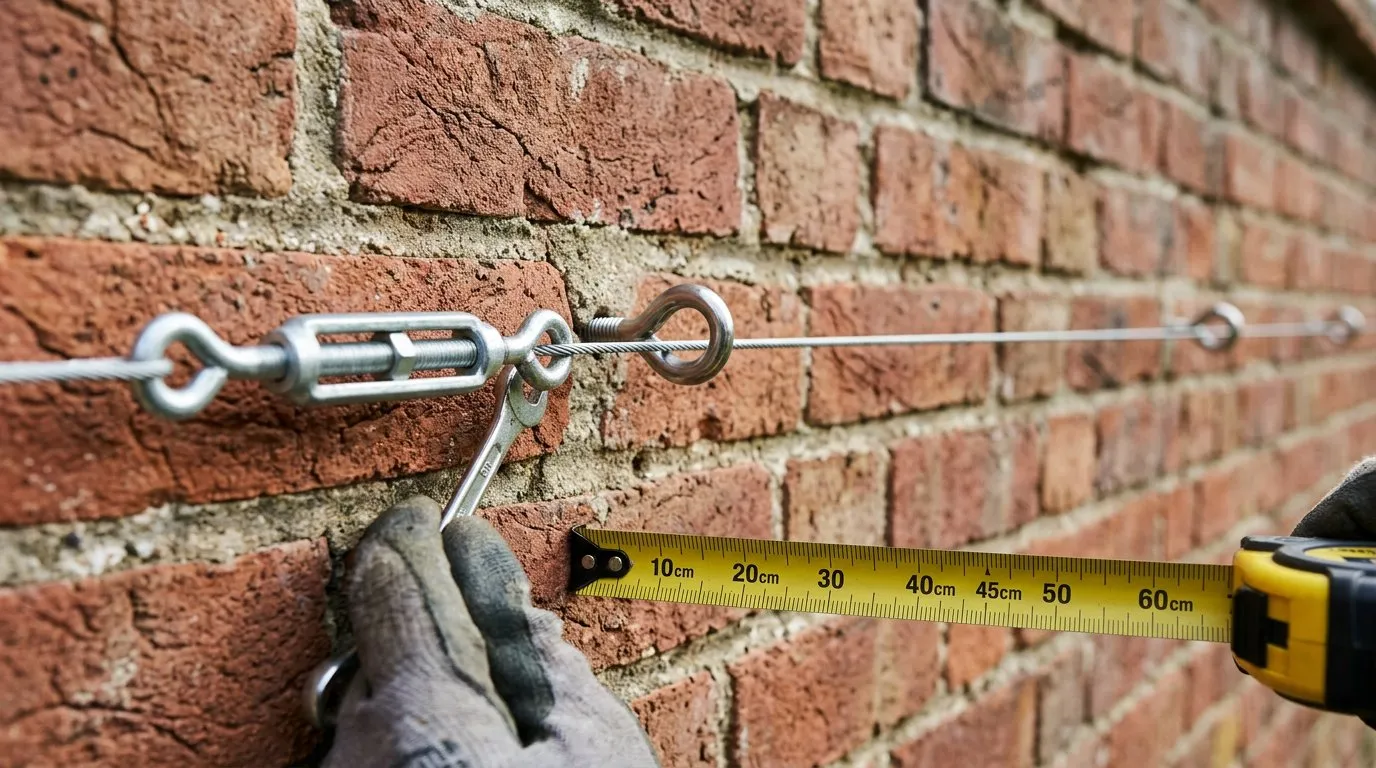 Wire training system with vine eyes screwed into the wall and tensioning bolts.
Fix vine eyes (screw-in metal supports) into the wall at each end and every 1.8m along the run. The vine eyes hold the wire 10-15cm away from the wall, allowing air circulation behind the branches. Poor air movement encourages fungal diseases.
String 3mm galvanised steel wire between the vine eyes, pulling it taut with wire tensioners (turnbuckles) at one end. Space wires at 40-60cm vertical intervals, matching the planned tier spacing of your espalier or the rib angles of your fan.
Freestanding post-and-wire
For cordons and espaliers grown in open ground without a wall, set 2.4m treated timber posts at 3-4m intervals along the row. Bury them 60cm deep in concrete footings. Run horizontal wires at 60cm, 120cm, and 180cm heights. Brace the end posts with angled struts to resist the pull of tensioned wire.
Pruning trained fruit trees
Pruning is the ongoing skill that keeps trained trees productive and in shape. The approach differs depending on whether you are still building the framework (formative pruning) or maintaining a mature tree (maintenance pruning). It also depends on the fruit type.
Formative pruning (years 1-4)
Formative pruning happens during the dormant season (November to February) for apples and pears. Each winter, you extend the framework by one tier (espalier), add new ribs (fan), or allow the leader to extend (cordon).
The key principles:
- Select the strongest, best-placed shoots to become permanent branches
- Remove competing shoots, especially any growing directly toward or away from the wall
- Cut the central leader to just above the next wire to stimulate branching at that point
- Tie new branches to canes at 45 degrees first, then lower to their final position gradually
Formative pruning for stone fruit fans happens in spring (March to April) just as buds break. Never prune stone fruit during winter dormancy.
The Modified Lorette System (summer pruning)
Once the framework is established, the Modified Lorette System controls summer growth on trained apples and pears. It was developed by Louis Lorette in France and adapted for the UK climate. The RHS pruning guide provides additional detail on this technique.
In August, when the base of new side shoots has turned woody and dark:
- Cut shoots growing directly from the main branches back to three leaves above the basal cluster (the rosette of small leaves where the shoot joins the branch)
- Cut shoots growing from existing side shoots back to one leaf above the basal cluster
- Do not prune shoots shorter than 20cm as these are likely to become fruit buds naturally
In September, cut any secondary regrowth from the August cuts back to one leaf. This two-stage approach prevents excessive regrowth while encouraging the formation of fruit buds for the following year.
Spur pruning
Over the years, fruiting spurs (the short, knobby growths that carry blossom and fruit) become congested. Every 3-4 years, thin out crowded spur systems in winter. Remove the weakest and oldest spurs, keeping 2-3 healthy fruit buds per spur. Thinning lets light and air reach the remaining spurs, improving fruit size and quality.
Pruning stone fruit
Cherry, plum, and peach fans are pruned only in summer (June to August). The technique differs from the Lorette System:
- After harvest, cut out any branches that have fruited back to a new replacement shoot
- Tie in the replacement shoot to fill the gap
- Remove any shoots growing directly toward or away from the wall
- Thin overcrowded areas by removing weak or crossing shoots
This replacement pruning keeps a constant supply of young, productive wood. Peaches and nectarines fruit only on the previous year’s growth, making annual replacement essential for continued cropping.
Month-by-month training calendar
| Month | Task |
|---|---|
| January | Order bare-root trees from nurseries. Plan wire systems. Purchase vine eyes and tensioners. |
| February | Install wire support systems on walls and fences. Plant bare-root trees. |
| March | Complete planting before bud break. Formative prune stone fruit fans as buds swell. |
| April | Tie in new growth on fans. Check all ties are not cutting into bark. Remove blossom on newly planted trees. |
| May | Train new shoots on espaliers to canes at 45 degrees. Pinch out unwanted shoots on cordons. Water newly planted trees weekly. |
| June | Begin summer pruning on stone fruit fans after harvest. Tie in replacement shoots. Water in dry spells. |
| July | Continue tying in new growth. Thin heavy fruit crops to one apple per cluster. Summer prune stone fruit. |
| August | Modified Lorette System: cut mature side shoots on apple and pear espaliers and cordons to three leaves. |
| September | Second Lorette cut: trim regrowth to one leaf. Lower espalier branches from 45 degrees to horizontal. Pick fruit. |
| October | Harvest remaining fruit. Check wire tensions. Replace any broken ties. |
| November | Begin winter pruning on apples and pears. Thin congested spur systems. Plant new bare-root trees. |
| December | Continue winter pruning. Formative prune espalier tiers. Tie in permanent framework branches. |
For a broader view of what to pick and when across the garden, see our monthly harvest guide.
Common mistakes when training fruit trees
Trained fruit trees are a long-term investment. These five mistakes are the most frequent causes of failure, and all are avoidable.
1. Choosing the wrong rootstock
A vigorous rootstock like MM106 on a small wall produces a tree that outgrows its space within three years. Match the rootstock to the form: M27 for step-overs, M9 for cordons and small espaliers, M26 for standard espaliers, and Colt or Gisela 5 for cherry fans. An oversized tree is nearly impossible to bring back under control once established.
2. Pruning stone fruit in winter
Winter pruning of cherries, plums, and peaches invites silver leaf disease (Chondrostereum purpureum). The fungal spores are active from September to May and enter through pruning wounds. Always prune stone fruit between June and August when the tree can produce protective resins to seal cuts. This is the single most important rule for stone fruit health.
3. Tying branches down too quickly
New branches snap if forced horizontal in one movement. Lower them gradually over several months, moving the tie down 10-15 degrees each time. Tie to a cane first, then lower the cane. Patience here prevents a broken branch that costs an entire year of progress.
4. Neglecting summer pruning
Skipping the August Lorette pruning on apple and pear espaliers and cordons results in excessive leafy growth, reduced fruit bud formation, and a tangled mess by autumn. Summer pruning is not optional for trained forms. Block one afternoon in early August to complete this annual task.
5. Planting too close to the wall
Trees planted hard against a wall sit in a rain shadow where the soil stays dry even in wet weather. Plant 15-20cm from the wall base and angle the trunk backward toward the wall. Water thoroughly during the first two summers. Mulch with a 5-8cm layer of compost to retain moisture.
Buying pre-trained trees vs starting from scratch
You have two options when starting a trained fruit tree. Each has clear advantages depending on your budget and patience.
A maiden whip (one-year unbranched tree) costs around a third of a pre-trained tree. Starting from scratch gives you full control over tier spacing and branch selection. You can match the framework precisely to your wall dimensions. The disadvantage is time: expect 3-5 years of careful formative pruning before the framework is complete and cropping begins in earnest.
A pre-trained tree from a specialist nursery arrives with 2-3 tiers (espalier) or a basic fan framework already formed. You save 1-2 years and begin harvesting sooner. The cost is higher and the framework may not align perfectly with your wire spacing. Most UK fruit tree nurseries sell pre-trained espaliers, fans, and cordons in bare-root form from November to March.
For small garden designs, pre-trained trees deliver an instant structural feature. For allotments and larger gardens where you can plant several trees, maiden whips offer better value.
Gardener’s tip: Whether you buy pre-trained or start from a maiden whip, always check that the variety needs a pollination partner. Most apples need a different variety flowering at the same time within 15-20m. Cordons are ideal for this because their narrow spacing lets you grow several varieties side by side.
Now you’ve mastered training fruit trees, read our guide on how to store apples and pears to make the most of every kilogram your espalier produces.
Frequently asked questions
How long does it take to espalier a fruit tree?
Expect 3-5 years of formative pruning. Each winter you add one new tier of horizontal branches to the framework. A three-tier espalier on M26 rootstock typically reaches its final form in year four. Pre-trained trees from nurseries save 1-2 years of formative work but cost significantly more than starting with a maiden whip.
Can I espalier any fruit tree?
Apples and pears are the best candidates. They fruit on short spurs along older wood, which suits the rigid horizontal structure of an espalier. Stone fruit like cherries and plums perform better as fans because they produce fruit along the length of younger branches rather than on fixed spurs. The Garden Organic training guide provides further guidance on matching fruit types to forms.
What rootstock should I use for an espalier apple?
M26 is the standard choice for garden espaliers. It produces a tree reaching 2.5-3.5m in height and spread. M9 suits smaller walls with a 2-2.5m spread. MM106 is too vigorous for most walls and requires heavy pruning to control. For step-overs at knee height, use the ultra-dwarfing M27 rootstock which restricts overall growth to 60-90cm.
When should I prune trained fruit trees?
Prune apples and pears in winter for formative work. Summer pruning follows the Modified Lorette System in August, with a follow-up cut in September. Stone fruit must only be pruned in summer (June to August) to avoid silver leaf fungal infection. This seasonal distinction is critical for tree health.
Do I need a south-facing wall for espalier fruit trees?
South or west-facing walls are ideal for dessert apples and pears. East-facing walls work for late-flowering varieties that avoid frost damage to blossom. North-facing walls suit Morello cherries and cooking apples such as ‘Bramley’. Avoid placing early-flowering varieties on east-facing walls where morning sun thaws frozen blossom too rapidly, causing cell damage.
What is the Modified Lorette System?
It is a summer pruning method for trained apples and pears. Cut new side shoots longer than 20cm back to three leaves above the basal cluster in August. Cut secondary regrowth back to one leaf in September. This two-stage approach controls vigour and redirects the tree’s energy into forming fruit buds for the following season.
Should I buy a pre-trained tree or start from a maiden whip?
Pre-trained trees save 1-2 years but cost roughly double. A two-tier espalier arrives with the basic framework formed. Starting from a maiden whip is cheaper and allows you to match tier spacing exactly to your wire system. Most UK fruit nurseries sell both options in bare-root form between November and March.
How far apart should I plant cordon fruit trees?
Plant single oblique cordons 75cm apart along the wire system. This close spacing is the main advantage of the cordon form, allowing many varieties in a small area. A 6m fence accommodates eight cordon trees. Use M9 or M26 rootstock. Double cordons need 1.2-1.5m spacing, and triple cordons need 1.5-2m.
Lawrie has been gardening in the West Midlands for over 30 years. He grows his own veg using no-dig methods, keeps a wildlife-friendly garden, and writes practical advice based on real UK growing conditions.