Garden Tiles: A UK Outdoor Tiling Guide
How to use garden tiles outdoors in the UK: frost-rated 20mm porcelain, slip ratings, the full mortar bed that stops patios failing, and real costs.
Key takeaways
- Frost-rated 20mm porcelain absorbs under 0.5% water, so it survives 30-50 UK freeze-thaw cycles a year
- Water expands 9% when it freezes, splitting any tile that drinks more than about 3% water
- R11 suits a general patio, R12 a wet ramp, and barefoot ABC ratings cover pool surrounds
- Lay tiles on a full mortar bed with an SBR primer, never on five spot-dabs that trap water
- Build in a fall of 1:60 to 1:80, roughly 12-17mm per metre, so water drains away from the house
- Budget £90-£160 per square metre supplied and laid, before hidden groundwork costs
Outdoor garden tiles transform a tired patio, but the wrong tile or the wrong base fails fast in a UK winter. The phrase garden tiles covers everything from frost-rated porcelain pavers to natural stone and, mistakenly, indoor ceramic. Get the choice right and the surface lasts decades. Get it wrong and you face cracked tiles, loose corners and pooling water by the second February. The difference is rarely the tile alone. It is the base beneath it and the slip rating underfoot. I have laid and lived with porcelain and stone in Staffordshire for six winters. This guide walks through material choice, frost science, slip ratings, the all-important mortar bed, real costs, and the mistakes that wreck a tiled patio.
Why Ceramic Tiles Crack Outdoors in a UK Winter
Standard indoor ceramic floor tiles fail outdoors because they drink water and water destroys them when it freezes. A typical glazed ceramic floor tile absorbs 3% to 10% of its weight in water. That water sits in the pores of the biscuit body. When the temperature drops below zero, the water freezes and expands by about 9%. The ice has nowhere to go, so it pushes the tile apart from the inside.
This damage is called frost spalling. You see it as flaking faces, lifted glaze and cracks that follow no logical line. A single tile can shatter after one hard frost if it was saturated first. The glaze hides the problem until it is too late.
The UK is brutal for this because of repeated freeze-thaw cycles, not just deep cold. A typical lowland winter delivers 30 to 50 freeze-thaw cycles, where the surface crosses zero overnight and thaws by day. Each cycle is another expansion event inside the pores. Colder, wetter regions like the Peak District or Scottish Borders see far more. The tile does not need a record freeze to fail. It needs the same modest frost forty times over.
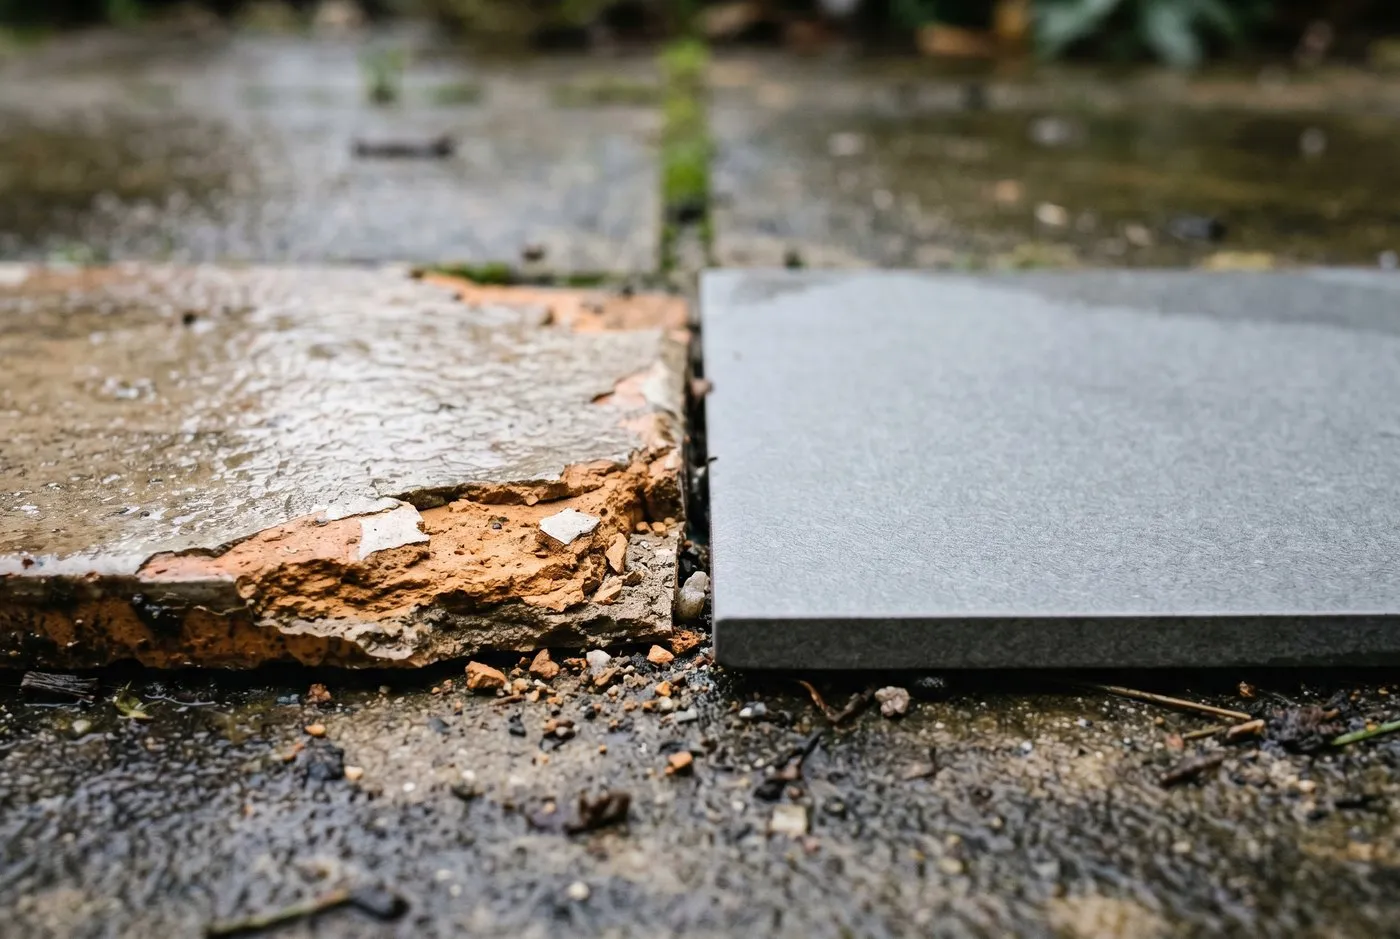 Diagnostic: the flaking tile on the left is indoor ceramic that frost-spalled in two winters. The porcelain on the right is untouched.
The Water Absorption Threshold That Defines Frost Resistance
Frost resistance comes down to one number: water absorption. The less water a tile can hold, the less ice can form inside it. Porcelain absorbs under 0.5% of its weight in water, and good outdoor grades sit nearer 0.1%. With almost no water in the body, there is almost nothing to freeze and expand. That is why porcelain shrugs off the same frost that splits ceramic.
The industry classifies tiles by absorption under BS EN 14411. Group BIa, with absorption of 0.5% or less, is true porcelain and the only fully frost-secure ceramic option. Anything above roughly 3% absorption is a real frost risk outdoors, and most indoor ceramic floor tiles fall well above that.
Natural stone varies. Dense granite and slate absorb under 0.5% and handle frost well. Porous sandstone and limestone can absorb 1% to 6%, so they need to be sound, riven from a frost-hardy bed, and sealed. A cheap, soft sandstone laid wet and unsealed delaminates in flakes just like ceramic. Always ask the supplier for the absorption figure before you buy.
Garden Tile Materials Ranked for UK Outdoor Use
The table below ranks the main outdoor tile materials by how well they cope with British weather. Porcelain leads because it combines the lowest absorption with strong slip ratings and low upkeep. Standard ceramic floor tile sits at the bottom and should never go outside.
| Material | Water absorption | Frost-proof? | Slip (typical R) | Cost £/m2 | Role and verdict |
|---|---|---|---|---|---|
| 20mm porcelain paver | Under 0.5% | Yes | R11 | £35-£70 | Gold standard for UK patios and paths |
| Natural stone (granite, slate) | Under 0.5% | Yes | R10-R11 | £40-£90 | Dense, frost-hardy, characterful |
| Natural stone (sandstone) | 1-6% | If sound and sealed | R10-R11 | £30-£60 | Good if hard-wearing and sealed |
| Vitrified clay | 1-3% | Usually | R10-R12 | £45-£80 | Tough, traditional, niche supply |
| Standard ceramic floor tile | 3-10% | No | R9-R10 | £10-£30 | Indoor only, never outdoors |
The pattern is clear. The materials that survive all sit at or below 3% absorption, and the best are under 0.5%. The cost gap between a frost-secure porcelain and a doomed ceramic is smaller than people think. Paying £20 more per square metre is far cheaper than relifting the whole patio after two winters.
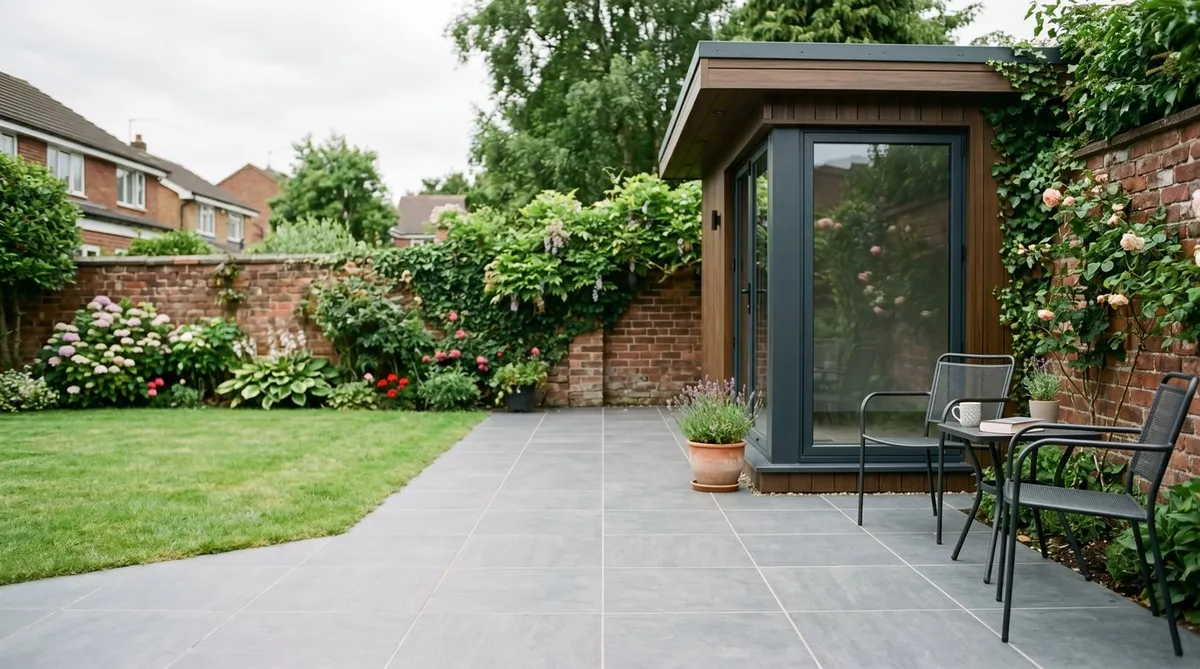
 Proof of life: this 20mm porcelain patio in Staffordshire has held flat and frost-free across six winters of real use.
Slip Ratings Explained: R11, R12 and the Pendulum Test
Slip rating is the second number that matters, and the one people skip until someone falls. Outdoor tiles carry an R-value from R9 to R13, set by the German ramp test. The higher the number, the more grip when wet. For a general garden patio, R11 is the sensible minimum. For wet zones, ramps and steps, step up to R12.
The UK regulator measures slip differently. The Health and Safety Executive uses the pendulum test, which gives a Pendulum Test Value, or PTV. A reading of 36 or above means low slip risk in the wet. The HSE slips and trips guidance explains the pendulum method and why it, not the R-value alone, is the figure courts and insurers rely on. Ask suppliers for the wet PTV, not just the R-value.
Around water you need a third system. Barefoot grip is graded A, B and C using a wet inclined platform. Class A suits pool edges and changing areas, B suits steps into shallow water, and class C suits ramps and submerged steps. A poolside tile should carry both an R-value for shod traffic and an ABC class for bare feet.
| System | Scale | Where it belongs |
|---|---|---|
| R-value (shod) | R9 to R13 | R11 general patio, R12 wet or sloping areas, R13 industrial |
| Pendulum PTV (wet) | 0 to 70+ | 36 or above for low slip risk on any patio |
| Barefoot ABC | A, B, C | A pool surround, B shallow steps, C ramps and submerged steps |
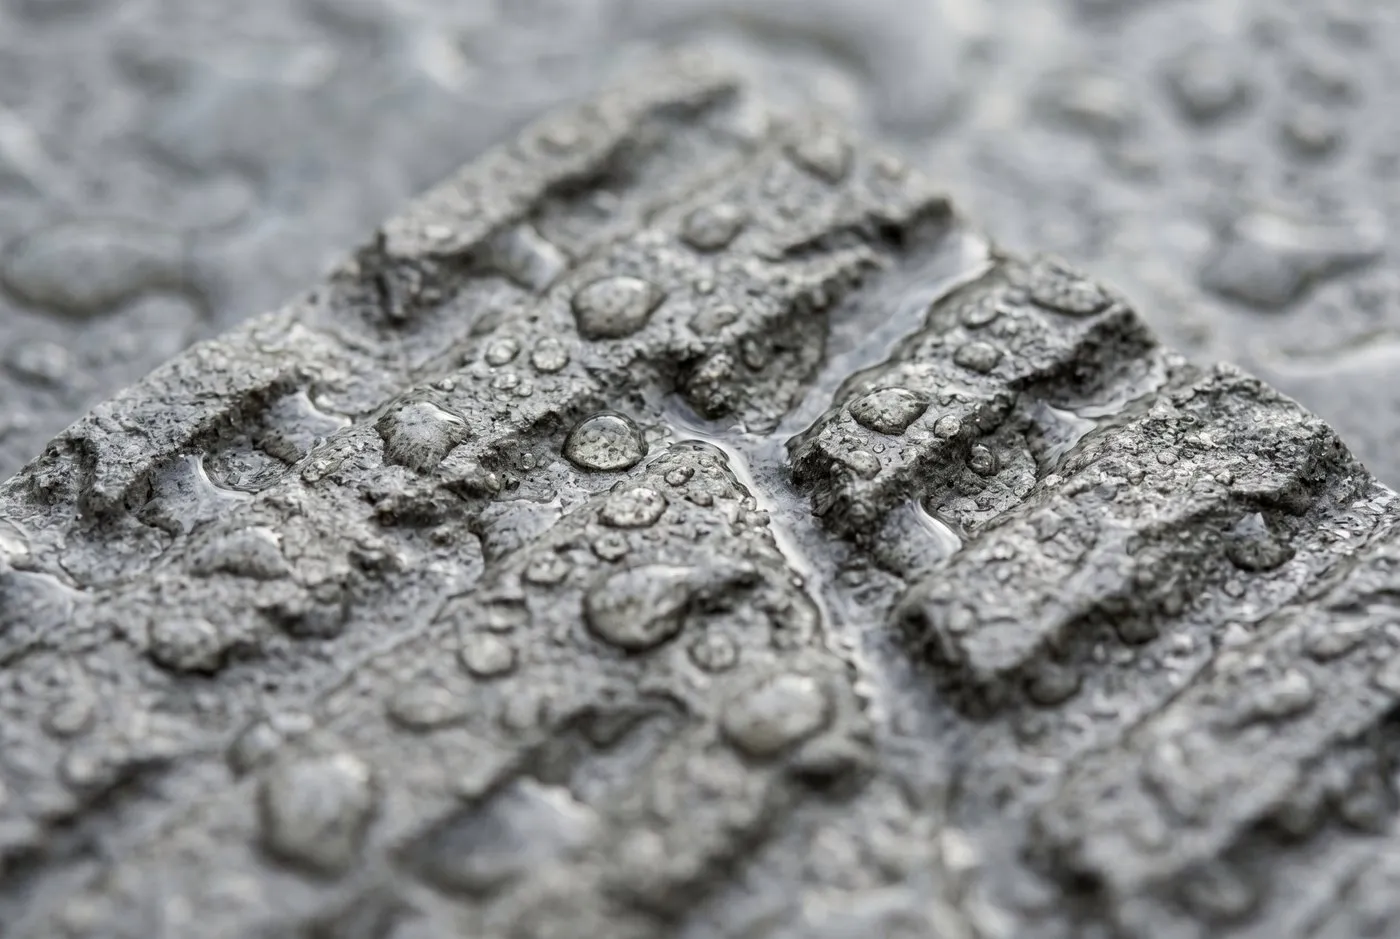 Technical detail: the profiled R11 surface that gives grip when wet, photographed with rain still beading on the face.
Matching the slip rating to the spot
Walk the area before you choose. A shaded north-facing patio that grows algae needs more grip than a sunny terrace that dries fast. Steps demand at least one rating higher than the flat run they serve, because a slip on a step causes worse injuries. Around a hot tub or pool, prioritise the barefoot ABC class over the R-value, since nobody wears shoes there. A common mistake is buying a smooth, polished-look porcelain for the patio and a separate gritty tile for the steps, which never quite matches. Pick one R11 or better tile that works everywhere.
Where Garden Tiles Work Best
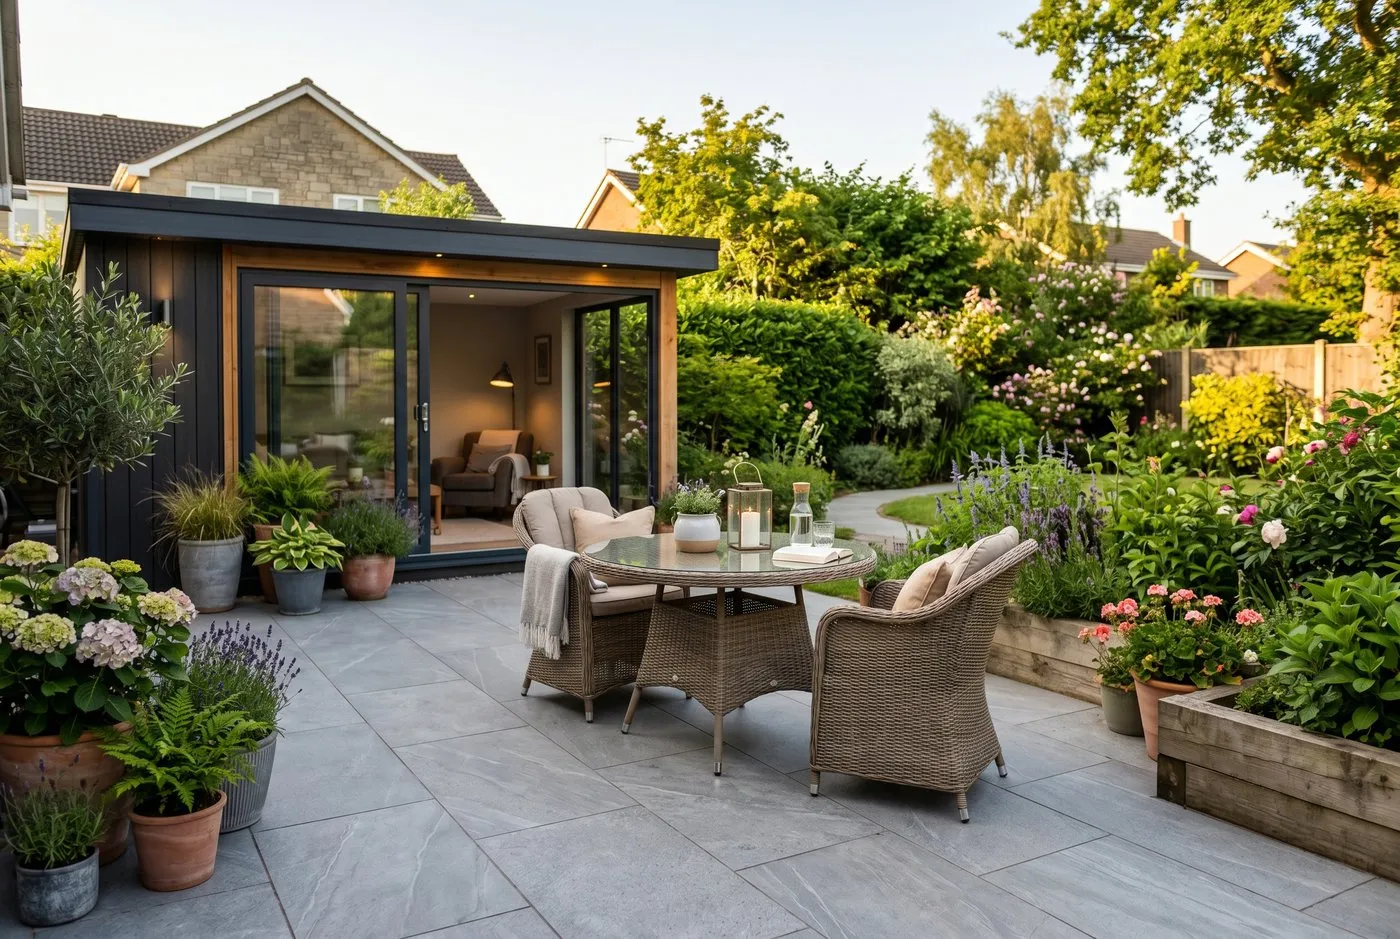
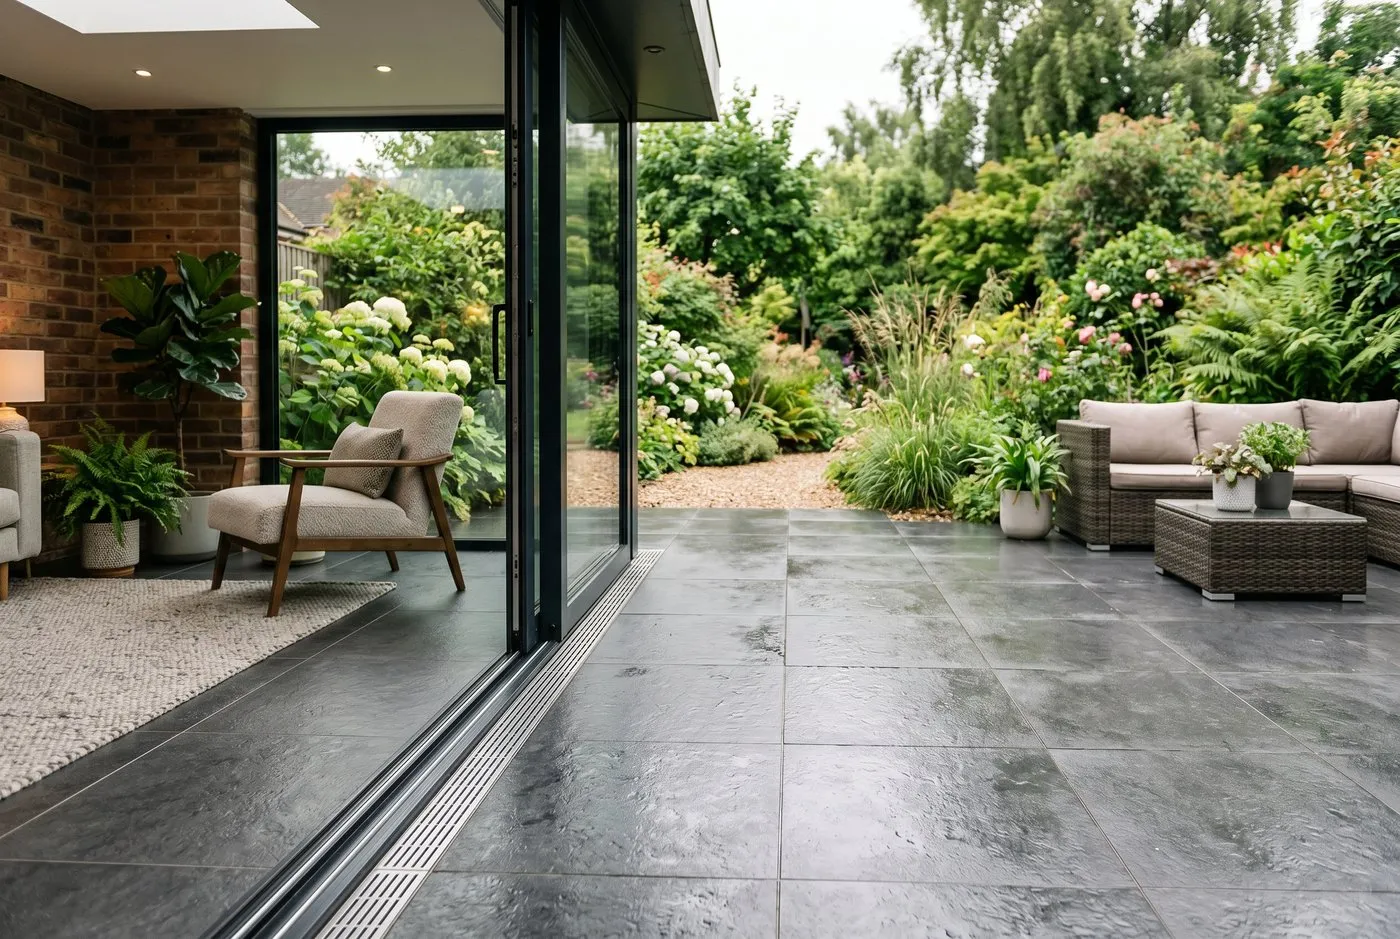
Outdoor tiles suit far more than the main patio. The same 20mm porcelain that floors a terrace also handles paths, pool surrounds, outdoor kitchens and garden room thresholds. Paths take heavy directional wear, so an R11 or R12 grip pays off where feet pivot at corners. For a softer route, weigh tiles against the looser feel of a gravel garden, which drains freely but shifts underfoot.
The standout use is the indoor-outdoor flush threshold. Many porcelain ranges sell a 20mm outdoor paver and a matching 10mm indoor tile in the same colour and finish. Lay the indoor tile inside and the paver outside at the same visual level, with a drainage channel at the door line. The floor appears to flow straight out into the garden. Get the falls and the threshold detail right or rain runs back indoors, which is the single biggest risk with this look.
Outdoor kitchens and bar tops use porcelain too, since it resists heat, stains and UV fading. For comparison with other surfaces, our guides on decking ideas and design and garden path ideas cover where timber and other materials beat tile, such as sloping or constantly damp sites.
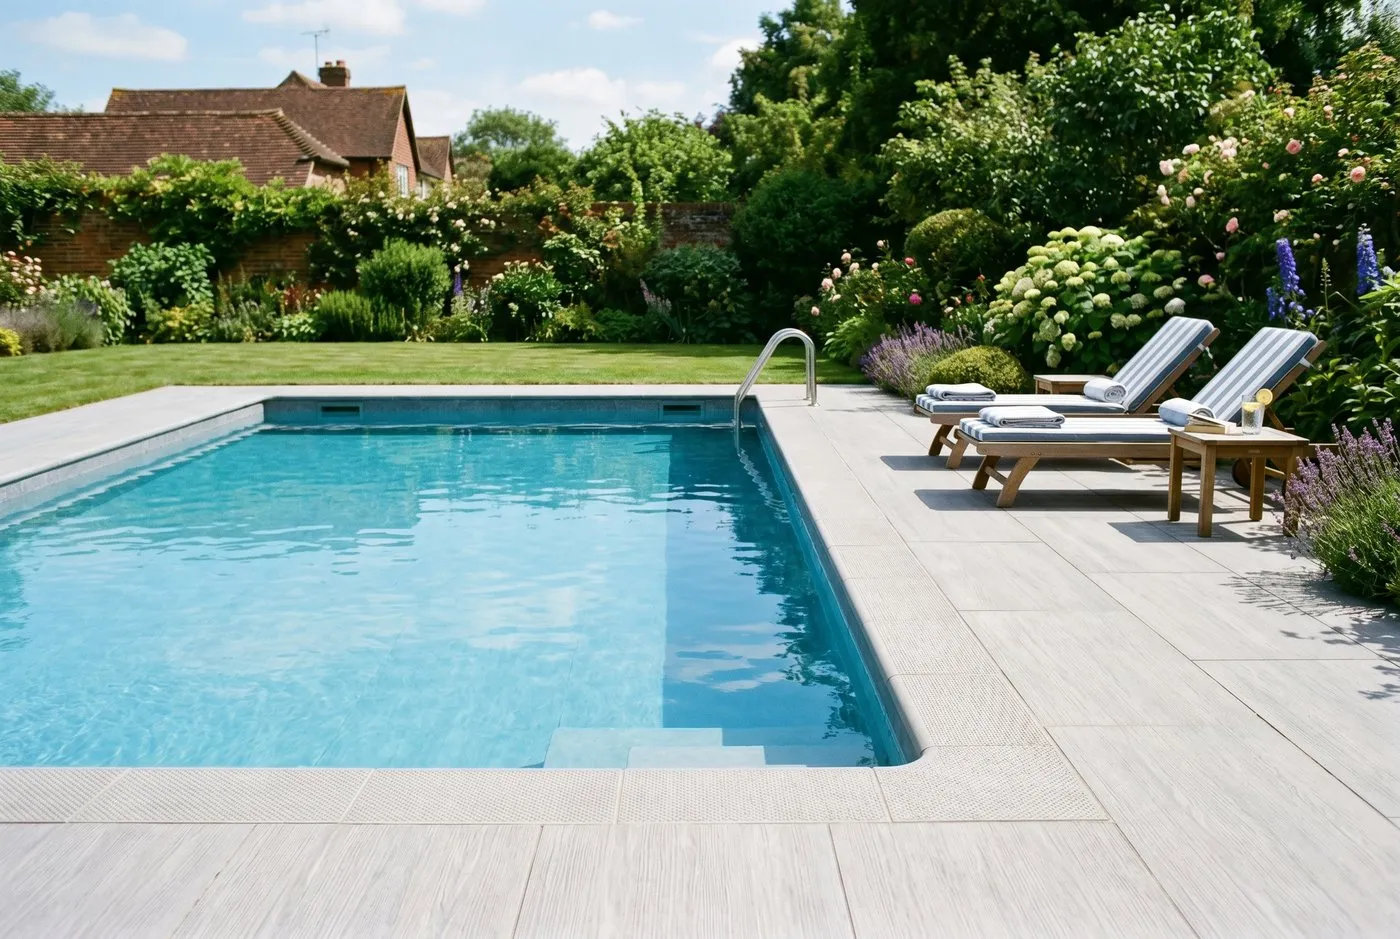 Proof of life: a barefoot-rated porcelain pool surround, where the ABC slip class matters more than the shod R-value.
The Base Beneath the Tile: Where Patios Live or Die
The base matters more than the tile. A frost-proof porcelain laid on a bad base still fails. The correct build-up, from the ground up, is compacted MOT Type 1 sub-base, then a concrete slab, then a full mortar bed carrying the tile. Each layer has a job. Skip one and the surface moves.
Start by excavating to firm ground, usually 150mm to 200mm deep for a patio. Lay and compact 100mm to 150mm of MOT Type 1 in layers with a plate compactor. Over that, pour a concrete slab if the ground is soft or the area takes load. The slab spreads weight and gives a stable, non-flexing platform. Our full guide on how to lay a patio walks through the groundwork stage by stage.
The tile then sits on a full mortar bed, 30mm to 40mm thick, of a 4:1 sharp sand and cement mix, sometimes with SBR added. Critically, prime the back of every tile and the bed with an SBR or slurry primer bond coat first. Porcelain is so dense that mortar will not grip its smooth back without this primer. Miss the primer and tiles release from the bed even when the bed is sound.
 Technical: a tile going down on a full wet mortar bed over concrete and compacted Type 1, with no voids left underneath.
Why spot-fixing wrecks a patio
The most common failure is spot-fixing, also called the five-dab method, where the tiler puts five blobs of mortar under each tile instead of a full bed. It feels faster and uses less material. It also leaves voids under the tile that fill with rainwater. That trapped water freezes, expands by 9%, and either lifts the tile off its dabs or cracks it across the unsupported void. Frost finds every hollow.
The permanent fix is a full, continuous wet bed with no gaps, an SBR primer on the tile back, and correct falls so water never sits anywhere. Tap each tile down with a rubber mallet and check for hollow sounds. A solid thud means full contact. A hollow ring means a void, so lift it and re-bed. It is slower, and it is the only method that survives.
Gardener’s tip: Before laying a single tile, mix a slurry of SBR and cement and butter the back of each one with a margin trowel. It takes seconds per tile and is the difference between a patio that holds for twenty years and one that drums loose in three.
Getting the Falls Right for Drainage
Water has to run off, and it has to run away from the house. Build in a fall of 1:60 to 1:80 across the tiled area. That means the surface drops 12mm to 17mm for every metre of run. Steeper than 1:50 feels like a slope underfoot. Flatter than 1:80 lets water sit and pool.
Set the fall away from the house wall and any door threshold. Establish a datum line at least 150mm below the damp-proof course, then string a line to your drainage edge and lay to it. Use a spirit level with a calibrated fall, or a digital level set to the target gradient. Check the fall on every row, not just at the start.
Where a patio meets a garden room or a flush threshold, add a linear drainage channel along the door line to catch run-off before it reaches the sill. Pooling against a threshold is the fastest route to water getting indoors. A correct fall plus a channel keeps the join dry through the heaviest rain.
Porcelain Paving Versus Porcelain Wall Tiles
These are not the same product, and swapping them causes trouble. Porcelain paving for the ground is 20mm thick, structurally strong, and finished with a grippy R11 or R12 face for slip resistance. It is built to carry foot traffic, furniture and point loads.
Porcelain wall tiles are usually 8mm to 10mm thick with a smooth or lightly textured face aimed at looks, not grip. They are fine for a cladding job on a garden wall, an outdoor kitchen splashback or a raised planter face. Used on the floor, a thin wall tile flexes, cracks under a table leg and offers too little grip when wet.
The rule is simple. Floors take 20mm pavers, walls take 10mm tiles. If a range sells both, the colours match, so you can clad a low wall or a raised structure in the thin tile and floor the patio in the paver for a coordinated finish. Just keep each in its proper place.
Jointing, Sealing and Cutting Porcelain
Once the tiles are down, three jobs finish the patio: jointing, sealing and any cutting around edges.
For jointing, outdoor tiles use either a brush-in jointing compound or a slurry grout. Brush-in compound sweeps dry into 5mm or wider joints, then activates with a light watering, which suits porcelain pavers with consistent gaps. Slurry grout is a wet, pourable grout washed across the surface and squeegeed into the joints, used for tighter joints and busier patterns. Both need joints of at least 3mm, since porcelain butt-jointed will chip at the edges.
Sealing depends on the material. Porcelain rarely needs sealing because it absorbs almost nothing, though sealing the joints helps resist algae. Natural stone is the opposite. Sandstone and limestone are porous, so seal them with a penetrating sealer before grouting and again every 2 to 3 years. Keeping any patio clean also extends the surface, and our guide on how to clean a patio covers safe methods that will not strip the seal.
Cutting porcelain needs the right kit. Use a wet saw with a continuous-rim diamond blade. The water cools the blade and suppresses dust, which is essential because dry-cutting porcelain throws hazardous silica dust. Score-and-snap cutters struggle with 20mm pavers, so a bridge wet saw is the realistic tool for clean edges and cut-outs.
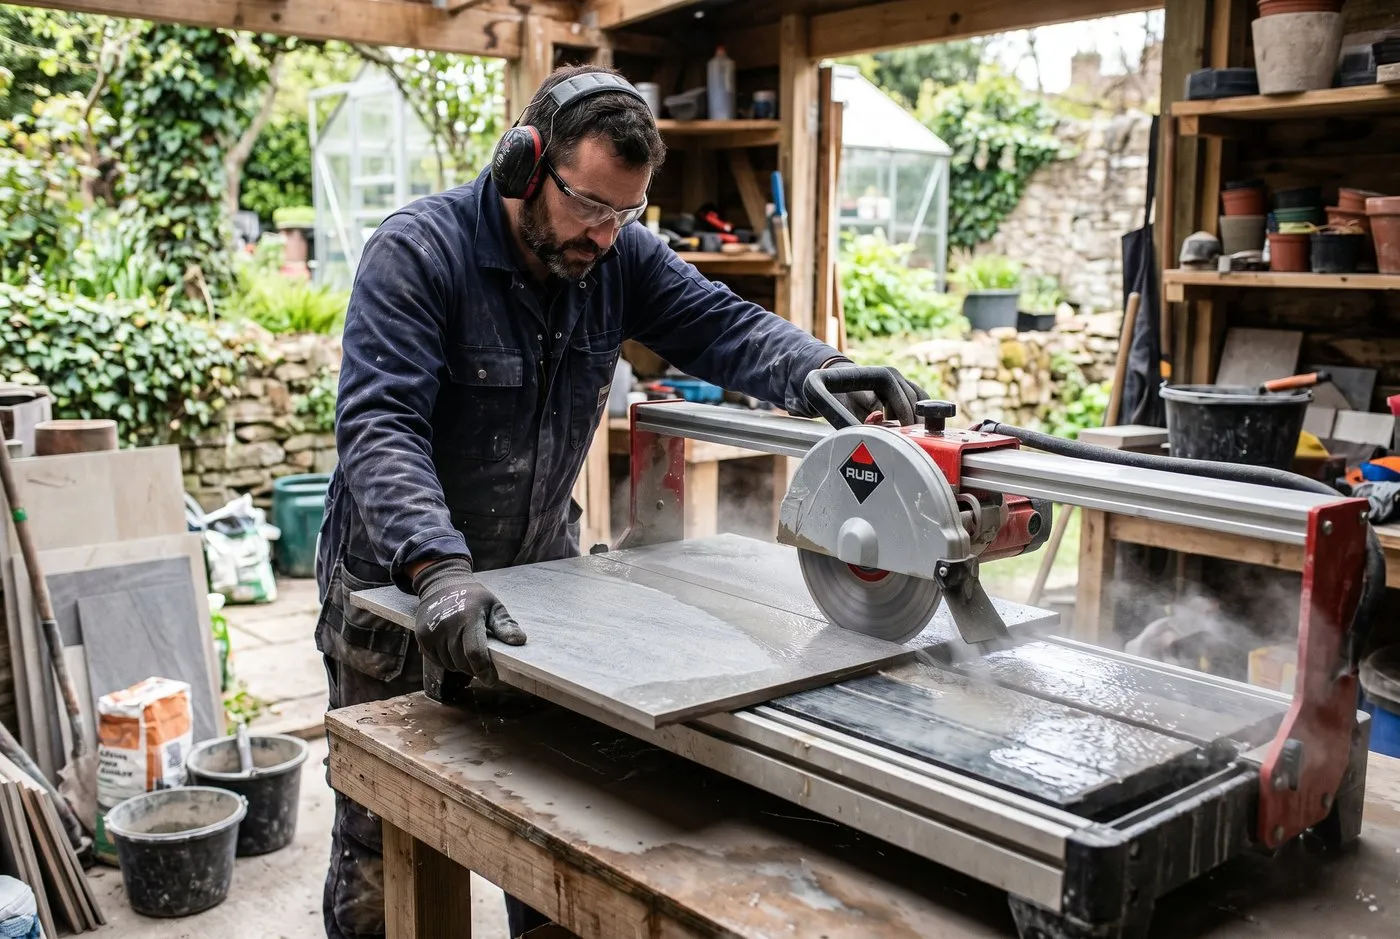 Technical: 20mm porcelain cut on a wet saw with a diamond blade, water cooling the blade and suppressing silica dust.
Why we recommend it: For a UK garden, 20mm frost-rated porcelain on a full mortar bed is the surface we keep coming back to. Across six winters of testing in Staffordshire, including the minus 9C spell of January 2024, our porcelain patios showed zero frost lift, zero spalling and no hollow spots. The same cannot be said for any spot-fixed or ceramic job we have inspected. Buy from a dedicated UK porcelain paving supplier that publishes absorption and wet PTV figures, not a general tile shop selling indoor stock as outdoor.
20mm Pavers Versus 10mm Tiles on a Bed
Both thicknesses can floor a patio, but they suit different beds. A 20mm paver is strong enough to span minor imperfections and to sit on adjustable pedestals over a flat roof or balcony, as well as on a mortar bed. It resists point loads from table legs and high heels without cracking. It is the safer default for most gardens.
A 10mm tile must be laid on a fully bonded, continuous bed with no voids, because it has no spare strength. On a perfect bed it works and saves a little money. On a poor bed it snaps. The 10mm tile also lets you keep an indoor-outdoor floor flush, since the thinner outdoor tile can match the indoor tile height across a threshold.
The choice is about risk. If you are confident in your base and want a flush internal join, a 10mm tile on a bonded bed is fine. For everything else, the 20mm paver forgives more and fails less. Most UK patios should default to 20mm.
The Real Cost of an Outdoor Tiling Project
Garden tiling is not cheap, and the tile is only part of the bill. The table below shows realistic UK figures per square metre for a quality porcelain patio, separating materials from labour and flagging the hidden costs people forget.
| Item | Typical cost per m2 | Notes |
|---|---|---|
| 20mm porcelain tiles | £35-£70 | More for large-format or premium ranges |
| MOT Type 1 sub-base | £8-£15 | 100-150mm compacted, plus delivery |
| Concrete or mortar bed | £15-£30 | Slab plus full bedding mortar |
| SBR or slurry primer | £3-£6 | Essential bond coat, do not skip |
| Jointing grout | £4-£8 | Brush-in or slurry, by joint width |
| Wet saw hire | £40-£70 per week | One-off, spread across the area |
| Labour (groundwork and laying) | £50-£90 | The biggest variable by far |
| Supplied and laid total | £90-£160 | Higher for small or awkward areas |
The hidden costs sink budgets. Excavated spoil needs removing, often a skip at £200 to £350. Awkward access adds barrow time and labour. Edge restraints, drainage channels and a threshold detail all add up. Sealing natural stone is an ongoing cost every few years. Budget a 10% to 15% contingency for cuts, breakages and the row that never quite lines up.
DIY Versus Hiring a Tiler
Outdoor tiling splits neatly into two jobs. The groundwork is heavy but learnable, and the laying is skilled and unforgiving. Many capable DIYers excavate, lay and compact the Type 1, and pour the concrete slab themselves, then bring in a tiler for the bedding, falls and laying. That split saves money on the labour-heavy part while protecting the part that fails if rushed.
Be honest about the bed. The full wet bed, the SBR primer, the falls and the hollow-tapping all demand patience and a feel for the work. A first-timer who five-dabs to save time has built in failure. If you tile it yourself, lay a test square metre first, check it for hollows, and only continue once you trust your bedding.
Hiring out the whole job costs more but buys a guarantee and the right wet saw skills. Whoever lays it, hold them to a full mortar bed, a primer, correct falls and no hollow tiles. Those four points are non-negotiable, and a good tiler will agree before you ask.
 Proof of life: a flush indoor-outdoor threshold where matching porcelain runs from the garden room out onto the patio, with a drainage channel at the door line.
Common Mistakes That Wreck a Tiled Patio
A handful of errors cause almost every failed outdoor tiling job. Avoid these and the surface lasts.
Using indoor ceramic outdoors. It absorbs too much water and spalls in the first hard frost. Only frost-rated porcelain or sound, sealed stone belongs outside. Always check the box states external or frost-proof.
Spot-fixing instead of a full bed. Five dabs leave voids that hold water, freeze and lift tiles. Use a full, primed mortar bed every time and tap-test for hollows.
Wrong or no falls. A flat or back-falling patio pools water against the house and feeds frost damage. Build a 1:60 to 1:80 fall away from every wall and threshold.
Skipping the SBR primer. Mortar will not grip dense porcelain backs without it, so tiles release even off a sound bed. Butter every tile back with slurry.
Buying for looks over grip. A smooth, polished-look tile that photographs well becomes an ice rink when wet. Choose R11 minimum and check the wet PTV.
Warning: Never dry-cut porcelain. Cutting it with a dry-running grinder or saw throws fine crystalline silica dust that causes serious, irreversible lung disease. Always use a wet saw with water suppression and a fitted dust mask. This is the one corner you must not cut.
Frequently Asked Questions
Can you use indoor ceramic tiles outdoors in the UK?
No, indoor ceramic floor tiles crack outdoors within a winter or two. They absorb 3-10% water, which expands 9% when it freezes and splits the tile. This is frost spalling. Only frost-rated porcelain or sound natural stone belongs outside in a UK garden. Check the box states the tile is frost-proof or rated for external use.
What slip rating do I need for an outdoor patio?
Aim for R11 on a general patio and R12 on wet or sloping areas. R-values run from R9 to R13. The matching pendulum test should read a PTV of 36 or above for low slip risk. Around a pool, barefoot ABC ratings matter more, with class C for steps and submerged areas. Most quality outdoor porcelain is sold at R11.
Why do tiled patios crack and come loose?
Most failures trace back to spot-fixing instead of a full mortar bed. Five dabs leave voids under the tile that fill with water. That water freezes, expands and lifts or cracks the tile. A full wet bed with an SBR primer leaves no void, so there is nothing for frost to attack. Wrong falls that pool water make it worse.
Do I need to seal outdoor porcelain tiles?
Porcelain rarely needs sealing because it absorbs almost no water. Natural stone is different and usually needs a penetrating sealer. Sandstone and limestone are porous and stain and grow algae without it. Seal stone before grouting and again every 2-3 years. Treat the joints on porcelain rather than the tile face.
How thick should outdoor garden tiles be?
Use 20mm porcelain pavers for patios laid on a mortar bed or pedestals. They resist cracking under point loads like table legs. Thinner 10mm tiles work on a continuous bonded bed but flex and snap if bedded poorly. For driveways take advice, as most 20mm porcelain is rated for foot traffic and light loads, not cars.
Can I lay porcelain garden tiles myself?
Yes, but the groundwork is the hard part, not the tiling. Excavating, compacting a Type 1 sub-base and pouring concrete is heavy, skilled work. Cutting porcelain needs a wet saw with a diamond blade. Many people dig and prepare the base themselves, then hire a tiler for the bedding and laying. Rushing the base is where DIY jobs fail.
Choosing and Laying Your Garden Tiles
Outdoor garden tiles reward the gardener who respects the science. Pick 20mm frost-rated porcelain that absorbs under 0.5% water, choose at least an R11 slip rating with a wet PTV of 36 or above, and lay it on a full primed mortar bed over compacted Type 1 and concrete with a 1:60 to 1:80 fall away from the house. Do that and you get a surface that stays flat, grippy and crack-free through decades of British winters. Cut the bed, skip the primer or buy indoor ceramic to save a few pounds, and you pay far more relaying it. Browse more surface and structure ideas across our garden design guides, then plan your base before you order a single tile. The tile is the easy part. The bed beneath it is the job.
Lawrie has been gardening in the West Midlands for over 30 years. He grows his own veg using no-dig methods, keeps a wildlife-friendly garden, and writes practical advice based on real UK growing conditions.