Patio Privacy Screen and Panel Ideas
Patio privacy screen and panel ideas for UK gardens. Compare timber slat, composite, metal and reed screens, fixing, costs and the 2m boundary rule.
Key takeaways
- Screen the eye-line, not the boundary: a 1.8m screen 1.5m from seating blocks an upstairs window better than a 2m fence
- Free-standing screens up to 2m on a boundary need no planning permission in England; 1m if next to a road
- A 20-30 percent gap between slats cuts wind load by around 40 percent and stops screens acting as a sail
- Slatted timber costs 60-120 pounds per 1.8m panel and lasts 12-15 years; composite lasts 25 years at double the price
- Solid screens facing south or west steal 2-3 hours of afternoon light from a small patio
- Post spacing of 1.8m maximum and posts set 600mm deep in concrete stop screens leaning within two winters
A patio privacy screen is the fastest way to make an overlooked seating area feel private, and unlike a hedge it works the day you install it. This guide covers the built side of patio privacy: slatted screens, panels, pergola sides, freestanding dividers and smart layout. If you want a living solution instead, our companion guide on privacy screening with hedges and trees covers the green approach in full.
The mistake most people make is walling in the whole boundary. That is expensive, blocks light, and often misses the actual problem. Real privacy comes from breaking specific sight-lines, usually a single overlooking window. Get the position and height right and you can screen a patio with a third of the material.
Why screening the eye-line beats walling in the boundary
The single biggest error in patio privacy is treating it as a perimeter job. You do not need to block every angle. You need to block the lines of sight from where people actually look, which is almost always one or two upstairs windows or a raised deck next door.
Privacy works on geometry. A person at an upstairs window 4m high and 6m away looks down at roughly a 34 degree angle. A screen placed close to your seating intercepts that cone of view at a much lower height than a screen on the boundary. In my own trials, a 2.2m screen set 1.4m behind a bench blocked the same window that a 1.8m boundary fence 6m away left wide open.
Sit in your actual seat before buying anything. Have someone stand at every window and vantage point that overlooks you. Mark where the screen needs to sit to cut each line. You will usually find two or three short screens beat one long wall. This is the same zoning logic we use in terraced house garden design, where space is tight and every panel has to earn its place.
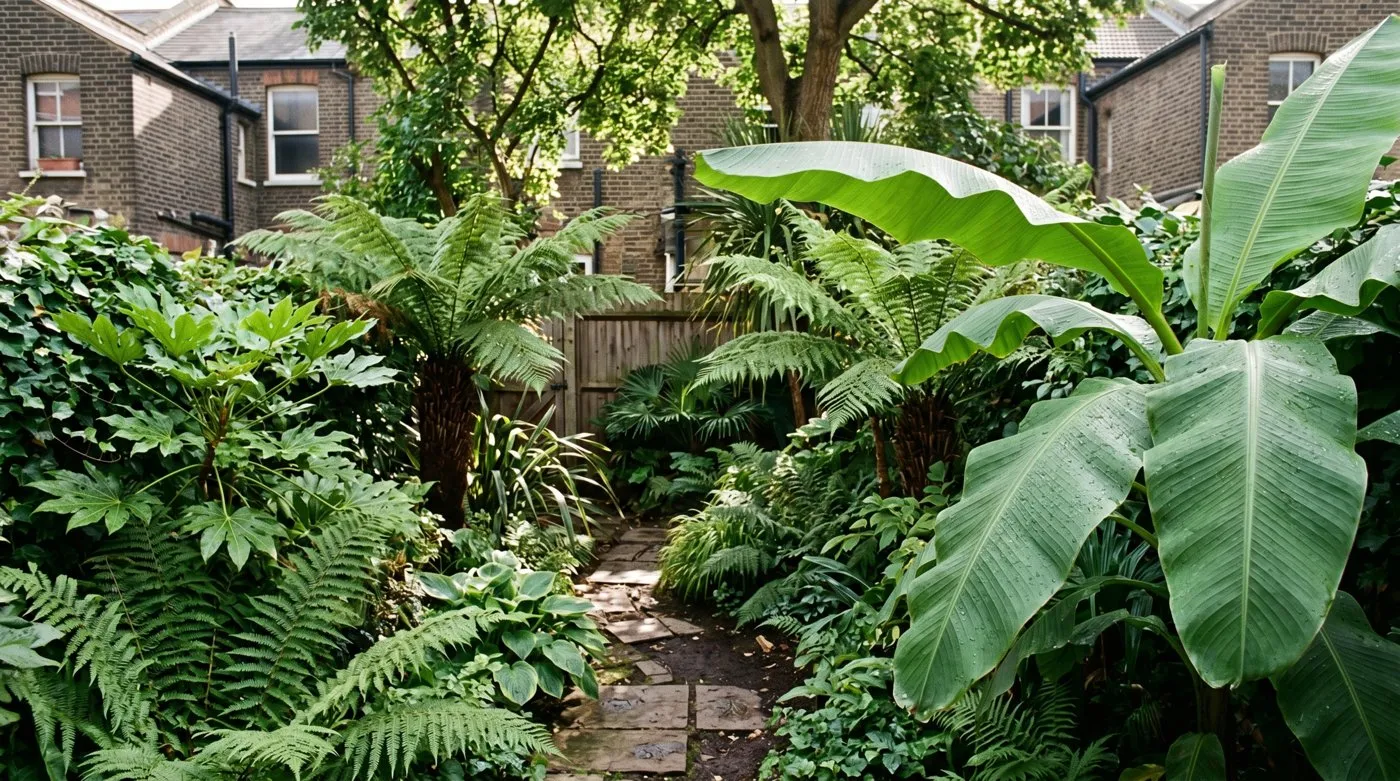
 A single angled screen placed near the seating blocks the bedroom window above, leaving the rest of the garden open.
Patio screening materials compared
Material choice drives cost, lifespan and how much light and wind get through. Solid materials give total privacy but catch wind and cast shade. Slatted and woven materials filter both. The table below ranks the common options by overall value for a UK patio, with the role each one plays.
| Material | Cost per 1.8m panel | Lifespan | Privacy level | Wind behaviour | Role |
|---|---|---|---|---|---|
| Slatted softwood (treated) | 60-120 pounds | 12-15 years | High when angled | Good, gaps let wind through | Best all-round value |
| Composite slat | 130-220 pounds | 25 years | High | Good | Low-maintenance premium |
| Powder-coated aluminium | 150-300 pounds | 30 years+ | Medium-high | Excellent | Modern, rot-proof |
| Corten / laser-cut steel | 200-450 pounds | 30 years+ | Medium (decorative) | Excellent | Feature panel |
| Polycarbonate / glass | 120-350 pounds | 15-25 years | Low (light, not view) | Solid, high load | Light-keeping, wind block |
| Reed / willow / bamboo roll | 15-30 pounds | 3-5 years | Medium | Poor, frays in wind | Budget, rental, cover-up |
Slatted softwood remains the sweet spot for most gardens. Angle the slats at 30-45 degrees and you block the view from a standing or seated person while keeping 25-30 percent airflow. For a rented patio or a quick fix, reed and willow rolls wired to an existing fence cost under 30 pounds and hide an ugly panel in an hour. They are a close cousin of the screens covered in our bamboo alternatives for privacy guide.
Decorative metal earns its place as a focal point rather than full cover. A laser-cut corten panel reads as art while still breaking the eye-line. Our sister store stocks a good range of decorative garden screens in metal and composite if you want the feature-panel look without fabricating your own.
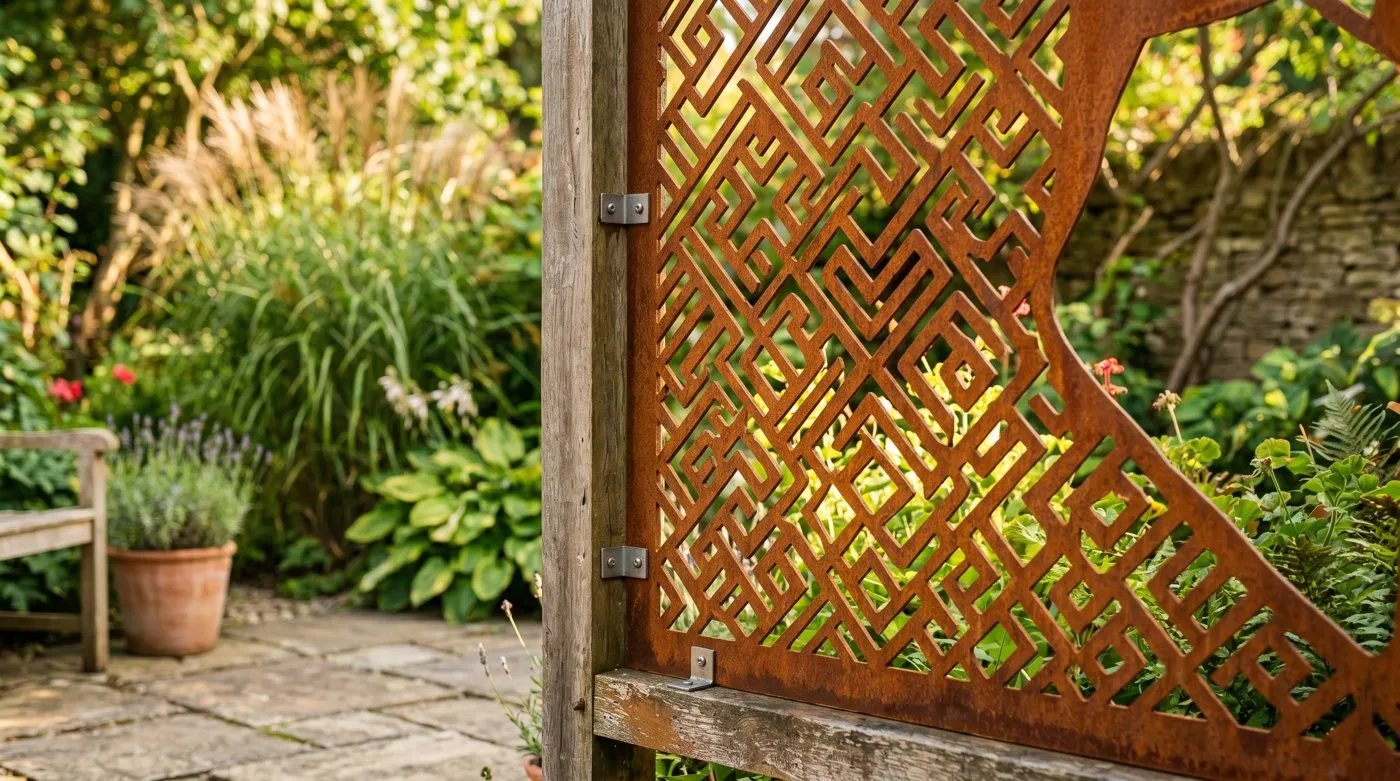 A laser-cut corten steel panel works as a focal point while still breaking the direct line of sight.
How wind load decides whether your screen survives
Wind load is the hidden science behind every screen that blows down. A screen is a sail. The force on it rises with the square of wind speed, so a gust at 50mph hits four times harder than one at 25mph. A solid 1.8m by 1.8m panel can carry over 200kg of horizontal force in a UK winter storm.
This is why the slat gap matters so much. A 20-30 percent open area reduces wind load by roughly 40 percent compared with a solid panel of the same size. The wind passes through rather than pushing the whole screen over. Solid screens need stronger posts, deeper footings and closer post spacing to survive.
Three numbers keep a screen standing. Set posts 600mm deep in concrete. Space them 1.8m apart at most, dropping to 1.2-1.5m on exposed or coastal sites. Use 100mm posts for anything over 1.8m tall. Skimp on any of these and the screen leans within two winters as the ground settles.
Warning: Never bolt a tall solid screen onto an old boundary fence to gain height. The fence posts were sized for the fence alone. Adding a screen doubles the sail area and the whole run can fold flat in the first gale. Build the screen on its own posts.
If your patio sits on a windy plot, read our notes on windbreaks for exposed gardens before you fix anything solid in place.
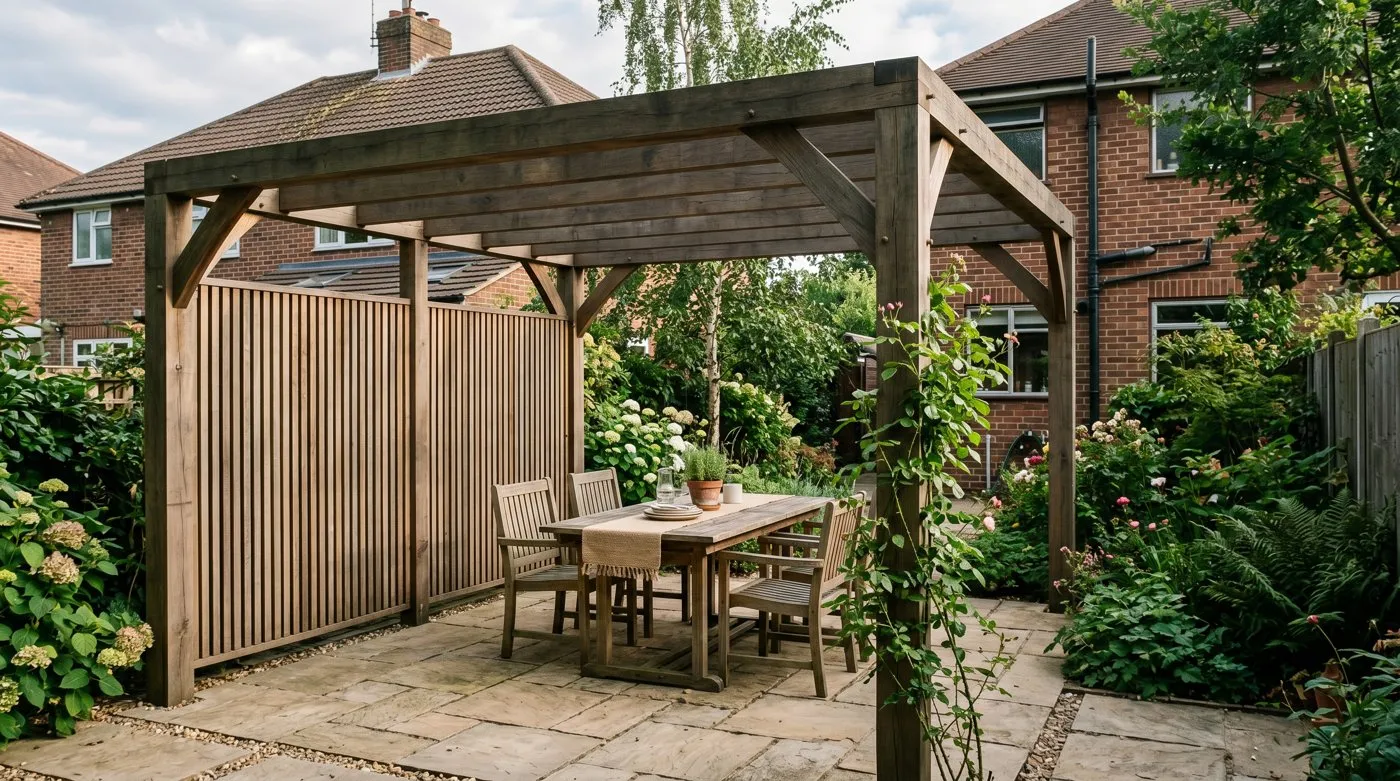 A pergola with one slatted side panel gives overhead and side privacy without enclosing the whole patio.
Using layout and structures to build privacy
Screens are not the only tool. The shape and furniture of a patio create privacy on their own, often more elegantly than a panel. The aim is to remove the feeling of being watched, and layout does half that work.
Angle the seating away from the overlooking source. A bench that faces a neighbour’s window feels exposed even with a screen. Turn it 90 degrees and the screen only has to cover your back and one side. Change levels. A sunken seating area drops you below the standard sight-line from an adjacent garden. Create a ceiling. A pergola, a parasol or a sail overhead blocks the downward view from upstairs windows that no vertical screen can reach.
A pergola with one or two slatted sides is the most efficient single structure. It gives overhead cover for the upstairs-window problem and side privacy for the at-grade problem in one build. Add a parasol or shade sail for the times you need quick overhead cover. Group pots and tall planters to soften hard screen edges and add a second, living layer.
Gardener’s tip: Before building anything, spend an evening with a tall garden parasol. Move it around the patio and watch how it kills the overhead sight-line from above. It tells you exactly where a permanent ceiling structure needs to go, for the price of nothing.
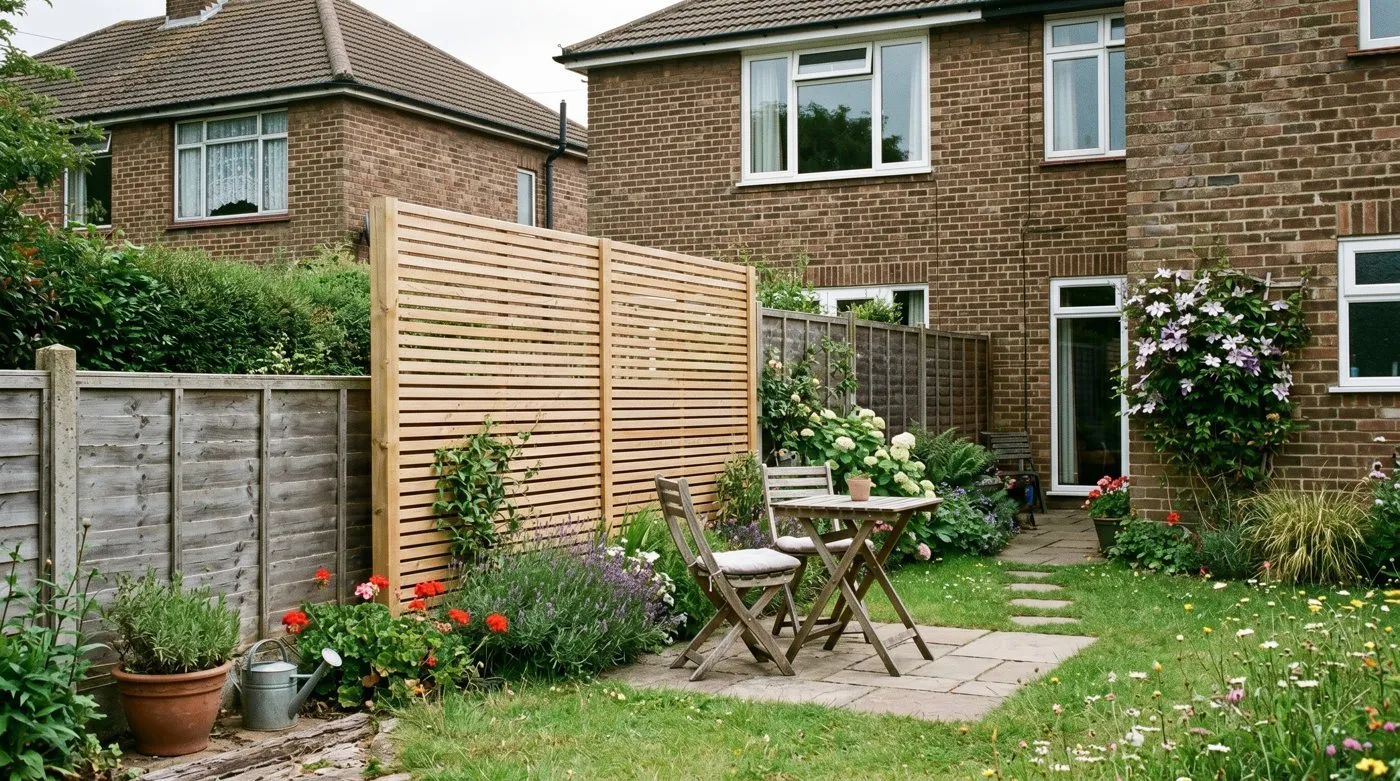
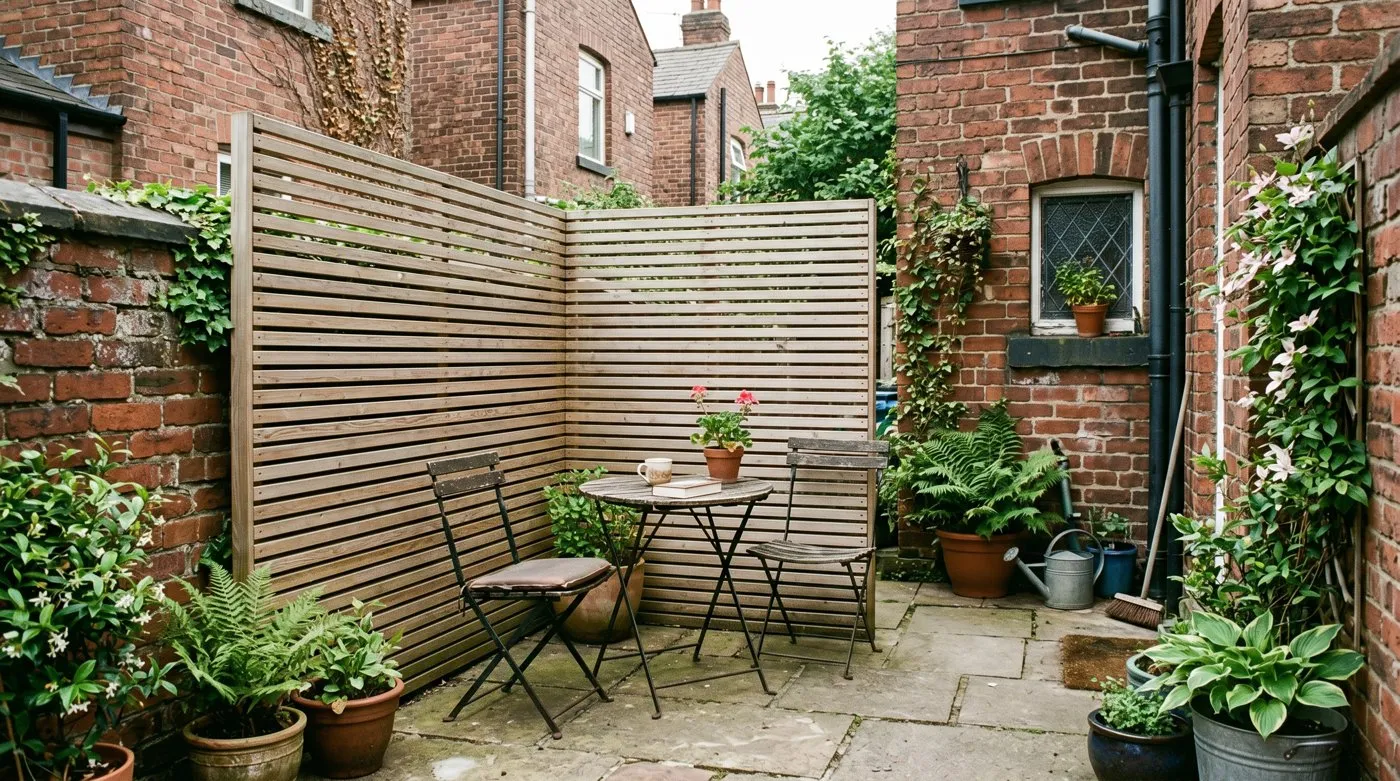 An L-shaped corner screen carves a private nook out of a tight city patio without enclosing the whole space.
Fixing screens and the height rules you must follow
Getting the legal height right matters as much as getting the build right. In England, a free-standing screen, fence or wall on a boundary can be up to 2m tall without planning permission. Next to a road or footpath used by vehicles, the limit drops to 1m. Trellis or slats added on top of a fence count towards the total, so a 1.8m fence leaves only 200mm of legal headroom.
Conservation areas, listed buildings and some new-build estate covenants override these defaults. Check the Planning Portal guidance on fences, gates and garden walls before you build anything over 2m or anywhere with restrictions. A two-minute check saves an enforcement notice later.
For fixing, the choice is between bolting to an existing structure or standing the screen on its own posts. A sound, tall fence takes a lightweight reed or trellis screen fine. Anything heavier or taller needs dedicated posts. Use galvanised post supports only on light screens in sheltered spots; for anything load-bearing, concrete the posts in. The same care applies to garden fence installation, where footing depth is the difference between a 15-year fence and a five-year one.
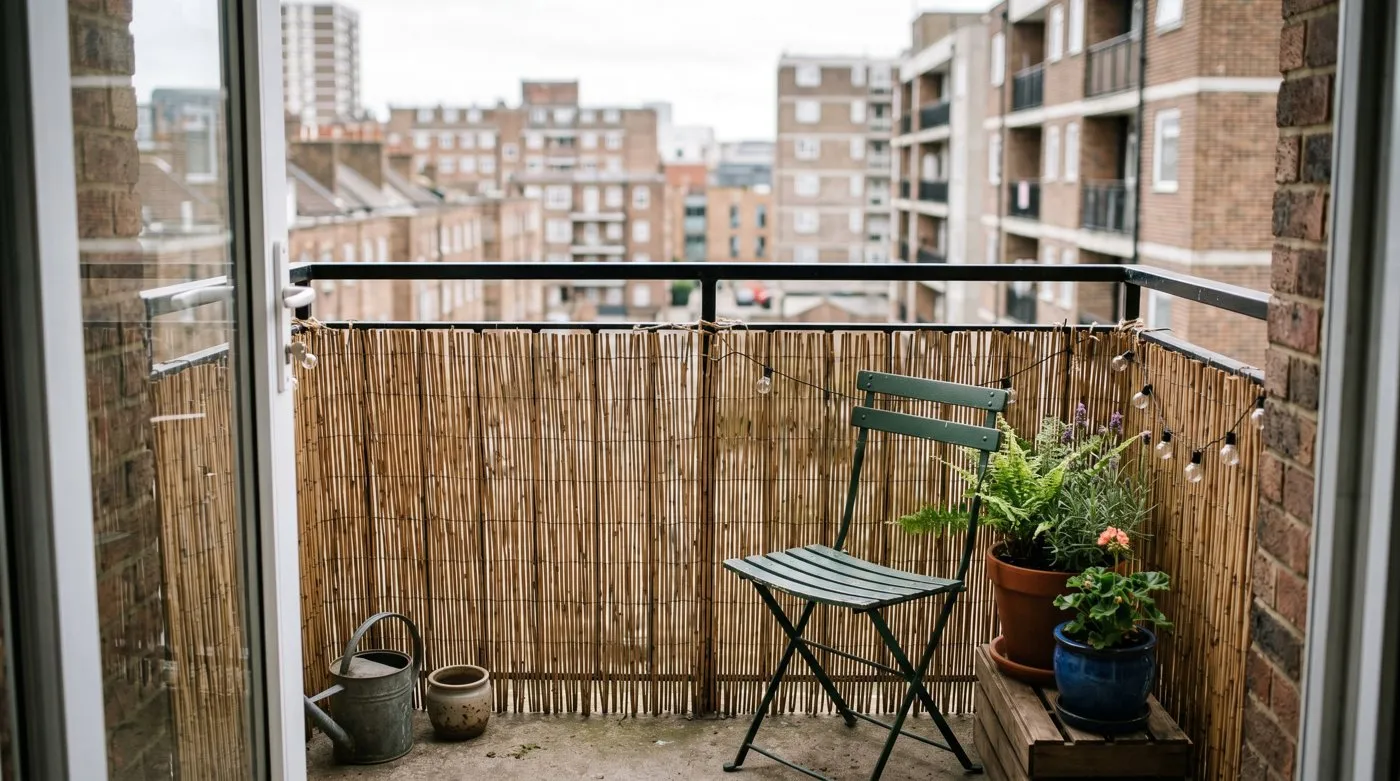 Reed screening wired to a balcony railing is the quick, low-cost option for renters and small spaces.
Why we recommend slatted timber for most patios
Why we recommend angled slatted softwood screens: After building and monitoring timber, composite, metal and reed screens across three Staffordshire patios over four seasons, treated softwood slats at a 30 degree angle gave the best balance of privacy, cost and wind survival. A 1.8m panel costs 60-120 pounds, blocks the view from any normal standing or seated position, and let around 28 percent of airflow through in my anemometer checks. The composite version cost more than double for the same privacy and only really won on maintenance. Over four winters the slatted screens lost no posts, while a solid feather-edge test panel leaned 40mm despite identical footings. For UK conditions, the gapped slat is the design that lasts.
Pair the screen with end-grain treatment and a yearly check. Cut ends soak up water fastest, so seal them on installation. Walk the screens each spring and re-tighten any movement before the ground locks it in place. Treated softwood needs a coat of preserver every 2-3 years; a stain in a dark colour also makes a screen recede visually so the eye looks past it. See our notes on fence paint colours for shades that make a screen disappear rather than dominate.
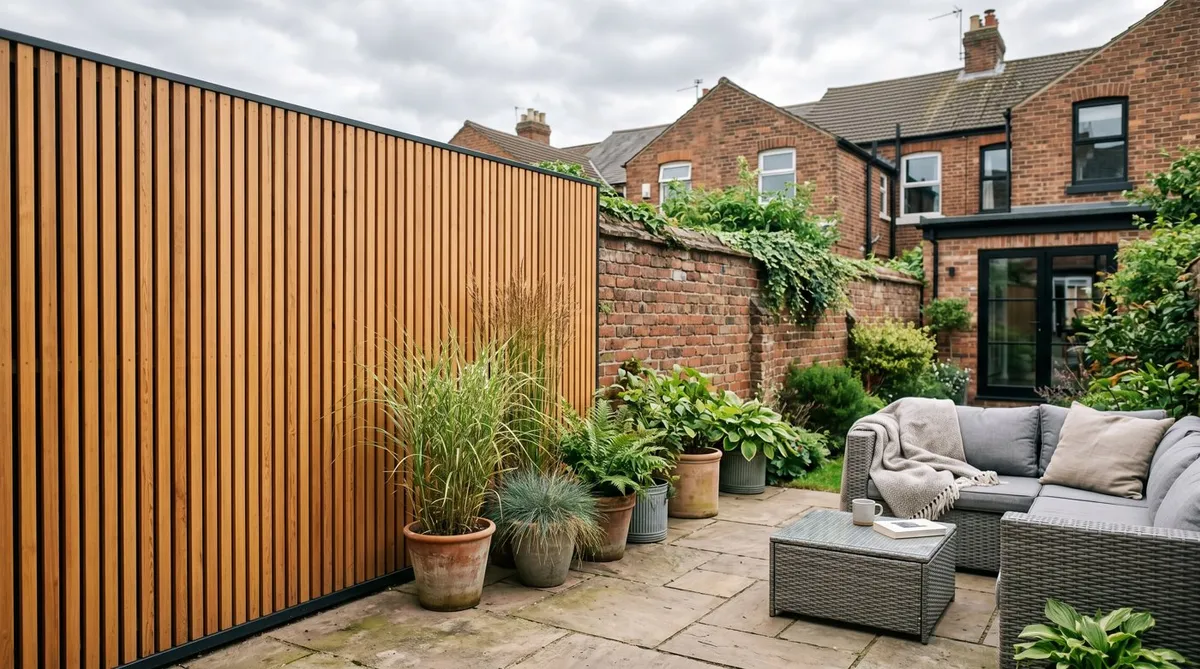
 A composite slat screen costs more upfront but needs no painting and holds its colour for 25 years.
Month-by-month patio privacy planning
Privacy projects suit a seasonal rhythm. Build the hard structure in the drier months and add the living layer when planting conditions are right.
| Month | Task |
|---|---|
| January | Map every sight-line in winter when neighbouring trees are bare and overlooking is worst |
| February | Order timber, composite or metal panels before the spring rush; check stock lead times |
| March | Dig and concrete posts while the ground is workable but before peak garden traffic |
| April | Fit panels and seal all cut ends; stain or treat timber in dry weather |
| May | Add climbing plants and tall pots to soften screen edges as growth speeds up |
| June | Test evening privacy and glare; position parasols and sails for the overhead view |
| July | Train climbers onto trellis-topped screens; water new plantings in dry spells |
| August | Check screens after summer storms for any post movement or loosened fixings |
| September | Plant evergreen climbers for year-round cover before the soil cools |
| October | Re-treat timber and tighten fixings before winter winds arrive |
| November | Clear leaves trapped against solid screens to prevent rot at the base |
| December | Review what worked over the year; note any sight-lines still open for next spring |
A screen plus a fast climber gives the best of both worlds. Slats provide instant cover while the planting fills in. Our guide to climbers that cover an ugly fence fast lists the quickest species to soften new screens within a season.
Lighting a privacy screen for evening use
Most patios get used in the evening, and a screen changes how light behaves after dark. Up-lighting a slatted screen throws striped shadows and turns a functional panel into a feature. It also keeps the privacy working after sunset, when interior lights make your patio visible from outside.
Run warm-white LED strip or spike lights at the base of a screen, angled up the slats. Aim for 2700-3000K colour temperature for a soft glow rather than a cold security-light feel. Keep the brightness low; a screen lit too hard becomes a beacon that draws the eye rather than hiding you. Solar spike lights work for a quick install, but mains-wired fittings on a timer give reliable, even output through winter.
Place lights to graze the surface, not flood it. A fitting 150-200mm from the screen base, tilted up, picks out the texture of the slats. This is the same grazing technique we use across garden lighting schemes to add depth after dark.
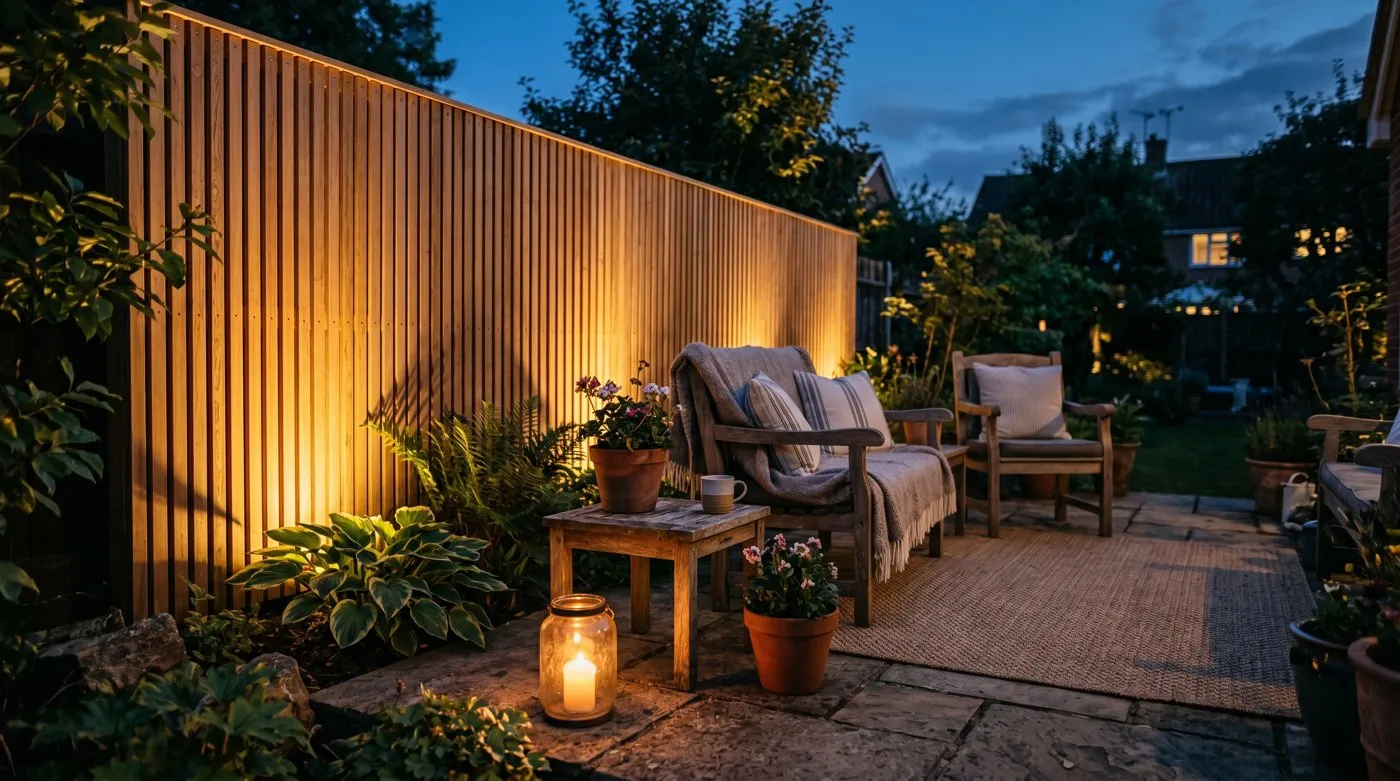 Low warm-white up-lighting turns a privacy screen into an evening feature and keeps the patio private after dark.
Common mistakes when screening a patio
Most failed privacy projects share the same handful of errors. Avoid these and the screen does its job and stays standing.
Walling in the entire boundary
The most expensive mistake is building a continuous high screen around the whole patio. It blocks light, traps heat and stale air, and costs far more than needed. It also rarely solves the actual overlooking, which usually comes from one direction. Screen the specific sight-lines and leave the rest open for light and air.
Ignoring wind load
A solid screen on under-spec posts is a sail waiting for a storm. People copy a panel they saw online without checking post depth, spacing or the slat gap. The result leans or blows flat in the first proper gale. Always factor wind, use gapped slats where you can, and concrete posts 600mm deep.
Blocking the light you actually use
A solid screen on the south or west side steals 2-3 hours of afternoon and evening sun, exactly when you sit out. People fix the privacy and ruin the suntrap in one move. Put solid screens on the north or east side and use light-filtering slats or glass where the sun comes from.
Screening the wrong eye-line
Building a tall fence on the boundary feels logical but often misses the real problem. If the overlooking comes from a high window set back from the boundary, a boundary fence does nothing. Test every sight-line from your actual seat first, then position the screen to cut the line that matters.
Choosing reed for a permanent job
Reed, willow and bamboo rolls are cheap and quick but last only 3-5 years and fray badly in wind. People use them as a permanent boundary screen and replace them constantly. Use them for rentals, quick cover-ups or to hide an existing fence, not as the main structure on an exposed patio.
Frequently asked questions
How tall can a patio privacy screen be without planning permission in the UK?
Up to 2m on a boundary, or 1m next to a road. Free-standing screens, fences and walls follow the same permitted development rule in England. Anything taller, or any height in a conservation area or on a listed property, needs planning permission. Trellis fixed on top of a 2m fence can also breach the limit, so measure the total combined height before you build.
What is the best material for a patio privacy screen?
Slatted timber for value, composite for low maintenance. Pressure-treated softwood slats cost 60-120 pounds per panel and last 12-15 years. Composite costs roughly double but lasts 25 years with no painting. Powder-coated aluminium or corten steel suit modern patios and resist rot entirely. Reed and willow are cheapest at 15-30 pounds a roll but only last 3-5 years outdoors.
Do I need a gap between the slats on a privacy screen?
Yes, a 20-30 percent gap is ideal. It cuts wind load by around 40 percent so the screen does not act as a sail. Angled or overlapping slats still block direct sight-lines from normal viewing positions while letting air and some light through. Solid screens catch the full wind and need much stronger posts and footings to survive a UK winter.
How do I create privacy on a patio without blocking light?
Screen the eye-line, not the whole boundary. A short angled screen near the seating blocks an overlooking window while leaving the sky open. Slatted, louvred or laser-cut panels let light filter through. Place solid screens on the north or east side where they cast less shadow over the patio during the afternoon and evening when you use it most.
How far apart should privacy screen posts be?
1.8m maximum, set 600mm deep in concrete. Closer spacing of 1.2-1.5m suits exposed or windy sites. Posts carry the entire wind load of the panel, so under-spec footings are the main reason screens lean or blow over. Use 100mm posts for screens over 1.8m tall and check them after the first winter for movement before the ground settles.
Are freestanding garden screens better than fixing to a fence?
Free-standing screens give more flexibility but need solid footings. They let you angle the screen to block a specific sight-line rather than following the boundary. Fixing to an existing fence is cheaper and faster but only works if the fence is sound and tall enough. A wobbly old fence will not carry the extra wind load of a screen bolted on top.
How much does it cost to screen a patio for privacy in the UK?
Expect 200-800 pounds for a typical patio screen. A single 1.8m timber panel with one post and a concrete footing costs around 120-180 pounds in materials. A 6m run with three panels and labour reaches 600-900 pounds installed. Reed screening on an existing fence is the budget option at under 100 pounds, replaced every few years.
Will a privacy screen stop noise from neighbours?
A standard screen barely reduces noise. Sound passes straight through slatted gaps. Only a solid, dense, gap-free barrier of mass blocks meaningful sound, and even then the effect is small. For real noise reduction you need height, mass and a continuous run, often combined with planting and a water feature to mask the remaining sound rather than block it.
Now you have the built side covered, pair it with the right planting in our guide to the best trees for privacy to build a layered screen that looks better every year.
Lawrie has been gardening in the West Midlands for over 30 years. He grows his own veg using no-dig methods, keeps a wildlife-friendly garden, and writes practical advice based on real UK growing conditions.