Key takeaways
- Test every dripper for 48 hours before relying on it during a holiday
- Divide usable reservoir litres by measured daily use to calculate unattended days
- Capillary matting suits small plastic pots that have open drainage holes
- Treat bottle drippers as a tested backup, not an assumed long-term supply
- Use roof vents and shading to keep greenhouse temperatures below the RHS 25-27C guide
A tested drip system is the safest way to water a greenhouse while you are away. The correct reservoir size depends on the measured output of every dripper. Ventilation and shading matter too, because wet compost cannot protect plants from excessive heat. This guide compares drip irrigation, capillary matting and bottle drippers. It also gives a capacity calculation and a pre-holiday test. The RHS holiday watering advice also recommends timed drip irrigation and checking local water restrictions. If you grow in containers, our guide to container vegetable gardening covers reservoir pots in detail.
Why greenhouse watering is different from garden watering
Greenhouse plants face conditions that open-ground crops never experience. Trapped heat accelerates transpiration. Pots and grow bags hold far less moisture than open soil. There is no rainfall to top up the water supply. Daily water use changes with crop size, pot volume, compost, ventilation and weather. Do not copy a generic litres-per-plant figure. Place every dripper in a measuring jug and run the planned schedule for 48 hours.
Add the measured output from all drippers to find daily use. Divide the reservoir’s usable litres by that total. For example, a measured daily use of 20 litres gives five days from 100 usable litres. Add a reserve rather than planning to use the final drop.
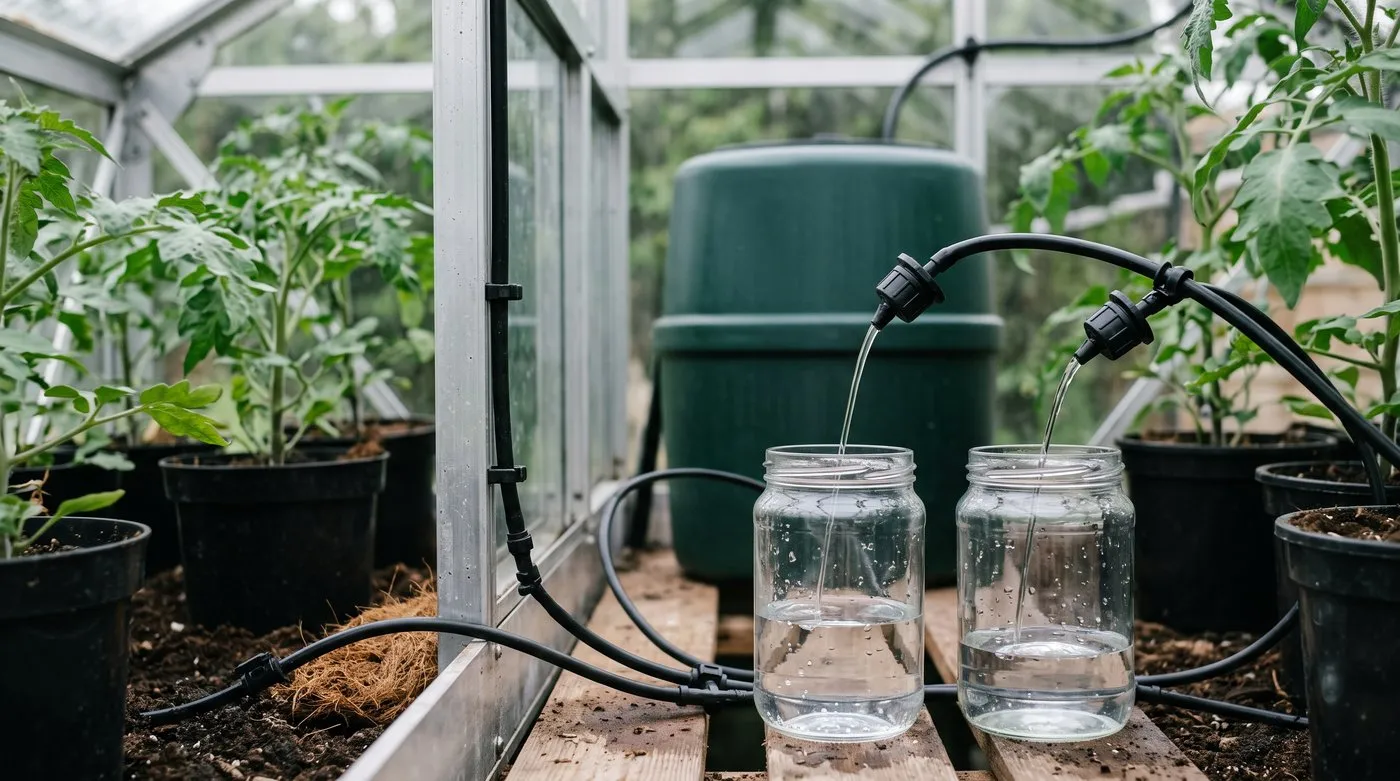 Collect each dripper’s output for the same timed run before calculating reservoir capacity.
Run a 48-hour capacity test
Build the final system before testing. Use the same barrel height, tubing length, timer programme and dripper settings planned for the holiday.
- Place every dripper in a separate container for one complete timed cycle.
- Compare the collected water and adjust any emitter that differs sharply from the others.
- Return the drippers to their pots and run the full system for 48 hours.
- Mark the reservoir level before and after the test to find total daily use.
- Check the driest and wettest pots by hand, then correct their flow.
Repeat the test after any change. Moving a barrel, adding a branch line or cleaning a dripper can alter pressure. Keep the measured daily total with your holiday instructions.
The final calculation is usable reservoir litres divided by daily litres used. Reduce the answer to leave a reserve for warmer weather or small leaks. A neighbour check remains sensible because a calculation cannot detect a disconnected hose.
Water-efficient gardening techniques can reduce demand, but they do not remove it. Grouping pots away from the hottest glass and using suitable mulch may slow drying. Test the complete arrangement before travel.
Drip irrigation: the most reliable option
Drip irrigation delivers measured amounts of water directly to each pot through thin tubing and adjustable drippers. It is the most dependable method for holidays lasting a week or more.
Gravity-fed systems
A raised water barrel can supply drip tubing without electricity or a mains connection. Follow the kit’s minimum height and maximum line-length instructions. Both affect pressure and flow.
Measure the usable reservoir volume after the outlet and sediment allowance. Then use the 48-hour dripper test to calculate capacity. Linked barrels add volume, but each connection introduces another leak point to inspect.
Timer-controlled mains systems
If your greenhouse has a mains water connection, a battery-operated tap timer automates the supply. Set the schedule from measured output, not an assumed running time. Check the battery specification and replace it before travel when needed. The advantage over gravity-fed systems is unlimited water supply. The risk is a leak or disconnection that floods the greenhouse floor. Test the system for a full week before you travel.
What each drip component does
| Component | Role | Check before travel |
|---|---|---|
| Battery tap timer | Starts and stops a mains supply | Battery, seal and programme |
| Drip tubing | Carries water to each pot | Kinks, loose joints and blocked ends |
| Adjustable drippers | Controls flow at each plant | Measured 48-hour output |
| Gravity reservoir | Stores water without mains pressure | Usable litres, stand and outlet height |
| Filter | Catches debris before drippers | Clean element and secure housing |
Gardener’s tip: Run drip lines along the surface of the compost rather than poking them into it. Surface delivery spreads water more evenly and is easier to adjust and inspect.
Capillary matting: simple and effective for small pots
Capillary matting draws water from a reservoir into pot compost through capillary action. It suits small plastic pots whose drainage holes make direct contact with the wet mat.
How to set it up
Place the matting on a flat surface such as a greenhouse bench. Drape one end into a water tray or reservoir below bench level. The mat wicks water from the reservoir and keeps the surface damp. Pots placed on the mat draw moisture through their drainage holes. For best results, use pots with large drainage holes and sit them directly on the wet mat without saucers. The compost must make contact with the matting. Glazed pots without drainage holes will not work.
Limitations
Capillary performance changes with pot shape, drainage holes and compost. It is less suitable for deep containers and thirsty fruiting crops. For tomatoes, cucumbers and grow bags, use a measured drip supply.
The reservoir still needs enough water for the full absence. Run the setup until the reservoir reaches its safe minimum. Record the elapsed time and check that every pot remains evenly moist.
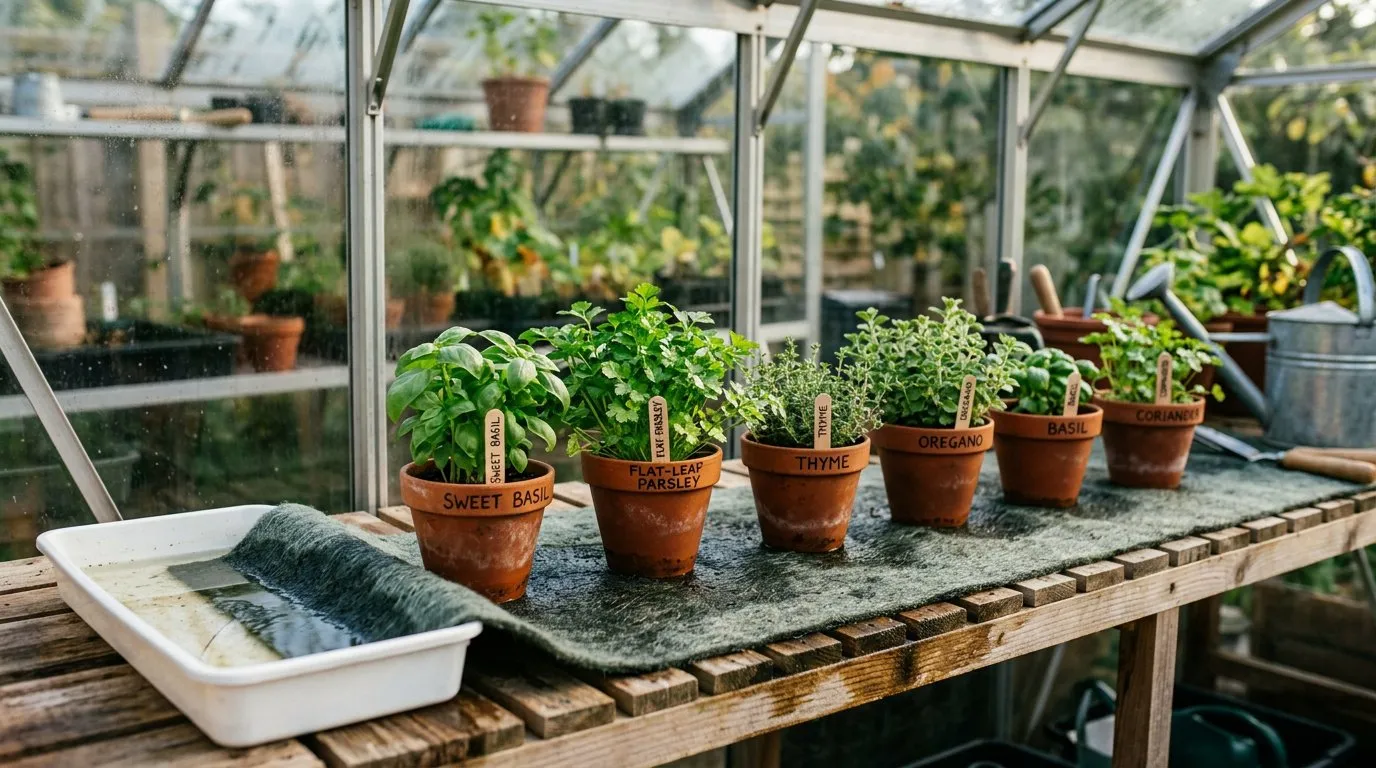 Capillary matting keeps small pots evenly moist by wicking water from a reservoir tray.
DIY bottle drippers: free and quick
The simplest holiday watering method costs nothing. Fill a plastic bottle, poke a small hole in the cap, and push it upside down into the compost. Water trickles out slowly as the soil draws moisture.
How to make one
- Clean a 1-litre or 2-litre plastic bottle
- Pierce a single small hole (1-2mm) in the cap with a heated pin
- Fill the bottle with water and replace the cap
- Push the bottle neck-first into the compost at a slight angle
- Check the drip rate after 30 minutes and adjust the hole size if needed Bottle flow varies too much for a fixed duration claim. Test each bottle in its final pot and measure how long it takes to empty. This method may suit herbs as backup. Do not assume it can support tomatoes or chilli peppers.
Warning: Test bottle drippers for at least 24 hours before leaving. Some drain too quickly, flooding the pot and leaving it dry within a day. Others drip too slowly and provide almost no water.
Comparing the three main methods
| Method | Best for | Main constraint | Required proof |
|---|---|---|---|
| Drip irrigation, gravity-fed | Pots and grow bags without mains water | Reservoir capacity and pressure | Measured daily output |
| Drip irrigation, mains timer | Larger greenhouse collections | Leaks, timer and water restrictions | Full-system trial |
| Capillary matting | Small plastic pots | Pot contact and reservoir size | Every pot still moist |
| DIY bottle drippers | Backup for individual pots | Unpredictable flow | Timed emptying test |
| Self-watering pots | Individual container plants | Small built-in reservoir | Tested refill interval |
A duration estimate requires a timed check in the final greenhouse. The table separates each system’s role from the proof needed before travel.
Ventilation: as important as watering
A well-watered greenhouse can still suffer heat damage. The RHS ventilation and shading guide warns that plant damage can occur above 27C. It advises using only enough shade to stay near 25-27C.
Automatic roof vents
Automatic roof vent openers use an expanding wax cylinder and need no electricity. Opening temperatures and fitting methods vary by model. Our guide to greenhouse ventilation and humidity control explains how roof, side and door openings work together.
Check compatibility against the vent frame and follow the manufacturer’s instructions. The Palram automatic roof vent opener is one current example, not a universal fit.
Shading
Apply suitable greenhouse shading paint to compatible glazing, or fit shade mesh. Product instructions matter because some coatings are unsuitable for acrylic or polycarbonate. Keep a maximum-minimum thermometer inside and adjust shade before travel.
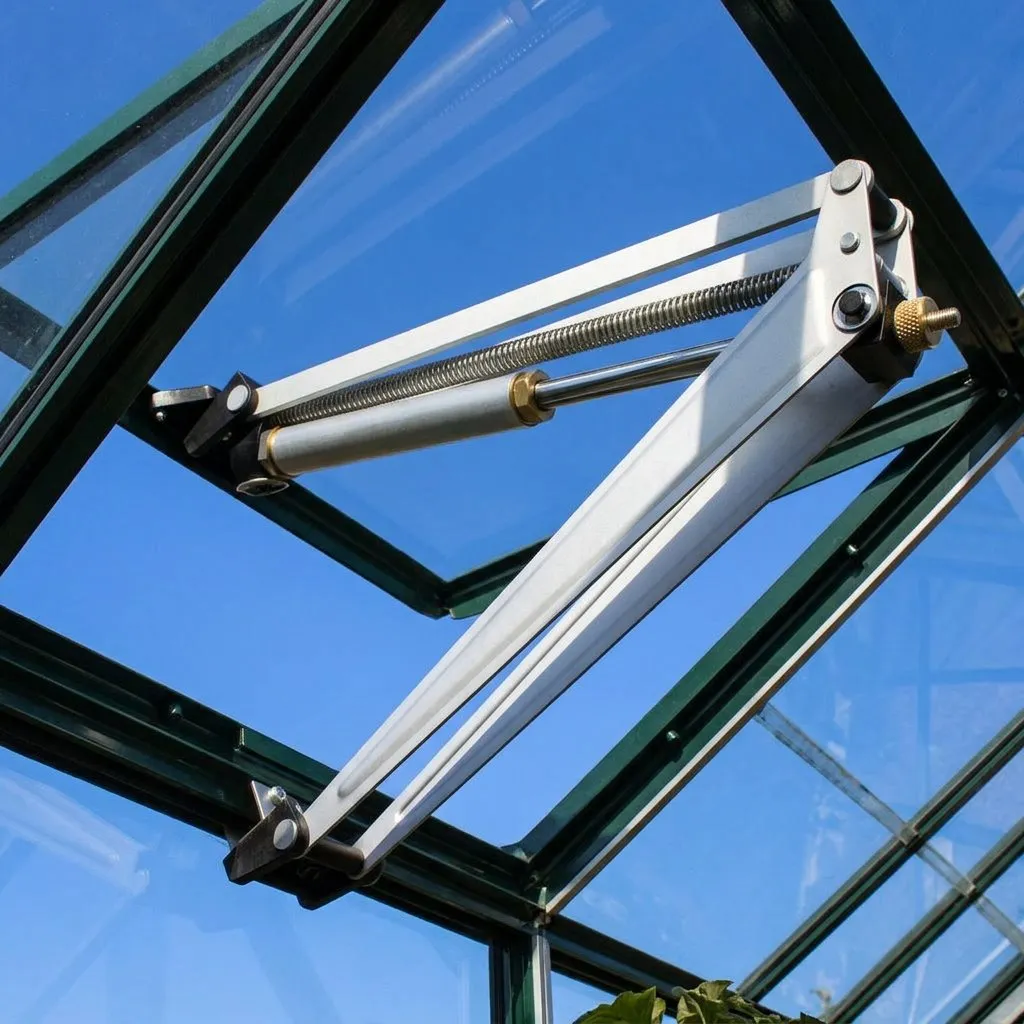 An automatic roof vent opener and shading mesh working together to prevent overheating while you are away.
Pre-holiday checklist
Follow this checklist 2-3 days before you leave to give time for testing and adjustments.
Watering
- Install and test your chosen watering system for at least 48 hours
- Fill all reservoirs, barrels, and water butts to maximum capacity
- Mulch the surface of every pot with 2-3cm of gravel or bark
- Move pots away from the south-facing glass to reduce heat exposure
- Group pots together to create a shared humid microclimate
Ventilation and temperature
- Fit and test automatic roof vent openers
- Apply shading paint or mesh to glass
- Leave the door on a secure latch if possible for cross-ventilation
- Remove any black staging covers that absorb and radiate heat
Feeding and plant care
- Give a full liquid feed 2-3 days before departure
- Remove all ripe and nearly ripe fruit to prevent rot
- Pinch out side shoots on cordon tomatoes
- Check for pests and treat any infestations before leaving
- Harvest any vegetables that will mature while you are away
Backup
- Ask a neighbour to check the greenhouse every 3-4 days
- Leave clear written instructions next to the watering system
- Place a max-min thermometer inside to check on your return
Common mistakes to avoid
Relying on a single method. Use drip irrigation as your primary system and capillary matting or bottle drippers as backup. If one fails, the other gives your plants extra days.
Not testing before you leave. Every watering system needs a 48-hour trial run. Drip lines block, bottle drippers drain too fast, and capillary mats dry out unevenly. Discover problems while you can still fix them.
Forgetting ventilation. Water cannot prevent heat damage. The Royal Horticultural Society recommends doors, roof vents and shading where needed.
Overwatering before departure. Flooding pots with extra water before leaving causes root rot and does not create a useful reserve. Water normally and let the automated system maintain consistent moisture.
Ignoring grow bag plants. Their shallow compost can dry quickly. Give each grow bag its own measured drippers. For broader care, use our greenhouse growing calendar.
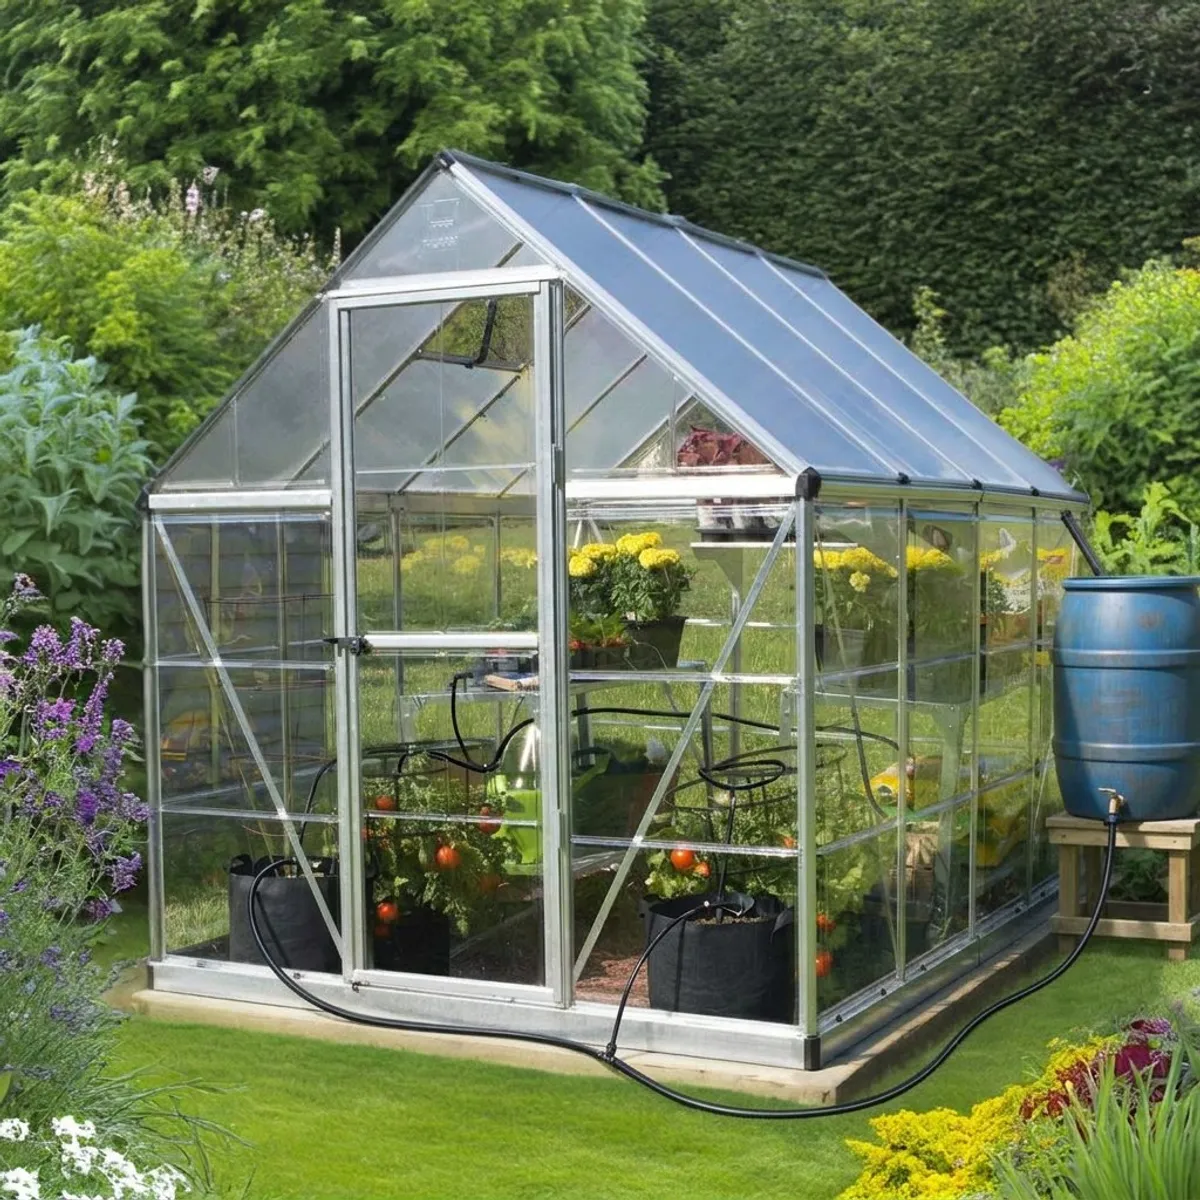
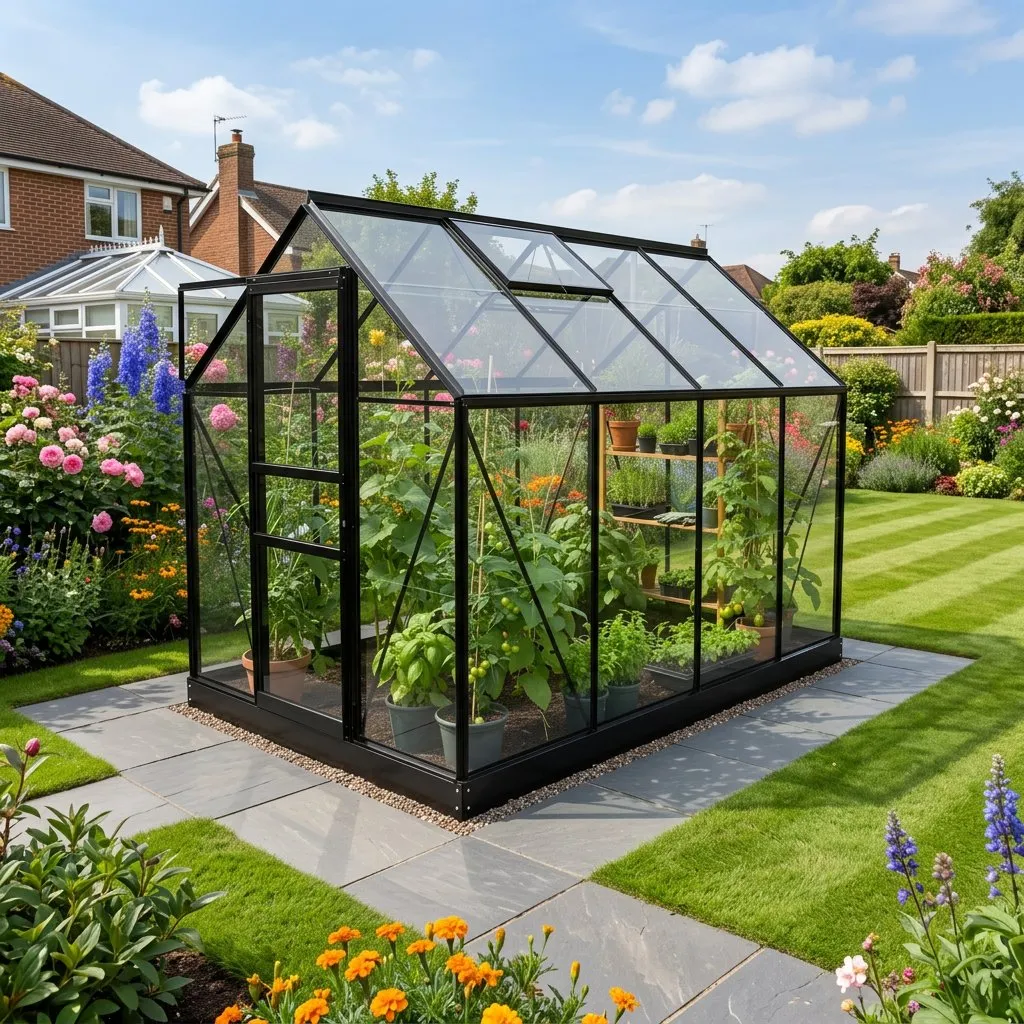 A holiday-ready Vitavia Venus 5000 greenhouse with grouped pots, bark mulch, and gravity-fed drip irrigation.
Shop the Vitavia Venus 5000 at Greenhouse Stores →
Before leaving, check our guide to greenhouse ventilation and humidity control. It covers roof, side and door airflow.
A holiday-ready Vitavia Venus 5000 greenhouse with grouped pots, bark mulch, and gravity-fed drip irrigation.
Shop the Vitavia Venus 5000 at Greenhouse Stores →
Before leaving, check our guide to greenhouse ventilation and humidity control. It covers roof, side and door airflow.
Frequently asked questions
How long can greenhouse plants survive without watering?
There is no safe fixed duration. Pot size, crop, compost, weather and ventilation change daily demand. Measure your full setup before leaving and keep a reserve.
What is the best automatic watering system for a greenhouse?
Drip irrigation is the most reliable option. Gravity-fed kits avoid a mains connection. Tap timers remove reservoir limits but add leak, programme and water-restriction checks.
Do capillary mats really work?
Capillary matting works for suitable plastic pots. Their drainage holes must touch the wet mat. Test every pot because compost mixes and container shapes wick differently.
Can I use a bottle dripper for tomatoes?
Use bottle drippers only after a measured test. Flow changes with hole size, compost and bottle position. Keep them as backup for tomatoes rather than the only supply.
How do I stop my greenhouse overheating while on holiday?
Fit automatic roof vents that respond to heat. Add suitable shading and use safe cross-ventilation. Monitor the greenhouse and aim to keep it below 25-27C.
Browse the how-to guides or continue with greenhouse ventilation and humidity control.
Our team produces practical UK gardening guidance from source research, contributor records and established horticultural practice. Editorial standards are overseen by Matt W.