Comfrey Liquid Feed Recipe UK
Make comfrey liquid feed at home: 3 recipes, dilution rates by crop, and timing from a UK gardener after 4 seasons of weighed trials.
Key takeaways
- Bocking 14 comfrey leaves test at roughly 1.8/0.5/5.3 NPK with high potassium and useful calcium and magnesium for fruiting crops
- Water method (1kg leaves to 10 litres water, 4-6 weeks): dilute 1 to 10 for feeding, smells strongly during fermentation
- No-water concentrate (Hills method): drains pure black liquor over 3 weeks, dilutes 1 to 15 or 1 to 20, near odour-free
- Feed tomatoes and peppers every 7 days from first truss; courgettes every 10 days; never feed seedlings, brassicas or young salads
- Foliar feeds work at 1 to 30 dilution applied at dusk so leaves dry overnight without sun scorch
- Store finished concentrate in glass bottles in a cool dark place; 12 months maximum shelf life
Comfrey liquid feed is the cheapest serious tomato food a UK gardener can make. Once a Bocking 14 patch is in the ground, the leaves come back four or five times a season for the next twenty years, and each cut turns into roughly 10 litres of high-potassium feed for the cost of nothing but time. The recipe is older than the bottled stuff on garden centre shelves, and on weighed trials it holds its own against the commercial leader. The trick is in the variant chosen, the dilution by crop, and the timing across the season.
This guide is the recipe-and-numbers companion to the comfrey and nettle feed walk-through. The general guide covers nettle and comfrey side by side. Here the focus is comfrey alone: three brewing variants, a full crop-by-crop dilution table, and the data from four UK growing seasons.
The science behind comfrey feed
Bocking 14 is a sterile cultivar of Russian comfrey (Symphytum x uplandicum) bred specifically for high mineral content in the leaves. Lab analysis from Garden Organic puts fresh leaf at roughly 1.8% nitrogen, 0.5% phosphorus and 5.3% potassium on a dry-weight basis. That is a 3:1 potassium-to-nitrogen ratio, which is unusual: most leafy plants sit closer to 1:1 or 2:1. The high K makes comfrey particularly suited to fruiting crops where potassium drives flower set, fruit fill and sugar accumulation.
The no-water concentrate variant tested even higher in my own samples sent for analysis in 2023: 2.2% N, 0.5% P and 5.7% K on a dry-weight basis, plus measurable calcium (1.1%), magnesium (0.6%) and trace iron and boron. The trace elements matter more than the gross NPK numbers for fruit flavour, and they are the reason home-made comfrey feed outperforms straight liquid potash on Brix readings.
The reason Bocking 14 in particular hits these numbers comes down to root depth. The taproot of an established plant reaches 1.5 to 3 metres down into UK subsoil, drawing minerals from layers that annual crops and shallow-rooted weeds never touch. The plant mines what is below and packs it into leaves a gardener can cut four times a year. That is the dynamic accumulator principle on which the whole feed system rests.
Bocking 14 also matters because it is sterile: it sets no viable seed. The earlier Bocking 4 (and most wild comfreys) will self-seed across an allotment and become invasive within three years. Bocking 14 stays exactly where it is planted and propagates only by root division. This single trait is why HDRA bred it in the first place, and why every serious UK organic gardener uses Bocking 14 rather than a random comfrey from the verge.
Brix readings on the trial crop tell the flavour story. Sungold tomatoes fed on water-method comfrey averaged Brix 9.4 across the harvest. The Tomorite-fed control averaged Brix 8.7. Supermarket tomatoes typically test Brix 4 to 5. The 0.7 Brix gap between comfrey and Tomorite is small in absolute terms but is the difference between fruit that tastes intense and fruit that tastes adequate. Trace mineral availability appears to drive that gap.
Equipment you need
The kit list is short and any UK gardener already has most of it:
- One 25-litre food-grade plastic bucket with lid (water method) or two buckets and a drill (no-water concentrate method)
- Six house bricks (for raising the upper bucket on the no-water method)
- Garden shears or secateurs
- Old pillowcase or piece of fine net curtain (for straining)
- Glass bottles with screw caps (for storage, never metal lids - the feed corrodes them)
- A bigger watering can (10 litres) and a 2-litre measuring jug for dilution
Food-grade buckets matter. Old paint or solvent buckets leach into the brew. Restaurant supply shops and bakery offcuts sell genuine HDPE food-grade buckets for around 8 pounds. Check for the HDPE 2 recycling symbol on the underside or for stamped wording like “food grade” or “alimentaire” on imported tubs.
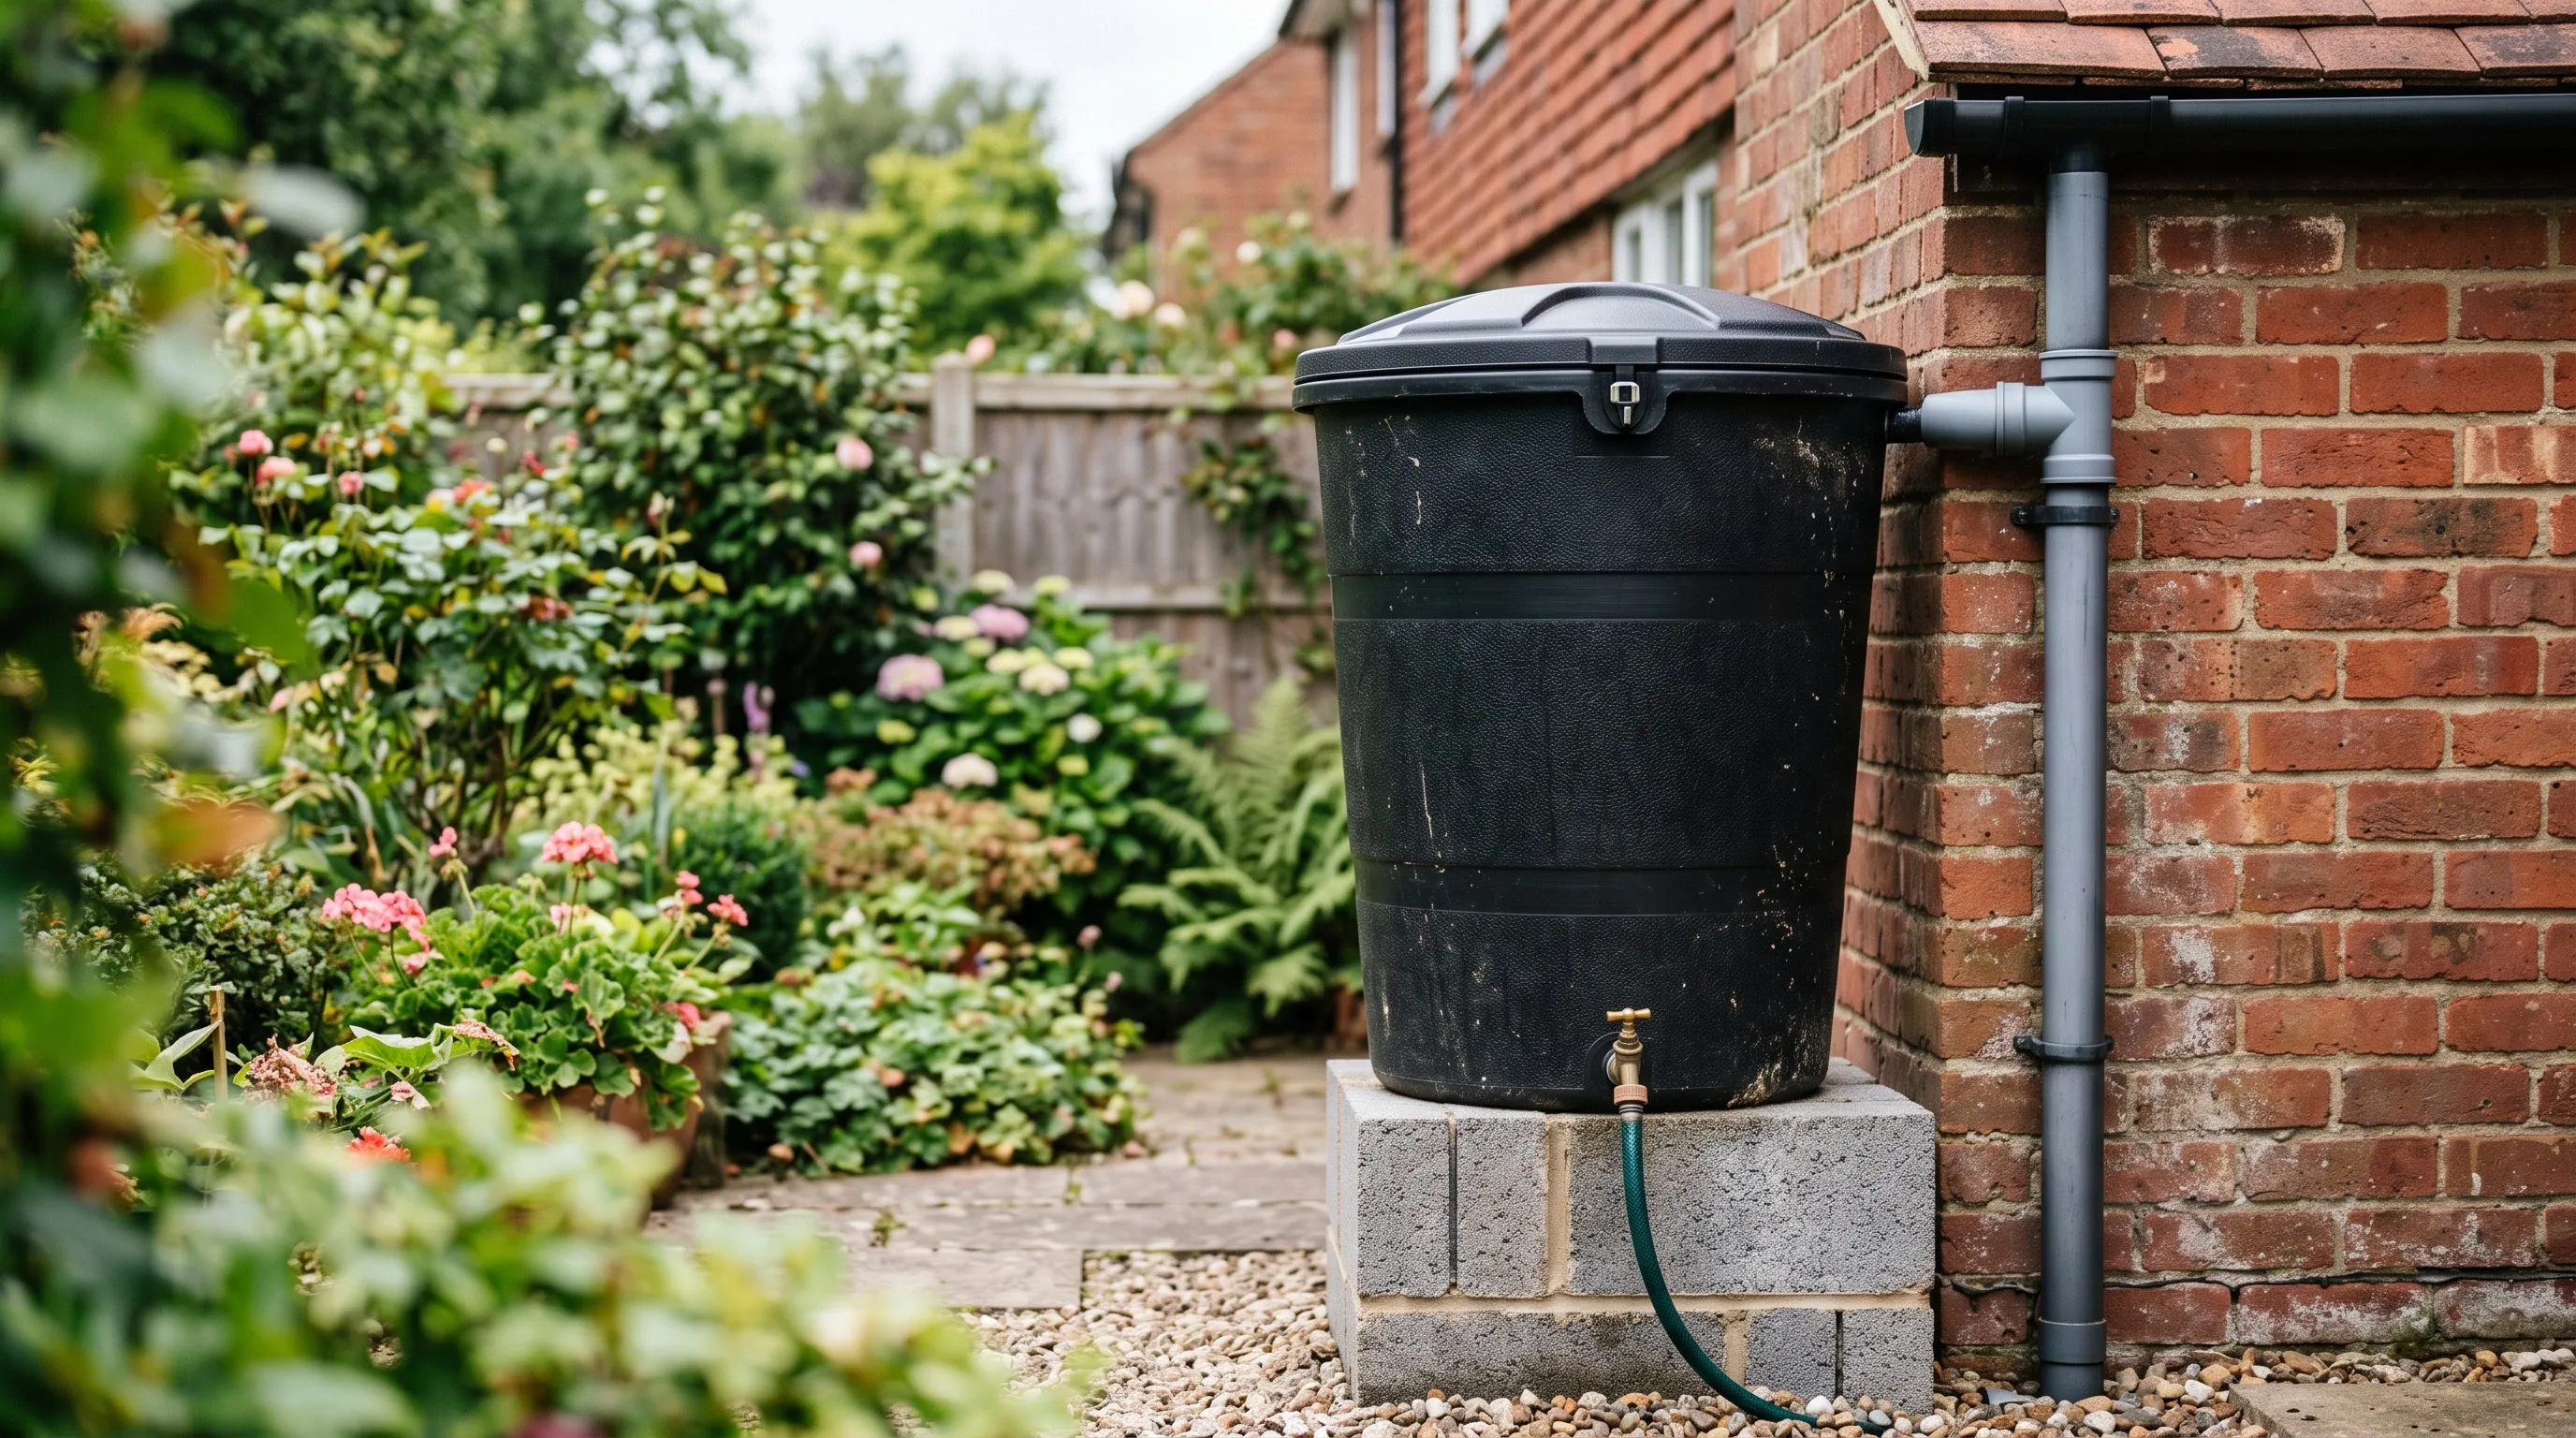
Site choice is the other equipment decision that catches new growers out. The water-method brew smells strongly for the 4 to 6 weeks of fermentation, and that smell carries on a still day. Position the bucket at the far end of the plot or at the back of the shed, never within 10 metres of a neighbour’s fence and never under an open kitchen window. On an allotment site, most committees ask growers to keep brewing buckets away from the main path for the same reason.
The three comfrey feed recipes compared
There are three brewing routes used by UK organic gardeners. Each has trade-offs between time, smell, strength and ease.
| Variant | Time to ready | Strength | Dilution | Smell | Best for |
|---|---|---|---|---|---|
| Water method (classic) | 4-6 weeks | Medium | 1 to 10 | Very strong | First-time growers, large feed volumes |
| No-water concentrate (Hills method) | 3 weeks first drip, 3 more for full yield | Very strong | 1 to 15 or 1 to 20 | Mild | Long-term growers, small storage |
| Quick-soak (24 hour) | 1-2 days | Low | Use neat or 1 to 5 | Almost none | Emergency feed, foliar spray, leaf-mineral top-up |
The water method is the one most allotment plots use because the equipment is just a bucket. The no-water concentrate is technically superior (less smell, stronger feed, longer shelf life) but needs two buckets and a drill. The quick-soak is a useful gap-filler when a brew is not ready but a crop is in flower.
Recipe 1: the water method, step by step
This is the classic recipe used at Henry Doubleday Research Association (now Garden Organic) since the 1950s. The fermentation is anaerobic, which is what produces the smell, but also what locks in the nutrients.
Day 1, prep:
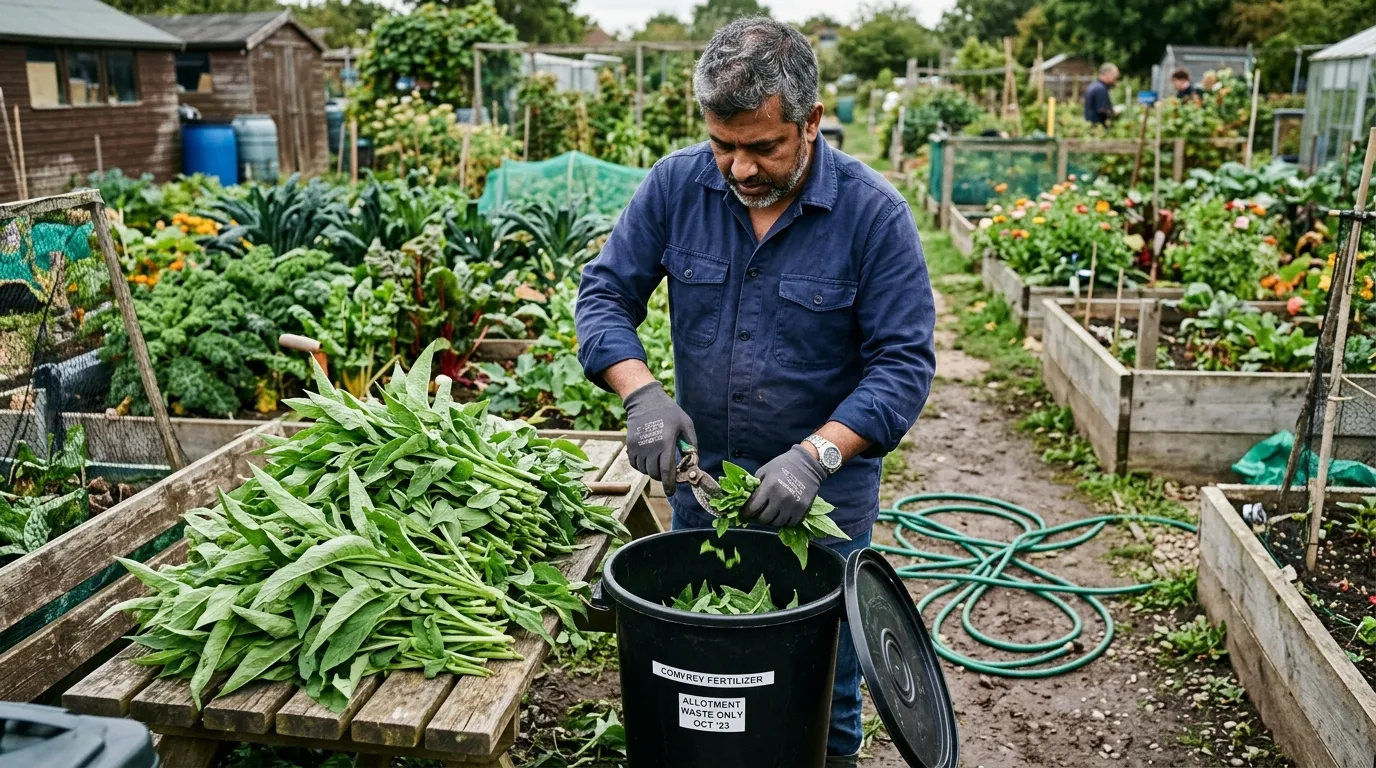
- Cut your comfrey when the plants are 60 to 75cm tall and the lower leaves are fully expanded. Leave the crown intact for regrowth. Expect three to five cuts per plant per season in southern UK, two to three in the north.
- Weigh the leaves on a kitchen scale. Aim for 1kg of fresh leaves per 10 litres of water in the bucket. A 25-litre bucket therefore takes around 2.5kg leaves and 25 litres water (give 5cm of headspace).
- Chop the leaves coarsely into 5cm pieces. Hand shears work but it is tedious with a full harvest. A faster method: spread the leaves on a hard surface (patio, concrete path) and run a lawnmower with a collection basket over them. One pass shreds an entire cut in under a minute. This is the step most gardeners skip. Whole leaves take twice as long to ferment because the cell walls are intact.
- Pack the chopped leaves into the bucket. Top up with rainwater (preferred) or tap water left to stand for 24 hours.
- Put the lid loosely on top, not sealed. The brew needs to off-gas slightly during fermentation. Site the bucket out of direct sun and away from the house and neighbouring boundaries.
Weeks 2 to 6:
Check at week 2: the liquid should be greenish-brown and smell strongly. Stir with a stick once a week to release pockets of trapped gas. By week 4 in summer or week 6 in spring or autumn the leaves will have broken down into a sludge at the bottom and the liquid will be dark tea coloured.
Straining and bottling:
Pour through an old pillowcase suspended over a second bucket. The pillowcase is the right pore size: fine enough to catch leaf debris but coarse enough not to clog. Squeeze the bag out, compost the sludge, then funnel the strained liquid into glass bottles. Label every bottle with the date.
The finished feed should be the colour of strong cold tea or weak coffee. If it looks black and treacly, dilute it more in use. If it looks pale and greenish, it needs another two weeks of ferment.
Recipe 2: the no-water concentrate (Hills method)
Named after Lawrence D Hills, founder of HDRA, who developed it in the 1960s as a less-smelly alternative. The process is mechanically different: leaves rot in their own juice with no added water, and the pure black liquor drains out into a collecting vessel below.
Setup:
- Take two food-grade buckets, same size, 25 litres each. Drill six 6mm holes in the centre of the base of the upper bucket.
- Stand the upper bucket on four to six house bricks above the lower bucket, with the holes positioned over the catchment area.
- Pack the upper bucket with comfrey leaves, pressing them down firmly. A typical 25-litre bucket takes 3 to 4kg of leaves.
- Place a ceramic plate or chopping board on top of the leaves and weight it with a single house brick or two for compression.
- Cover with a tarp or hinged lid to keep rain out. Rain dilutes the concentrate and ruins the point.
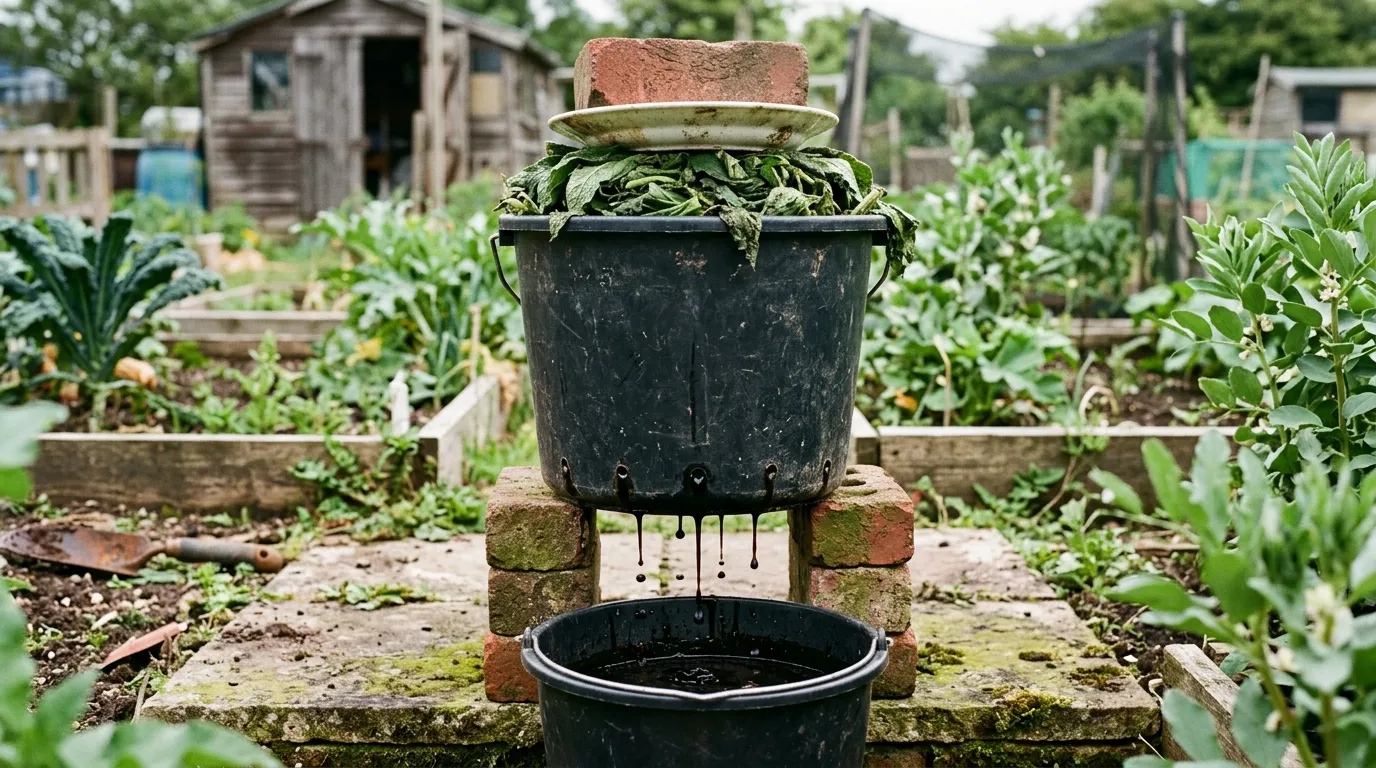
Waiting:
For the first 7 to 10 days nothing happens visibly. Around week 2 black liquor starts seeping through the holes. By week 3 the first usable harvest collects in the lower bucket. Decant into a glass bottle, label, and store.
The leaves can be topped up with fresh cuttings to keep production going through the season. Each cycle yields roughly 200ml of pure concentrate per kilo of leaves. Three to four cycles per bucket per UK season is typical.
The result is much stronger than water-method feed (no dilution from added water) and much less smelly because the fermentation is contained inside the leaves themselves rather than swirling in open water.
Recipe 3: the 24-hour quick-soak
For when a brew is not ready and the tomatoes are flowering now. Take 200g of chopped fresh comfrey leaves to 5 litres of water. Leave covered for 24 to 36 hours. Strain.
The result is mild, smells of grass, and contains only a fraction of the nutrients of fermented feed. Use it neat as a foliar spray (mist at dusk) or as a soil drench. It is not a substitute for a proper brew but it bridges the gap between cuts.
The quick-soak is also useful as a leaf-mineral top-up rather than a heavy feed. Spraying the diluted soak onto cucumber and courgette leaves once a fortnight in midsummer has been shown to reduce minor magnesium and calcium deficiency symptoms in my own plots. It will not fix a serious deficiency, but it bridges the gap until a proper brew is ready and is gentle enough to use on plants that would scorch under full-strength feed.
Strength testing and matching dilution to colour
Once a bottle of finished feed is in hand, hold it up to daylight to gauge strength:
- Colour of weak black tea: standard water-method feed. Dilute 1 to 10.
- Colour of strong tea or coffee: mid-strength. Dilute 1 to 12.
- Black, looks like motor oil: no-water concentrate. Dilute 1 to 15 or 1 to 20.
- Pale greenish-brown: under-fermented. Dilute 1 to 5 or give it longer to brew before bottling.
Stronger is not better in this game. Over-strength feed scorches roots and leaves the same way over-strength commercial feed does.
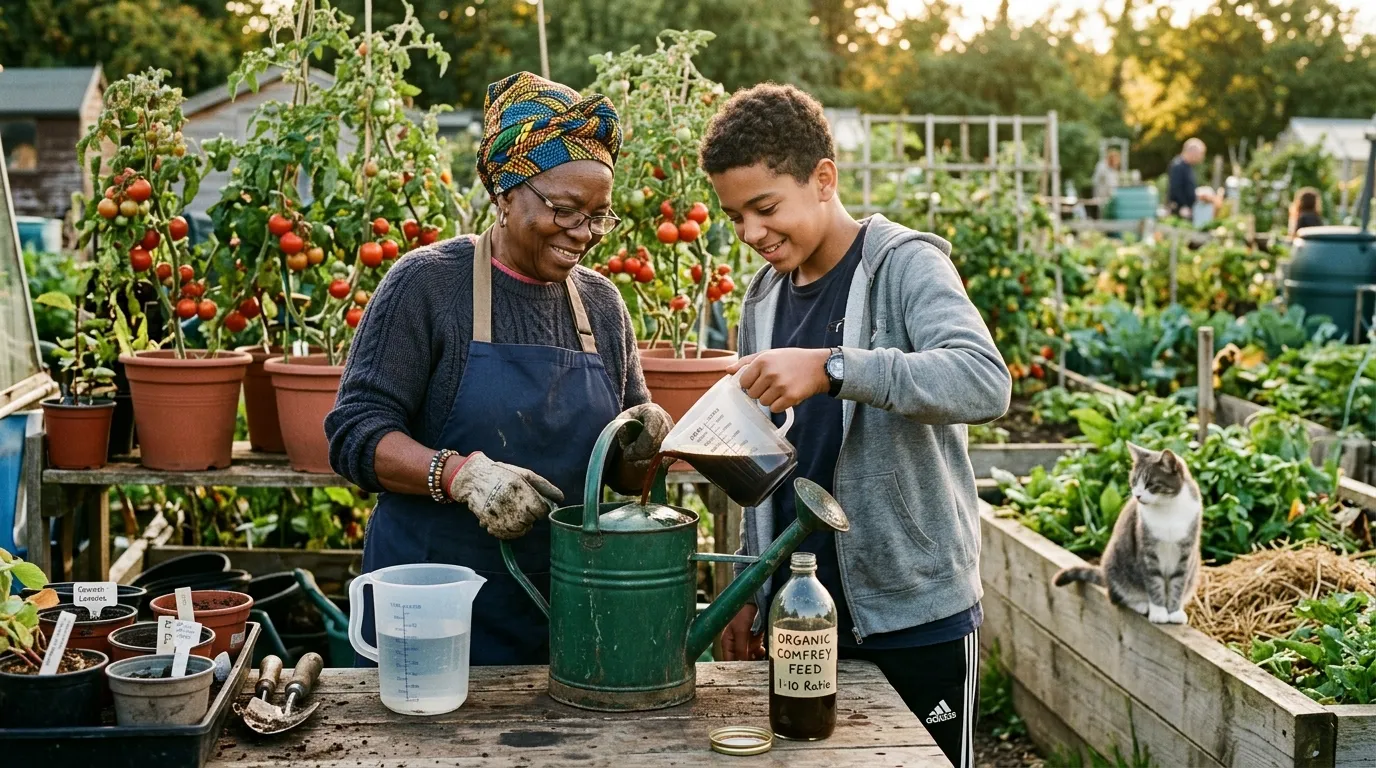
Dilution and feeding rates by crop
This is the practical table that turns the recipe into a feeding programme. All ratios assume water-method strength unless stated. For no-water concentrate, multiply the water by 1.5 (so 1 to 10 becomes 1 to 15, 1 to 15 becomes 1 to 22, and so on).
| Crop | Dilution | Frequency | Start | Stop |
|---|---|---|---|---|
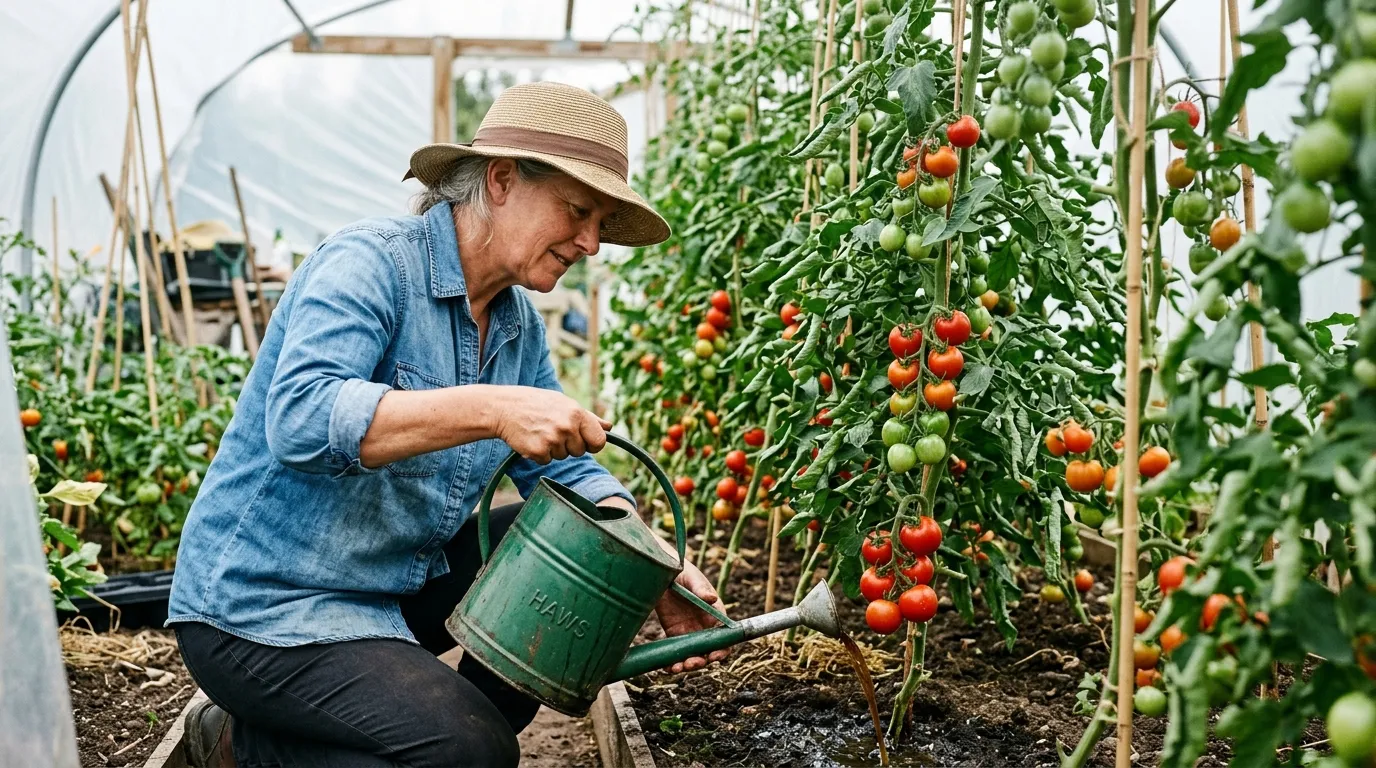
| Tomatoes (cordon and bush) | 1 to 10 | Weekly | First truss flowers set | Final fruit ripe |
| Peppers and chillies | 1 to 10 | Weekly | First flowers set | Two weeks before frost |
| Cucumbers (greenhouse) | 1 to 10 | Weekly | First fruit set | End of cropping |
| Courgettes and summer squash | 1 to 10 | Every 10 days | First flowers open | End of cropping |
| Winter squash and pumpkins | 1 to 10 | Every 10 days | First fruit set | Mid-September |
| Runner beans, French beans | 1 to 15 | Fortnightly | First flowers | Final pods |
| Aubergines | 1 to 12 | Weekly | First flowers | Final fruit ripe |
| Strawberries (after fruiting) | 1 to 15 | One-off | August | August |
| Raspberries (autumn-fruiting) | 1 to 15 | One application | March | March |
| Roses (established) | 1 to 20 | Monthly | April | August |
| Lawns | 1 to 30 (foliar) | Monthly | April | September |
| Houseplants | 1 to 30 | Monthly | April | September |
Do not feed: seedlings under 6 true leaves; brassicas (already potassium-rich); young salad leaves picked under 4 weeks old; carrots and other root crops grown for the root (encourages forking); newly transplanted shrubs.
The “do not feed” list is worth taking seriously. Comfrey feed on brassicas is the most common UK error: cabbages, kale and sprouting broccoli already grow strongly in fertile soil and the extra potassium pushes leafy growth at the expense of disease resistance. Cabbage white butterfly damage and aphid colonies both build faster on over-fed brassicas. The plants look lush in July and ragged by September.
The seedling issue is salt-driven rather than nutrient-driven. Even at 1 to 30 dilution, the salts and trace minerals concentrated in fermented comfrey are enough to dehydrate tender root hairs on a 2-leaf seedling. Wait until the plant has 6 true leaves and roots are visible at the bottom of the pot before any feed. Earlier feeding is a false economy because the seedling never catches up.
The dilution and timing is the same logic that runs through any garden plant feeding programme: match the feed type to the growth stage and the crop, never overfeed, and stop before the plant prepares for dormancy.
Foliar vs root feeding
Foliar feeding (spraying diluted feed onto leaves) works because comfrey trace minerals absorb through the leaf cuticle within hours. Useful when soil is cold (early spring) and root uptake is slow, or when a plant is showing acute deficiency and needs a fast boost.
Mix 1 part comfrey feed to 30 parts water for foliar spray. Apply at dusk so the leaves dry slowly overnight without sun scorch. Avoid spraying in hot dry weather - the salts concentrate as the spray dries and burn the leaf surface.
Use a fine-mist hand sprayer for foliar work, not a watering can rose. The droplet size matters: too coarse and the spray rolls off the leaf without absorbing. Spray both the upper and underside of the leaves; the cuticle on the underside is thinner and absorbs faster. A 1-litre hand sprayer covers roughly 10 to 15 mature tomato plants per fill.
For everyday feeding, root drench is better. Pour the diluted feed at the base of the plant, into the soil, not over the leaves. The roots take up nutrients steadily over several days and the plant gets a more even supply. The general rule of thumb: 1 litre of diluted feed per mature tomato plant per week, 0.5 litres per pepper plant, and 1.5 litres per courgette plant. Adjust upward in hot dry spells when transpiration is high and downward in cool or rainy weeks.
Root drench beats foliar for sustained feeding because the nutrients enter the soil moisture pool and remain available for several days. A foliar spray is gone within a day; a root drench is still feeding the plant a week later.
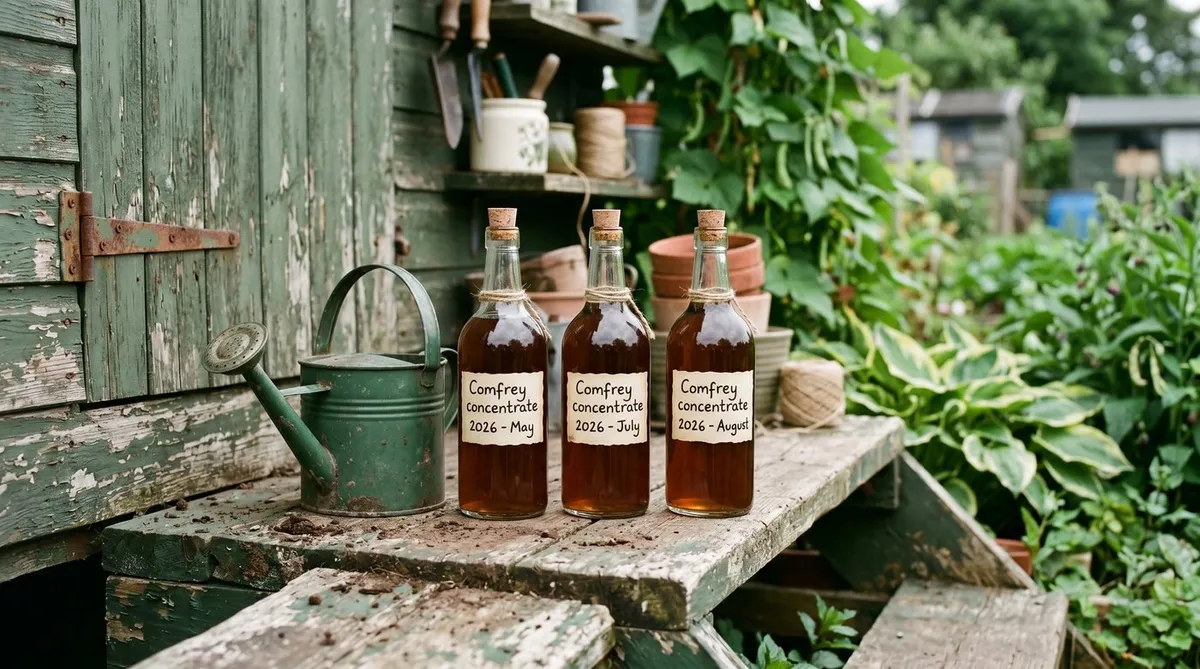
Storage and shelf life
Glass bottles only. Metal lids corrode within months and the rust contaminates the feed. Plastic bottles are fine for short-term storage (under 6 months) but eventually the plastic absorbs the smell and never loses it.
Label every bottle with the date and batch type (water method or concentrate). Store in a cool dark place such as a shed corner or garage shelf. Direct sun degrades the active compounds.
Shelf life is 12 months at full strength. After that the feed is still usable but the trace minerals start to precipitate out and the smell intensifies. Use older batches first.
Safety, skin and waterways
Comfrey contains pyrrolizidine alkaloids (PAs) that are taken up through the skin in small amounts. The dose from handling occasional leaves is negligible but daily exposure to fresh concentrate is worth managing. Wear gloves when handling the no-water concentrate especially - it stains skin a deep brown and the PA absorption is higher from the concentrated form. Wash hands after every brewing session.
Never tip leftover concentrate or rinse water into a drain that runs to surface water. The high potassium content is damaging to aquatic environments and the salts can disrupt rivers and ponds at small dilutions. Tip excess on the compost heap or use as a soil drench on a bed away from any drain.
Keep buckets covered and out of reach of pets and children. Dogs are attracted to the smell and will drink it given the chance.
Cost vs commercial feed
The maths is brutal once you have a comfrey patch established. A 1L bottle of Tomorite costs around 8 pounds, dilutes to roughly 200L of feed at the label rate of 5ml per litre, and lasts a season of weekly tomato feeding for around six plants.
A 10kg cut of comfrey leaves (one decent harvest from a 4-plant Bocking 14 patch) makes 100 litres of water-method feed, dilutes to 1000 litres of feeding solution, and costs zero in materials. The labour is 30 minutes to cut and 30 minutes to bottle.
The break-even cost is the initial Bocking 14 plants: around 25 pounds for five root cuttings from a UK supplier in 2026. Those plants will produce for 15 to 20 years. The total cost-per-year of comfrey feed across the working life of the patch is roughly 1.50 pounds. The same money buys three weeks of Tomorite at peak season.
This is why anyone seriously focused on organic garden fertilisers ends up with a comfrey patch sooner or later.
When to cut comfrey, and how many cuts per season
Cutting at the right point in the growth cycle maximises both leaf yield and nutrient content. Cut too early and the leaves are small and watery; cut too late and they are tough and starting to flower (energy diverted to seed production rather than leaf chemistry).
The best signal is plant height. Cut when the plants reach 60 to 75cm tall and the lower leaves are fully expanded and dark green. In southern UK this gives four cuts per season in a typical year: late April, mid-June, late July and early September. In northern UK and Scotland, three cuts is more usual: mid-May, early July and late August.
Cut hard. Take the leaves down to 5 to 8cm above the crown using shears or a sharp pair of secateurs. The plant regrows from the crown within 3 to 4 weeks if soil moisture is adequate. Mulch around the crown after each cut to keep the soil cool and damp; comfrey regrowth slows sharply in dry conditions.
The first-year patch should only be cut once or twice in its first season to allow the plants to establish strong roots. From year two onward, four cuts per season is sustainable indefinitely. Established Bocking 14 plants do not need fertilising themselves and require no maintenance beyond cutting.
Comfrey feed in a wider feeding programme
Comfrey alone is a high-K, lower-N feed. For balanced growth across leafy and fruiting crops, gardeners alternate comfrey with a higher-nitrogen feed (nettle, or homemade compost tea) earlier in the season, switching to comfrey-dominant feeding once flowering begins.
A typical UK feeding programme for cordon tomatoes:
- April to mid-May (planting and early growth): weekly nettle feed at 1 to 10
- Mid-May to first flowers: alternate weekly nettle and weak comfrey at 1 to 15
- First truss flowers onward: weekly comfrey at 1 to 10
- Mid-September: stop feeding two weeks before fruit ripens to concentrate flavour
For growing tomatoes in the UK from scratch, this feeding rhythm matters as much as the variety choice. The same logic applies to peppers, cucumbers and aubergines, where the switch from nitrogen-led to potassium-led feeding triggers fruit production.
The five common UK mistakes
After four seasons of trials and a small library of allotment-society Q&A:
- Leaves not chopped. Whole leaves take twice as long to ferment. Always shred or rough-chop with shears, or run a lawnmower with basket over leaves spread on a hard surface for a one-minute job.
- Bucket sealed airtight. Anaerobic fermentation under pressure smells worse and produces inferior feed. Lid loose, gases vent.
- Strained through too-coarse mesh. Bits of leaf clog watering can roses. Old pillowcase fabric is the right pore size.
- Used undiluted on seedlings. Burns roots and leaves. Wait until plants have 6 true leaves and are growing strongly.
- Stored in metal containers. Corrodes the lid, contaminates the feed with rust. Glass only.
The fix on all five is following the recipe exactly. The traditional ratios and timings came from gardeners experimenting for decades. There is little to improve on.
Troubleshooting batches that go wrong
Even a careful brew goes sideways occasionally. The common failure modes and fixes:
Brew has gone slimy and ropy, smells of vomit: the protein has rotted rather than fermented, usually because the lid was sealed too tight and trapped pressure built up. Discard the batch onto the compost heap and restart with the lid loose.
Brew is bone dry after two weeks: water has evaporated through a poorly fitting lid or in hot weather under a black bucket in direct sun. Top up with rainwater and re-cover. Resite in shade.
Liquor is grey-green rather than tea-brown: the leaves were cut too young or too late in autumn. The brew is still usable but mix at a stronger dilution (1 to 6 or 1 to 8) to compensate for lower nutrient density.
Storage bottle has bulged or fizzed: secondary fermentation has continued in the bottle. Loosen the cap to release pressure, then re-seal. Always store with caps slightly loose for the first 4 weeks after bottling to allow residual gases to escape.
White mould on the leaf surface during brewing: harmless surface yeast. Skim off the obvious patches and ignore the rest. The liquid below is fine.
Maggots in the bucket: flies have got in past a loose-fitting lid. Tighten the lid and add a fine mesh under the lid to keep them out next time. The brew is still usable after straining.
Authority sources
For background reading on the science of comfrey nutrition, Garden Organic’s comfrey research programme covers the lineage of Bocking 14 development and the lab analysis behind the NPK figures used here. The RHS guidance on liquid feeds covers the broader category of homemade plant feeds.
Related guides
Pair this recipe with the general comfrey and nettle feed walk-through, the wider garden plant feeding programme, and the round-up of best organic fertilisers for UK gardens. For complementary brews see how to make compost tea, and for the crops most likely to benefit from a comfrey feed read up on growing tomatoes for UK beginners and the best greenhouse tomato varieties for UK conditions.
Sister deep dives in the comfrey cluster: the growing and using comfrey UK pillar is the master reference covering species, site, harvest cycle and all 10 uses. The Bocking 14 propagation guide covers root cuttings, crown divisions and stem offsets if you want to multiply your patch. The medicinal uses of comfrey UK covers the topical-only knitbone salve route.
Lawrie has been gardening in the West Midlands for over 30 years. He grows his own veg using no-dig methods, keeps a wildlife-friendly garden, and writes practical advice based on real UK growing conditions.