How to Dry Hydrangea Flowers in the UK
How to dry hydrangea flowers: pick when papery in autumn, use the vase water method, and keep antique colour. UK timing, methods ranked and tips.
Key takeaways
- Timing is everything: pick when blooms feel papery, usually mid-Sept to late Oct in the UK
- The vase water method gives the best results, around a 90% success rate in our trials
- Fresh, soft summer blooms wilt and collapse, so never pick before they mature on the plant
- Mophead and paniculata types like 'Limelight' dry best; lacecaps shatter and rarely work
- Drying takes 2 to 3 weeks indoors and the heads keep their antique colour for 1 to 2 years
- Keep dried heads out of direct sun and a light hairspray mist reduces petal shedding
Learning how to dry hydrangea flowers turns a fading autumn border into months of free indoor colour. Drying hydrangeas is simple once you understand the one rule that decides success: timing. Pick the blooms at the right moment, when they have matured on the plant and feel papery, and they hold their shape and antique tones for a year or more. Pick them fresh and soft in summer and they wilt within days.
This guide covers exactly when to pick across the UK autumn, the five drying methods ranked by how well they actually work, how to prepare the stems, which hydrangea types dry best, and how to keep the colour. The advice comes from eight autumns of drying the same plants and logging the results.
When to pick hydrangeas for drying in the UK
Timing is the single thing that decides whether your hydrangeas dry well or collapse. The flowers must mature on the plant first. A fresh summer mophead is full of water and soft to the touch. Cut it then and it wilts within two or three days, no matter which method you use.
Wait instead until the blooms change texture. By early autumn the petals stop feeling soft and fresh. They turn slightly papery and leathery, almost like tissue or thin card. Many also start to tint with dusky pinks, greens and parchment tones. That texture change, not the calendar, is your signal to pick.
In most of the UK this falls between mid-September and late October. Southern gardens often reach the papery stage a week or two ahead of the north. Pick before the first hard frost, which browns and spoils the heads. Choose a dry, sunny mid-morning once the overnight dew has lifted, so the stems carry as little surface moisture as possible.
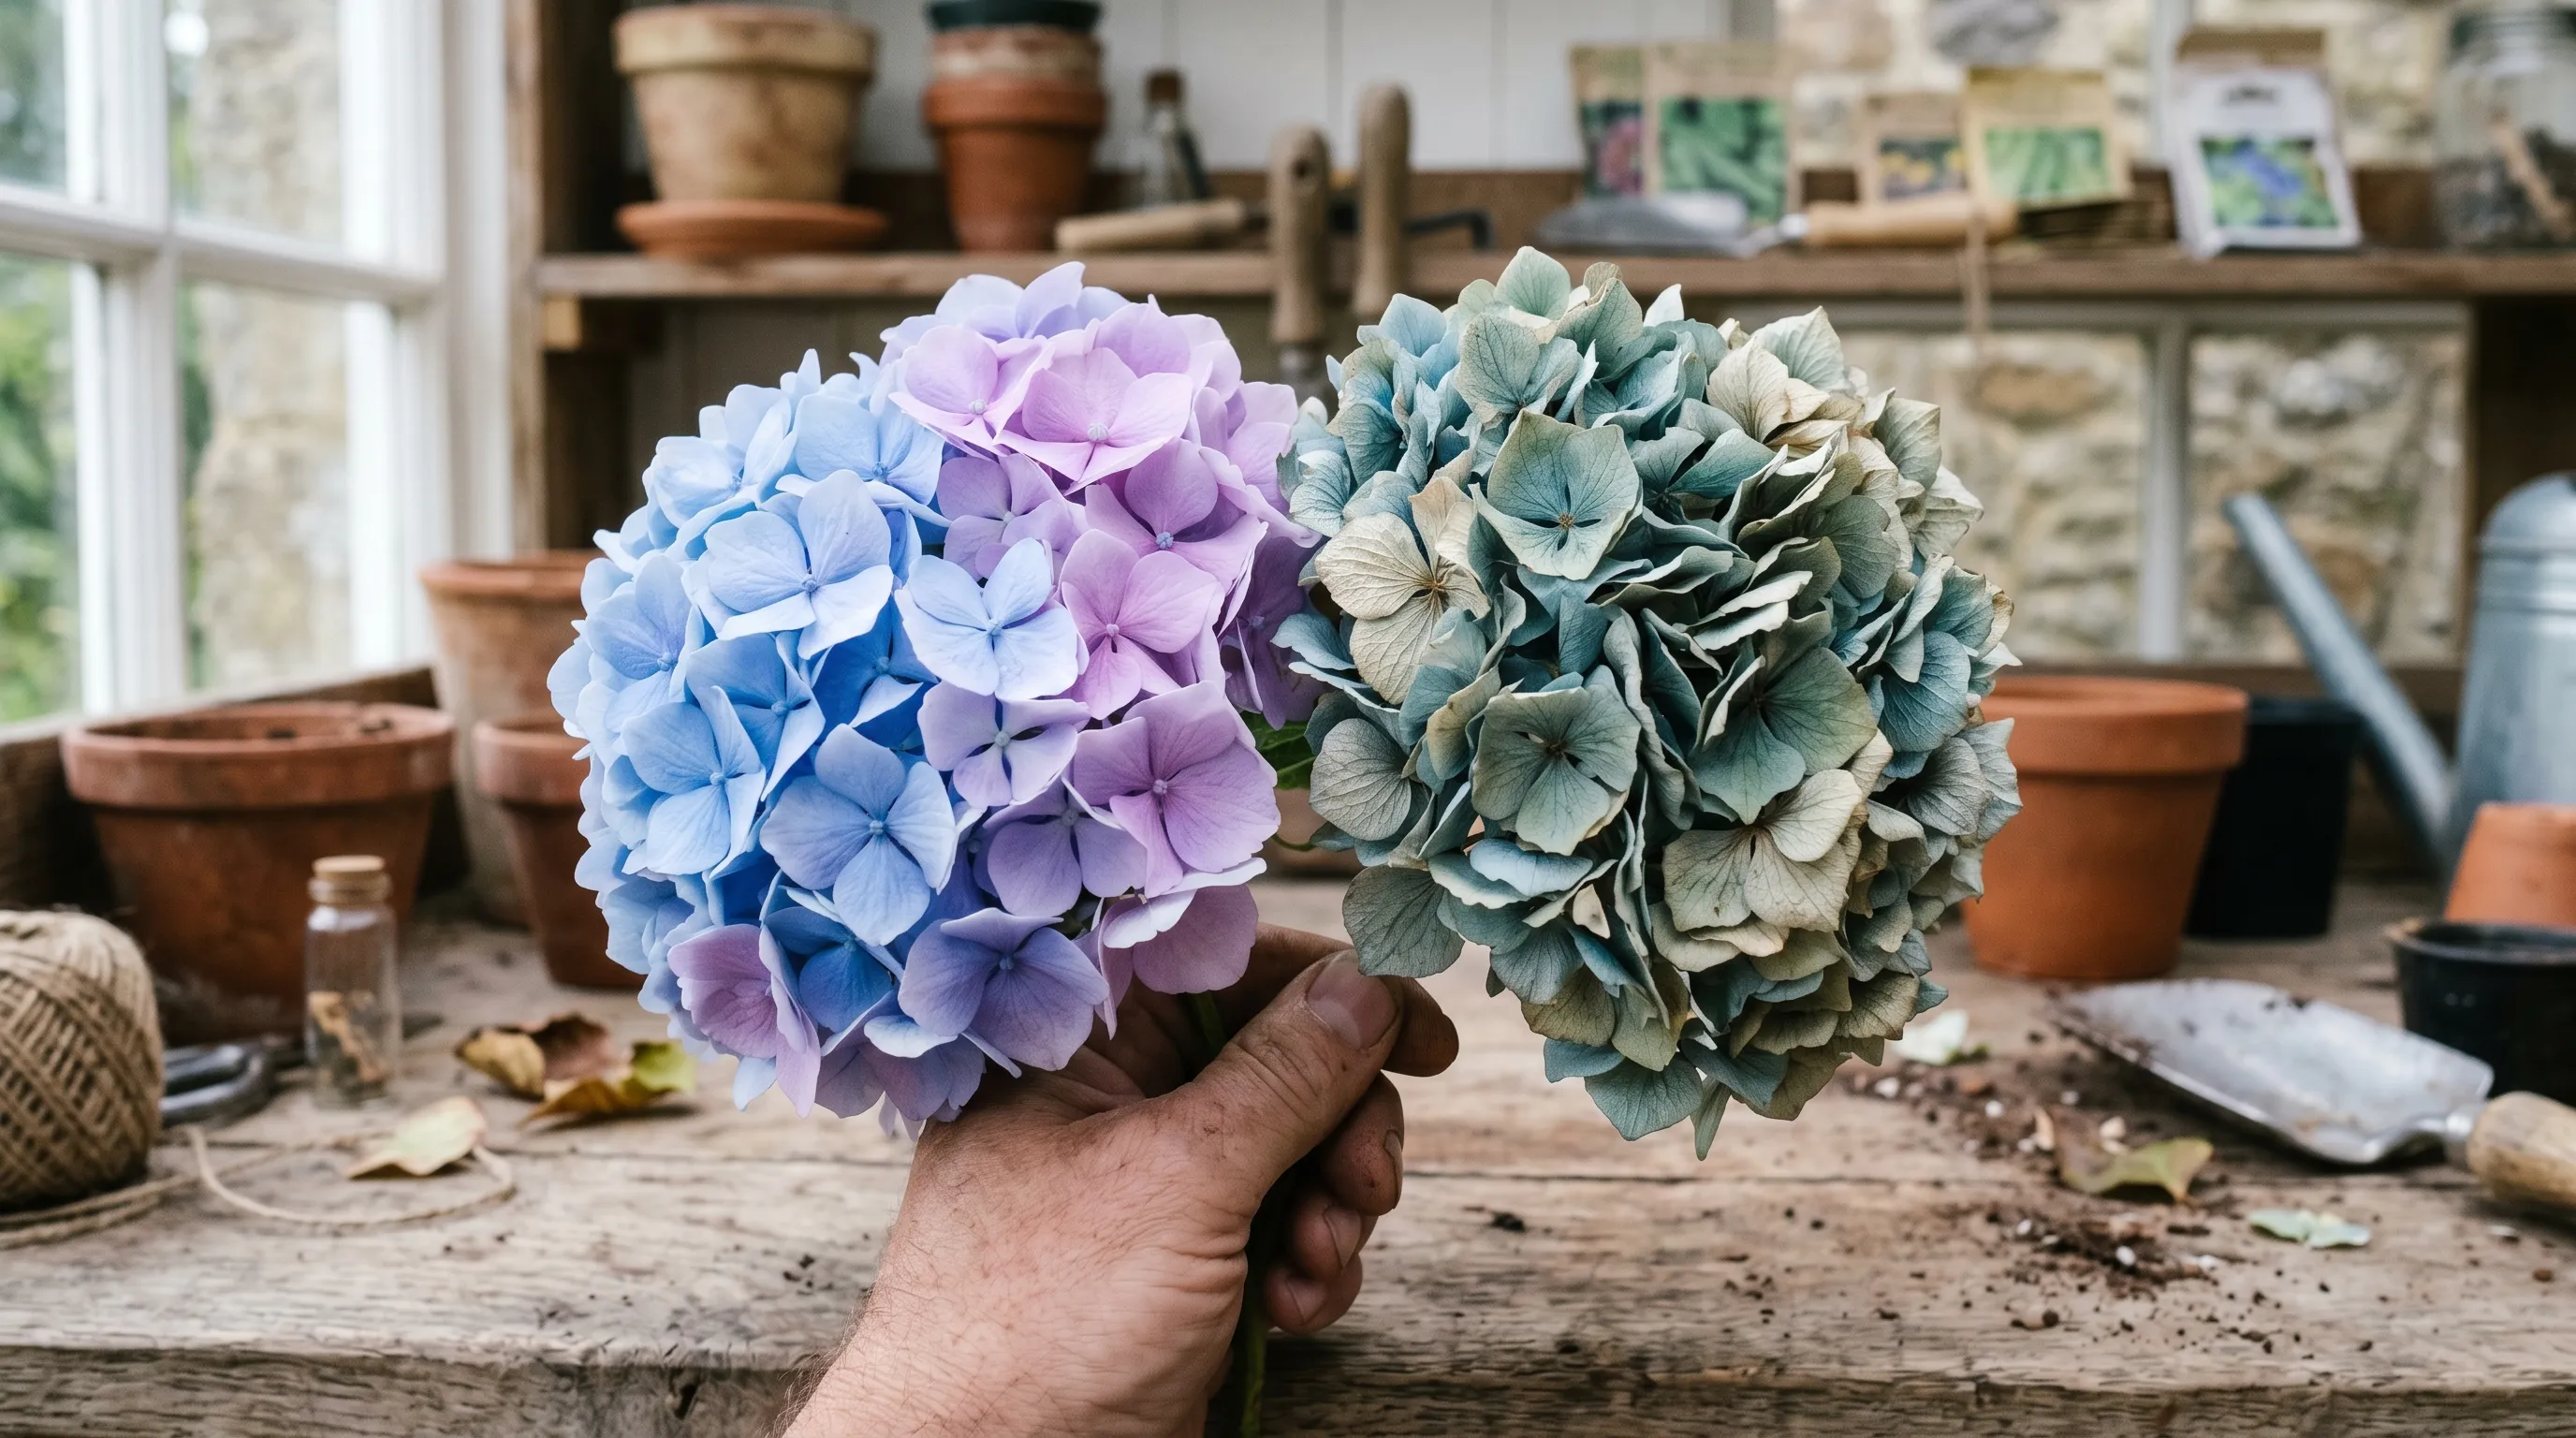 Left: a fresh, soft bloom that will wilt. Right: a mature, papery bloom ready to dry. The texture, not the date, tells you when to pick.
The five hydrangea drying methods ranked
Not all drying methods work equally well. The table below ranks the five common approaches by result quality, based on stems dried over eight autumns. The vase water method sits at the top because slow, gentle moisture loss stops the petals shrivelling.
| Method | How it works | Time | Result quality | Best for |
|---|---|---|---|---|
| Vase water method | Stand cut stems in 2-3cm water, let it evaporate | 2-3 weeks | Excellent, ~90% hold shape | Most people, best all-round |
| Air-dry hung upside down | Hang small bunches in a dark, airy room | 2-4 weeks | Good, ~70% hold shape | Picked-dry heads, no vase free |
| Silica gel | Bury heads in desiccant in a sealed tub | 5-10 days | Best colour and form held | Show blooms, single heads |
| Glycerine | Stand stems in 1 part glycerine to 2 parts hot water | 2-3 weeks | Supple but colour shifts | Foliage and arrangements wanting flexibility |
| Microwave with desiccant | Short bursts in silica gel in the microwave | 2-3 minutes | Variable, scorch risk | A single rushed bloom |
The vase water method wins on reliability for everyday use. Silica gel keeps colour and shape best of all, so it is the choice for a show entry, but it is fiddly and dries only a head or two at a time. Glycerine keeps stems supple and is brilliant for foliage, though it shifts flower colour towards beige. Treat the microwave as a last resort.
Why we recommend the vase water method: After drying roughly 60 stems this way across eight autumns, around 90% held their shape and antique colour, against barely 40% when I picked the same plants fresh and air-dried them. The slow evaporation is the secret. The stems keep drinking for the first few days, then dry gradually as the water level falls, so the cell walls firm up rather than collapse. It needs no special kit, just a vase and a bright spot out of direct sun.
How the vase water method works step by step
The method is almost too simple to believe. Cut your matured, papery stems on a dry morning. Strip the leaves, which rot and hold damp. Stand the stems in a vase holding just 2 to 3cm of water, no more. Place the vase somewhere bright but out of direct sunlight, away from radiators.
Then leave them alone. The flowers drink the shallow water at first, which keeps them plump while the cell walls strengthen. As the water evaporates over 2 to 3 weeks, the blooms dry slowly and evenly. By the time the vase runs dry the heads are stiff, papery and stable. Lift one and the petals should feel crisp, not floppy.
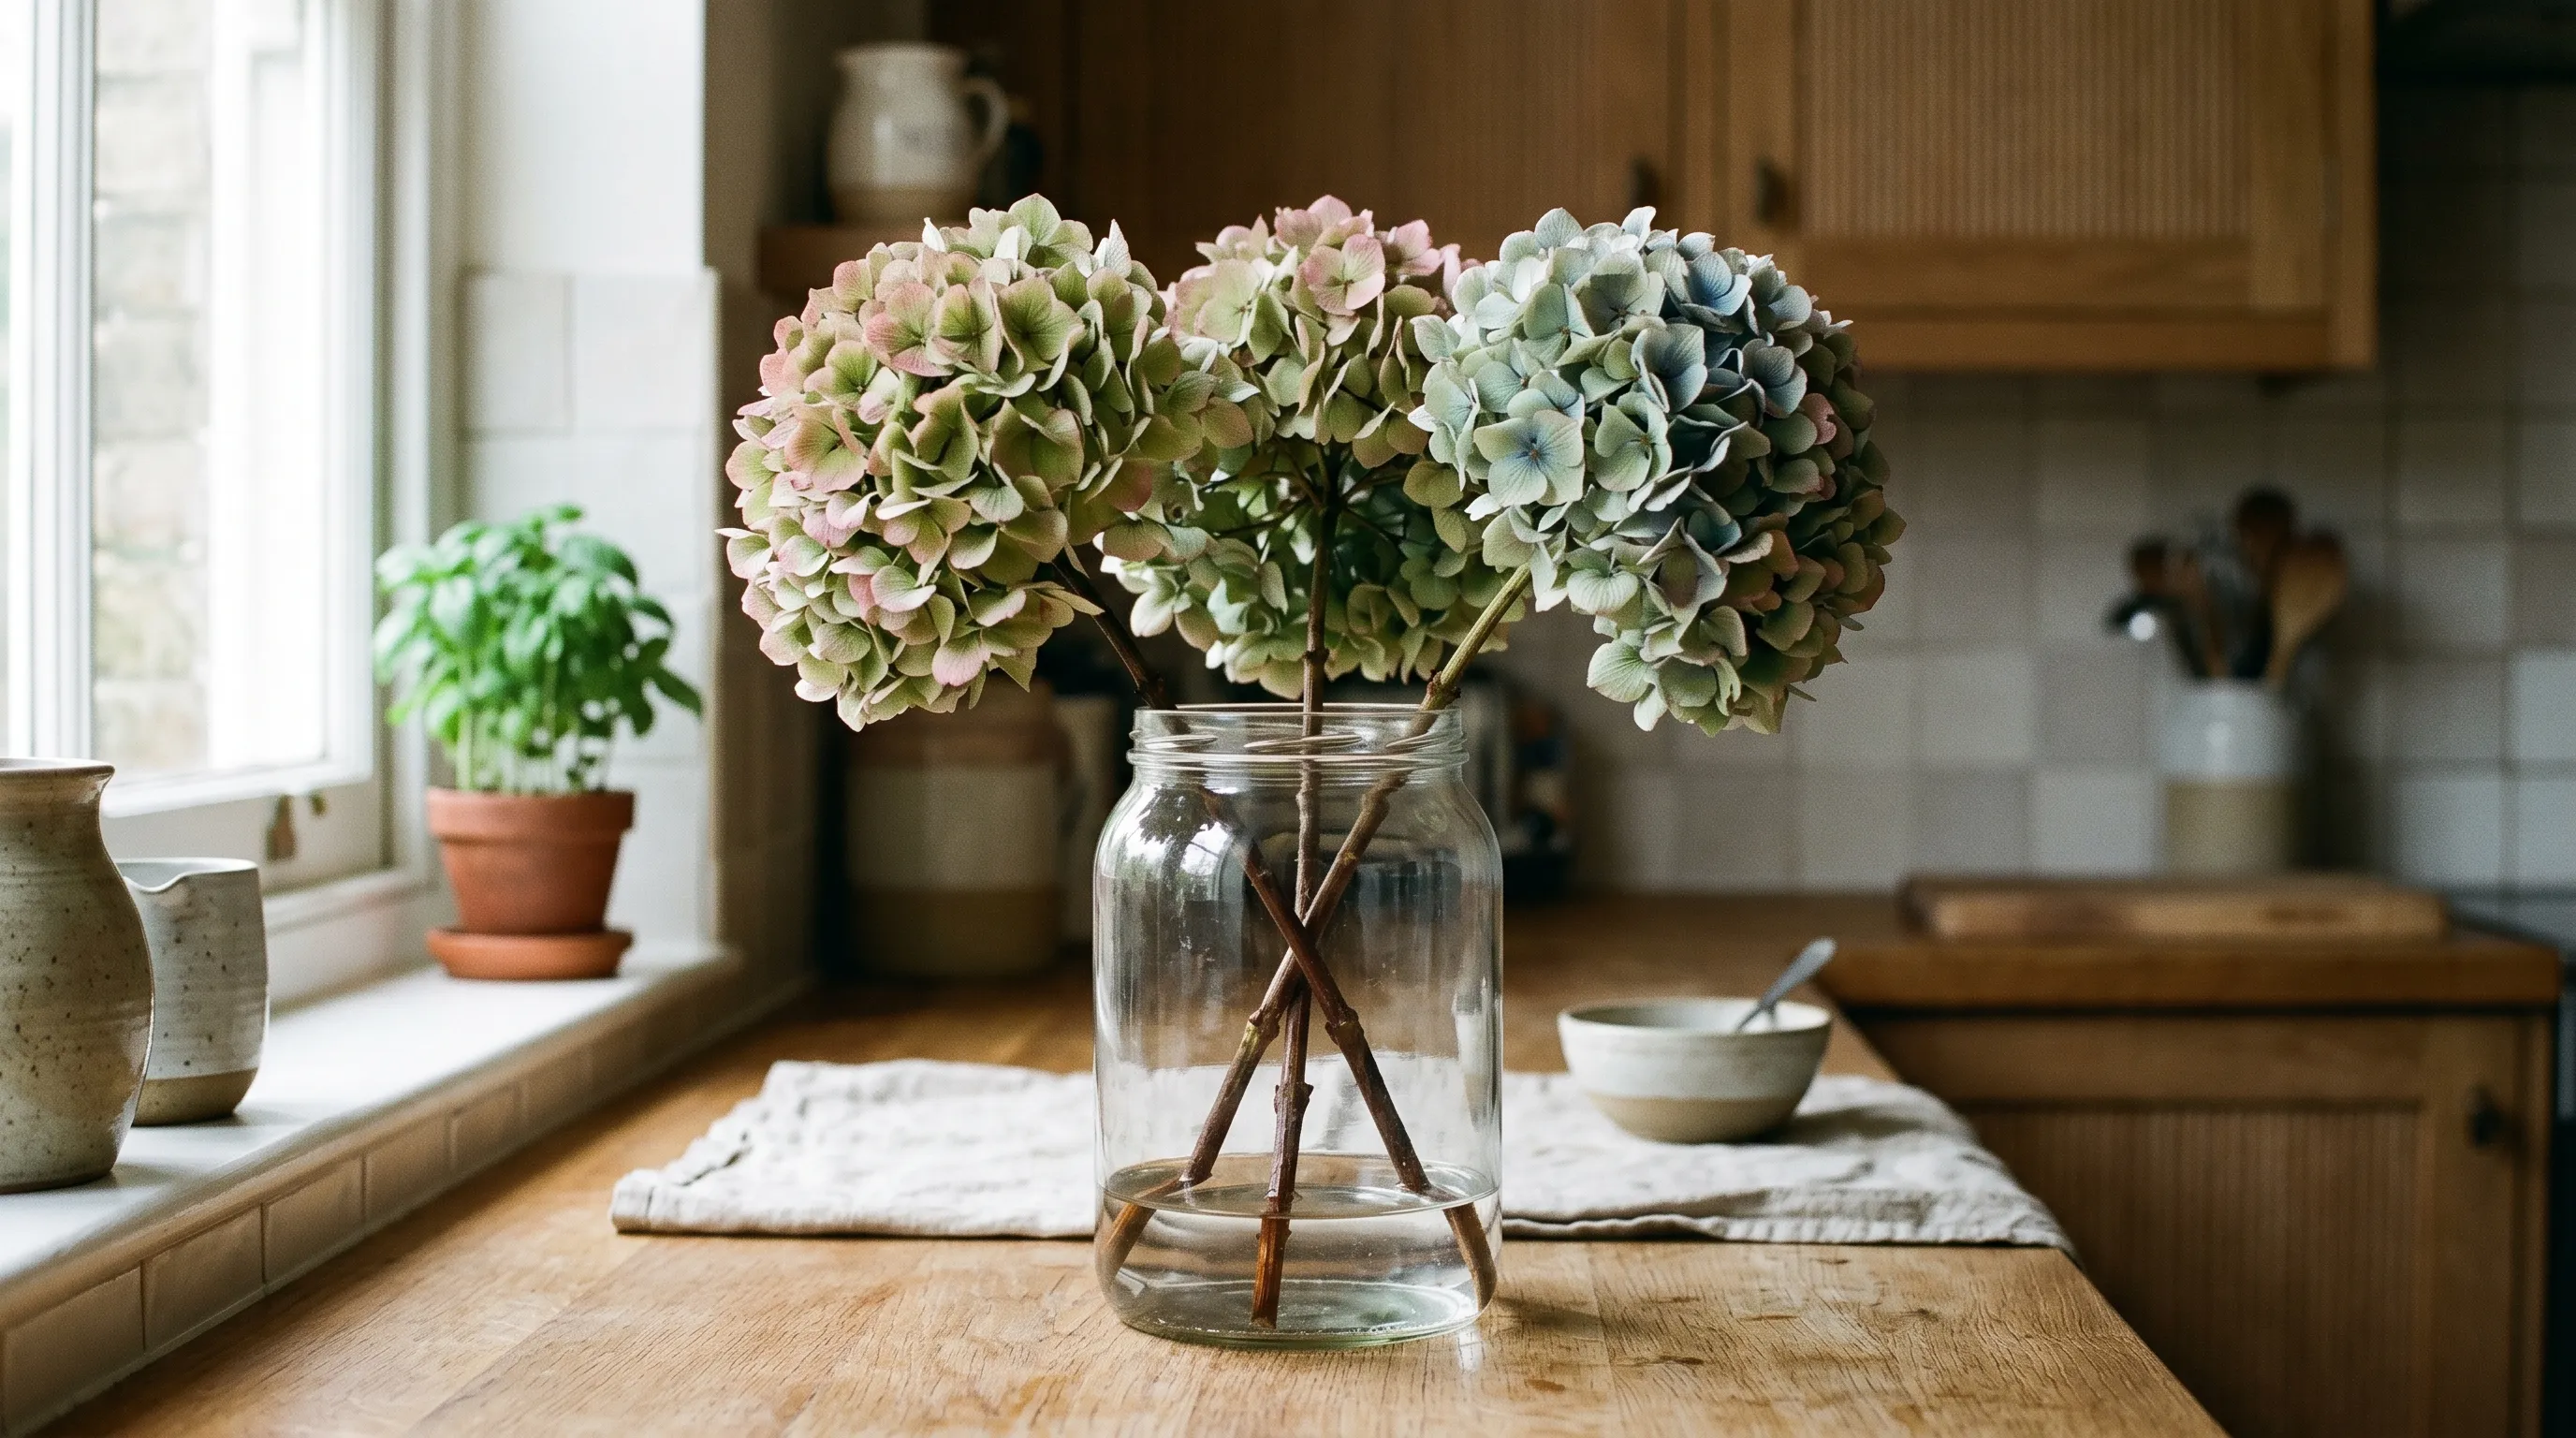 The vase water method: just 2 to 3cm of water, left to evaporate slowly over two to three weeks. The gradual drying is what stops the petals shrivelling.
How to prepare hydrangea stems for drying
Good preparation makes the difference between a clean dried head and a mouldy one. Start by stripping every leaf from the stem. Leaves hold far more moisture than the flower and they rot, brown and shed, spoiling the look and inviting mould in a closed bunch.
Cut each stem to the length you want for displaying, usually 30 to 40cm, plus a little spare. Make the cut at a 45 degree angle with clean secateurs. The angled cut gives a larger surface for water uptake in the vase method and lets you split woody stems if needed. Hydrangea stems are woody, so splitting the bottom 2cm helps them drink.
Pick over each head and pinch out any petals already browned or spotted, as these spread discolouration as they dry. Group stems loosely rather than cramming them, because air must move around each bloom. Crowded heads trap humidity and grow grey mould, the commonest cause of a failed batch.
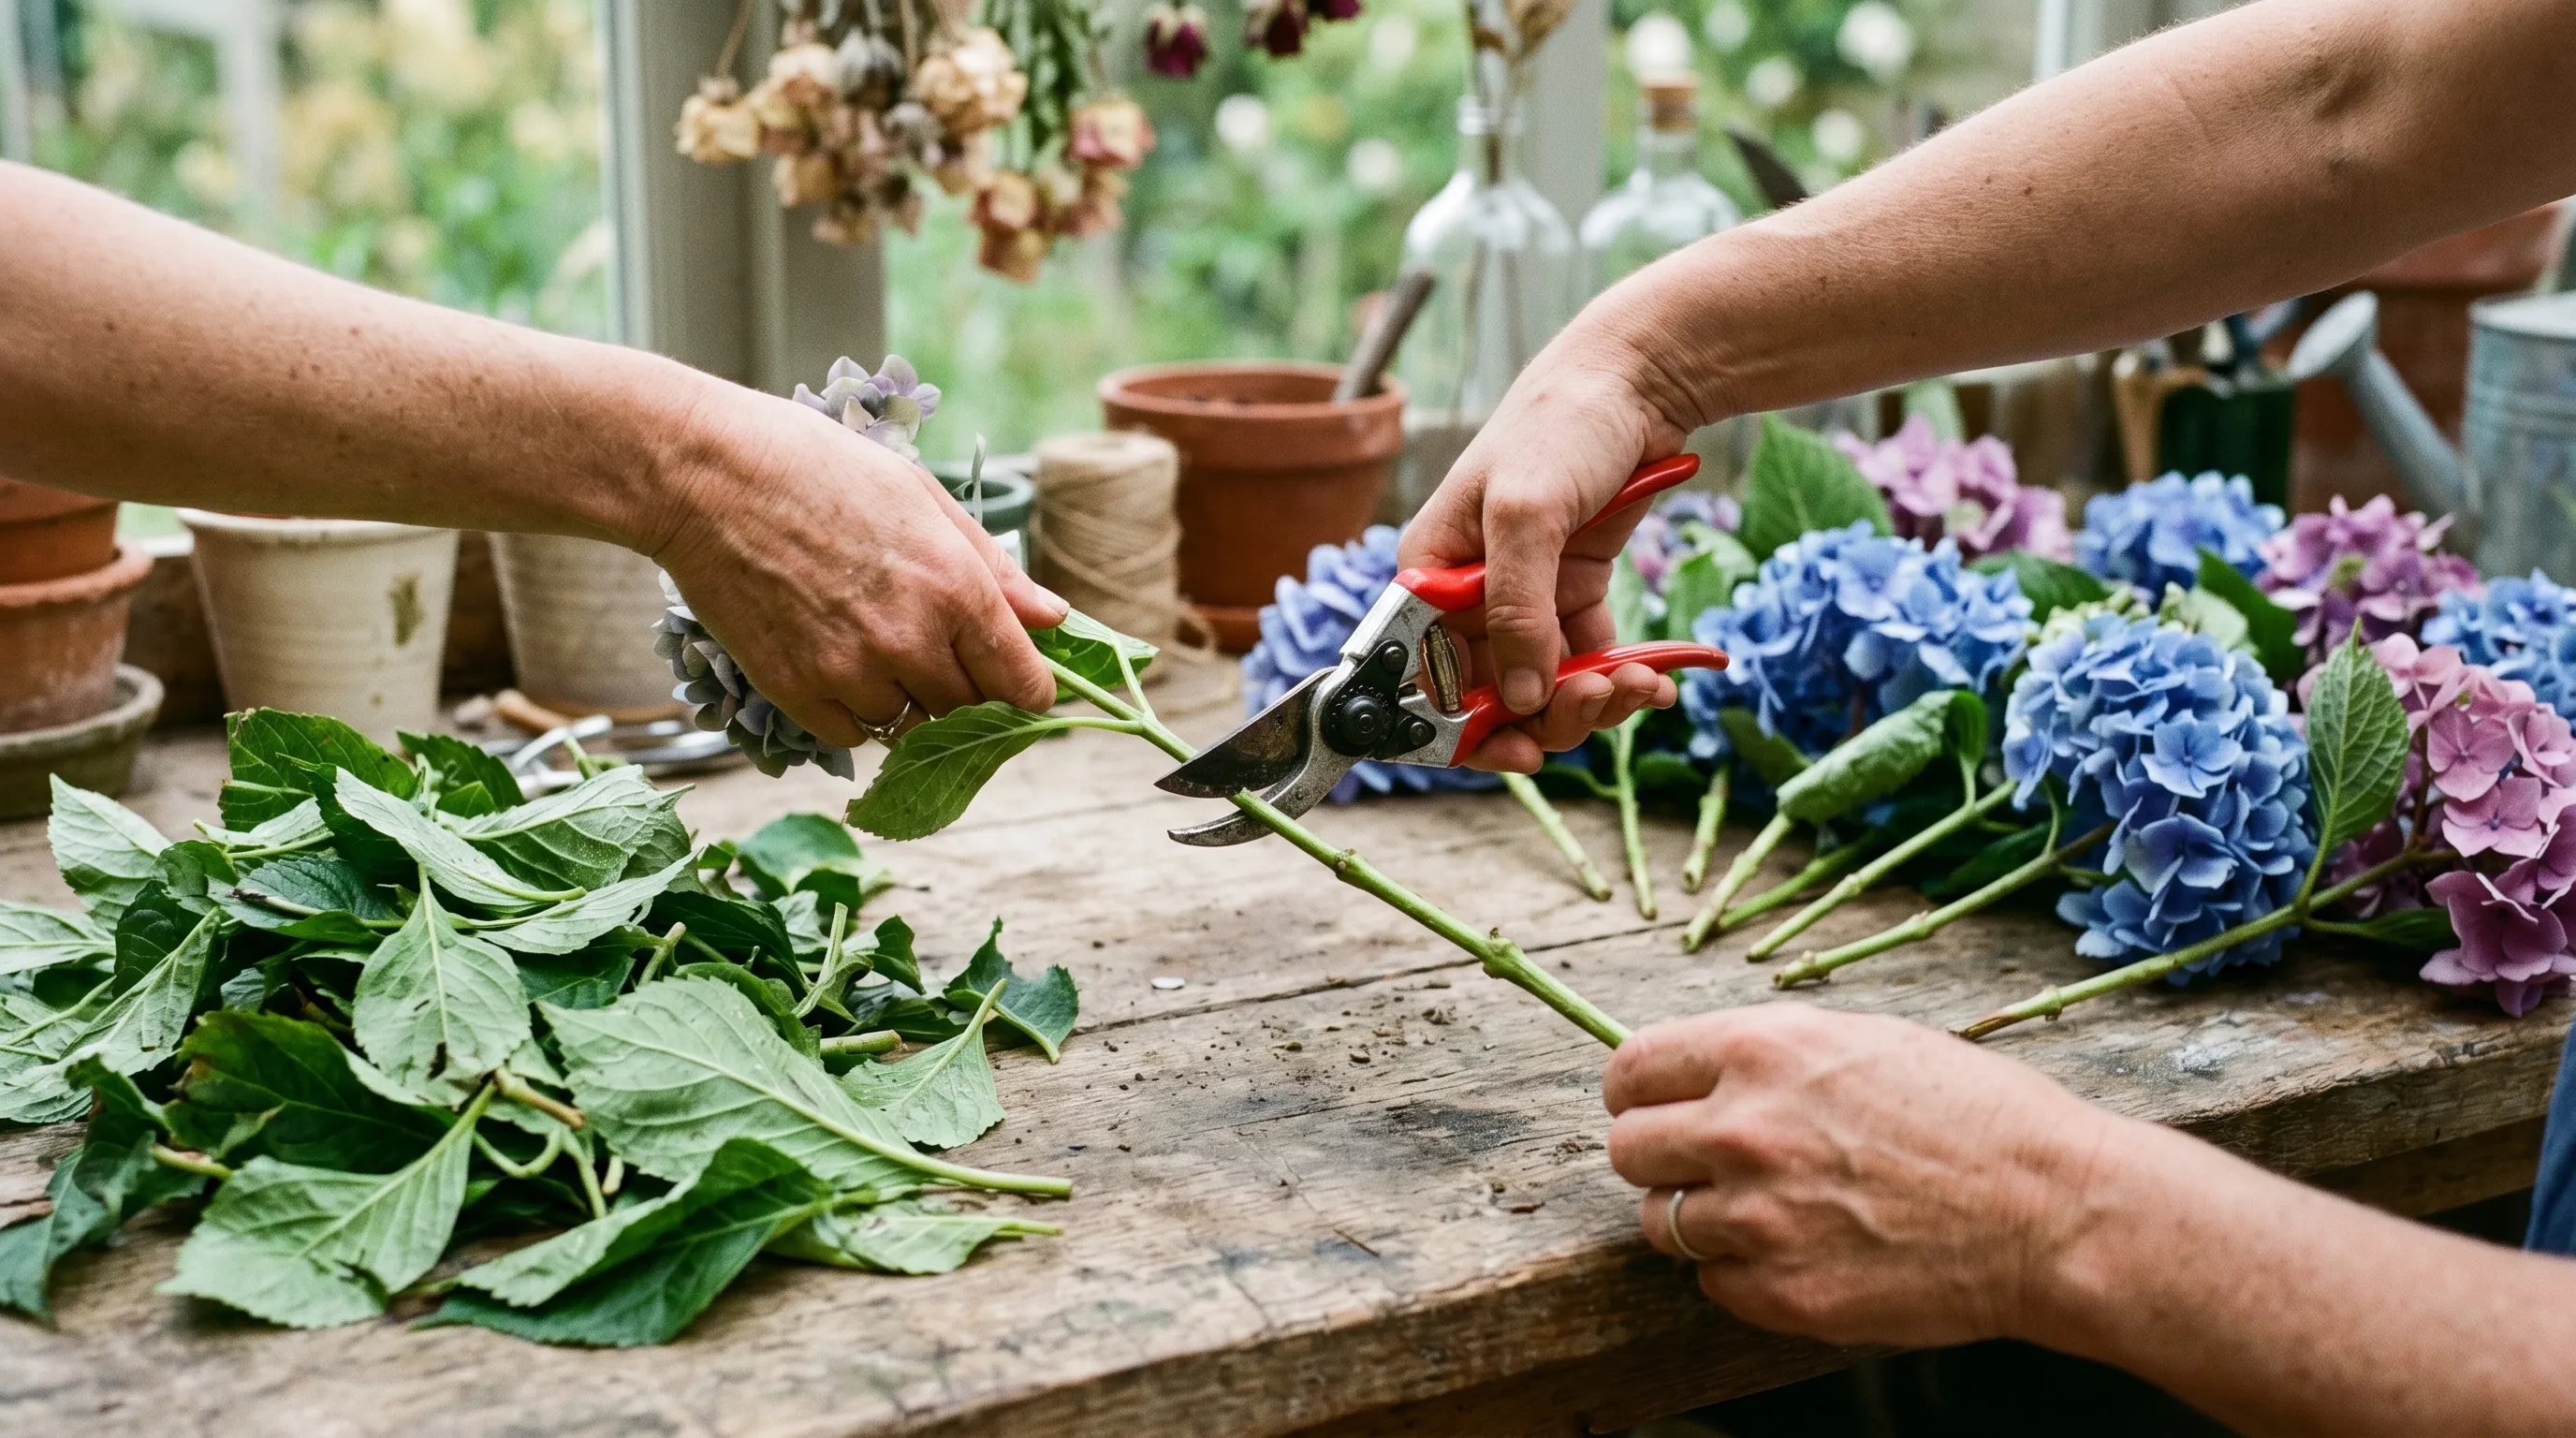 Strip every leaf and cut the stem at a 45 degree angle. Leaves hold moisture and rot, which is the fastest route to a mouldy bunch.
Air-drying hydrangeas hung upside down
Air-drying is the classic fallback when you have picked heads already dry, or no vase to spare. Tie stems into small bunches of three or four, never more, so air circulates between them. Bind the stems with twine or an elastic band, which tightens as the stems shrink.
Hang the bunches upside down in a dark, dry, airy room. A spare bedroom, an airing cupboard with the door ajar, or a frost-free shed all work. Darkness preserves colour, because light bleaches the petals as they dry. Good airflow prevents mould. Avoid a steamy kitchen or bathroom, where humidity stalls the drying and turns the heads grey.
Hung air-drying takes 2 to 4 weeks. In our trials it held shape on around 70% of stems, below the vase method’s 90%, because picked-dry heads have less internal structure to firm up. It still beats doing nothing, and a row of drying bunches in a potting shed looks the part.
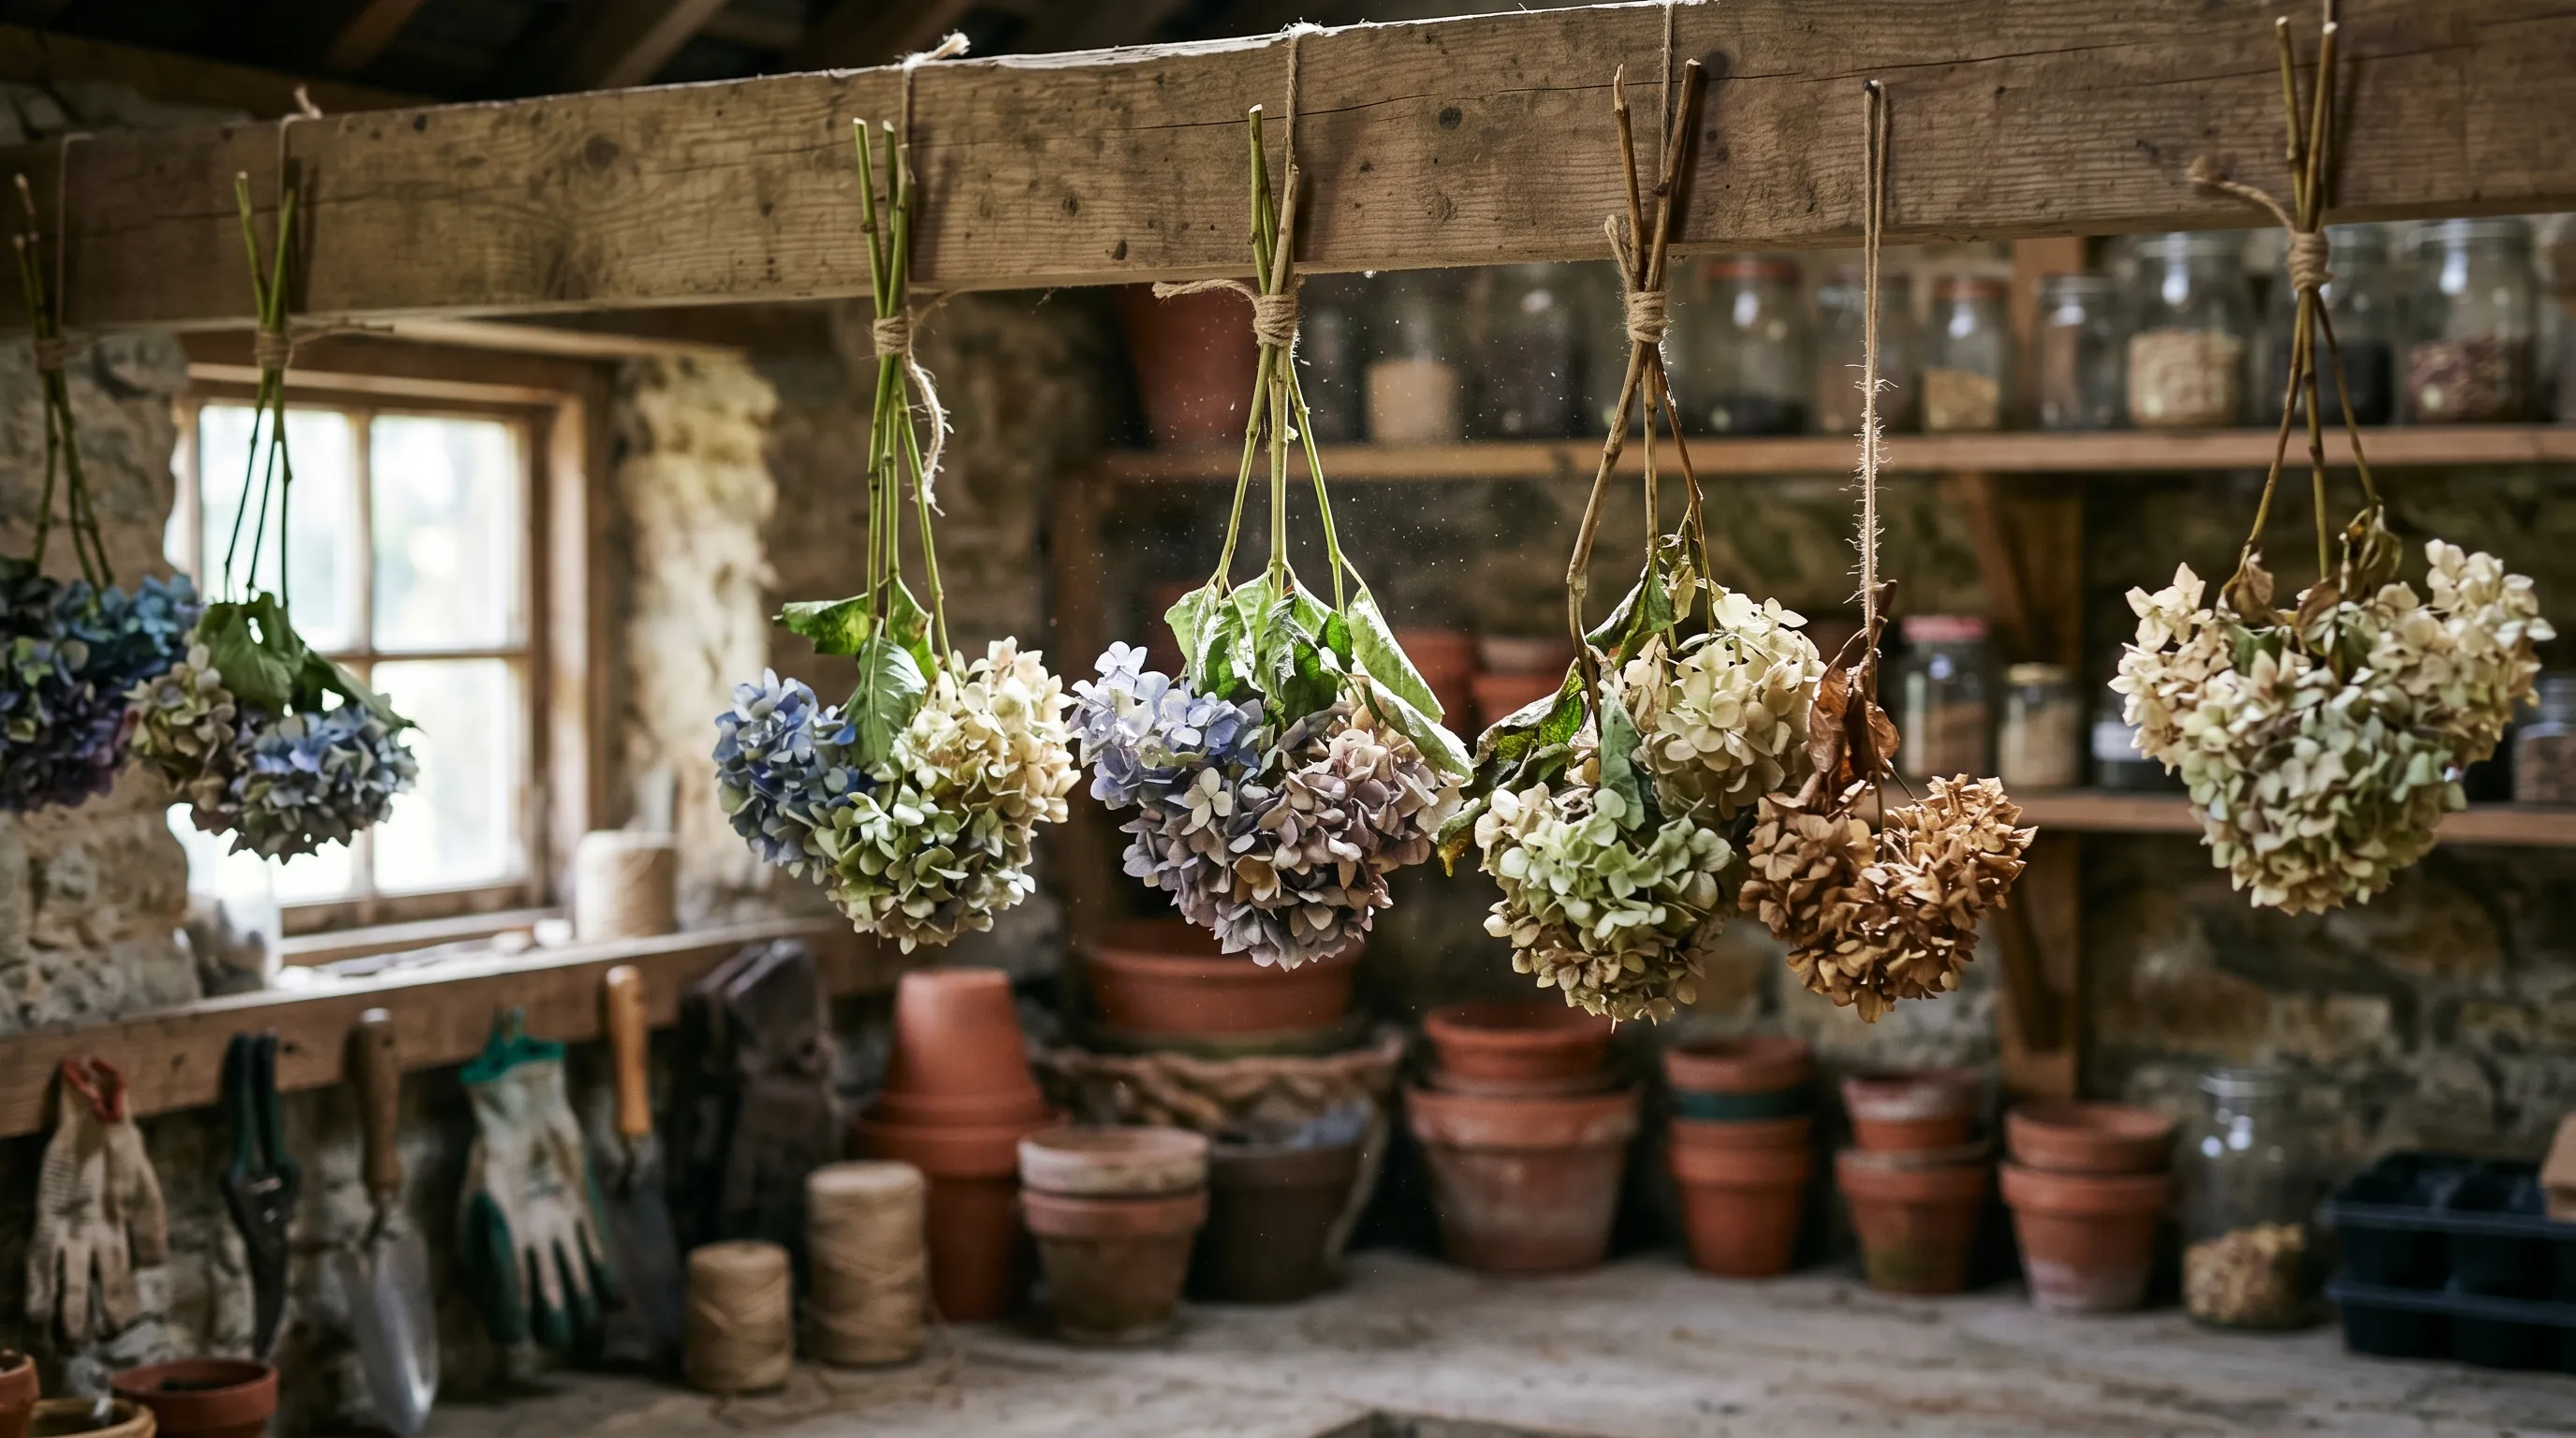 Air-drying in small bunches in a dark, airy potting shed. Keep them out of the light to stop the petals bleaching as they dry.
Which hydrangeas dry best
The type of hydrangea matters as much as the method. Mophead hydrangeas (Hydrangea macrophylla) dry beautifully. Their dense, rounded heads have hundreds of overlapping sepals that hold each other in place as they stiffen, so they keep a full, generous shape.
Paniculata types are the other star performers. Cone-shaped varieties like ‘Limelight’ and ‘Vanille Fraise’ dry to soft cream, lime and blush tones and hold their structure superbly. Many growers find paniculata the easiest of all to dry, because the firmer flower panicles barely shrink. Oakleaf hydrangeas (Hydrangea quercifolia) also dry well and bring russet autumn foliage colour.
Lacecaps are the disappointment. Their flat heads carry only a ring of showy sterile florets around tiny fertile flowers. As they dry the delicate outer florets shatter and drop, leaving a sparse, bare frame. If you only grow lacecaps, dry them in silica gel for the best chance, but expect more shedding than with a mophead.
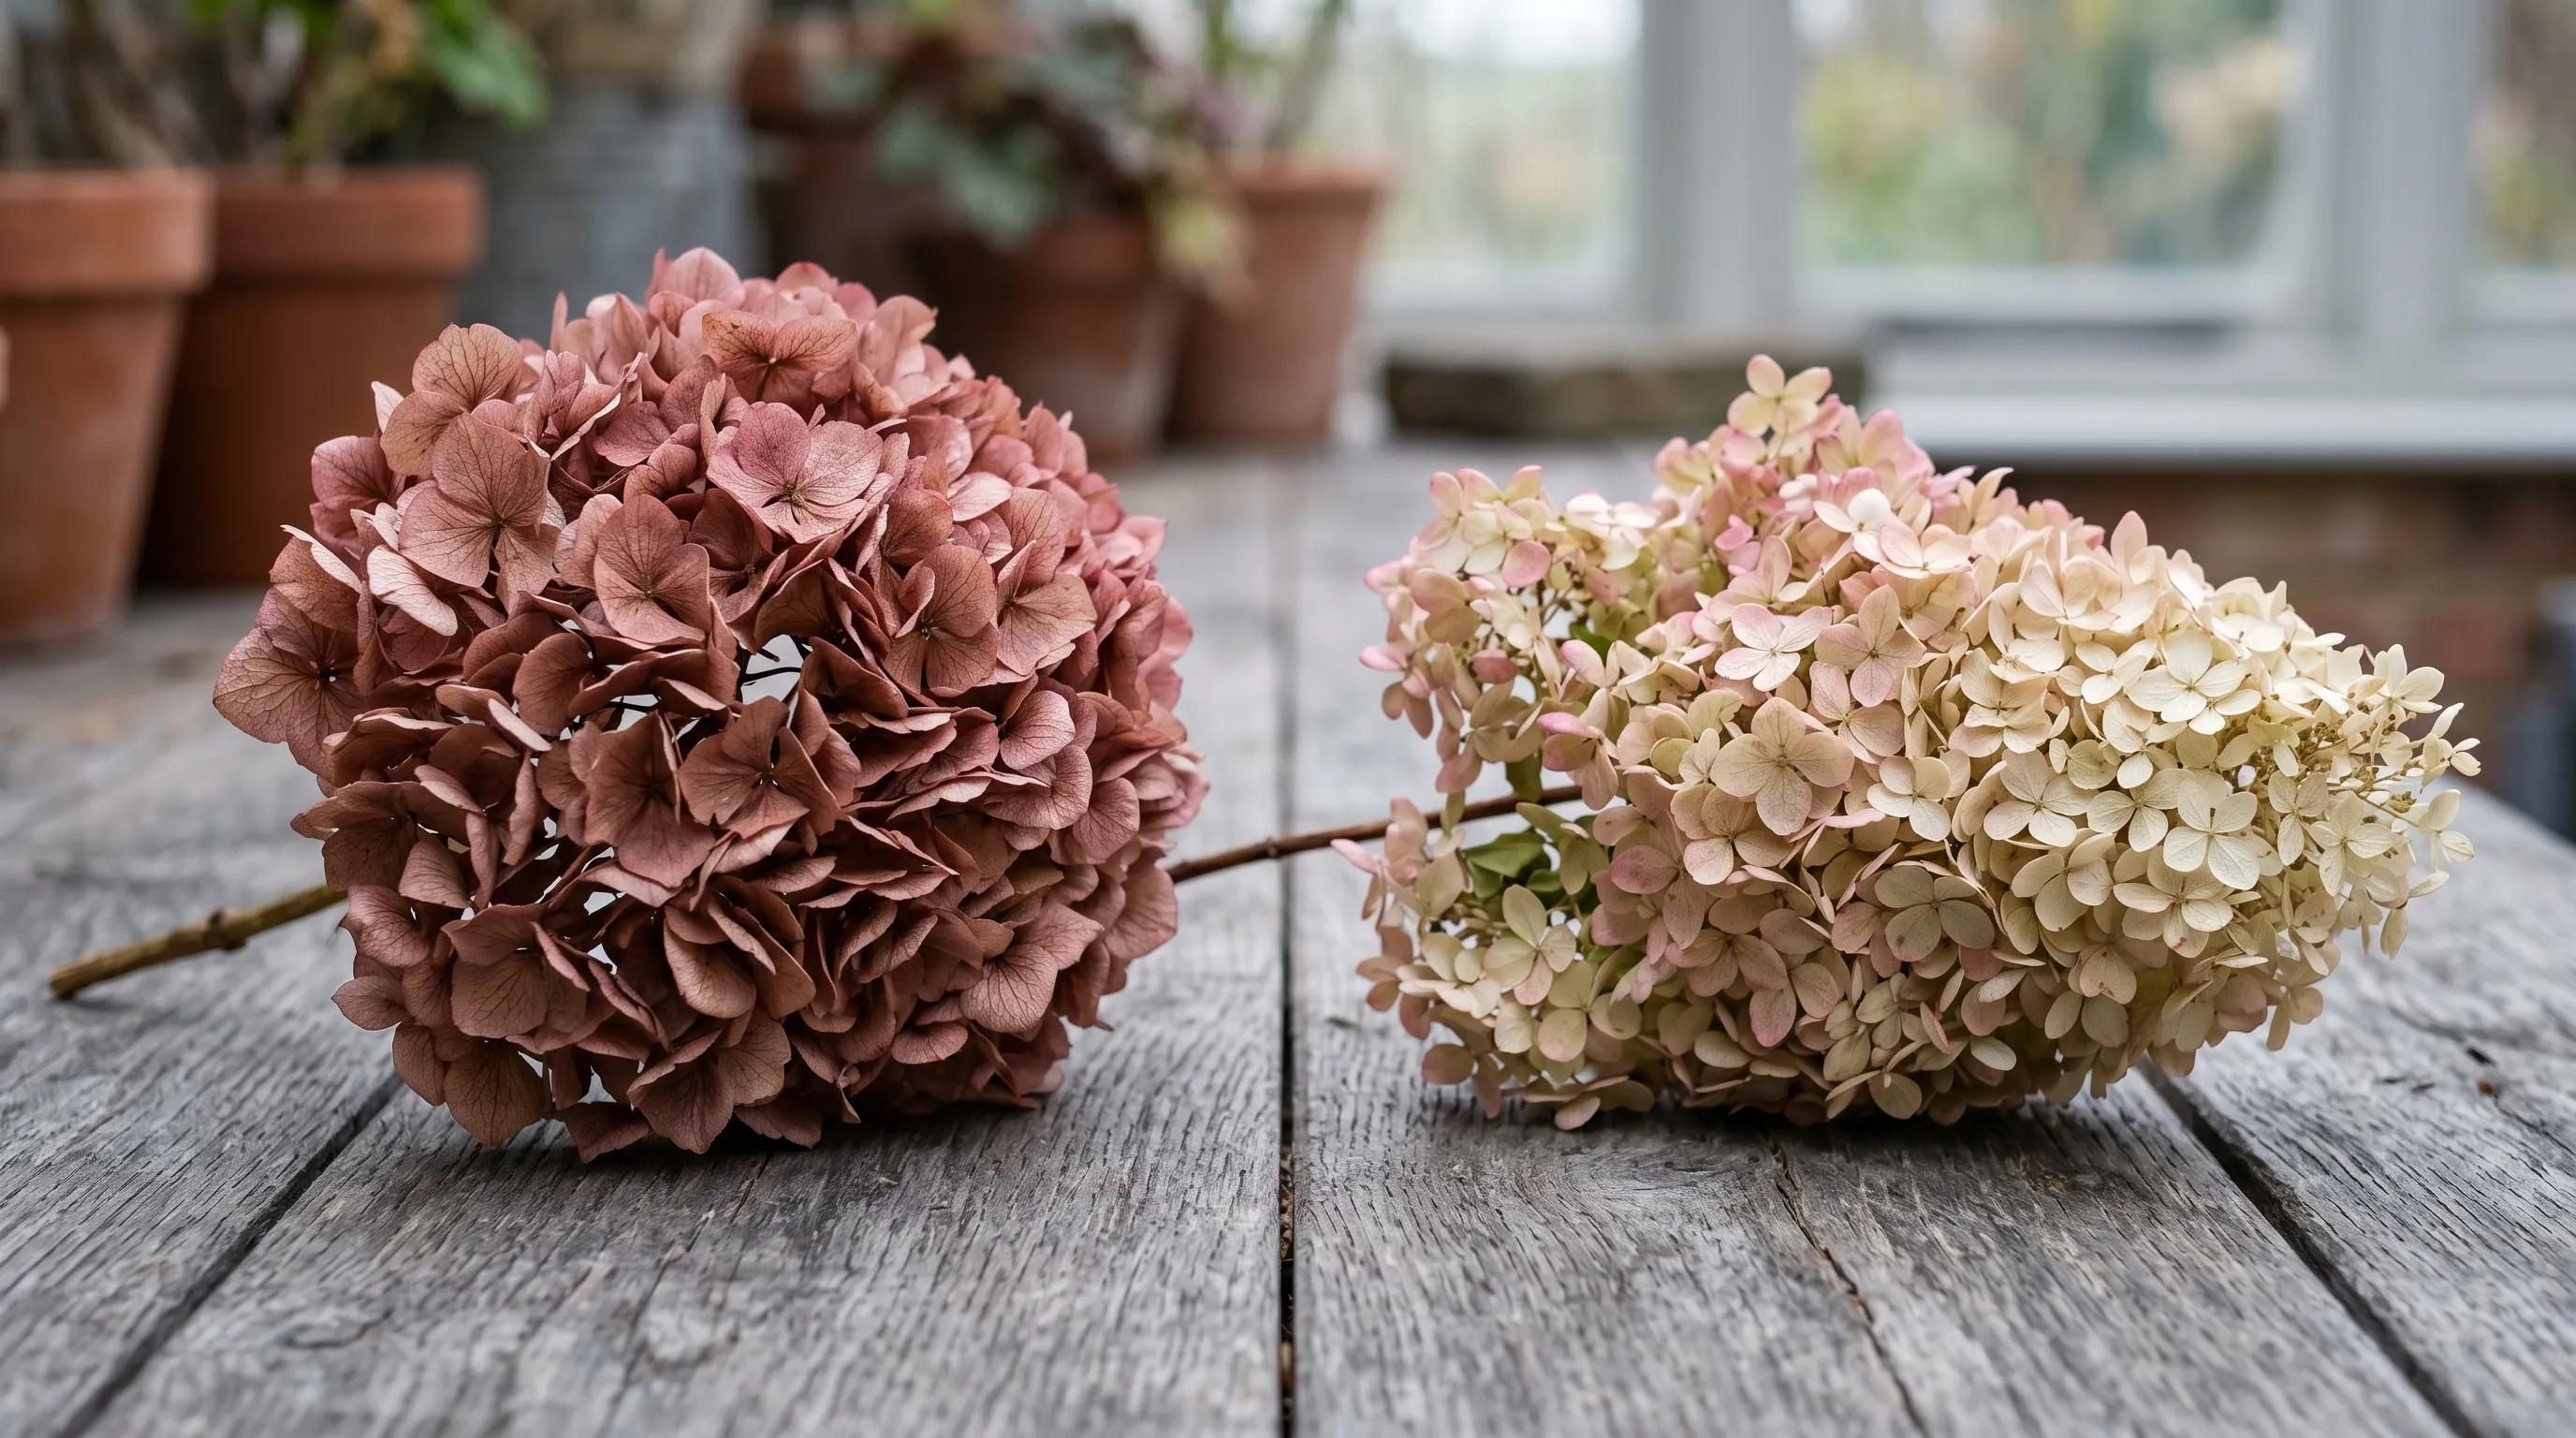 Mophead (left) and paniculata such as ‘Limelight’ (right) are the two types that dry most reliably, holding both shape and colour.
How to keep the colour in dried hydrangeas
Colour retention comes down to when you pick and where you keep them. Pick at the antique stage, when the blooms have started to tint on the plant but before frost browns them. Flowers picked at this tinted, papery moment dry to the prettiest dusky pinks, sages and parchment creams. Pick too green and they dry flat and dull.
Light is the enemy of dried colour. Display the heads out of direct sunlight, because UV bleaches the petals within weeks. A north-facing windowsill, a shaded dresser or a hallway keeps colour far longer than a sunny south window. Damp is the other threat, so avoid bathrooms and steamy kitchens where the petals reabsorb moisture and grow limp.
For richer tones, some gardeners pick a little later, into late October, once the petals have deepened. Bear in mind the colour of fresh hydrangeas depends partly on soil, which you can adjust before the season starts. Our guide on how to change hydrangea colour explains how soil pH turns mophead blooms blue or pink in the first place.
A step by step how-to for drying hydrangeas
This is the full sequence we use, start to finish, for the vase water method.
- Wait for the papery stage. Check the blooms from mid-September. Squeeze a petal between finger and thumb. When it feels dry, papery and slightly leathery rather than soft, it is ready. This is usually early to mid October in the Midlands.
- Pick on a dry morning. Cut once the dew has lifted, mid-morning on a rain-free day. Wet stems risk mould.
- Strip the leaves. Remove every leaf from each stem. They hold moisture and rot.
- Cut the stems. Trim to 30 to 40cm at a 45 degree angle and split the bottom 2cm of woody stem.
- Add 2 to 3cm of water. Stand the stems in a vase with only a shallow level of water. No more than 3cm.
- Place out of direct sun. Bright but shaded, away from radiators and damp.
- Leave to evaporate. Do not top up the water. Over 2 to 3 weeks the level falls and the blooms dry slowly.
- Check they are crisp. When the petals feel stiff and papery and the vase is dry, they are done. Display or store.
Gardener’s tip: A single light mist of cheap hairspray, held 30cm away, seals the dried petals and cuts shedding by more than half on mophead heads. Spray outdoors or over newspaper, let it dry for an hour, then bring the heads inside. Re-mist once the following autumn to extend a display into a second year.
When to pick across the UK, month by month
The papery stage arrives at different times depending on your region and the season. This calendar shows the realistic UK window for picking hydrangeas to dry.
| Month | Bloom stage | Verdict for drying |
|---|---|---|
| July | Fresh, soft, full of water | Far too early, blooms will wilt |
| August | Still soft, colour at its brightest | Too early, high failure rate |
| Early September | Firming up, colour starting to settle | Watch closely, not quite papery |
| Mid to late September | Turning papery in the south | Good in southern gardens |
| Early October | Papery and tinting across most of UK | Best window, peak pick week |
| Late October | Deep antique tones, papery | Excellent, pick before first frost |
| November | Browning, frost damage likely | Too late in most years |
Early October is the sweet spot for most UK gardens. Northern and exposed gardens may run a week or two later, while sheltered southern plots can be ready by mid-September. Watch the texture, not just the date, and always beat the first hard frost.
Common mistakes when drying hydrangeas
A handful of errors account for nearly every failed batch. Avoid these and your success rate climbs sharply.
Picking too early, while the blooms are fresh and soft. This is the number one fault. Soft summer flowers are full of water and collapse as they dry. Wait for the papery, leathery texture before cutting, however tempting the bright summer colour looks.
Using too much water in the vase. The vase method needs only 2 to 3cm. Fill the vase deep and the stems keep drinking, the blooms stay plump, and they never dry, eventually rotting at the stem. Shallow water is the whole point.
Displaying in direct sunlight. A sunny windowsill bleaches dried hydrangeas within weeks. The colour you worked to preserve fades to pale straw. Keep them in a shaded, indirect spot to hold the antique tones for a year or more.
Drying in a humid room. A bathroom, a steamy kitchen or a damp garage stalls the drying and breeds grey mould. The petals reabsorb moisture and go limp. Choose a dry, airy room with steady airflow.
Leaving the leaves on. Leaves hold far more water than the flower and rot first, browning and shedding into the bunch. Strip every leaf before drying, every time.
Warning: Never pick hydrangeas to dry after the first hard frost has hit them. Frost ruptures the petal cells, so the blooms thaw to brown mush and cannot be saved. If a frost is forecast and your blooms are papery, pick them the day before, even if you would rather wait another week.
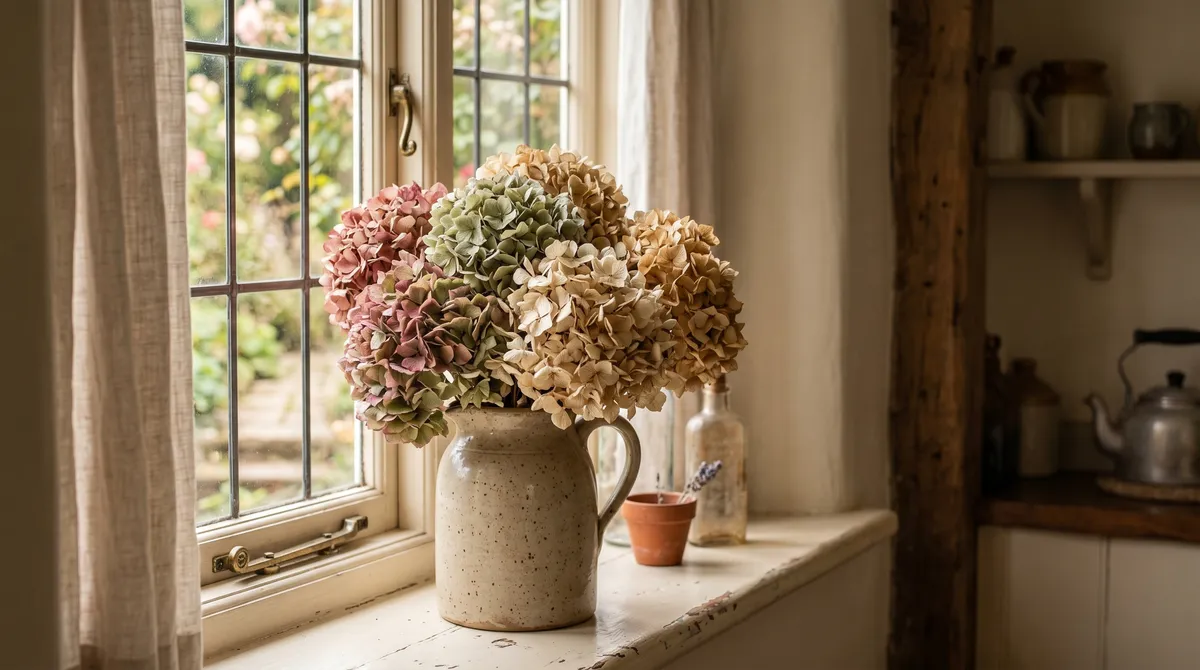
Displaying dried hydrangeas and how long they last
Dried hydrangeas suit almost any informal arrangement. A loose bunch in a stoneware jug, a wreath base, or mixed with other dried stems all work. Because the heads are full and light, a few stems fill a vase generously. They need no water, so they sit happily on a mantel or dresser for months.
Expect dried heads to last 1 to 2 years before the colour fades too far. The first year they hold their tones well in a shaded spot. Through the second year the petals pale and grow brittle, so handle them gently and dust with a soft brush or a hairdryer on cool. A fresh light mist of hairspray each autumn buys extra time.
If you enjoy bringing the garden indoors, dried hydrangeas are a starting point for wider work. Our guide to flower arranging for beginners covers conditioning, foam-free mechanics and seasonal palettes that pair beautifully with dried hydrangea heads through autumn and winter.
Frequently asked questions
Do you dry hydrangeas with the leaves on or off?
Always strip the leaves off before drying. Leaves hold far more moisture than the flower head and rot first, turning brown and shedding into the bunch. Removing them speeds drying and stops mould. Leave only the bare woody stem below the bloom for the cleanest result.
Can you dry hydrangeas in water?
Yes, and it is the best method. Stand cut stems in 2 to 3cm of water and let it evaporate over 2 to 3 weeks. The shallow water keeps the blooms plump while the cell walls firm up, then they dry slowly as the level falls. This stops the shrivelling you get from rapid air-drying.
Why are my dried hydrangeas turning brown?
Browning usually means frost damage or picking too late. Frost ruptures petal cells, so the blooms brown as they thaw. Browning can also come from drying in a humid room where mould sets in. Pick at the papery stage before the first hard frost and dry in a dry, airy spot.
How do you stop dried hydrangeas from shedding?
Pick at the right papery stage and mist lightly with hairspray. A single light coat of cheap hairspray, held 30cm away, seals the petals and cuts shedding by more than half. Mopheads shed least; lacecaps shed most. Re-mist each autumn to keep a display intact for a second year.
Can you dry blue hydrangeas and keep the colour?
Blue mopheads dry well but the blue softens to a dusky greyish blue. Pick at the antique stage and keep them out of direct sun to hold the most colour. For the truest blue, silica gel preserves it better than the vase method. Soil pH sets the fresh colour before the season starts.
Your next step with hydrangeas
Now you can dry your hydrangea flowers and keep them all winter, get the plants producing more blooms to cut next autumn. Read our hydrangea pruning guide to time your cuts correctly, our main guide on how to grow hydrangeas in the UK for season-long care, or browse all our how-to gardening guides for more projects. The Royal Horticultural Society also has useful background on hydrangea types and care.
Lawrie has been gardening in the West Midlands for over 30 years. He grows his own veg using no-dig methods, keeps a wildlife-friendly garden, and writes practical advice based on real UK growing conditions.