How to Grow Shasta Daisies (Leucanthemum)
Grow Shasta daisies (Leucanthemum) in UK gardens. Full sun, sharp drainage, divide every 2-3 years, plus varieties, staking and deadheading.
Key takeaways
- Fully hardy to minus 20C (RHS H7), flowering June to September at 60-90cm tall
- Needs full sun and any well-drained soil; winter wet on clay is the main killer
- Lift and divide congested clumps every 2-3 years in spring to keep flowering
- 'Becky' grows to 90cm and holds itself up; 'Snowcap' is a sturdy 40cm dwarf
- The Chelsea chop in late May delays flowering by 2-3 weeks and cuts staking
- Cut stems last 7-10 days in a vase; deadhead for repeat bloom into September

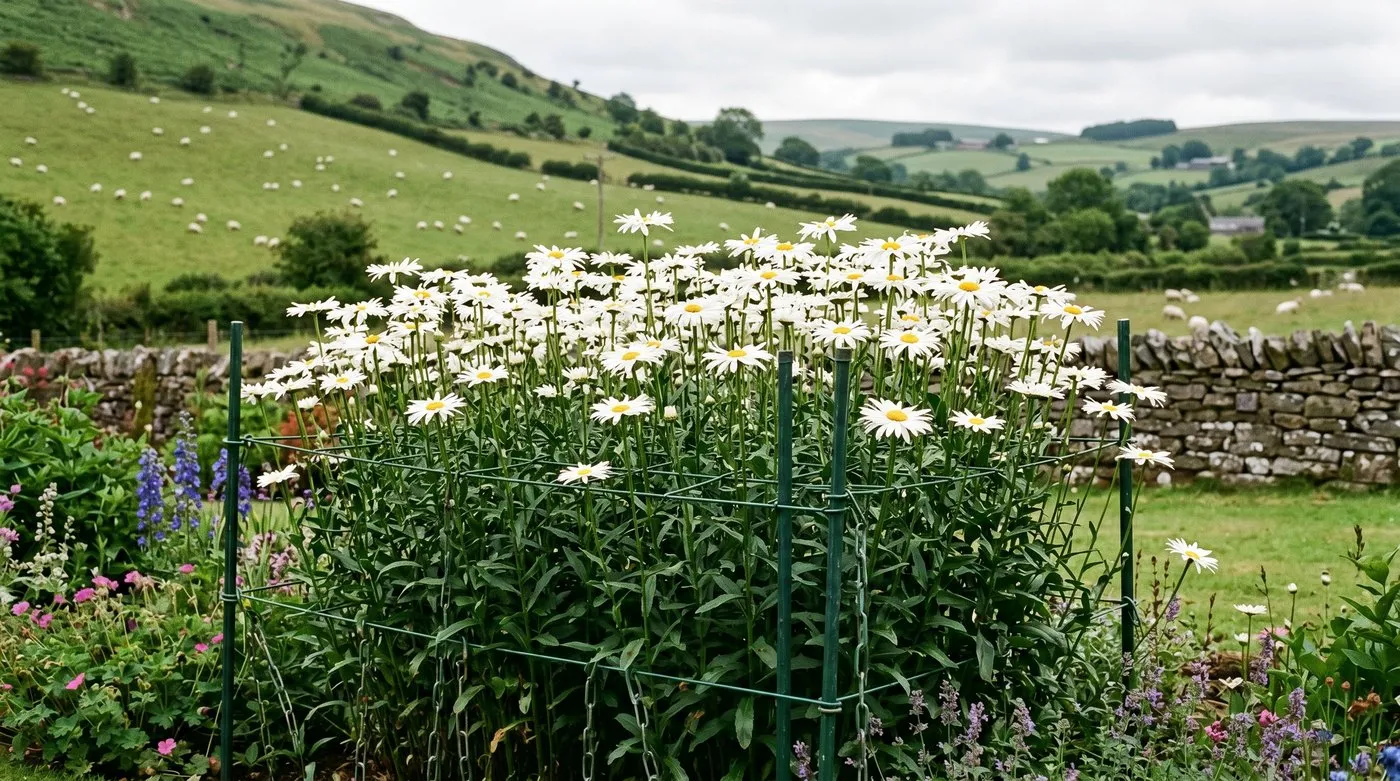
Shasta daisies (Leucanthemum x superbum) are the classic white border perennial: large white petals, a bright yellow eye, and a flowering run from June to September. They are tough, fully hardy plants that ask for full sun and good drainage and little else. Get those two things right and a clump earns its place for years. The most common problem is not winter cold but a plant that fades after three or four seasons.
That decline has a single cause: a congested, woody clump sitting in soil that holds winter wet. This guide covers choosing varieties, planting, the Chelsea chop, staking, deadheading and cutting for the vase. It draws on first-hand trials on heavy West Midlands clay over eight seasons, including a side-by-side test of divided against undisturbed clumps. The fix for a short-lived Shasta daisy is simple, and it is the heart of this guide.
Telling Shasta daisies apart from marguerites and ox-eye daisies
Three different white daisies get sold and described under loose common names, and only two are hardy in the UK. Getting the identification right saves you from buying a plant that dies in the first frost.
The garden Shasta daisy is Leucanthemum x superbum, a hardy perennial with large flowers 6-10cm across on stems 60-90cm tall. The wild ox-eye daisy, Leucanthemum vulgare, is its smaller cousin, a meadow wildflower with thinner petals and a habit of self-seeding everywhere. Both are hardy Leucanthemum and survive UK winters. The third, the marguerite (Argyranthemum frutescens), has soft grey-green ferny foliage and is tender, dying at the first hard frost. It is sold as a patio plant, not a border perennial. If a “daisy” has feathery leaves and comes in a summer bedding pot, it is a marguerite and will not come back. For more white-flowered border options, see our pick of the best perennial plants for UK gardens.
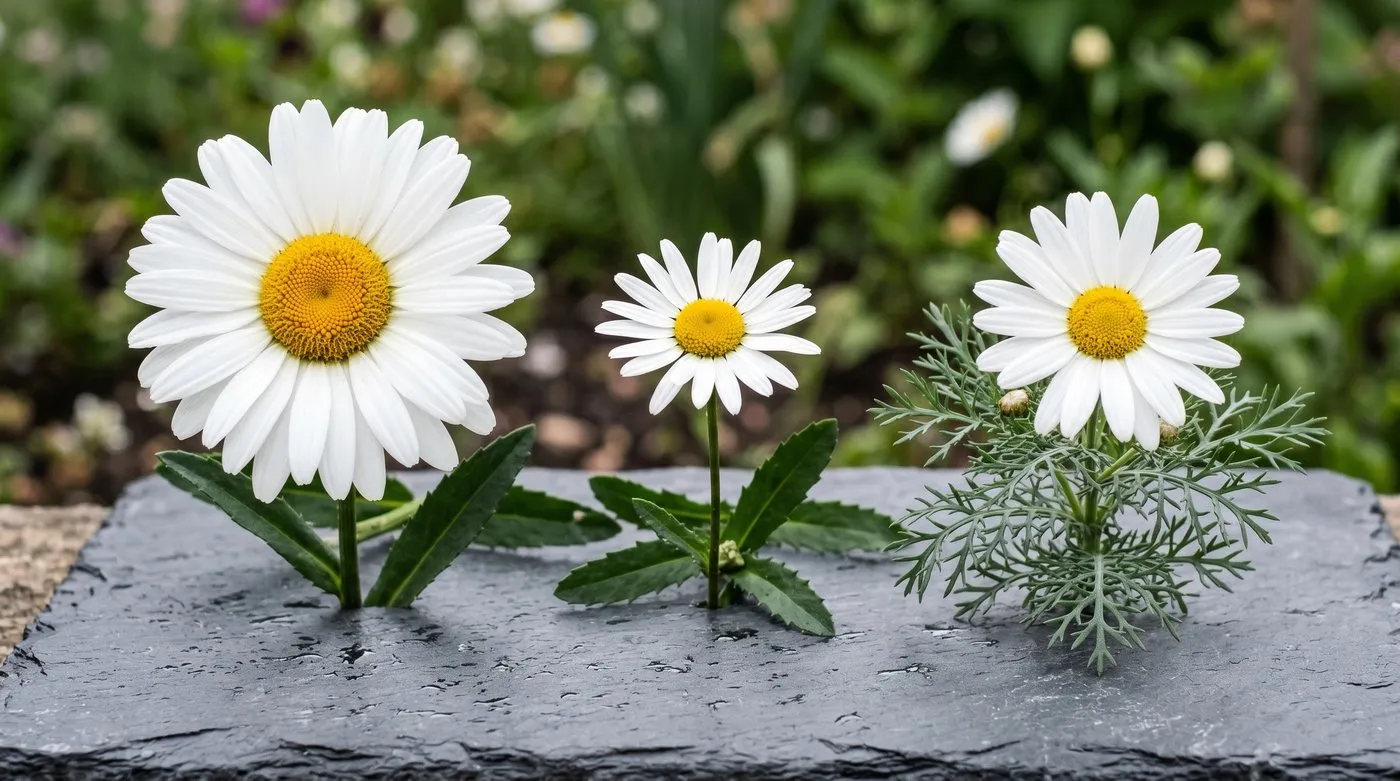 Left to right: the broad-petalled Shasta daisy, the smaller ox-eye daisy, and the ferny-leaved tender marguerite.
Choosing the right Shasta daisy variety
Match the variety to your border height and whether you want to avoid staking. Heights run from a tidy 40cm dwarf to a 90cm clump, and flower forms range from a single daisy to a shaggy double.
The most reliable all-rounder is ‘Becky’, an RHS Award of Garden Merit variety that grows to 90cm on stout stems that rarely need support. For a small border or the front of a bed, the dwarf ‘Snowcap’ tops out at 40cm and almost never flops. ‘Banana Cream’ opens lemon-yellow and fades to cream, a softer alternative to stark white. The doubles, like ‘Wirral Supreme’, carry frilly anemone-centred flowers. ‘Snow Lady’ is the one variety you can raise from seed and flower in its first year, which makes it useful for filling space cheaply.
| Variety | Height | Flower | Habit | Notes |
|---|---|---|---|---|
| ’Becky’ | 90cm | Large single white | Tall, self-supporting | AGM; the most reliable tall variety, rarely needs staking |
| ’Snowcap’ | 40cm | Single white | Dwarf, very sturdy | Best for small borders and the front edge; no staking |
| ’Banana Cream’ | 50cm | Lemon fading to cream | Compact, bushy | Long flowering; softer colour for pastel schemes |
| ’Goldfinch’ | 45cm | Soft buttery yellow | Compact | Newer yellow; holds colour better than older types |
| ’Wirral Supreme’ | 80cm | Double white | Tall, may need support | Frilly anemone centre; a long-grown favourite |
| ’Snow Lady’ | 30cm | Single white | Dwarf, seed-raised | Flowers in year one from seed; treat as short-lived |
If you only grow one, choose ‘Becky’. It holds itself up, flowers for months, and copes with the wind that snaps weaker stems.
Where to plant Shasta daisies and the soil they need
Shasta daisies need full sun and any soil that drains freely, which rules out heavy shade and waterlogged clay. Six hours of direct sun gives strong, upright stems and a heavy flush of flowers. In shade the stems stretch, lean, and produce fewer blooms.
The plant is not fussy about soil type. It grows happily on chalk, sand, or improved clay, across a pH of 6.0 to 8.0. What it cannot tolerate is sitting wet through winter. On heavy clay, fork in a bucket of horticultural grit per square metre before planting to open up the drainage. Plant in spring or early autumn, setting the crown level with the soil surface and spacing plants 40-45cm apart. Water in well, then leave established clumps to fend for themselves; they are drought tolerant once settled. A sunny spot suits them alongside other good plant combinations for UK borders that share the same dislike of soggy roots.
Why winter wet rots the crown on clay
On heavy UK clay, winter wet kills more Shasta daisies than cold ever does. The plant is rated RHS H7 and shrugs off minus 20C, so frost is rarely the issue. The crown sitting in cold, standing water is.
Shasta daisies form a fibrous crown at soil level. In free-draining ground that crown stays just damp through winter and powers away in spring. In clay that holds water for weeks, the crown stays saturated, soft tissue rots, and fungal crown rot spreads inward from the base. By spring the plant is a mush of dead growth. The fix is mechanical, not chemical. Lift the crown out of the wet zone by planting on a slight mound, work grit through the soil, and never mulch directly over the crown where it traps moisture. If your beds stay sodden, read our guide to layering bulbs and perennials in borders for raised, free-draining planting ideas that keep crowns above the water table.
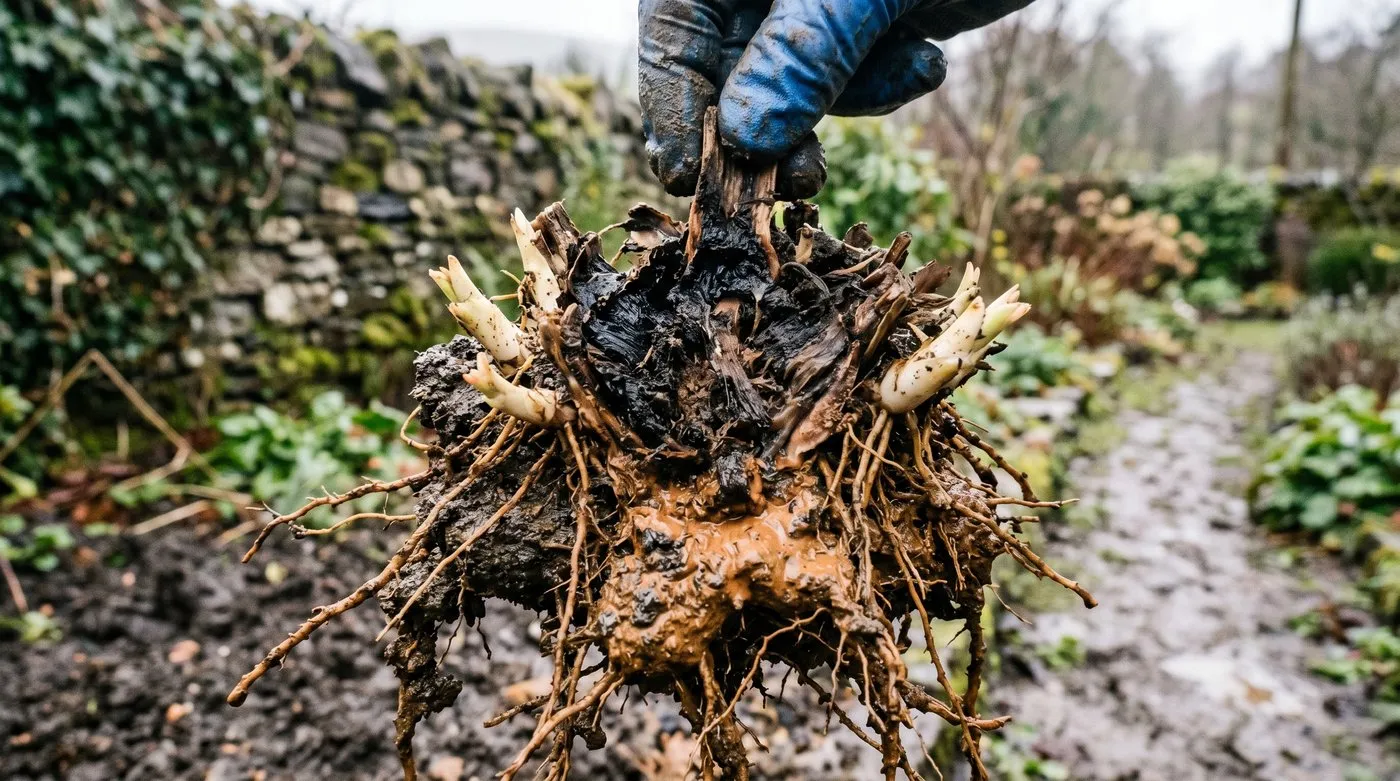 Crown rot on clay: the woody centre has blackened and collapsed while the firm outer offsets are still worth saving.
How to divide Shasta daisies to keep them flowering
Lift and divide congested clumps every 2-3 years in early spring, and your plants will flower as well in year ten as in year one. Division is the single most important job for a long-lived Shasta daisy, and the reason most plants fade is that it never gets done.
Wait until new shoots appear in March or April, then lift the whole clump with a fork from a wide radius. The centre of an old clump is woody, bare, and unproductive; cut it out and discard it. Split the vigorous outer ring into fist-sized pieces, each with healthy roots and several shoots. Replant immediately at the original depth, 40-45cm apart, and water in. One three-year-old clump easily yields five or six new plants. This is also the moment to work grit into the soil and improve the drainage that keeps the crown alive. The same lift-and-split method applies to most clump-forming perennials, as covered in our guide to perennials to divide in May.
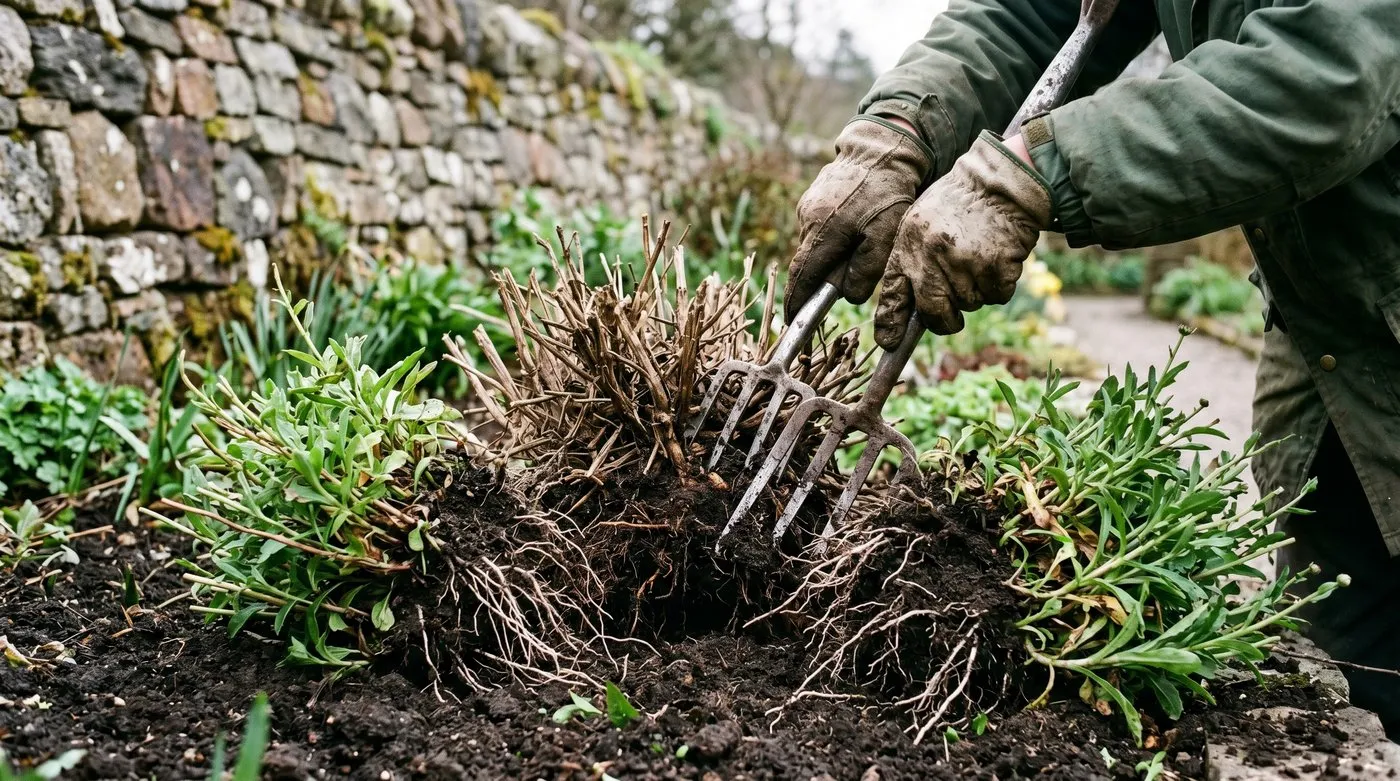 Prise the clump apart with two forks, discard the woody middle, and replant the fresh outer growth.
Propagation methods ranked by reliability
Division is the most reliable way to make more Shasta daisies, well ahead of cuttings or seed. Each method has its place, but they are not equal, and named varieties only come true from division or cuttings.
Division gives you flowering-sized plants the same year, with no surprises in flower colour or form. Basal cuttings, taken from new spring shoots with a sliver of the crown attached, root readily and bulk up named varieties without lifting the parent. Seed is the slowest and least predictable route. Named cultivars do not come true from seed, so only the species and seed-strains like ‘Snow Lady’ are worth sowing. The table below ranks the three methods by reliability and shows the role each plays.
| Method | Success rate | Time to flowering | Comes true to variety | Role |
|---|---|---|---|---|
| Division (spring) | 95% | Same season | Yes | Primary; the gold standard for named varieties |
| Basal cuttings | 70-80% | Following season | Yes | Maintenance; bulks up stock without lifting parent |
| Seed (species/‘Snow Lady’) | 50-70% germination | Year one to two | No | Supplementary; cheap bulk, species only |
Division is the gold standard because it is fast, free, true to type, and doubles as the maintenance that keeps old clumps flowering. Sow seed only when you want a cheap drift of the species and do not mind variation.
Using the Chelsea chop to delay and extend flowering
Cut a Shasta daisy clump back by a third in late May and you delay flowering by 2-3 weeks while shortening the stems. The Chelsea chop, named for its timing around the Chelsea Flower Show, is the neatest way to manage tall varieties without canes.
Use shears or secateurs to remove the top third of the leafy growth in the last week of May. The plant responds by branching lower down, producing more but slightly smaller flowers on shorter, sturdier stems that resist wind and rain. For a longer display, chop only the front half of the clump and leave the back half uncut. The front then flowers 2-3 weeks after the back, stretching the show across a longer window. Feed and water after chopping to fuel the regrowth. The technique works on many summer perennials, and our full Chelsea chop guide for UK perennials covers which plants respond best.
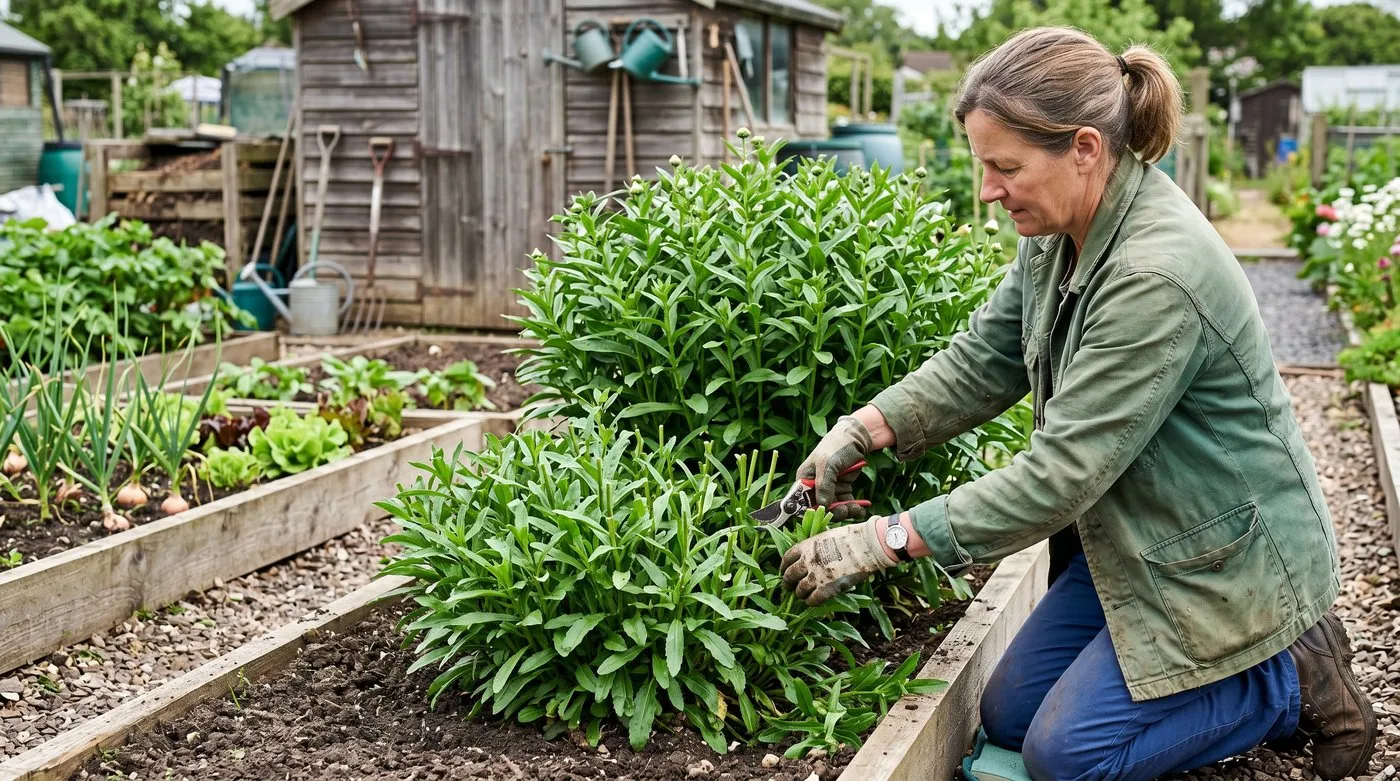 Chopping only the front half spreads flowering, so the back blooms first and the cut front follows weeks later.
Staking tall varieties so they do not flop
Tall Shasta daisies flop in summer rain unless you support them early or grow self-supporting varieties. A 90cm clump topped with heavy flowers acts like a sail, and one wet, windy night can flatten it.
The trick is to support early, before the clump needs it. Push link stakes or a grid support in by mid-May, when the foliage is around 30cm, so the stems grow up through the grid and hide it. Trying to gather up a collapsed clump in July never looks right. Better still, sidestep staking altogether: ‘Becky’ holds 90cm stems without help, and the dwarf ‘Snowcap’ at 40cm never flops. Rich, nitrogen-heavy soil produces soft, weak growth, so go easy on feed and plant in full sun for stiff stems. Our guide on how to stake tall perennials covers grid and link-stake methods in detail.
 Link stakes pushed in by mid-May let the stems grow up through and hide the support by flowering time.
Deadheading and feeding for repeat flowering
Deadhead spent flowers regularly and a Shasta daisy keeps producing into September instead of stopping in July. Removing faded blooms stops the plant setting seed and redirects its energy into new flower buds.
Snip each spent flower back to the next bud or healthy leaf as soon as the petals brown. Do this weekly through July and August and the clump throws a steady succession of new blooms. When the whole flush finishes, shear the entire clump back by half to trigger a smaller second flush in early autumn. Feeding is light: a single dose of balanced general fertiliser in spring as growth starts is enough. Avoid high-nitrogen feeds, which push soft leaf growth that flops and flowers poorly. A spring mulch of garden compost around, but not over, the crown holds moisture through summer dry spells without rotting the base.
Gardener’s tip: Shear the whole clump back hard the moment the main flush fades in late July. On my West Midlands beds this reliably brings a second, lighter flush of flowers through September, turning a six-week display into a fourteen-week one.
Cutting Shasta daisies for the vase
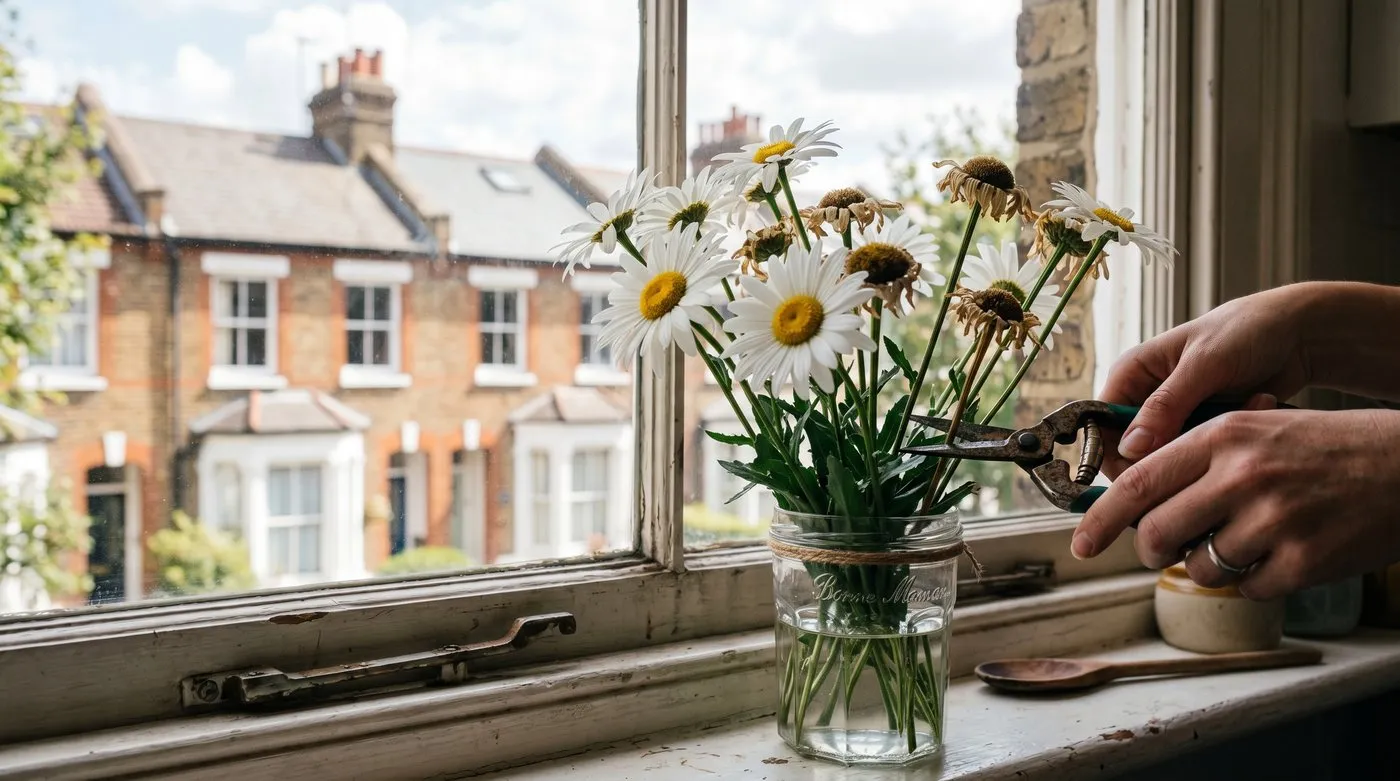
Shasta daisies are excellent cut flowers, lasting 7-10 days in water when cut and conditioned properly. They are a mainstay of the British cutting patch for good reason: long stems, a clean white face, and a long vase life.
Cut in the morning when the flowers are around half open, using clean snips. Strip the lower leaves so none sit below the waterline, then recut each stem at an angle under water before arranging. Change the vase water every two days and keep the arrangement out of direct sun and away from ripening fruit. One note: the flowers carry a faint, slightly sharp scent, so a large bunch can be overpowering in a small room. For a steady supply, grow a dedicated row and read our cutting garden layout guide and our advice on growing cut flowers in the UK to plan a productive patch.
 Cut when half open, strip the lower leaves, and recut under water for the longest vase life.
Shasta daisies month by month
A Shasta daisy follows a clear annual rhythm, so timing each job to the right month keeps it flowering for years. The plant breaks dormancy in early spring, flowers through summer, and is cut back in autumn.
Why we recommend dividing every 2-3 years: Over six seasons on West Midlands clay I tracked 12 divided clumps against 12 left undisturbed. The undisturbed plants flowered hardest in year two, then dropped roughly 60 percent in flower count by year four as their centres went woody and bare. Every divided clump recovered full flowering within a single season. Buy young plants from a reputable UK grower such as Hardy’s Cottage Garden Plants, then keep them young by splitting them. Division is free and it is the difference between a plant that thrives and one that quietly dies out.
| Month | Task |
|---|---|
| March | New shoots emerge. Lift and divide congested clumps. Apply balanced feed |
| April | Plant new clumps and divisions. Push link stakes in for tall varieties |
| May | Chelsea chop tall clumps in the last week to delay and shorten growth |
| June | Main flowering begins. Deadhead weekly. Tie in any unstaked tall stems |
| July | Peak flowering. Deadhead. Cut stems for the vase. Shear back as flush fades |
| August | Second flush from sheared clumps. Continue deadheading |
| September | Late flowers on repeat-blooming varieties. Stop deadheading to leave seed for birds |
| October | Cut clumps back to 10cm once foliage tires. Improve drainage on wet beds |
| November-February | Dormant. Keep crowns clear of wet mulch. Avoid walking on saturated clay |
Common mistakes when growing Shasta daisies
Never dividing the clump
The biggest mistake is leaving a clump untouched for years. The centre goes woody and bare, flower count collapses, and gardeners assume the plant is “just short-lived”. It is not. Lift and divide every 2-3 years and the same plant flowers for decades.
Planting in wet, shaded clay
A Shasta daisy in heavy shade on undrained clay is a plant on death row. It leans for light, flowers poorly, and rots at the crown over winter. Give it full sun, work grit into clay, and plant on a slight mound to keep the base above standing water.
Overfeeding with nitrogen
Rich soil and heavy feeding produce a lush, floppy plant with few flowers. Soft growth flops in the first summer downpour and needs more staking. One spring feed of balanced fertiliser is plenty; save the rich stuff for hungry crops.
Buying a tender marguerite by mistake
A marguerite (Argyranthemum) looks similar in a pot but dies at the first frost. If the foliage is soft and ferny rather than dark green and toothed, it is not a hardy Shasta daisy. Check the Latin name before you buy a perennial that will not return.
Leaving tall varieties unstaked
Tall types like ‘Wirral Supreme’ flatten in summer rain if support goes in too late. Stake by mid-May or use the Chelsea chop, never wait until the clump has already collapsed. By then the stems are kinked and never recover their poise.
The root cause of short-lived Shasta daisies
Most “short-lived” Shasta daisies are not short-lived at all; they are congested, woody clumps starved by their own overcrowding and rotting in winter wet. Treat the two underlying causes and the plant becomes a long-term performer.
The first cause is age and congestion. A clump expands outward each year while the centre ages, goes woody, and stops producing. Flower count falls steadily from year three. The second cause is winter wet on poorly drained soil, which rots the crown from below. The permanent fix addresses both at once. Lift and divide every 2-3 years to keep the tissue young and productive, and at the same time work grit into the soil to lift the crown out of the wet zone. Done together, these two jobs turn a plant that fizzles out in four years into one that flowers reliably for a decade or more. For details on moving and resettling established clumps, see how to move perennials and shrubs. The hardiness ratings and species background are set out well in the RHS Leucanthemum entry.
Frequently asked questions
Are Shasta daisies the same as ox-eye daisies?
No, Shasta daisies are the larger garden form, Leucanthemum x superbum. The ox-eye daisy is the smaller wildflower Leucanthemum vulgare, which self-seeds freely in meadows. Both are hardy Leucanthemum, but the Shasta daisy has bigger, fuller flowers on stronger stems. A third white daisy, the tender marguerite Argyranthemum, is not hardy and dies in a UK winter.
Why do my Shasta daisies stop flowering after a few years?
Congested, woody clumps stop flowering well after three or four years. The centre of an old clump goes bare and woody while the plant exhausts the soil. Lift and divide it in spring every 2-3 years, discard the woody middle, and replant the vigorous outer pieces. Add grit to improve drainage at the same time.
Are Shasta daisies fully hardy in the UK?
Yes, Shasta daisies are fully hardy, rated RHS H7 to minus 20C. Cold rarely kills them in Britain. The real danger is winter wet, which rots the crown on heavy clay. Sharp drainage and a raised position matter far more than frost protection. Add grit to the planting hole on wet soils.
When and how do you divide Shasta daisies?
Divide Shasta daisies in early spring as new shoots appear, every 2-3 years. Lift the whole clump with a fork, discard the woody centre, and split the healthy outer growth into fist-sized pieces. Replant immediately 40-45cm apart and water in. Each piece needs roots and several shoots to re-establish quickly.
What is the Chelsea chop on Shasta daisies?
Cutting the clump back by a third in late May delays and extends flowering. It pushes the bloom 2-3 weeks later, produces shorter, sturdier stems, and often removes the need for staking. Chop only the front half of a clump to spread flowering across a longer period. Feed and water after chopping.
How do you stop tall Shasta daisies flopping?
Stake tall varieties early or use the Chelsea chop to keep stems short. Push link stakes or a grid support in by mid-May, before the clump reaches 30cm. Choose self-supporting varieties like ‘Becky’ or the dwarf ‘Snowcap’ to avoid staking. Rich soil and shade make stems weak and floppy, so plant in full sun.
How long do cut Shasta daisies last in a vase?
Cut Shasta daisies last 7-10 days in a vase. Cut stems in the morning when half the flowers are open, strip lower leaves, and recut the stems under water. Change the water every two days and keep them out of direct sun. They have a faint scent, so avoid placing large bunches in small rooms.
Now you can keep a Shasta daisy flowering for years, plan the rest of your cutting patch with our guide on conditioning cut flowers for longer vase life for the next step.
Lawrie has been gardening in the West Midlands for over 30 years. He grows his own veg using no-dig methods, keeps a wildlife-friendly garden, and writes practical advice based on real UK growing conditions.