How to Build a Garden Wall: Footings to Coping
Build a freestanding brick garden wall step by step: footing depths, 1:5 mortar mix, gauged courses and coping, with tracked UK costs per metre.
Key takeaways
- No planning permission needed under 2m, or under 1m beside a highway
- Footing trench: 300mm wide for a half-brick wall, concrete 150-300mm deep
- Mortar is 1 part cement to 5 parts building sand with plasticiser, 10mm joints
- Gauge courses at 75mm and lay no more than six courses a day
- Half-brick walls over 600mm high need a 215mm pier every 3m
- Our 6m x 1.2m DIY wall cost £548 against builder quotes from £1,680
Building a garden wall is the most permanent boundary upgrade a UK garden can get. A well-built brick garden wall lasts 60 years or more, against 12 to 15 for a treated timber fence. The job looks skilled, and parts of it are, but a patient DIYer can build a freestanding wall up to 1.2m with hand tools, a string line and a £25-a-day mixer. I built a 6m by 1.2m stretcher-bond wall in my Staffordshire garden in spring 2024. I tracked every receipt and spent £548 against builder quotes starting at £1,680. This guide covers the full sequence: planning rules, footings, mortar, laying, bonds, piers and coping, with the real costs and the mistakes that wreck first attempts.
Do you need planning permission for a garden wall?
Most freestanding garden walls in the UK need no planning permission at all. Permitted development rules let you build up to 2m high within the garden, and up to 1m where the wall sits beside a highway, which includes pavements and footpaths. Measure height from natural ground level. The rules are set out on the Planning Portal, and ten minutes reading there is cheaper than an enforcement letter later.
There are exceptions. Listed properties need consent for any new wall. Conservation areas often protect existing boundary walls too, so taking one down needs permission even where building does not. Some newer estates have permitted development rights removed in the deeds, so check before ordering bricks.
Boundary position matters as much as height. Build the whole wall, footing included, on your own land unless your neighbour agrees the line in writing. A wall built astride the boundary falls under the Party Wall Act 1996 and needs formal notice. And if you want screening above 2m, planting gets you there without an application: see our guide to privacy screening with hedges and trees.
How deep should garden wall footings be?
Footings carry the whole wall, and skimping here is the top cause of cracked brickwork. Dig a footing trench 300mm wide for a half-brick wall (102.5mm thick) and 450mm wide for a one-brick wall (215mm thick). The wall sits centred on the strip with roughly 100mm of concrete showing either side.
Depth depends on the ground. Dig down to firm, undisturbed subsoil, which on my Staffordshire clay meant 450mm. Topsoil, soft fill and old root runs will not carry a wall. Pour concrete 150mm deep for walls up to 1m high, and 225-300mm deep for anything taller. Mix it at 1:2:4, cement to sharp sand to 20mm aggregate, or order ST2 ready-mix for anything over half a cubic metre. My 6m trench swallowed 0.41 cubic metres, mixed by hand in 14 barrow loads.
Keep the top of the concrete at least 150mm below finished ground level. That sits the footing below the worst frost movement and leaves room for two brick courses underground, so no grey concrete shows at the base. One warning: this guide is for freestanding walls only. If the wall must hold back soil, read our guide to garden steps and retaining walls instead, because the loads are completely different.
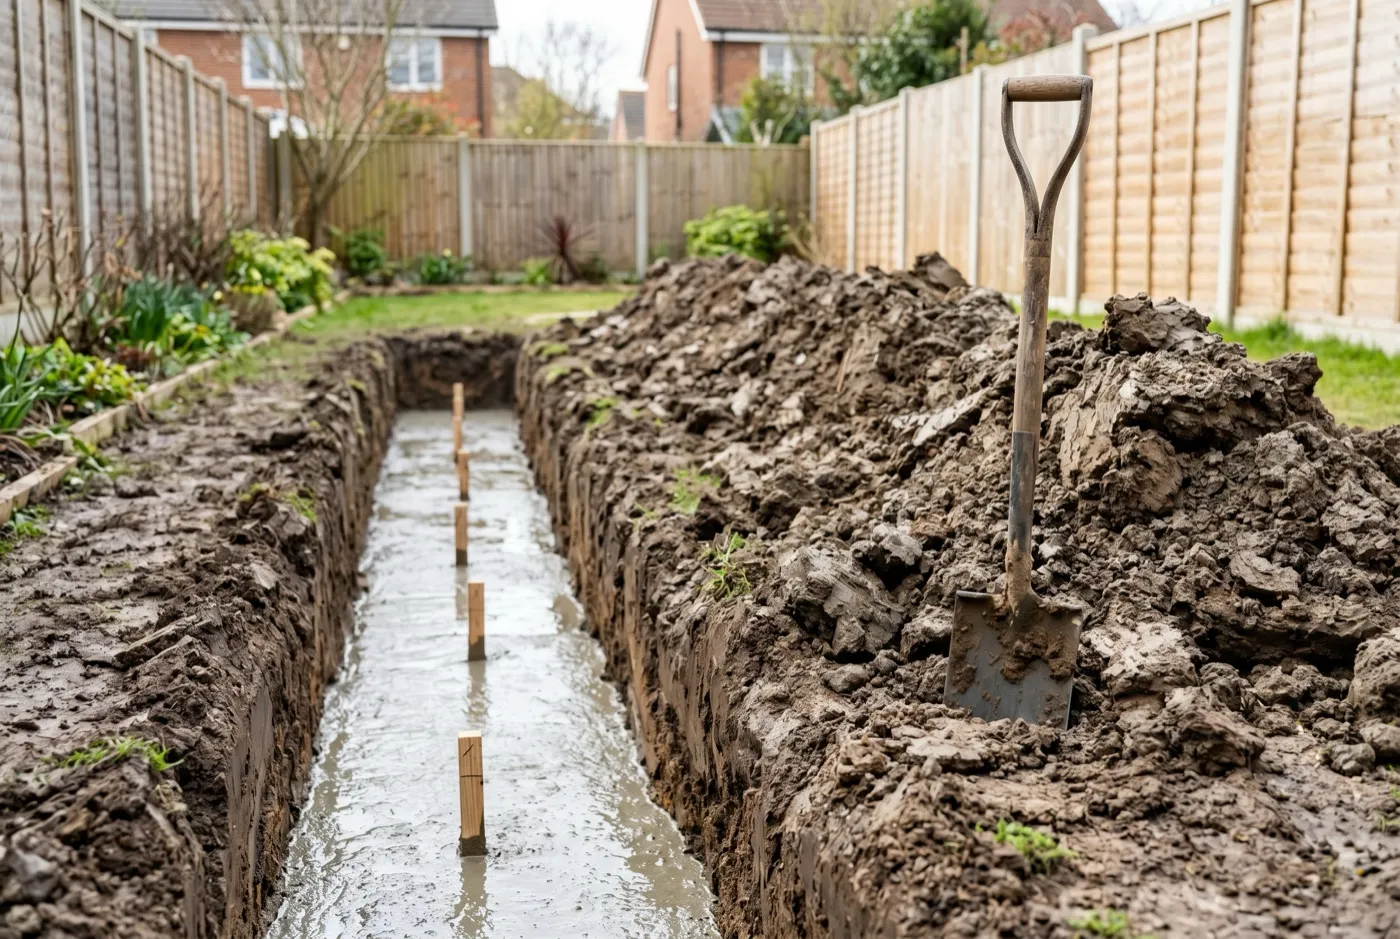 A footing trench dug to firm subsoil with concrete poured. The top sits 150mm below ground so two courses run underground.
Setting out with profile boards and string lines
Profile boards are the difference between a straight wall and an expensive wiggle. Knock two stakes in about 600mm beyond each end of the trench and screw a level crossbar between them. Stretch a string line between the boards to mark the face of the wall, not the centre. Because the boards sit clear of the trench, the line survives all the digging and concreting.
Before mixing any mortar, dry-lay the first course along the line with 10mm gaps between bricks. A standard UK brick is 215mm long, so each brick plus its joint takes up 225mm. My 6m run worked out at 26 whole bricks plus one half-bat per course. If your dry run ends on a thin sliver, shift the wall length by a few centimetres rather than cutting slips that crack.
Check the crossbars with a spirit level or line level before committing, and mark the wall face position on each board with a saw cut so the line always returns to the same spot. The same setting-out discipline applies when laying a patio: get the lines and levels right first and everything after goes faster.
What mortar mix does a garden wall need?
The right mix for a freestanding garden wall is 1 part cement to 5 parts building sand, with a capful of plasticiser in the mixing water. Plasticiser costs around £8 a bottle and makes the mortar buttery, so it spreads instead of tearing. Measure with a gauging bucket, never a shovel. A heaped shovel of damp sand carries half as much again as a level one, and uneven batches dry to visibly different joint colours.
A workable mix has the texture of soft ice cream. It should hold its shape when you cut a slice with the trowel, spread without dragging, and leave the steel with one sharp flick. Too wet and it slumps, runs down the faces and stains the brickwork. Too dry and the bricks cannot bed down, which leaves weak, hollow joints.
Mix small. One bucket of cement to five of sand kept me laying steadily for about 90 minutes. Use every batch within two hours, and never add water to bring a stiff batch back to life: re-tempered mortar can lose up to half its final strength. In hot, dry spells, dunk very absorbent bricks in water for a few seconds so they do not suck the bed dry.
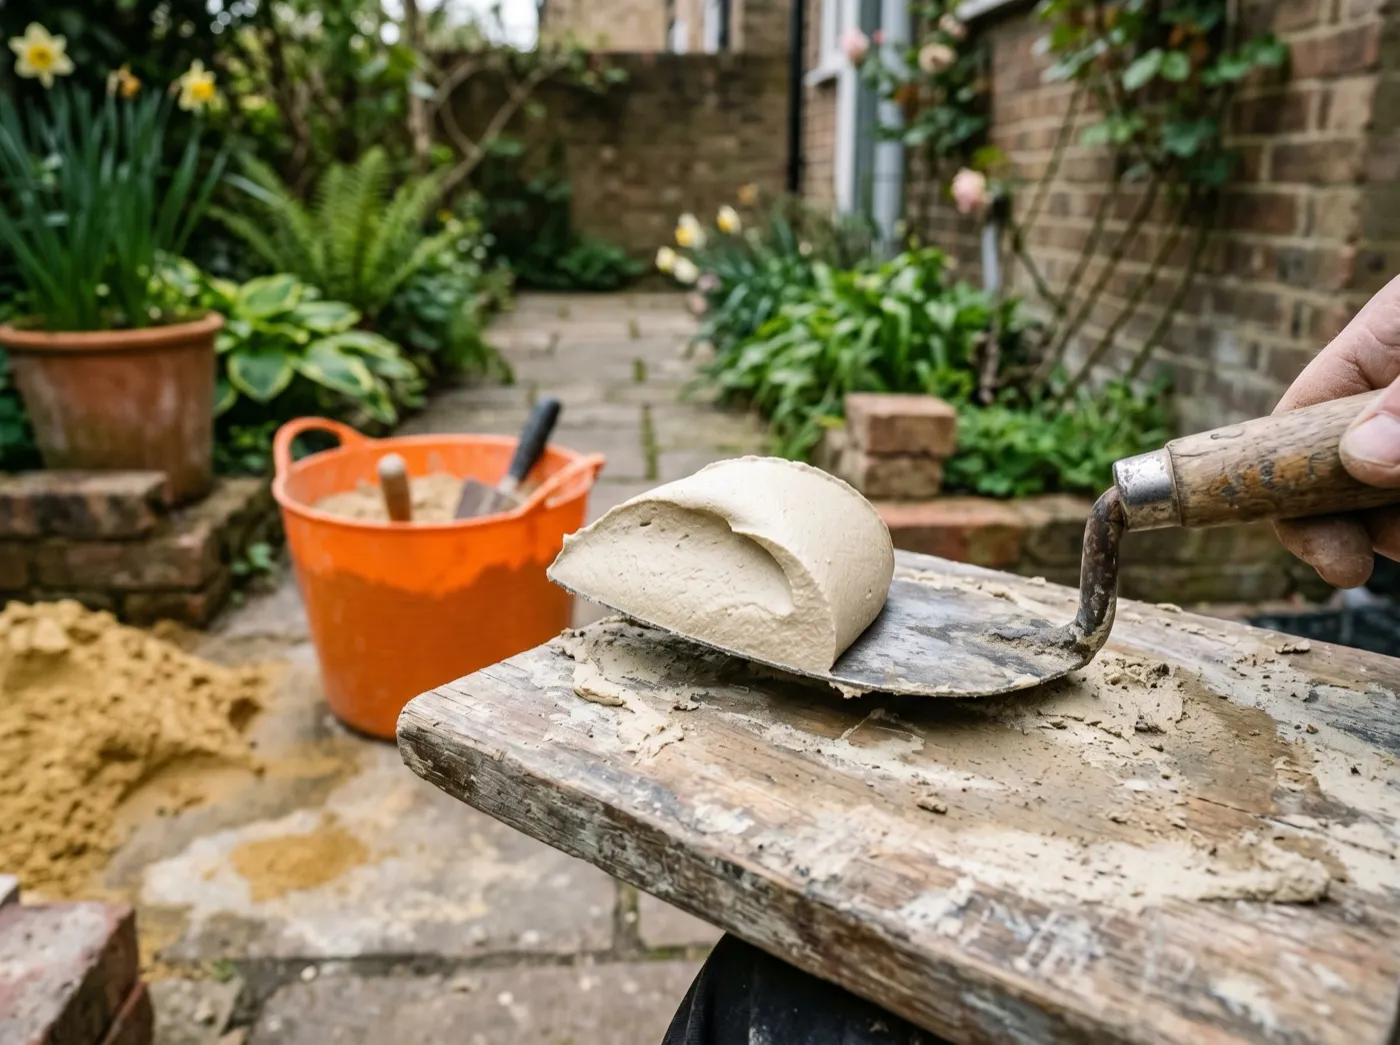 A workable 1:5 mix holds its shape on the trowel and leaves the steel cleanly. Too wet slumps, too dry will not bed.
Laying courses: 10mm joints and a 75mm gauge
Lay the first course on a full 10mm bed spread along the footing, tight to the string line. From there the routine never changes. Spread a bed, furrow it lightly with the trowel point, butter the end of each brick and push it up to its neighbour to form a 10mm joint.
Make a gauge rod from a straight batten marked every 75mm. A UK brick is 65mm high, so 65mm plus a 10mm bed gives 75mm per course. Hold the rod against the work as every course goes on. If the marks drift, your beds are creeping fat or thin and the top of the wall will pay for it.
Check level and plumb every three to four bricks, not at the end of a course when fixing it means tearing bricks out. Tap each brick down to the line with the trowel handle, never your hand. Build both ends up first, three or four courses high, then stretch a line between corner blocks and fill the middle to it.
Stop at four to six courses a day. Fresh mortar squeezes under weight, and a wall pushed higher than that drifts out of plumb by morning.
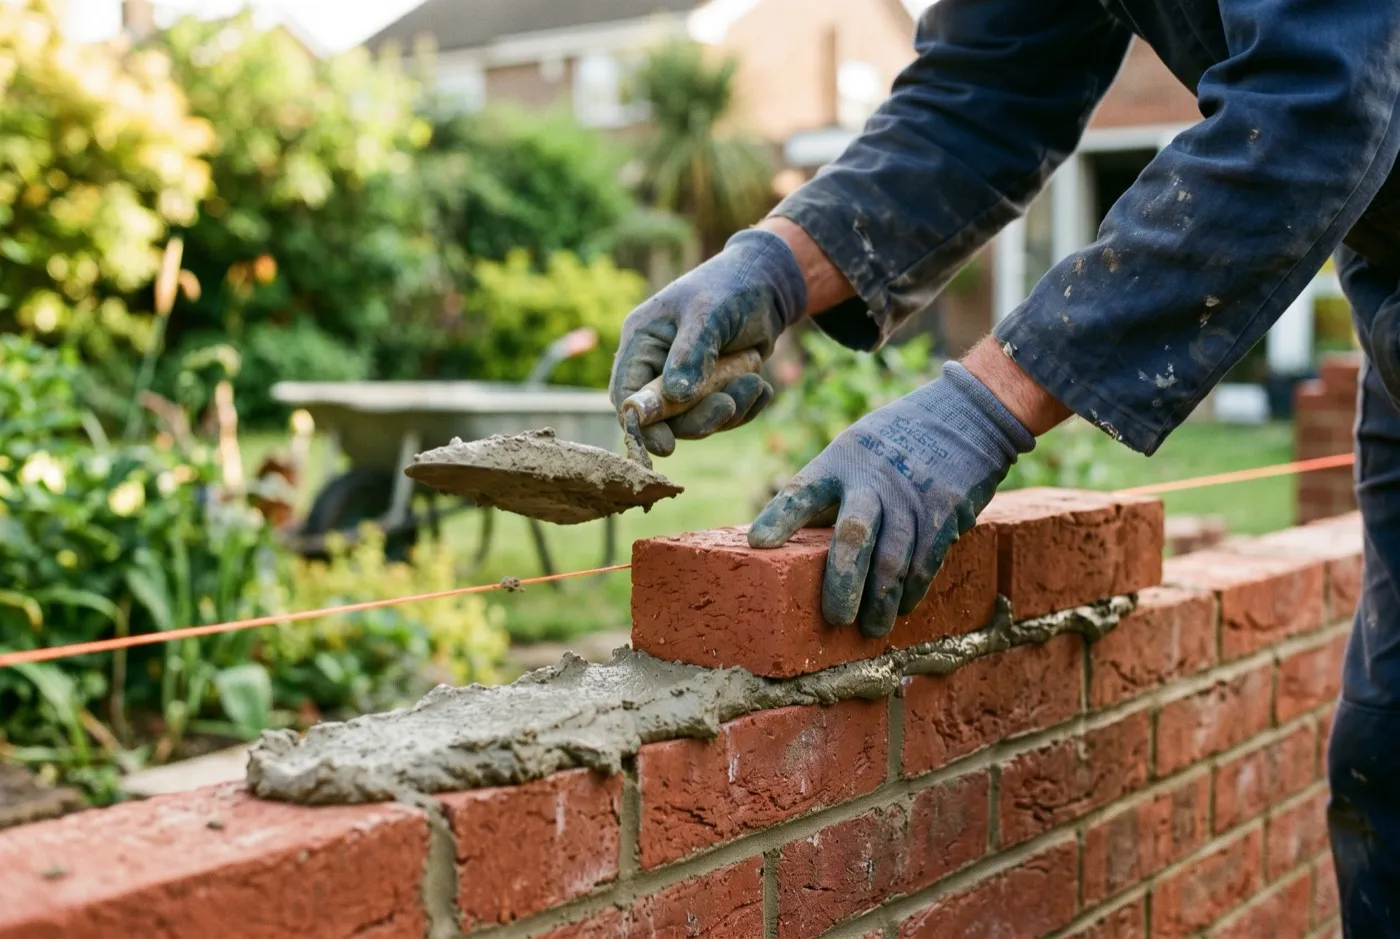 Each brick is buttered, pushed to a 10mm joint and tapped down to the string line. The line, not the eye, sets the course.
Brick bonds and piers that keep the wall standing
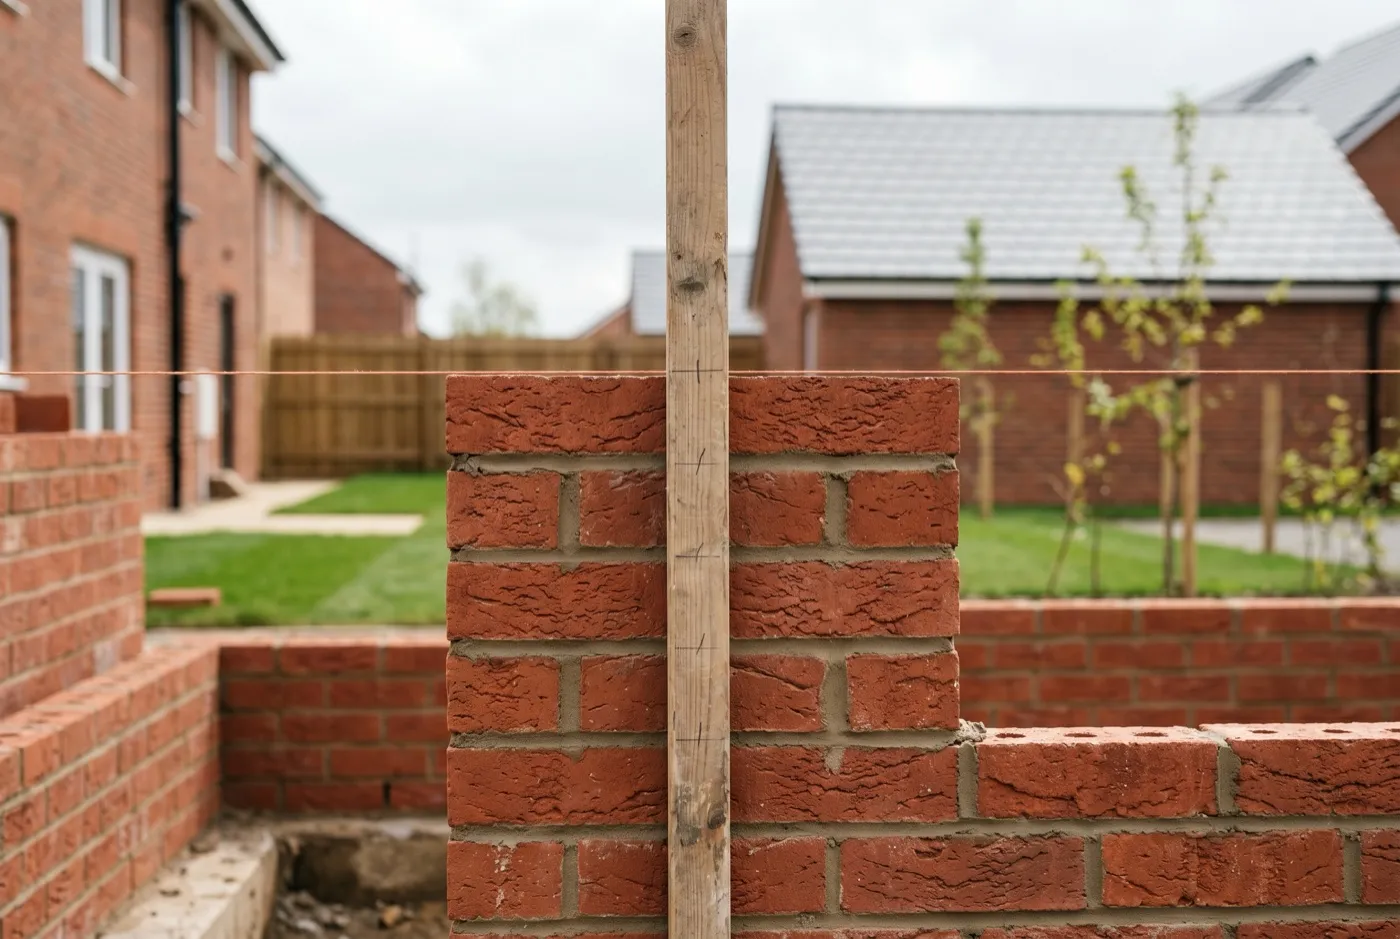
A wall is only as strong as its bond, the overlap pattern that ties the bricks into one unit. For a half-brick wall use stretcher bond: every brick overlaps the two beneath by half its length, and alternate courses start with a half-bat to stagger the joints. It is the simplest bond to lay and the one I used on my 6m wall.
One-brick walls at 215mm thick call for Flemish bond, which alternates headers and stretchers within each course, or English bond, which alternates full courses of each. Both run header bricks through the full thickness of the wall, which is where the extra strength comes from, and both suit period houses.
Piers are not optional on slender walls. A half-brick wall over 600mm high needs a 215mm x 215mm pier every 3m, plus one at each free end, bonded in as the wall rises rather than stuck on afterwards. My wall carries three: one at each end and one in the middle at the 3m mark. Widen the footing trench to 450mm where each pier lands, because the pier doubles the load on that strip of concrete.
 A scrap batten marked at 75mm intervals checks every course. If the marks drift, the mortar beds are creeping.
The build sequence from first dig to cured mortar
Concrete and mortar cure on their own clock, and the build has to follow it. Here is the sequence with realistic timings for a 15C UK spring day.
- Day 1: dig and pour. Excavate to firm subsoil, peg the levels and pour the footing. Concrete stays workable for about 2 hours and takes its initial set within 24-48 hours.
- Day 3: foundation courses. At around 15C the footing reaches roughly half strength after 72 hours. Lay the underground courses up to ground level.
- Days 4 to 9: the main lifts. Lay four to six courses per session. Mortar stiffens in about 2 hours and will carry the next lift after setting overnight.
- Day 10: coping and pointing. Bed the coping, then strike the joints once the mortar is thumb-firm.
- Day 28: full cure. Mortar and concrete reach design strength after 28 days. Keep ladders and leaning loads off until then.
The critical mistake is ignoring stage 3 and racing the wall up in a single day. The bottom joints squeeze from 10mm towards 7mm, the courses tip out of gauge and the wall bows. The second killer is temperature. Never lay below 3C and falling, and cover fresh work with polythene or hessian when frost or heavy rain threatens.
When to build a garden wall: month by month
Brickwork is seasonal in the UK. Cement needs temperatures above 3C to cure properly, and fresh joints need shielding from frost at one end of the year and fast drying at the other. This calendar keeps the build inside the safe window.
| Month | Wall-building task |
|---|---|
| January | Plan, measure and price materials. Too cold to lay in most years |
| February | Order bricks: allow 7-10 days lead time on facing bricks |
| March | Dig footings late in the month once hard frosts pass |
| April | Pour concrete and start laying. Cover work if frost is forecast |
| May | Prime laying month: mild days, long evenings, low frost risk |
| June | Lay freely. Dunk absorbent bricks in dry spells |
| July | Work mornings in heat. Mortar dries too fast in full afternoon sun |
| August | Keep laying. Shade fresh work with damp hessian above 25C |
| September | Settled and mild: the best month after May |
| October | Last safe pours and lifts. Watch overnight temperatures |
| November | Frost risk returns. Small repairs on mild days only |
| December | Do not lay. Sketch next year’s project instead |
Coping options and why walls fail without one
Garden walls rarely fail from the bottom up. They fail from the top down, and the root cause is nearly always a missing or broken coping. The exposed top course of a bare wall soaks up rain like a sponge. Water expands by about 9% as it freezes, so one hard frost can blow the face clean off a saturated brick. That damage, called spalling, then creeps down the wall winter after winter. Fit a coping in the same week you top out and the wall sheds water for decades instead.
Three options work. Brick on edge uses matching bricks laid on their sides for a traditional top. Pair it with creasing tiles, two offset courses of flat clay tiles beneath, to throw drips clear of the face. Concrete or stone coping stones are the quickest fix: a 600mm once-weathered concrete coping costs £5-£8 and overhangs each face by about 40mm, so water drips off rather than tracking down the brickwork.
Pointing finishes the weatherproofing. Run the joints with a jointing iron for a bucket-handle profile, or slope them weather-struck, so rain sheds out and down. Once the coping is bedded, the wall makes a perfect host for fast-growing climbers for fences and walls.
Why we recommend once-weathered concrete coping stones: I priced all three coping options for my 6m wall in 2024 and checked 12 older walls around our village for frost damage. Five of the 12 showed spalled faces, and every one of those five had no coping or a cracked one. Brick on edge with creasing tiles priced at £21 per metre and needed a full day. Stone copings started at £34 per metre. The concrete copings cost £9.70 per metre, went on in 90 minutes, and have shed two winters of rain without a single mark. Cheapest, fastest, and zero failures so far.
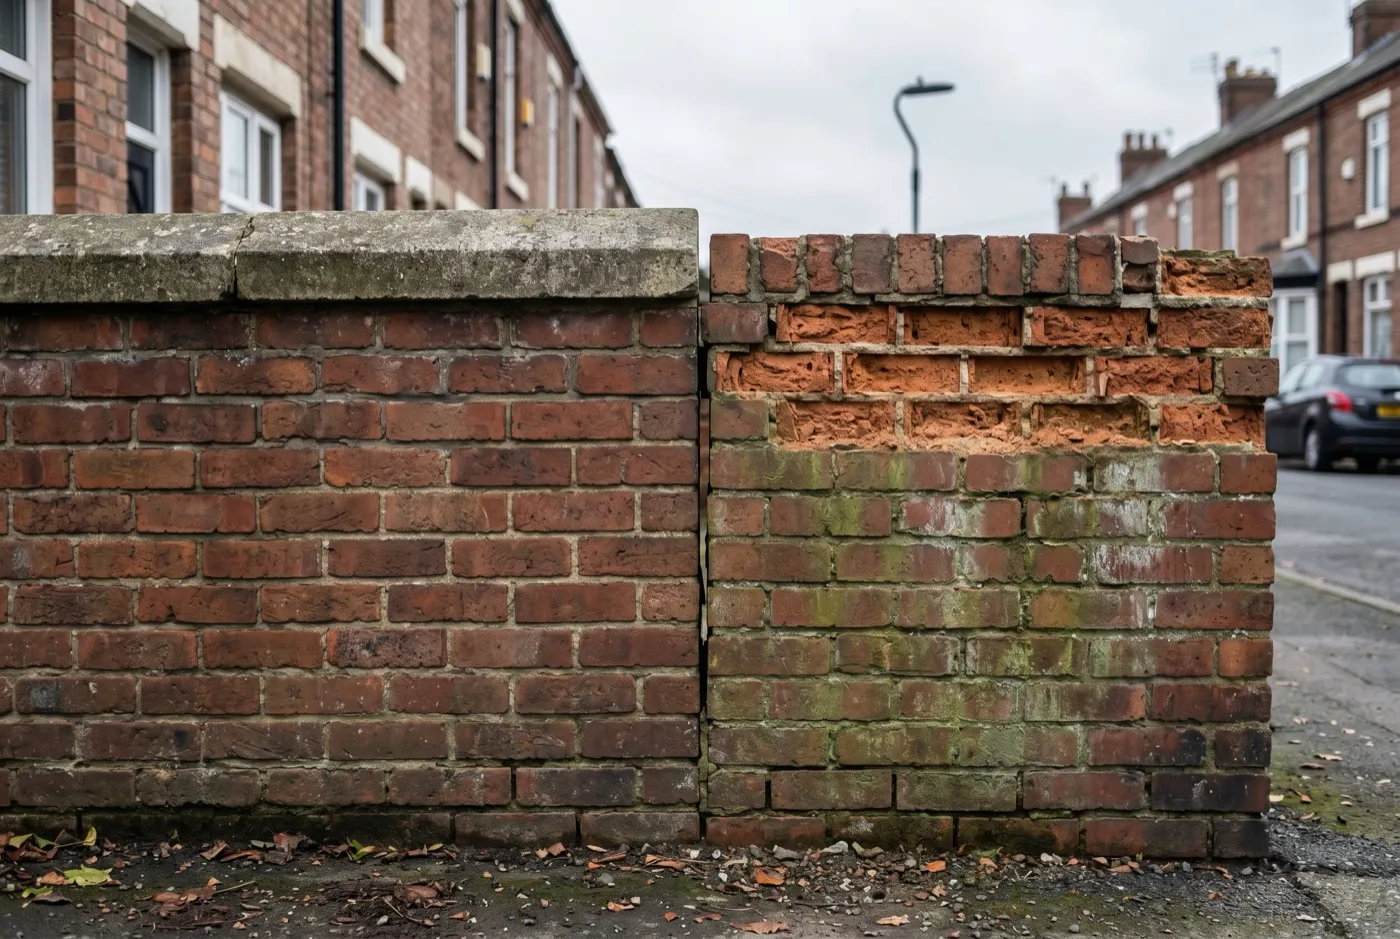 The diagnosis in one frame: the coped wall sheds rain, while the bare-topped wall has lost brick faces to frost spalling.
What does a garden wall cost per metre?
Materials for a half-brick wall around 1m to 1.2m high run £60-£95 per metre, footing and coping included. Bricks dominate the bill at 60 per square metre of wall face, anywhere from 50p for commons to £1.20 for handmade-style facings. Here is the breakdown.
| Material | Quantity per m² of wall | Typical 2026 cost |
|---|---|---|
| Facing bricks | 60 | £30-£72 |
| Concrete blocks (rendered alternative) | 10 | £15-£25 |
| Cement for mortar | Half a 25kg bag | £3.10 |
| Building sand | 60kg | £3.60 |
| Footing concrete | 0.07m³ per metre run | £9-£14 per metre |
The bigger decision is who does the work. These are the four routes for a 6m x 1.2m wall, ranked by cost per metre.
| Approach | Cost per metre | Time | Role |
|---|---|---|---|
| Full DIY (my build) | £91 | 31 hours over 4 weekends | Primary: best value, slowest |
| DIY with a labourer mixing | £120-£140 | About 18 hours | Supporting: nearly halves the laying time |
| Builder does footings, you lay | £150-£180 | 12 hours of your own | Supporting: removes the heaviest day |
| Builder supply and fit | £280-£385 | 3-4 days, none of yours | Easy win for walls over 1.8m or structural work |
Full DIY is the gold standard for freestanding walls up to 1.2m, because the skills are learnable in a weekend and the saving is huge: £1,132 on my wall against the cheapest quote. My 48 spare bricks went straight into a budget raised bed. If the numbers still will not stretch, a panel fence costs £35-£60 per metre fitted, and our garden fence ideas guide covers those options.
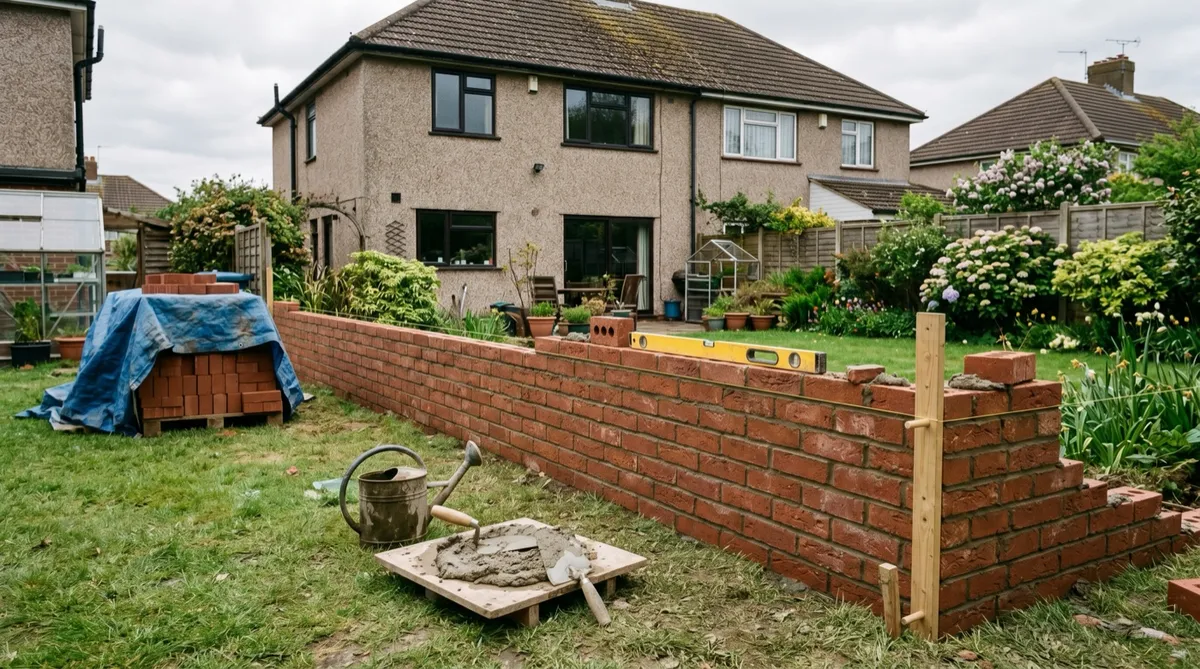
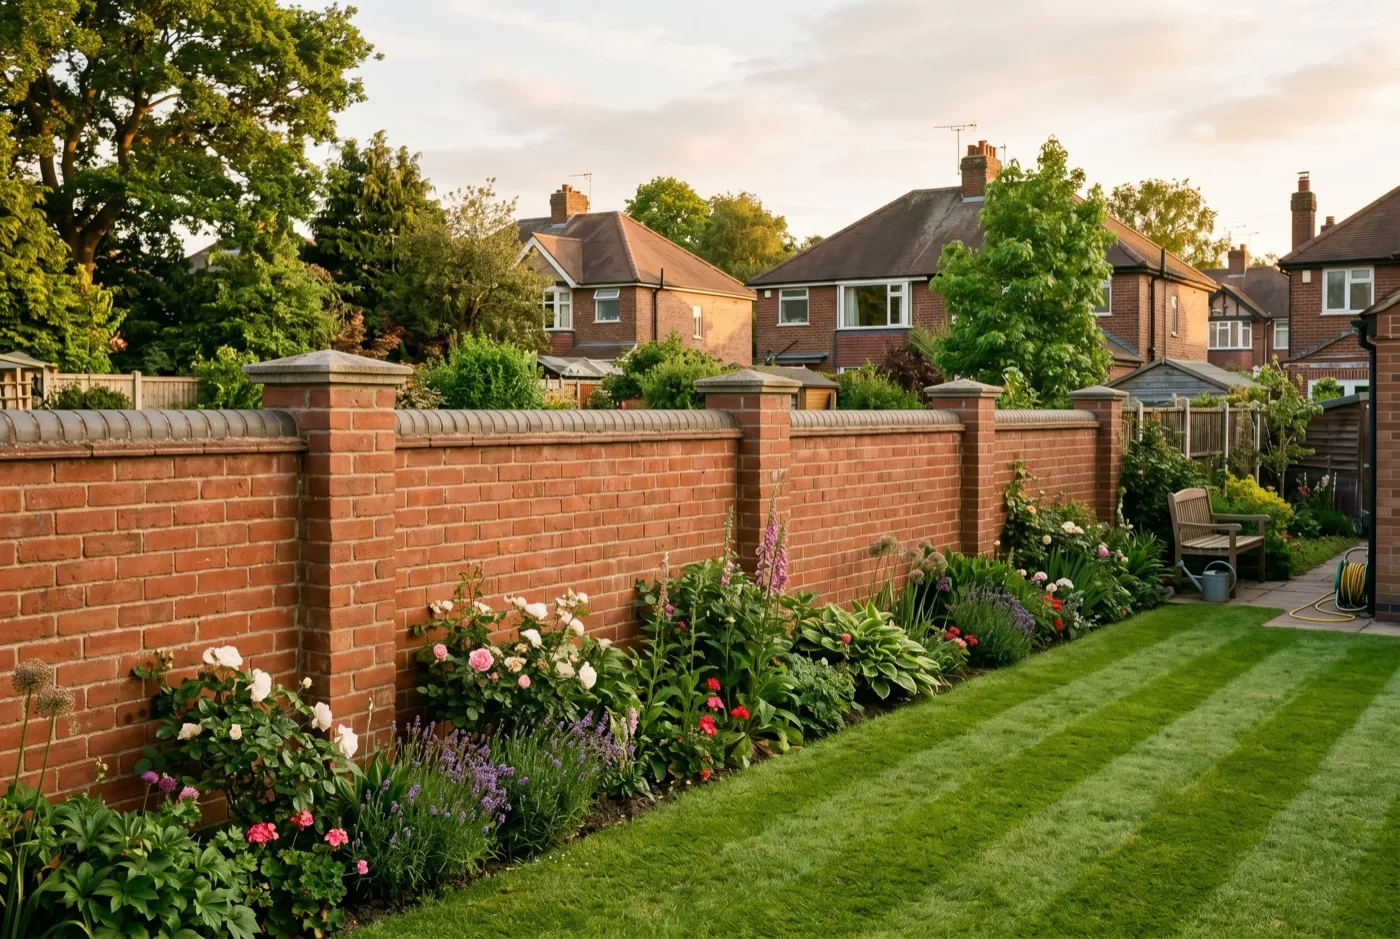 The finished 6m x 1.2m stretcher-bond wall: 432 bricks, three piers, concrete copings and £548 in tracked costs.
Common mistakes when building a garden wall
Most failed DIY walls die from one of five errors. All are avoidable for free.
- Footings too shallow. Digging stops at the first comfortable depth, often still in topsoil. The ground moves, the wall cracks. Dig to firm subsoil and pour at least 150mm of concrete.
- Courses not gauged. Without a gauge rod the beds creep thicker, courses wander and the coping ends up on a slope. Make the 75mm rod before the first mix.
- Building too high in one day. Fresh mortar squeezes under the weight of extra courses and the wall bows. Stop at four to six courses and come back tomorrow.
- No coping. The top course saturates, freezes and spalls within a few winters. Fit brick on edge, copings or creasing tiles the same week you finish.
- Laying below 3C. Frost stops the cement curing and the joints turn crumbly. Check the overnight forecast and cover fresh work with hessian if in doubt.
Frequently asked questions
Do I need planning permission to build a garden wall?
No, not if the wall is under 2m, or under 1m beside a highway. These limits come from permitted development rules and cover most garden walls. Listed buildings and some conservation areas need consent regardless of height. Check your council’s position on the Planning Portal before you dig.
How deep do garden wall footings need to be?
Pour concrete 150mm deep for walls under 1m, up to 300mm for taller walls. Dig the trench down to firm subsoil first, typically 400-500mm in clay. Make it 300mm wide for a half-brick wall and 450mm for a one-brick wall. Keep the concrete top at least 150mm below ground level.
What is the best mortar mix for a garden wall?
Use 1 part cement to 5 parts building sand with plasticiser. Measure with a bucket, not a shovel, so every batch matches. A workable mix holds its shape on the trowel and spreads cleanly. Use each batch within two hours and never add water to revive it.
How many brick courses can you lay in a day?
Lay no more than four to six courses a day on a garden wall. Fresh mortar cannot carry more weight until it has stiffened overnight. Push higher and the lower joints squeeze, throwing the wall out of level and plumb. Two short sessions beat one long one.
Why do garden walls need coping?
Coping stops rain soaking down into the brickwork and freezing. A saturated brick can lose its face in one hard frost, because water expands 9% as it freezes. Brick on edge, concrete coping stones and creasing tiles all work. Pick one with an overhang so water drips clear of the face.
Can you lay bricks in cold weather?
No, never lay bricks when the temperature is below 3C and falling. Frost stops cement curing and turns fresh joints crumbly and weak. Cover new work with hessian or polythene if frost threatens overnight. In the UK, April to October is the reliable building window.
With the wall up and coped, the brickwork bug tends to bite. For a timber project on the same scale, read our guide to building a raised deck, or browse the full how-to section for the next job.
Lawrie has been gardening in the West Midlands for over 30 years. He grows his own veg using no-dig methods, keeps a wildlife-friendly garden, and writes practical advice based on real UK growing conditions.