Soil Blocking: Seed Starting Without Pots
Soil blocking guide for UK growers: 20mm and 50mm block sizes, a 3:1:1 mix recipe, stamper tools from £18 and why air-pruned roots transplant faster.
Key takeaways
- A 50mm four-block stamper costs £18-35 and replaces module trays for most crops
- The mix is 3 parts sieved peat-free compost, 1 part perlite, 1 part loam, wetted to a putty
- Air pruning stops roots circling: tips dry at the cube face and the root branches inside instead
- 20mm mini blocks fit 20 sowings in the footprint of a postcard, then nest into 50mm cubes
- In a 120-seedling trial, blocked lettuce hearted up 8-10 days before module-grown plants
- Blocks need bottom watering only; an overhead can erodes the cube edges within a week
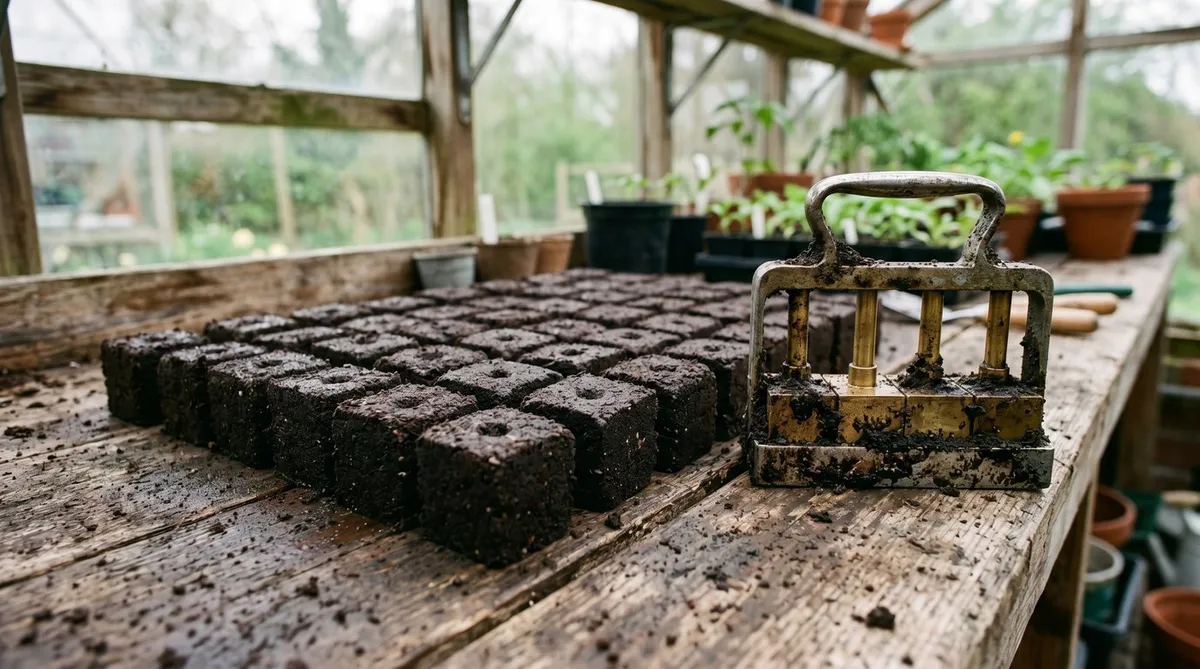
Soil blocking starts seeds in compressed cubes of compost, with no pots, cells or trays to buy, wash or store. A 50mm stamper costing £18-35 presses four blocks at a time, and a 20mm mini blocker fits 20 sowings into the footprint of a postcard. The pay-off is in the roots. Because each cube stands in open air, root tips stop at the face instead of circling, and the seedling plants out with almost no check. I tested 120 seedlings in my Stafford greenhouse through spring 2026, half in blocks and half in module trays, and the blocked lettuce hearted up 8-10 days ahead. This guide covers the kit, the mix recipe, the pressing technique and where blocks genuinely beat modules.
What is soil blocking and why does it work?
A soil block is a free-standing cube of compressed growing medium that acts as both pot and compost. The stamper packs a wet mix tight enough to hold shape, and a pin on the press leaves a dimple in the top of each cube for the seed. You sow, the roots grow through the cube, and at planting time the whole block goes into the ground untouched.
The idea is old. Market growers pressed blocks long before plastic cell trays arrived in the 1960s, and organic growers kept the method alive because it cuts plastic out of propagation entirely. Garden Organic has promoted blocking for decades as part of low-waste growing.
The method earns its place for two practical reasons. First, roots in a block are never disturbed at transplanting, because nothing is pulled, squeezed or knocked out of a cell. Second, the open faces of the cube air-prune the roots, which changes the root structure itself. More on that below. The trade-off is honest: pressing blocks is slower than filling a tray, and the cubes demand more careful watering. If you already sow seeds indoors each spring, blocking slots straight into the same routine.
Which soil blocker should you buy?
Buy the 50mm four-block stamper first. It is the workhorse size, right for tomatoes, brassicas, lettuce, courgettes and most half-hardy annuals from sowing through to planting out. The classic Ladbrooke brass-and-steel version costs £28-35 and mine shows no wear after heavy use; lighter copies sell for £18-25 and press perfectly serviceable cubes.
| Block size | Blocks per press | Tool cost | Best for | Time at this size |
|---|---|---|---|---|
| 20mm mini | 20 | £25-40 | Germinating small or costly seed in bulk | 10-20 days, then nest on |
| 50mm standard | 4 | £18-35 | Tomatoes, brassicas, lettuce, annuals | Sowing to planting out |
| 75-100mm maxi | 1 | £30-45 | Potting on big plants, cucurbits | Optional final stage |
The 20mm mini is the clever one. Twenty cubes sit in roughly 10cm by 13cm, so a single heated propagator lid covers 60-80 sowings. I germinate slow, expensive seed at this size, then move the winners on and bin nothing bigger than a sugar cube when one fails. Most 50mm stampers come with optional 20mm cube inserts too, which press a 20mm square hole in the top of each big block. That hole is the key to potting on, covered further down.
The maxi sizes are optional. A 50mm block carries a tomato comfortably to planting-out stage, so I only press 100mm cubes for cucumbers and squash sown in late April.
 The two tools that matter: a 50mm four-block stamper at £18-35 and the 20mm twenty-block mini at £25-40.
The block mix recipe that holds together
The mix is 3 parts sieved peat-free compost, 1 part perlite, 1 part loam, by volume. Measure with anything; I use a 1-litre plant pot. The loam is the binder. Straight multipurpose compost crumbles within days because there is nothing fibrous-fine holding the cube edges, and this is the single most common reason people give up on blocking.
Each part does a job:
- Compost, 3 parts. Sieve it to 6mm first. Bark chunks jam the press and leave voids that crack the cube. A £7-10 garden sieve clears a 40-litre bag in about 15 minutes. Any decent bagged product from our peat-free compost guide works as the base.
- Perlite, 1 part. Keeps the compressed cube breathing. A compressed block without it can sit airless and sour. Sharp sand substitutes at the same ratio and adds helpful weight to tall blocks.
- Loam, 1 part. Sieved molehill soil, sieved garden soil or bagged topsoil. The clay fraction glues the block. Stacked, rotted turf is the traditional source if you have it.
Now the water, which is where most first attempts fail. Blocking mix is far wetter than potting compost, closer to putty than crumble. Add water and turn the mix until a squeezed handful holds its shape and weeps a few drops between your fingers. For my 1-litre measure, that lands at roughly 1 part water to every 3 parts dry mix. Too dry and the blocks shear apart as the press lifts. Too wet and they slump into puddings within the hour.
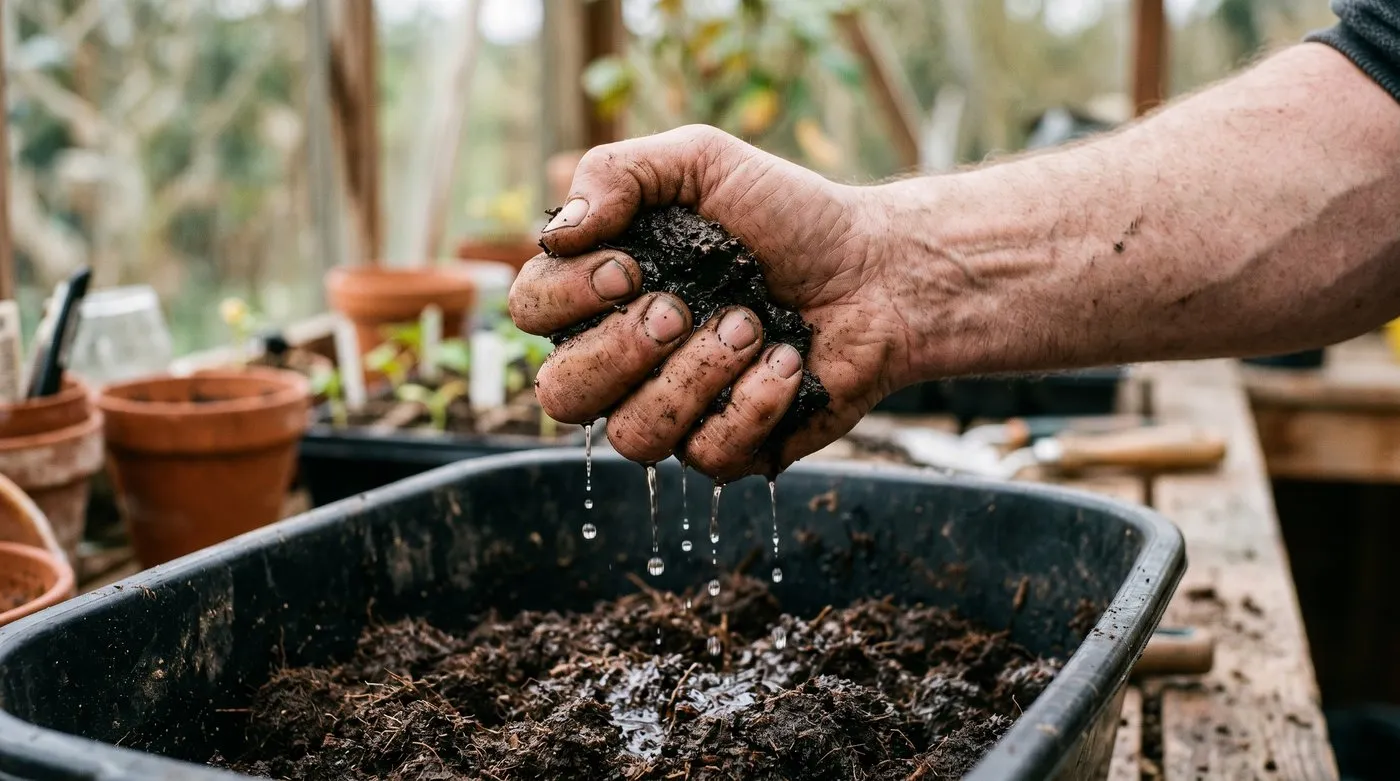 The squeeze test: properly wetted mix holds its shape and weeps a few drops, far wetter than normal potting compost.
How do you make soil blocks step by step?
Pressing good blocks takes four moves and about 5 seconds per press once the rhythm settles. Work on a flat tray with low sides; I use standard seed trays without drainage holes, which each hold 24 blocks of 50mm.
- Charge the press. Push the stamper into the wetted mix with a twisting motion, twice, until mix squeezes out of the top vents. Pack it against the bottom of the trug so each chamber fills solid.
- Scrape the base. Drag the loaded press across the trug edge so each cube face sits flush. A ragged base rocks and crumbles.
- Eject onto the tray. Set the press down where the blocks will live, squeeze the handle, and lift the frame clear in one steady motion. Leave 10-15mm between rows of blocks so air reaches every face.
- Sow into the dimple. One or two seeds per block, then cover to the depth on the packet using dry sieved compost or vermiculite. Nothing else moves until germination.
Heat and timing follow normal indoor sowing rules. Most spring crops germinate at 18-21°C, and the full species-by-species figures are in our guide to seed germination temperatures. A block exposes more surface than a cell tray, so check moisture daily on a heat mat. The cube should always look dark with moisture; pale grey edges mean it is drying.
Watering is the one hard rule: bottom water only. Stand the tray in 2cm of water for 10-15 minutes and let the cubes wick it up, exactly as described in our guide to bottom watering seed trays. A rose on a watering can erodes block edges within a week. After about day ten the roots knit each cube together and the blocks firm up noticeably, but I still never water mine overhead.
How air pruning grows better roots
Air pruning means a root tip stops growing when it reaches dry air at the cube face, and the plant branches behind the stopped tip instead. In a plastic cell, that same root hits the wall, turns, and keeps growing in a circle. By planting time a module seedling can carry a few long roots wound around the plug. A blocked seedling carries a dense web of short, branched roots filling the whole cube, with fresh white tips paused at every face and ready to surge into garden soil.
The difference shows fast after transplanting. The circling module roots must reorganise before the plant resumes growth, which is the “transplant check” that stalls plants for a week or more. Blocked roots just carry on. In my spring 2026 trial, not one of the 28 blocked tomatoes wilted on planting day, while 9 of the 27 module-grown plants flagged in the first afternoon sun, and the blocked lettuce hearted up 8-10 days ahead of its module twins.
Air pruning also removes the deadline pressure. A module seedling left 2-3 weeks too long becomes root-bound, and our guide to fixing root-bound seedlings exists because it happens to everyone. A block cannot bind in the same way. Mine have sat a fortnight past their ideal date with no spiralling, because every root that reached an edge had already stopped and branched.
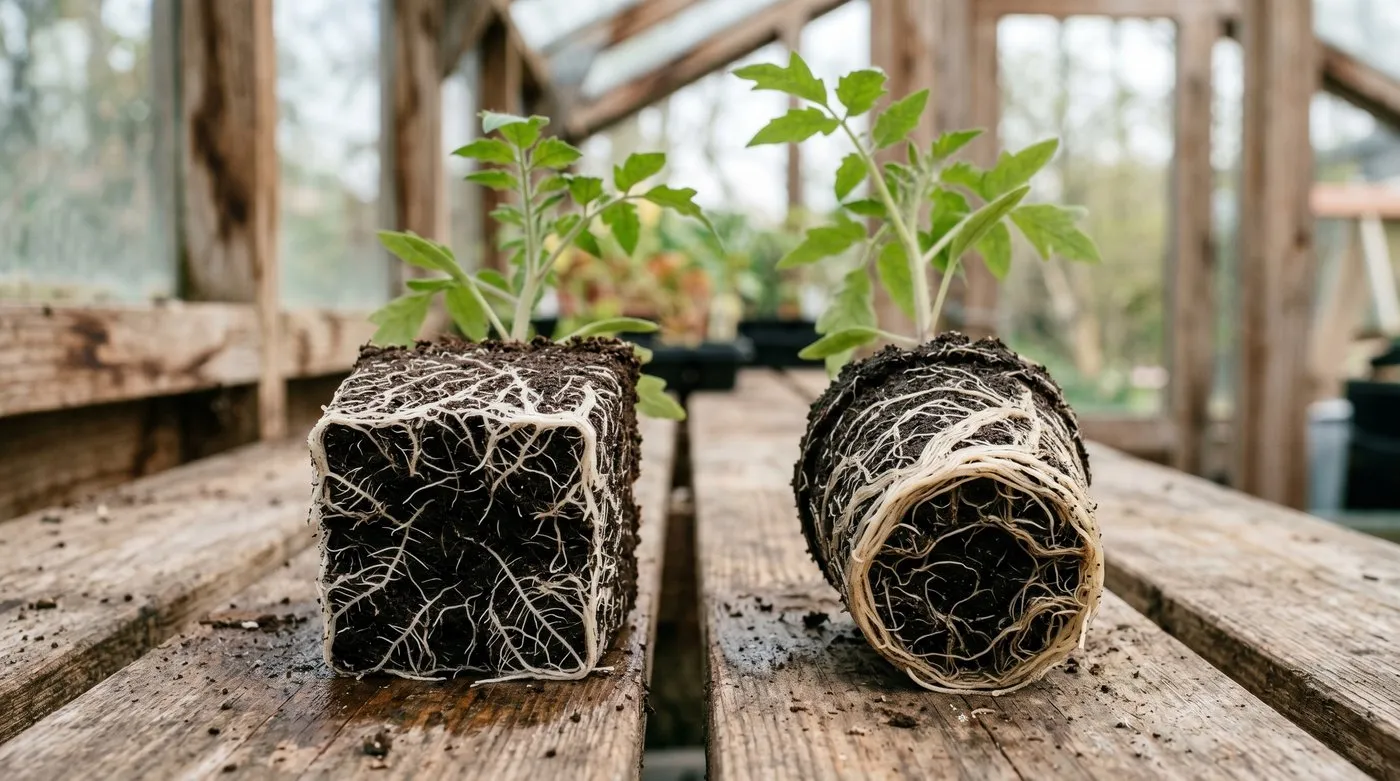 Day 38 from sowing: the block’s roots branch and stop at the faces, while the module plug’s roots circle the cell wall.
Potting on by nesting: 20mm into 50mm
Nesting means dropping a whole 20mm block into a matching square hole pressed in the top of a 50mm block. No tipping out, no teasing apart, no handling stems. Fit the 20mm cube insert pins to the 50mm stamper, and every large block comes out with a ready-made socket.
The sequence works like this. Germinate in 20mm minis, where 20 sowings occupy a postcard of heated space. After 10-20 days, once the first true leaf shows, press a batch of 50mm blocks with sockets and drop each mini in flush. Roots cross the join within 2-3 days; mine show white tips entering the big block by the second morning. The seedling never registers the move.
The benefit is heated space arithmetic. In February my propagator holds 60 sowings at 20mm. Only the ones that germinate earn a 50mm block, so the bench carries zero blanks. With module trays, a 40% germination round of old parsnip seed leaves you heating 40% empty cells for weeks. From the 50mm block, plants go straight to hardening off and then the ground, or into a 100mm maxi block for the big cucurbits.
 Potting on without touching a root: the 20mm block drops into its 50mm socket and roots cross the join within 2-3 days.
Soil blocks vs module trays: which is better?
Blocks win on root quality and transplant recovery; modules win on speed and stacking. Neither is the right answer for everything, and I now run both. Here is how they compared across my spring 2026 trial and a decade of module sowing before it.
| Factor | Soil blocks | Module trays |
|---|---|---|
| Kit cost to start | £18-40 stamper, lasts decades | £2-8 per tray, 1-4 seasons each |
| Time per 60 sowings | 25 minutes mixing and pressing | 8 minutes filling and sowing |
| Transplant check | Minimal; 0 of 28 tomatoes wilted | 9 of 27 tomatoes flagged on day one |
| Root structure | Branched, air-pruned at every face | Circling once roots reach the wall |
| Overrun tolerance | Sat 14 days late with no spiralling | Root-bound 2-3 weeks past ideal date |
| Watering | Bottom water only, daily checks | Overhead or bottom, more forgiving |
| Space efficiency | 20mm minis: 20 sowings per postcard | Fixed cell count per tray |
| Plastic | None | Replaced as trays crack |
The honest costs sit in the time row. Pressing is a pleasant job at the potting bench, but it is three times slower than filling trays. If you raise 500 bedding plugs a spring, modules remain the sensible tool for the bulk and blocks for the plants that resent disturbance. My own split: tomatoes, lettuce, brassicas and anything sown before March go in blocks; mass bedding and quick salads stay in trays.
Common soil blocking mistakes
- Using compost straight from the bag. Unsieved, unamended multipurpose crumbles within days because nothing binds it. Sieve to 6mm and add 1 part loam per 3 of compost. This one error causes most abandoned blockers.
- Mixing too dry. Blocking mix should feel like putty and weep when squeezed. A mix that feels like normal potting compost is 30-40% short of water, and the blocks shear as the press lifts.
- Watering overhead. A watering can rose strips 2-3mm off every edge per pass and the cubes round off into mush within a week. Stand trays in 2cm of water for 10-15 minutes instead.
- Pressing blocks touching each other. Faces in contact stay damp, roots cross between cubes and the air-pruning effect dies. Leave 10-15mm between rows when you eject.
- Letting minis dry out on a heat mat. A 20mm cube holds barely 8ml of water and can dry in a day at 21°C. Check minis every morning; pale grey faces mean water now.
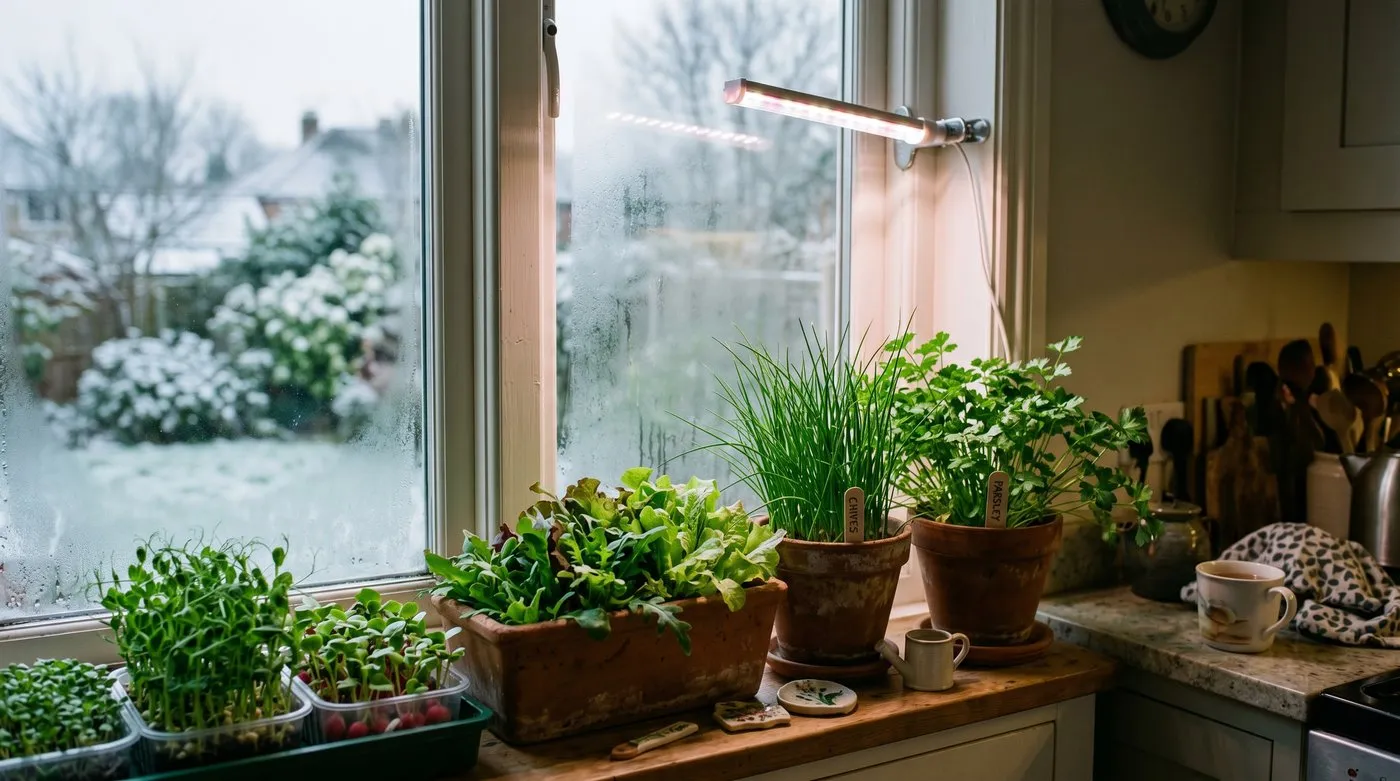
- Sowing under weak light because the windowsill is full. Blocks dry faster than trays, and stretched seedlings flop before their roots fill the cube. If sowing in February, the figures in our guide to grow lights for seed starting show what a £25-40 LED bar fixes.
Why we recommend starting with the 50mm blocker: I bought the 20mm mini first, reasoning that small blocks meant less mix and less risk. That was the wrong way round. The minis demand daily watering, their seedlings need nesting on within three weeks, and I lost a batch of February antirrhinums to one missed morning. The 50mm stamper is the forgiving one. Its cubes hold 8-10 times the water, carry a tomato from seed to planting-out with no intermediate step, and shrug off a weekend away. Start at 50mm, learn the mix, then add the mini for expensive seed. The pair together cost me £61 in 2024 and have retired every cell tray I own except the bedding ones.
The RHS guidance on sowing under cover applies to blocks unchanged: the same temperatures, the same pricking-out-free logic, the same hardening off. Blocking just swaps the container for the compost itself.
Frequently asked questions
What is soil blocking?
Soil blocking raises seedlings in compressed cubes of compost with no pot. A metal stamper presses a wetted mix into free-standing blocks, each with a seed dimple on top. The block is both container and growing medium, so there is nothing to remove at planting time and no plastic to store or replace.
What mix do you use for soil blocks?
Use 3 parts sieved peat-free compost, 1 part perlite and 1 part loam. Sieve the compost to 6mm first or the press will jam on bark chunks. Add water until a squeezed handful holds shape and weeps a few drops. Straight multipurpose compost from the bag crumbles because it lacks the loam binder.
Do soil blocks fall apart when you water them?
Not if you bottom water; overhead watering erodes blocks within days. Stand the tray in 2cm of water for 10-15 minutes and let the cubes draw it up. Roots knit the block together from about day ten, after which it firms up noticeably.
Are soil blocks better than module trays?
Blocks transplant with less check but take more time per sowing. In my trial, blocked lettuce was 8-10 days ahead at hearting and no blocked tomato wilted after planting. Modules win on speed and stacking. Pressing 60 blocks took me 25 minutes against 8 minutes filling two trays.
What size soil blocker should I buy first?
Buy the 50mm four-block stamper first, as it suits most crops. It handles tomatoes, brassicas, lettuce, courgettes and half-hardy annuals from sowing to planting out. Add the 20mm twenty-block mini later for slow, expensive seed you want to germinate in bulk before nesting on.
Can you make soil blocks without a blocker tool?
Yes, press mix firmly into a cut-down yoghurt pot, then tap it out. The DIY version works but the cubes vary in density and lack the seed dimple. At £18-35 for a stamper that presses four identical blocks in 5 seconds, the tool repays itself within a season or two of trays.
Blocks slot into the same spring rhythm as any indoor sowing, so plan the season with our seed sowing calendar and time each crop properly. For everything else raised from seed, the full growing section covers varieties, timings and troubleshooting. For crops you sow straight into the ground, seed tapes handle the spacing outdoors.
Lawrie has been gardening in the West Midlands for over 30 years. He grows his own veg using no-dig methods, keeps a wildlife-friendly garden, and writes practical advice based on real UK growing conditions.