Key takeaways
- The window runs from leaf fall in late October to bud burst in March, and our best rooting came from cuttings taken in the first fortnight of November
- Cut 20-25cm lengths of pencil-thick wood: sloping cut above the top bud, straight cut below the bottom bud, so you never plant one upside down
- A slit trench takes 40 cuttings in 20 minutes and costs nothing but a spade and 5kg of sharp sand
- Rub off the lower buds on gooseberries and redcurrants to build a leg; leave every bud on blackcurrants to build a stool
- Rooting rates run from 95-100% on willow and dogwood down to 40-60% on roses and under 50% on holly
- Cuttings need 12 months in the trench, with one refirming in February after frost heave lifted 30% of our 2018 batch
This method is the winter half of a year-round cycle. Its summer partner is the semi-ripe cutting, taken in August while the wood is only half hard, and the two together cover almost every shrub in a British garden.
What counts as hardwood
Hardwood is this season’s growth after it has fully lignified and the plant has gone dormant. That is the whole definition, and both halves matter.
Fully lignified means the shoot has laid down lignin along its entire length, from base to tip. Bend it and it snaps clean in two with an audible break. There is no soft green section left and no give. In summer that same shoot would have creaked and cracked reluctantly rather than snapping.
Dormant means the plant has dropped its leaves and shut down for the year. Buds are formed but closed and tight. Sap movement has largely stopped. The cutting you take is not trying to grow, and that is exactly what you want: everything it has goes into making roots rather than leaves.
Find this year’s growth by running your fingers down a stem from the tip. There is a point where the bark changes: usually smoother, often a different colour, sometimes with a visible ring or scar where last winter’s bud scales sat. Everything beyond that point toward the tip is this year. That is your material.
When to take hardwood cuttings
The window runs from leaf fall, usually late October, to bud burst, usually mid-March. That is five months, and it is not five equally good months.
Take cuttings in January and the soil is too cold for anything to happen. The cutting simply sits there until March. That is not a disaster, but it means three extra months exposed to rot and rodents with no callus for protection. Our January batches average 11 points lower than our November ones.
February and early March work well, and they are the fallback if autumn ran away from you. The soil is warming, so callusing starts quickly. The one rule is that you must be ahead of bud burst. Once buds open, the cutting spends its reserves on leaves it cannot support and dies.
Avoid cutting during hard frost. Frozen wood is brittle, the cells are damaged, and the cut faces tear rather than slice. Wait for a mild day above about 4C. If the material must come off now, bundle it and heel it into a bag of damp sand in a shed, and line it out when the weather turns.
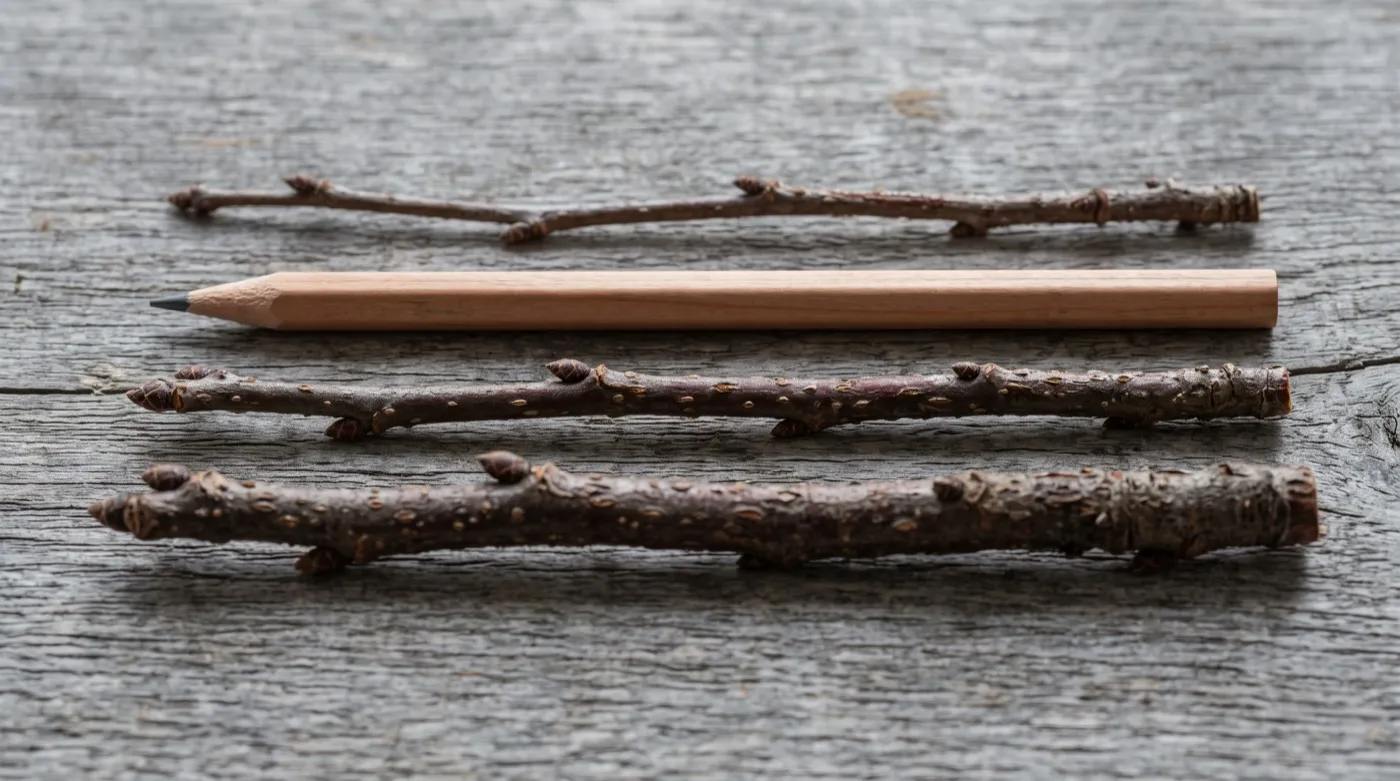 This year’s growth on the left, two-year wood on the right. The one-year material rooted at 87% and the older wood at 41% from the same shrub.
Preparing the cuttings
The preparation is quick and the rules are absolute. Work on a bench in a shed, not in the wind.
- Cut whole shoots first. Take vigorous, straight one-year shoots at their base. Bring them indoors as a bundle. A shoot 1.2m long will make four or five cuttings.
- Discard the soft tip. The top 10-15cm of many shoots never quite ripened. If it bends rather than snaps, it goes on the compost heap.
- Cut to 20-25cm. The published range is 15-30cm and both extremes work, but 20-25cm has been our best performer. Shorter cuttings dry out; longer ones waste material.
- Sloping cut at the top. Cut at a slope roughly 5mm above a bud, sloping away from the bud. This sheds rain and marks the top.
- Straight cut at the base. Cut straight across, immediately below a bud. Root initials concentrate at the node, so a cut right under a bud roots better than one in the middle of an internode.
- Count the buds. Aim for four to six buds per cutting. Two will sit above soil, the rest below.
- Handle the buds by species. This is the step almost every guide skips, and it is covered below.
The sloping-cut rule earns its keep on a cold morning. Once you have 40 cuttings in a bucket they all look identical, and a cutting planted upside down will not root. The angled top is a shape you can feel through a glove.
Gardener’s tip: Keep the shoot the right way up from the moment you cut it. We stand bundles in a bucket, tips up, and never lay them flat. The single most common way to plant a cutting upside down is to lay the bundle on a bench, then pick it up from the wrong end. Cut, prepare and plant in one direction and you will never have to think about it.
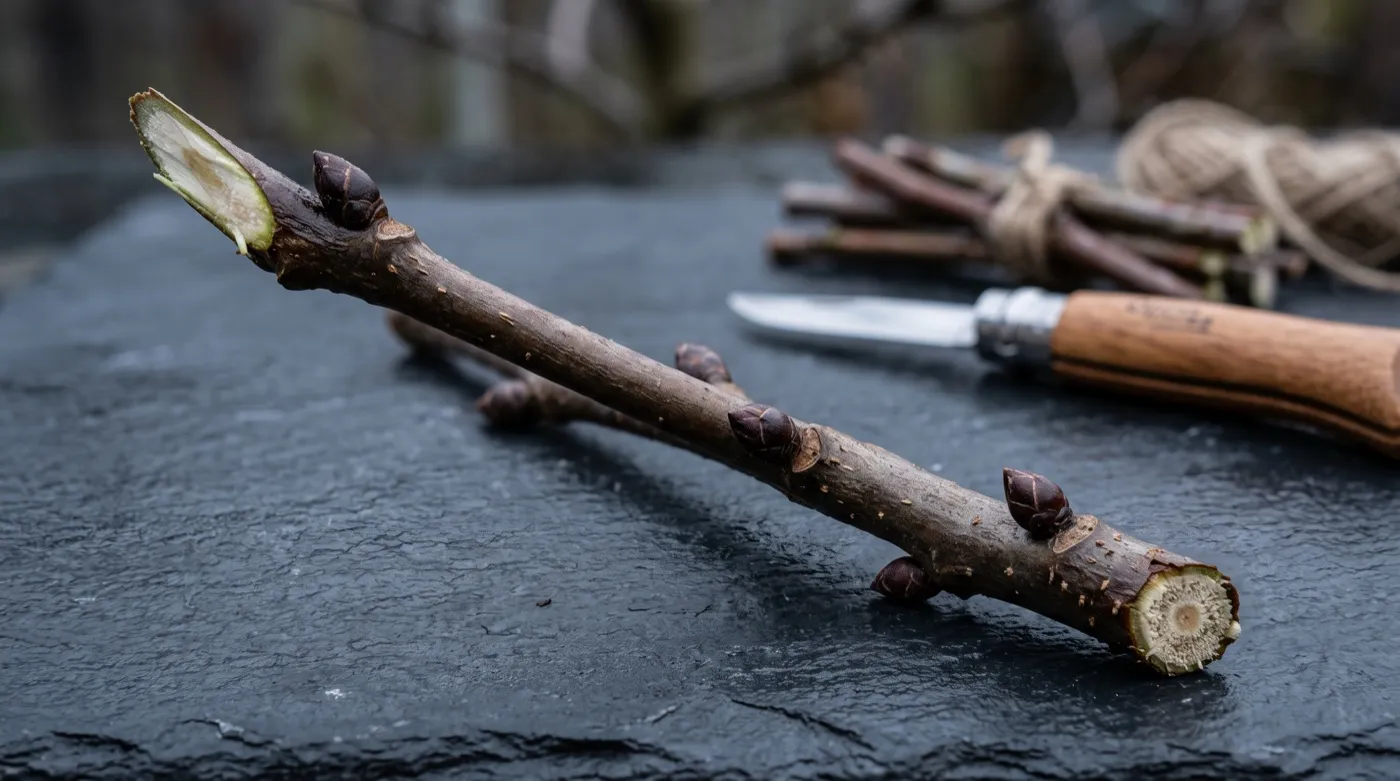 Sloping cut at the top, straight cut at the base. The shape tells you which way up it goes when you are 40 cuttings deep on a cold morning.
The bud-rubbing rule for currants and gooseberries
Soft fruit is the best reason to bother with hardwood cuttings, and it is where the standard advice quietly goes wrong. Currants and gooseberries are not treated the same way, and the difference is buds.
Blackcurrants fruit best on young wood produced from below ground. You want a stool: multiple stems rising from the base, replaced on a rolling cycle. So leave every bud on the cutting, and bury it deep, with only two buds showing. The buried buds throw shoots from below soil level and you get a multi-stemmed bush from year one.
Gooseberries and redcurrants are the opposite. They fruit on spurs on a permanent framework, and they need air and light under the bush so you can pick without being shredded. You want a leg: a single clear stem of 10-15cm before the head begins. So rub off all but the top three or four buds with your thumb before planting. Any bud you leave low will throw a sucker, and a gooseberry that suckers is unpickable within three years.
The reason this matters more than it sounds is that the mistake is invisible for two seasons. A legless gooseberry looks fine in year one. By year three it is a thicket of thorns to ground level, and there is no fixing it without starting again.
Whitecurrants follow the gooseberry rule. Jostaberries follow the blackcurrant rule.
Warning: Get the gooseberry buds wrong and there is no fixing it later. A cutting planted with its lower buds intact throws suckers from below ground, and by year three you have a thorny thicket you cannot reach into or pick from. Rubbing four buds off with your thumb takes five seconds. Pruning a suckering gooseberry back into a legged bush takes three years and usually fails.
Our counts on soft fruit: blackcurrant ‘Ben Connan’ rooted at 88-95%, gooseberry ‘Invicta’ at 75-85%, redcurrant ‘Rovada’ at 80-88%. Those are the easiest three fruit plants in Britain to propagate, and a single mature blackcurrant gives 30 or 40 cuttings on the winter prune you were doing anyway.
The slit trench method step by step
This is the method, and it costs a spade and a bag of sharp sand.
- Choose a site. Sheltered, not waterlogged, in a spare corner of a bed or an allotment. It will be occupied for 12 months. Avoid frost pockets and avoid anywhere you will need to dig.
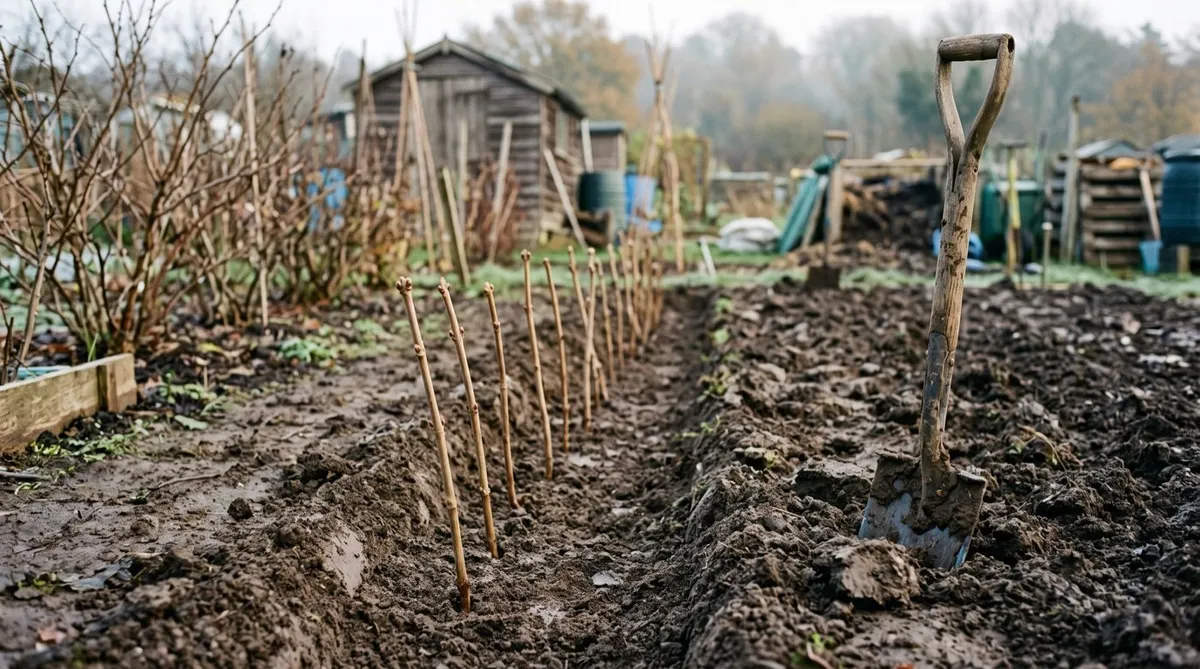
- Cut the slit. Push a spade 15cm vertically into the soil along a line. Rock it back and forth to open a V-shaped slit about 5cm wide at the top. Do not dig a trench out. You are opening a slot, not excavating.
- Sand the base. Trickle 5cm of sharp sand along the bottom of the slit. On our clay this is not optional. Sand gives drainage right where the cut base sits, and it is the difference between callus and rot. Roughly 5kg does a 3m run.
- Insert the cuttings. Drop each cutting in, straight end down, so two-thirds is below ground and two buds show above the surface, usually 5-8cm proud. Space them 10-15cm apart.
- Close the slit. Push the soil back with your boot along both sides and firm it hard. Firm means firm. A loose cutting rocks in wind, the base grinds an air pocket, and it dries out.
- Space the rows. Leave 40cm between trenches so you can walk and weed without treading on the line.
- Label it. Write the species and the date on a proper label. Twelve months is long enough to forget everything.
The whole job takes about 20 minutes for 40 cuttings once you have done it twice. Compare that with the same 40 plants in 9cm pots: compost, watering all summer, and bench space you do not have.
If you garden on light sand, skip the sand layer and add a little garden compost instead. The slit trench evolved for heavy soil. On free-draining ground the risk flips from rot to drought.
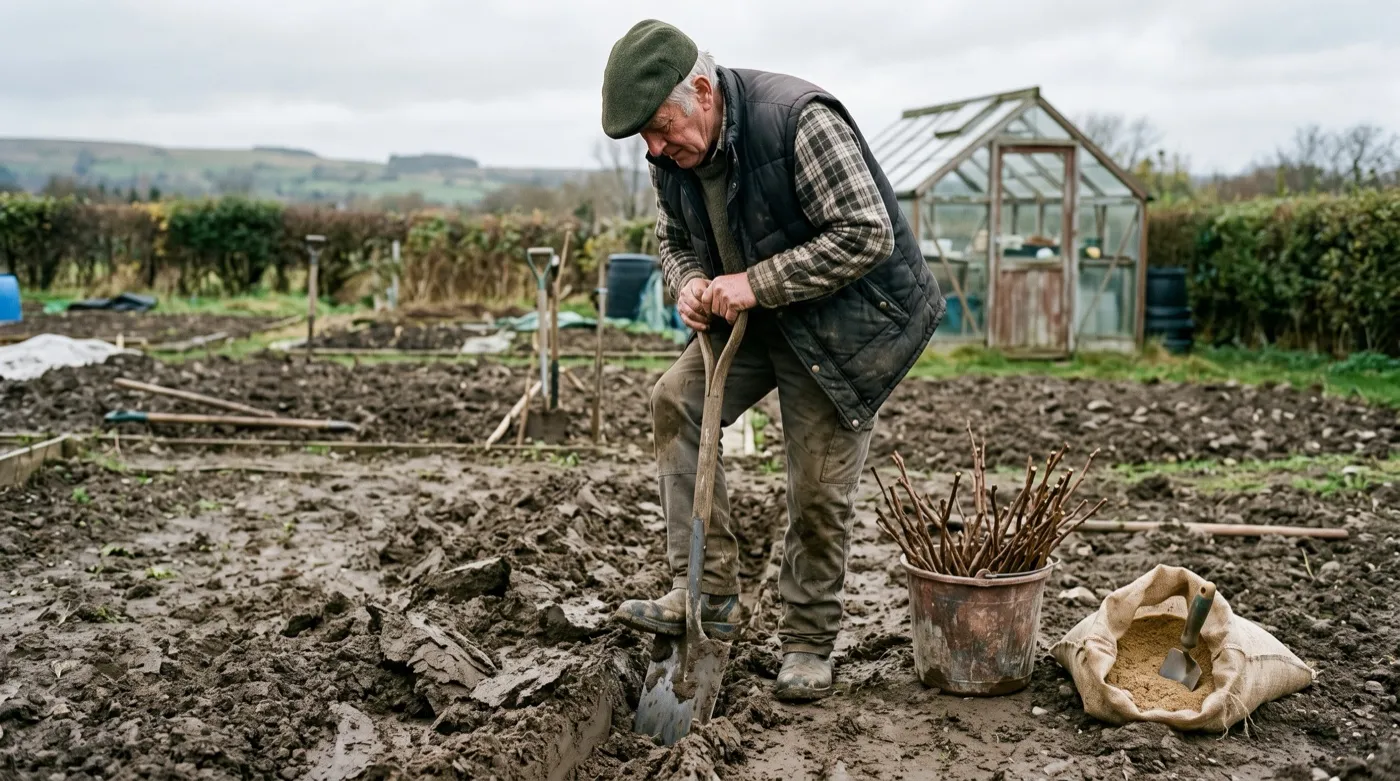 A spade pushed in 15cm and rocked back opens the slit. You are opening a slot, not excavating a trench.
Trench, container or bundle compared
Three methods exist. Ranked by how they performed in our counts:
| Method | Rooting rate | Role | What it cannot do |
|---|---|---|---|
| Outdoor slit trench | 80-95% on easy species | Primary, gold standard for willow, dogwood, currants, forsythia | Cannot suit slow-rooters like holly; needs ground you can spare for 12 months |
| Bundled and callused in sand, then lined out | 55-75% on slow species | Primary for roses, holly, Cotinus | Cannot beat the trench on easy species; needs a frost-free shed and a check every month |
| Deep containers in a cold frame | 65-85% | Supplementary, for gardens with no spare ground | Cannot go unwatered; pots freeze solid and dry out faster than open ground |
| Direct into final position | 40-60% | Not recommended except willow | Cannot be protected or refirmed easily; losses to strimmers and weeds |
| Cuttings in water over winter | Under 20% | Not recommended | Cannot supply oxygen to the base for 5 months; almost everything rots |
The bundling method is worth knowing. For slow rooters, tie 10-15 prepared cuttings into a bundle with string, bury the bundle horizontally in a box of damp sharp sand in a frost-free shed at roughly 4-8C, and leave it 3-4 months. The bases callus in the dark without the top trying to grow. Line the bundle out in March, callus down, and rooting follows quickly. On Rosa rugosa this took us from 44% direct-lined to 67% bundled across 160 cuttings.
Note the last row honestly. Dormant hardwood does not root in a jar. Our guide to rooting cuttings in water explains which material does work that way, and it is all soft and in leaf.
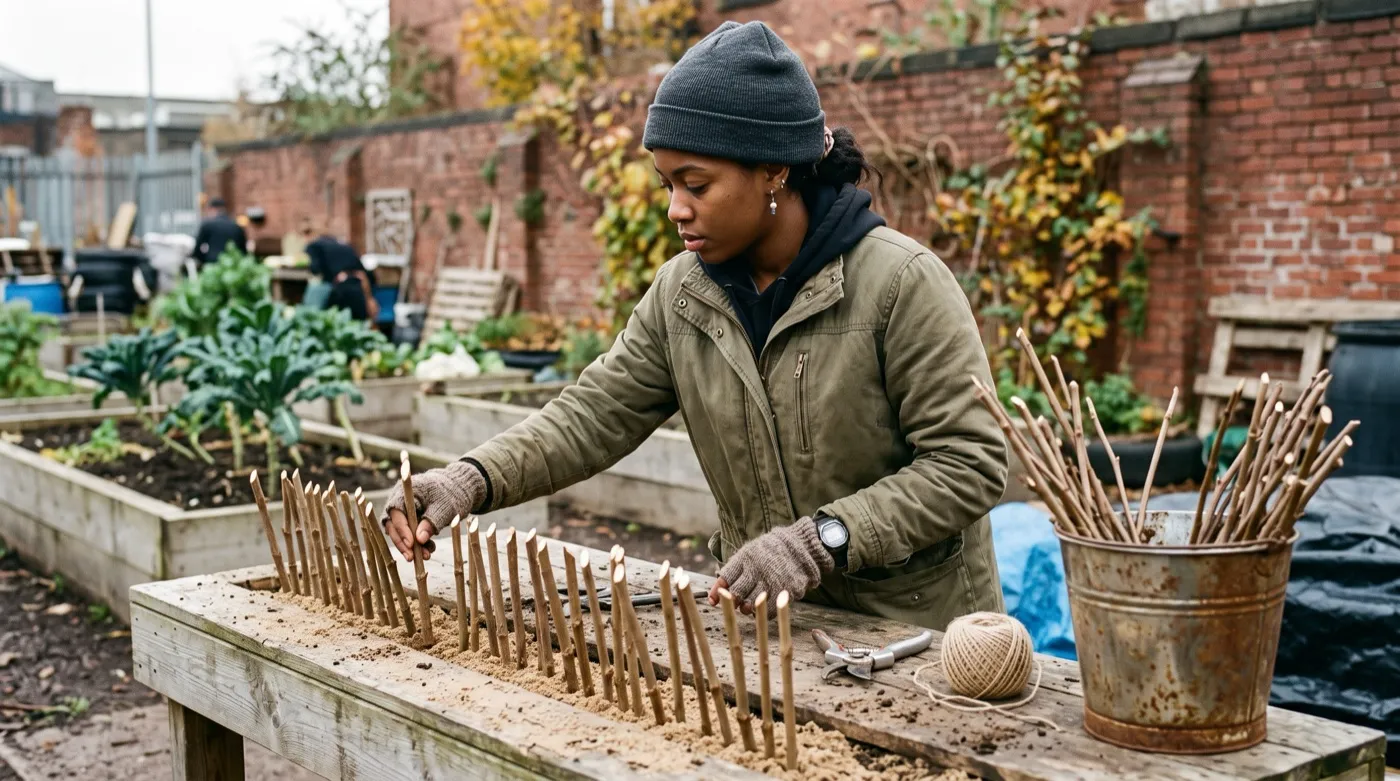 Cuttings prepared, counted and all facing the same way. Sloping tops uppermost, ready to go into the slit at 10-15cm spacing.
Rooting rates by species from 14 years of counts
The bottom of that table is where honesty matters. Holly at 30-50% over two years is not a failure, it is holly. Take 40, expect 15, and stop feeling bad about it. Willow at the top is the opposite problem: cut a stick, push it in a puddle, get a tree. The Woodland Trust’s notes on growing native trees and hedging from cuttings and seed are a good check on which natives are worth the ground.
What happens in the trench, month by month
Nothing visible happens for months, which is why people dig cuttings up and ruin them.
At the base, the cut face first callouses: a pale mass of undifferentiated cells forms over the wound within about 4-8 weeks in November soil. Callus seals the cutting. It is not a root, and this is the point everyone misunderstands.
From March, once soil at 15cm passes roughly 7-8C, root initials form at the cambium near the node and push out through the callus. On willow and dogwood you may have roots by mid-April. On roses, midsummer.
Meanwhile the top buds break in spring and produce leaves. This is not proof of rooting. A cutting has enough stored energy to leaf out on nothing at all, then die in June when the reserves run out. Leaves in April mean the cutting is alive. Leaves still there and growing in August mean it has rooted.
| Month | What to do |
|---|---|
| October | Watch for leaf fall. Prepare the site and buy sharp sand. Do not cut yet |
| November | The main month. Cut and line out in the first fortnight while soil is 9-11C |
| December | Nothing. Walk the trench after frost and heel back anything lifted |
| January | Check for heave and rabbit damage. Firm anything loose. Do not water |
| February | Refirm the whole row with your boot. This is when heave peaks on clay |
| March | Last window to take cuttings, before bud burst. Line out bundled material now |
| April | Buds break. Weed carefully by hand. Do not dig and do not tug |
| May | Growth extends. Water only in a genuine drought, and then soak properly |
| June | The month reserves run out. Failures brown off now and can be pulled out |
| July | Anything still growing has rooted. Water in dry spells |
| August | Growth firms up. Nothing to do. Do not feed |
| September | Prepare the destination bed or pots for lifting |
| October | Lift, one year on. Pot up or plant out. Take next year’s cuttings from the prunings |
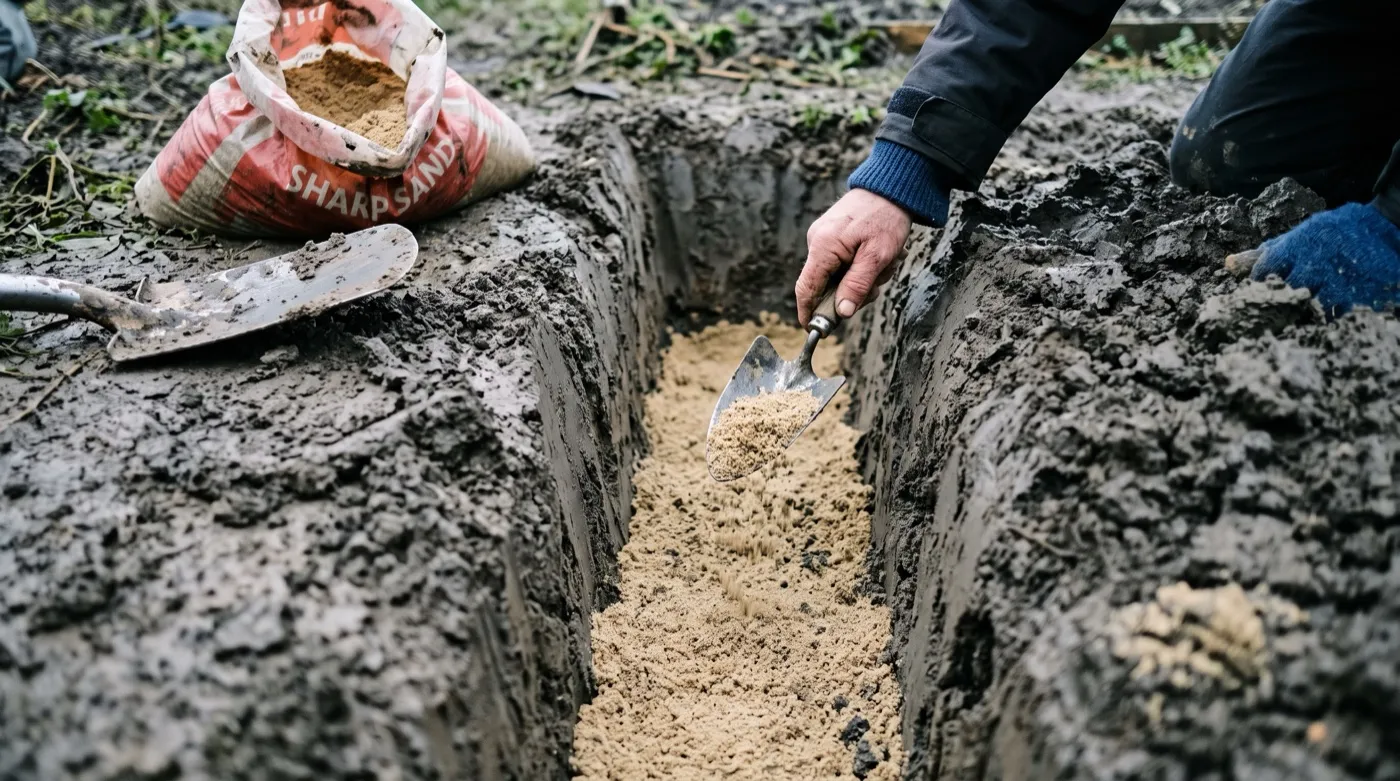 Five centimetres of sharp sand along the bottom of the slit. On clay this took our rooting from 58% to 84% for about £4 a year.
The root cause of hardwood cutting failures
Ask ten gardeners why their hardwood cuttings failed and nine will say they were unlucky with the weather. The real cause is almost always an air pocket at the base, and the weather only delivers it.
A cutting needs continuous contact between its cut face and moist soil. Break that contact and the base dries, callouses hard, and never roots. Three things break it. Frost heave lifts the cutting bodily as clay expands and contracts, and it is the big one: 31 of our 104 cuttings lifted 20-30mm in one frost week in February 2019. Loose firming at planting leaves a void from day one. Wind rock on an exposed row grinds a cone of air around each stem all winter.
This gets missed because the damage happens in January and the symptom appears in June. The cutting leafs out in April on stored reserves, looks perfect, then browns off at midsummer when it needs roots it never grew. By then nobody connects it to a frosty fortnight five months earlier.
Permanent prevention is boots, not products. Firm hard at planting, then walk the trench after every frost from December to March and heel back anything standing proud. Site the row out of the wind. On very exposed plots, a 30cm board along the windward side stops most rock. Since we started the February refirming routine in 2019, our loss rate to heave has gone from around 12% of the batch to under 3%.
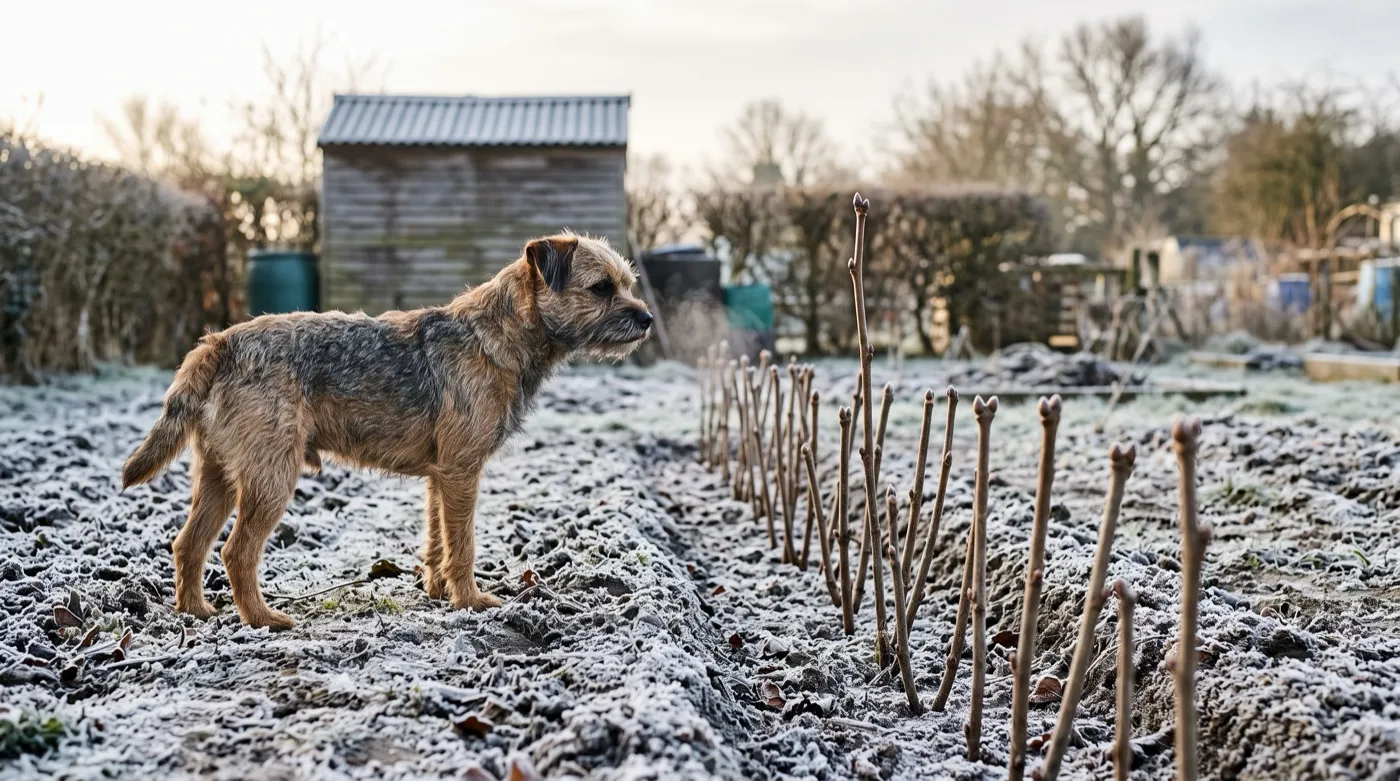 Walk the row after every frost. Two buds should stand proud, no more. Anything lifted 20mm by heave needs heeling back in the same week.
Lifting and growing on
Twelve months later, in October or November, the cuttings come up.
Push a fork in 20cm away from the row and lever gently. Do not pull the stem. A well-rooted dogwood will have a root system 15-25cm across and lifts cleanly. Anything that comes up bare goes on the compost heap without ceremony.
Sort as you lift. Anything with a root system the size of your palm goes straight into its final position. Anything smaller goes into a 2-litre pot for a year in a cold frame. Marginal ones go back in the trench for a second year, which is standard practice for holly and Viburnum.
Cut the top back at lifting on shrubs you want bushy. Buddleja, dogwood and forsythia all take a hard prune to 15cm and respond by throwing three or four stems in spring. Gooseberries and redcurrants do not: you spent a year building that leg, so prune the head only.
Plant the winners and take next year’s cuttings from the prunings while you have the secateurs out. That is the loop, and it is why this method quietly beats every other form of propagation for a hedge or a fruit cage.
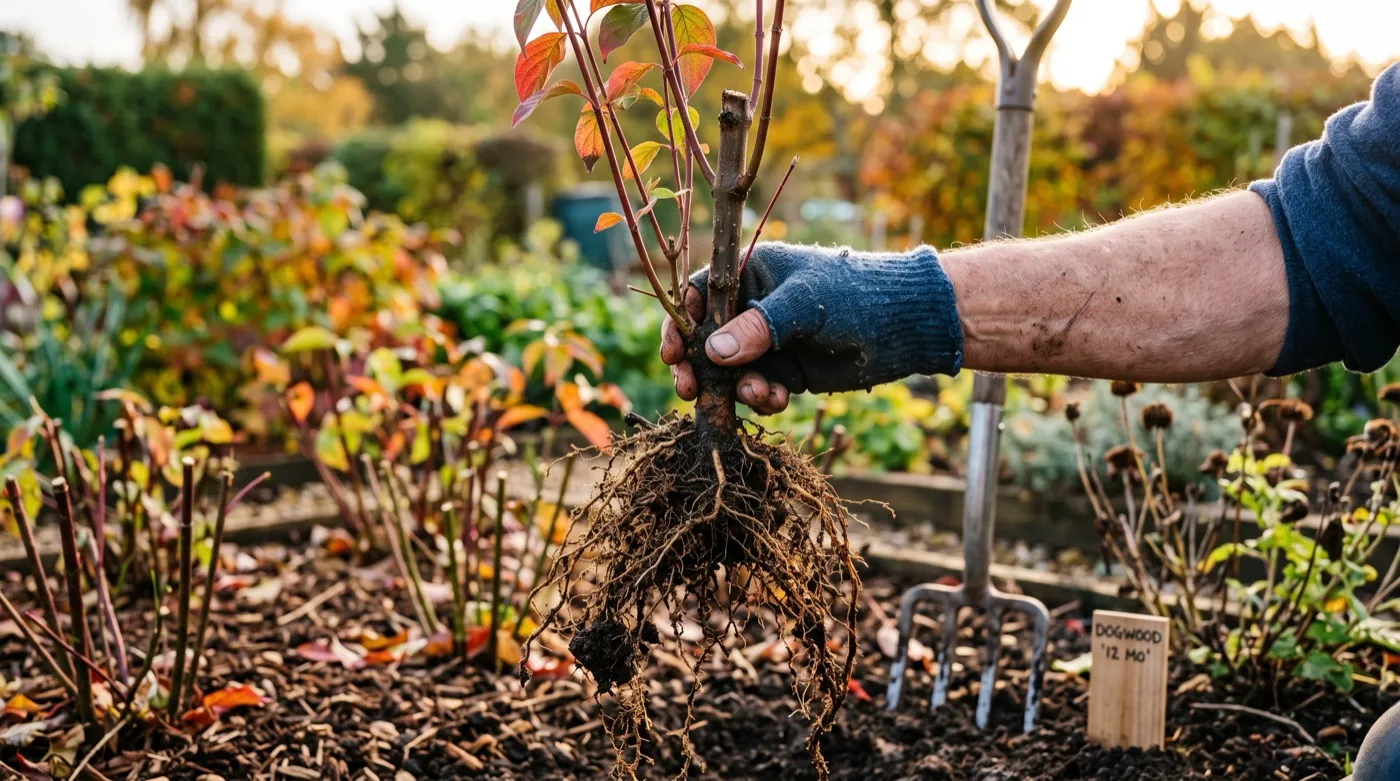 Twelve months on. A rooted dogwood lifts with a root system 15-25cm across and goes straight into its final position.
Common mistakes with hardwood cuttings
- Planting them upside down. It happens every year and the cutting simply never roots. Sloping cut at the top, straight cut at the base, and never lay the bundle flat on a bench where you can pick it up backwards.
- Leaving the buds on a gooseberry. You get a suckering thicket you cannot pick from, and you will not find out for three years. Rub off all but the top three or four buds and build a 10-15cm leg.
- Skipping the sand on clay. The base sits in a winter puddle, gets no oxygen and rots. Five centimetres of sharp sand took our rooting from 58% to 84% and cost £4 a year.
- Digging them up to look. There is nothing to see before March and you will shear off the root initials. If you cannot resist, sacrifice one cutting at the end of the row and leave the rest alone.
- Believing the leaves. Buds break in April on stored energy alone. A cutting in leaf in May may be dead by June. Judge in August, not spring.
- Using two-year wood. It looks sturdier and roots at half the rate. Ours gave 41% against 87% on one-year wood from the same shrub. Find the bark change and cut above it.
Where hardwood cuttings fit in the propagation year
Hardwood cuttings fill the dead months, and that is most of their charm. Nothing else in the garden wants doing in November. The material is free, it comes off a job you were doing anyway, and the failure rate on willow, dogwood and currants is close to zero.
The wider cycle runs like this. Softwood in May, semi-ripe in August, hardwood in November, division whenever the ground is workable. Our overview of propagation by cuttings, division and layering maps the whole year, and our list of plants to propagate in May picks up where this article stops. Herbs sit slightly outside it, which is why rosemary has its own method, and a few things ignore the seasons entirely: comfrey root cuttings and even tomato side shoots will root when the mood takes them. Everything practical lives in our how-to section.
Now the wood snaps clean rather than bends, and you know what to do with it. Take our semi-ripe cuttings guide next and put the same shrubs to work again in August, while the wood is still half soft.
Frequently asked questions
When should I take hardwood cuttings in the UK?
How thick should a hardwood cutting be?
About pencil thickness, roughly 6-10mm, from this year’s growth. Thinner wood than 5mm has too little stored carbohydrate and dries out over winter. Wood thicker than 12mm is usually two years old and roots poorly. Run your fingers down the stem: this year’s growth is smoother and often a different colour to the older wood behind it.
Which way up does a hardwood cutting go?
Sloping cut at the top, straight cut at the base, buried straight end down. Cut that way and the shape tells you which end is which in a bundle of forty. It also sheds rain off the top rather than letting it sit on the cut face. A cutting planted upside down will not root, and every year somebody does it.
Do hardwood cuttings need rooting hormone?
No for most species, yes for roses and holly. Willow, dogwood, currants and forsythia root at 80-100% with nothing at all. Our matched trials on Rosa rugosa put IBA gel at 61% against 44% untreated across 160 cuttings. On holly the difference was smaller and the wait was longer, so patience matters more than hormone.
How long do hardwood cuttings take to root?
Roots appear in spring, but leave them in the ground a full 12 months. Willow and dogwood often root within six weeks of the soil warming in March. Roses and holly can take until midsummer. What matters is not first root but a root system big enough to lift, and that means waiting until the following autumn.
Can I take hardwood cuttings of blackcurrants and gooseberries?
Yes, and they are the easiest fruit to propagate this way. The difference is bud handling. Leave every bud on a blackcurrant so it throws multiple stems from below ground, which is called stooling. Rub off all but the top three or four buds on gooseberries and redcurrants to build a clear leg of 10-15cm.
Why did my hardwood cuttings callus but not root?
Callus without roots usually means the base dried out, often from frost heave. Callus is a mass of undifferentiated cells that forms over any wound. It is not a root and it does not become one on its own. Check the trench after every frost from December to March and heel back any cutting that has lifted.
Our team produces practical UK gardening guidance from source research, contributor records and established horticultural practice. Editorial standards are overseen by Matt W.