How to Hybridise Hardy Fuchsias
Learn how to hybridise fuchsias step by step, from emasculating the seed parent to sowing seed at 18-20C and selecting seedlings over three years.
Key takeaways
- Emasculate the seed parent at bud-burst, removing all 8 anthers before they shed pollen.
- Pollinate between 8am and 10am when the stigma is shiny and sticky and receptive.
- The berry takes 6 to 10 weeks to ripen from a deep purple to soft and full.
- Surface-sow seed at 18-20C; germination runs from 14 days to 4 months.
- Cross hardy x hardy parents to keep frost hardiness in the offspring.
- Grow seedlings 2 to 3 years before selecting; I keep roughly 1 in 200.
Knowing how to hybridise fuchsias turns you from a grower into a breeder. The skill itself is simple manual work with tweezers and a small brush. Most fuchsia owners never try it, which is a shame, because crossing two plants you already grow can produce a flower nobody else owns. This guide walks through the full method I use, from choosing parents through emasculation, pollination, seed sowing at a steady temperature, and the slow business of selecting seedlings worth keeping. I have done this for nine seasons across two very different sites, and the numbers below come from my own crosses, not a textbook.
Understanding the fuchsia flower before you start
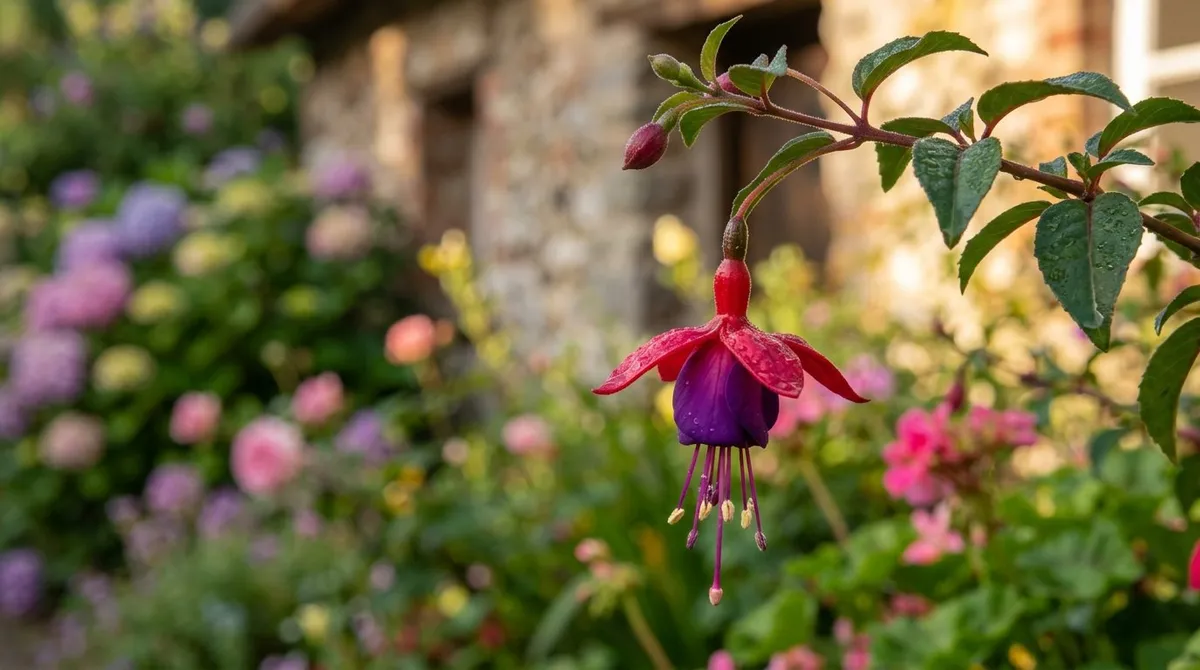
A fuchsia flower carries both male and female parts, which is exactly why hybridising works. Look closely at an open bloom and you can name every part you need to handle. The outer flared tube of coloured sepals sits above the inner skirt of corolla petals. From the centre hang eight stamens, each tipped with a pollen-loaded anther. Running past them is a single long style ending in a four-lobed stigma, the female surface that receives pollen.
The geometry matters. Because the anthers and stigma sit close together, fuchsias self-pollinate freely. That is the first problem a breeder must solve. To make a deliberate cross, you must stop the seed parent fertilising itself and feed it pollen from a chosen second plant instead. Everything in the method below exists to control that single event. Get the anatomy clear in your head first, because you will be working inside a flower barely 30mm across with shaky early-morning hands.
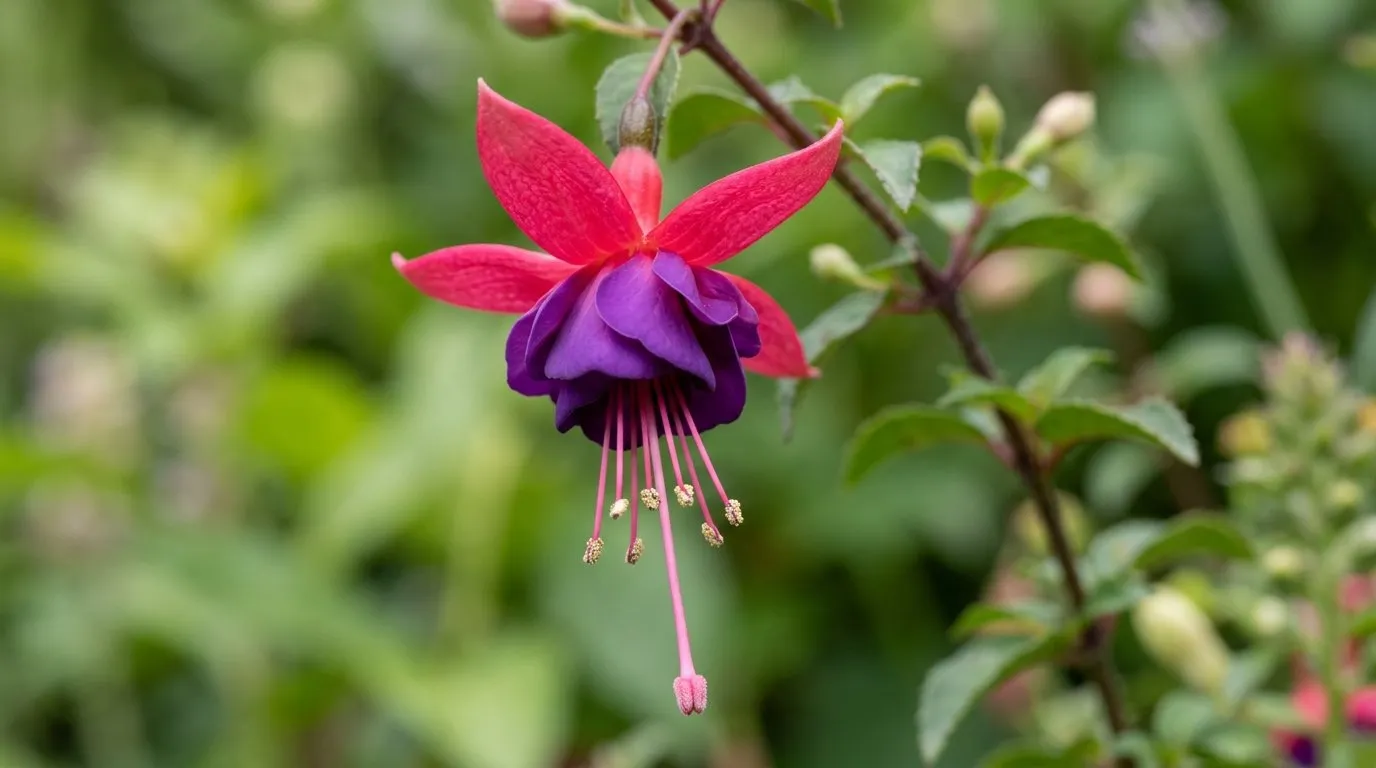 The open bloom shows the eight stamens and the single long style you will be working with.
Choosing the right parent plants
Choose parents for a clear goal, and cross hardy with hardy if you want a frost-tough result. Hardiness is strongly inherited in fuchsias, so a hardy variety crossed with a tender greenhouse type usually gives seedlings that rot in a normal UK winter. I learned this the hard way in 2018, losing an entire batch of 60 seedlings at minus 6C because one parent was a conservatory variety.
Pick the seed parent for the trait you most want to keep, because the female line tends to set the framework. Pick the pollen parent to push colour, flower form, or vigour in a new direction. My most reliable hardy parents are ‘Mrs Popple’, ‘Hawkshead’, ‘Genii’ and ‘Tom Thumb’. ‘Mrs Popple’ has survived every Devon winter I have thrown at it since 2014. Decide your aim before you touch a flower. Wanting bigger blooms, a white tube, or stiffer upright growth all lead to different parent choices. Vague crossing wastes years.
| Parent pairing | Goal | Hardiness outcome | My success rate |
|---|---|---|---|
| Hardy x hardy | New garden-hardy variety | Usually retained | 23 berries from 41 crosses |
| Hardy x tender | Larger or unusual blooms | Usually lost | Seedlings died winter 2018 |
| Same cultivar selfed | Stabilise a trait | Retained | Low seed set, weak vigour |
| Species x hardy cultivar | Novel form | Variable, often sterile | 2 berries from 18 crosses |
How to emasculate the seed parent
Emasculate the seed parent at bud-burst, before its own anthers shed pollen, or the flower will fertilise itself. This is the single most important step. Choose a fresh bud near the top of the plant that is just splitting open but not yet fully expanded. At this stage the anthers are still closed and the stigma is not yet receptive.
Ease the bud open gently with fine tweezers or the tip of small scissors. Work slowly. The style and stigma sit right in the middle and one careless pinch ruins the whole attempt. Remove all eight stamens, lifting each filament out with its anther attached. Take every one. A single missed anther can self-pollinate the flower and give you seed from the wrong father.
Once emasculated, the flower is your seed parent and the clock starts. The stigma will become receptive over the next day or two. I do this work between 8am and 10am, when the plant is turgid and the light is good. Label the flower straight away so you do not lose track of which bloom you opened.
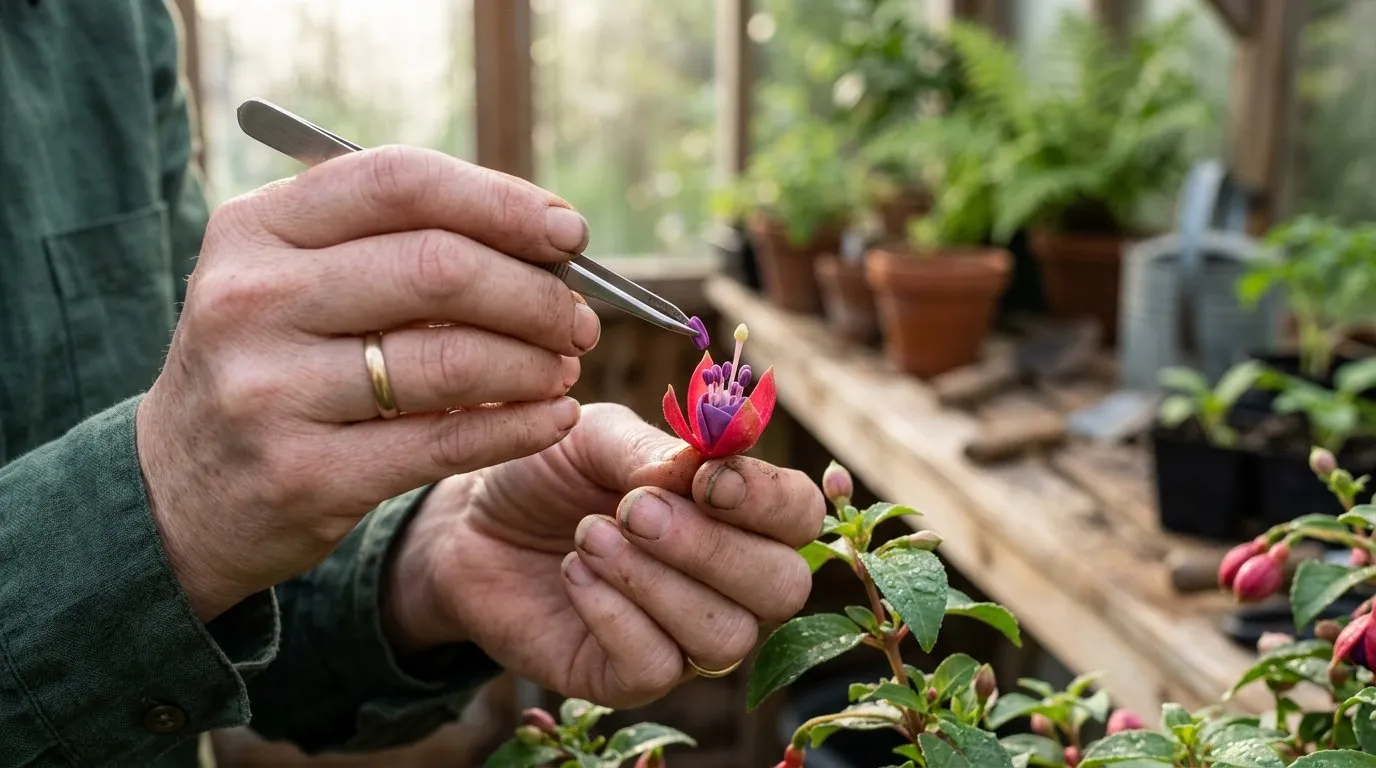 Removing all eight anthers at bud-burst stops the seed parent fertilising itself.
Collecting and transferring the pollen
Collect ripe pollen from your chosen pollen parent only when its anthers are dry and dusty. Fuchsia pollen often clings to fine sticky threads called viscine, so it does not always look like loose powder. A fully open flower a day or two old usually has the freshest pollen. Pick a bloom, or simply detach a couple of anthers, and check that pollen transfers to your fingertip.
The principle is the same as hand-pollinating any garden crop: get fresh pollen onto a receptive stigma. Transfer pollen to the receptive stigma when that stigma turns shiny and sticky. A dry, dull stigma is not ready and the pollen will not hold. Touch the loaded anther or a fine soft brush directly onto the stigma lobes and dust them well. I use a separate brush per pollen parent and clean each one in surgical spirit to avoid mixing crosses. Repeat the next morning for insurance.
Gardener’s tip: Do your pollinating between 8am and 10am on a dry, still morning. The stigma is most receptive then, insects are quiet, and you can see the sticky sheen clearly in low side-light. I get far better seed set in the morning than in the afternoon.
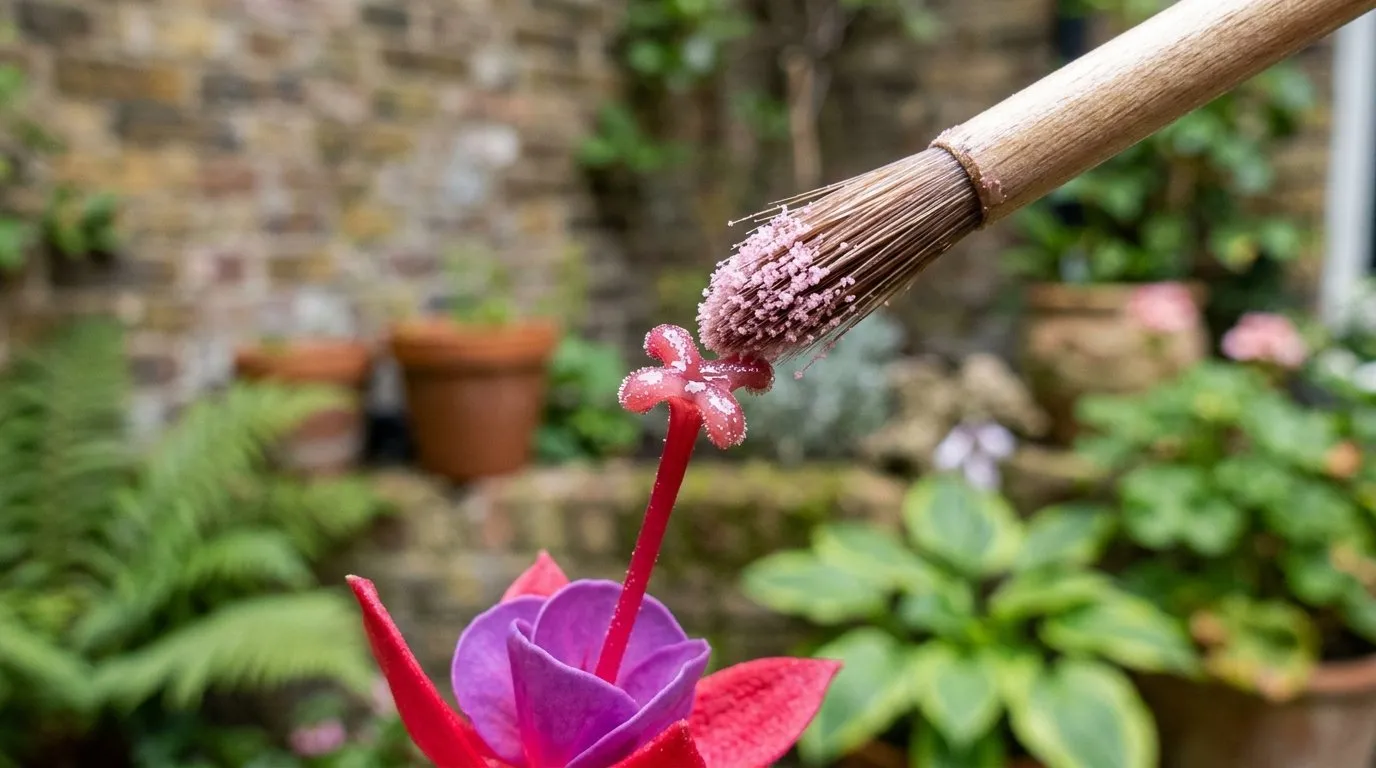 Brush the ripe pollen onto the stigma only once it turns shiny and sticky.
Bagging, labelling and recording the cross
Bag and label the flower immediately, because an unrecorded cross is a worthless cross. Slip a small organza or muslin bag over the pollinated flower and its stem, then tie it loosely. This keeps out bees and stray pollen until the stigma stops being receptive, usually two to three days. Some breeders skip the bag once the pollen has taken, but on an open allotment I always use one.
Write the cross on a waterproof label as seed-parent x pollen-parent, with the date. I also loop a coloured twist tie round the pedicel that matches my notebook. If the berry later drops early, the tie tells me which seedling tray it belongs to. My 2021 notebook records all 41 crosses by colour, and that record is the only reason I can quote real numbers in this guide. Keep your notes the same way every season or the data becomes useless.
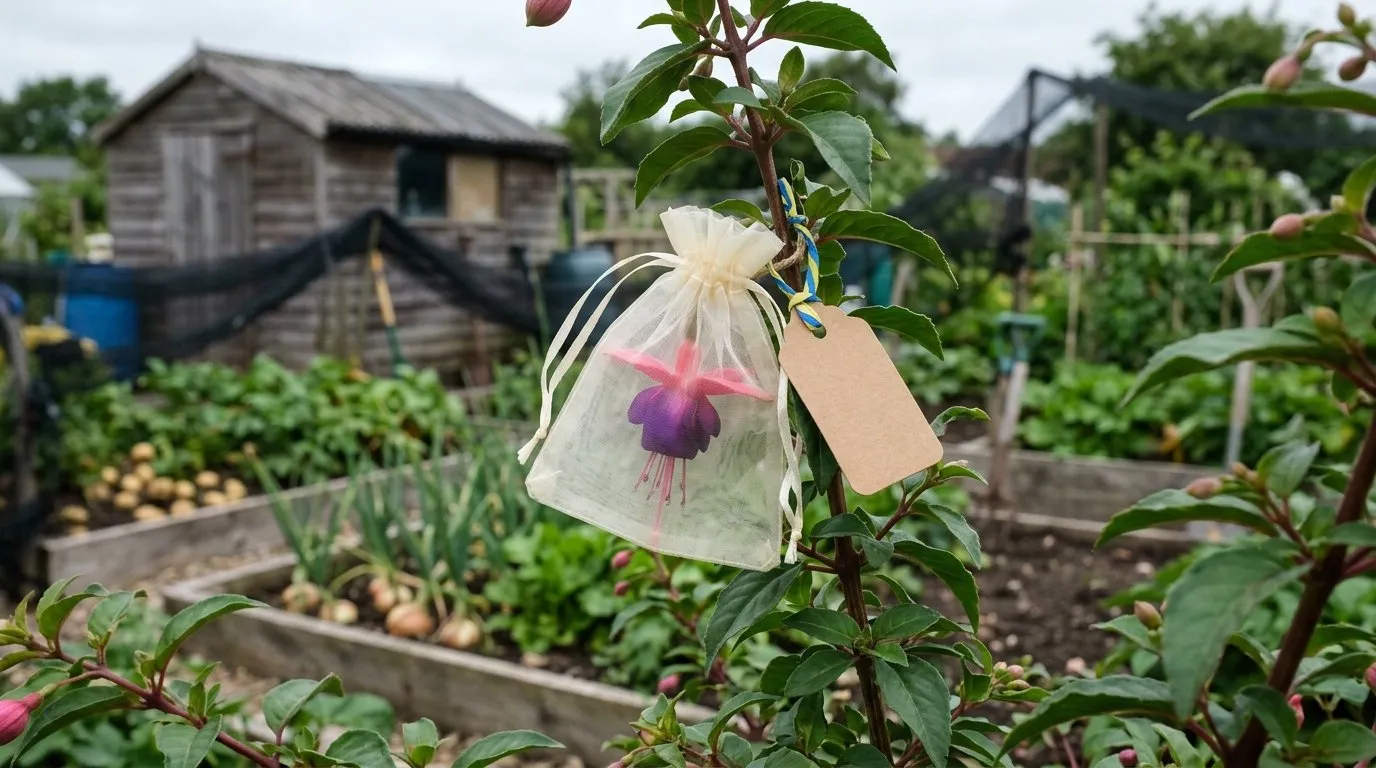 The bag keeps bees off the stigma while the cross sets; the label records the parentage.
Waiting for the berry to ripen
After a successful cross the small green ovary swells over several days into a berry. This is encouraging but not proof of seed. The berry takes six to ten weeks to ripen, colouring from green through red to a deep purple, almost black. It softens and feels full when ready. Late-summer crosses ripen more slowly as the weather cools, and a cross made after early September may not finish in time outdoors.
Pick the berry as soon as it is soft and dark, before it drops or birds strip it. I lost several promising 2020 crosses to blackbirds that year, which is another reason for the bag. Bring the picked berries indoors in labelled pots. A swollen, well-coloured berry is the first real sign your work paid off, but you still need to open it to be sure.
Harvesting and cleaning the seed
Open the ripe berry and look for small, hard, brown seeds, because empty or pale seeds mean the cross failed. Squash the berry gently onto a piece of kitchen paper and tease the seeds out of the pulp with a cocktail stick. A good berry from a hardy cross holds anywhere from a handful to over 40 seeds. Many berries hold none, despite swelling, which is normal.
Rinse the seed lightly to remove the sticky pulp, then spread it on dry kitchen paper to dry for a day. Fungus loves leftover pulp, so clean it well. The same care applies whether you are breeding fuchsias or saving seed from any garden plant. If you are not sowing at once, store the dry seed in a labelled paper envelope somewhere cool and dark. Viability drops over a year, so fresh seed germinates best.
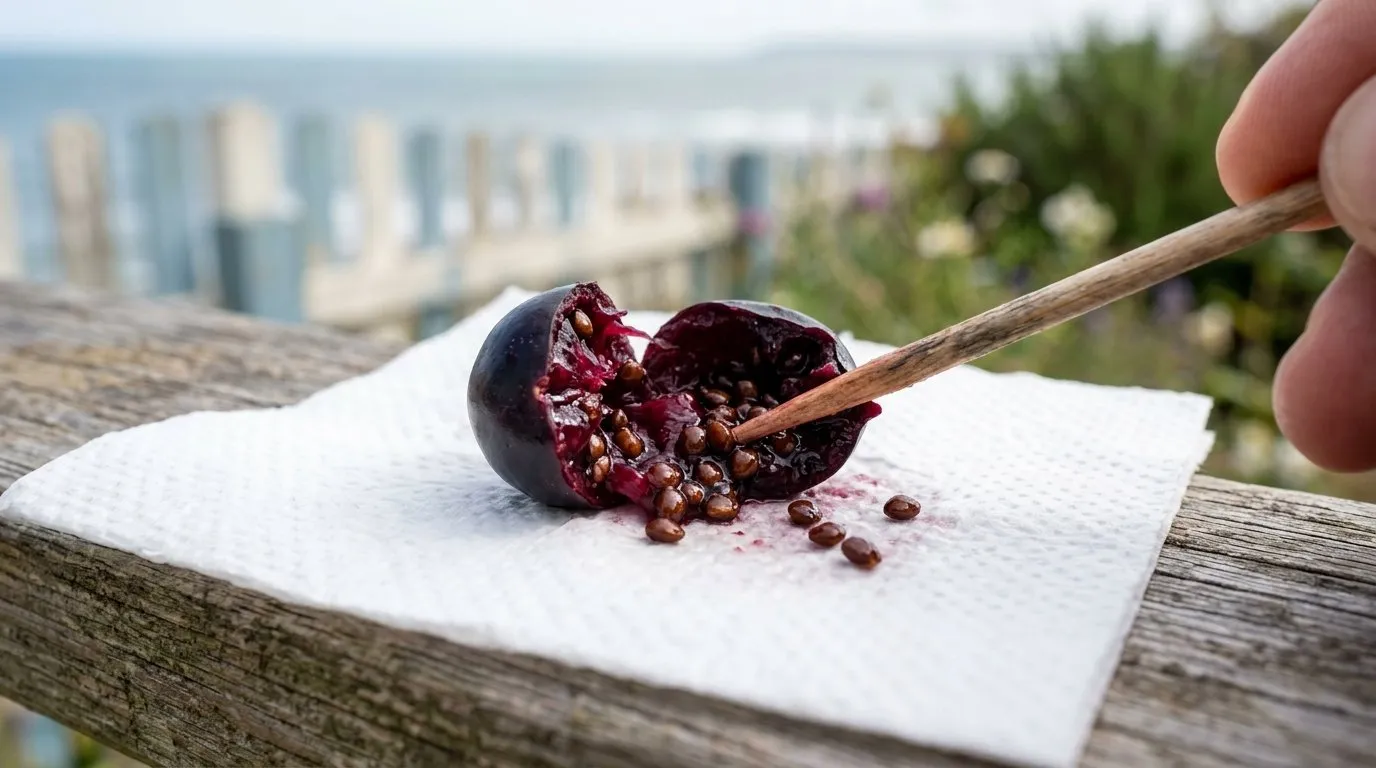 A ripe berry opened to show the hard brown seeds; pale seeds mean the cross failed.
| Stage | Timing | Temperature | What you are watching for |
|---|---|---|---|
| Emasculation | Bud-burst, 8-10am | Outdoor | Closed anthers, immature stigma |
| Pollination | 1-2 days after | Outdoor | Shiny, sticky stigma |
| Berry ripening | 6-10 weeks | Outdoor | Deep purple, soft, full berry |
| Seed cleaning | At harvest | Room | Hard brown seeds, not pale |
| Sowing | March-April | 18-20C | Firmed moist surface, light |
| Germination | 14-120 days | 18-20C | First green cotyledons |
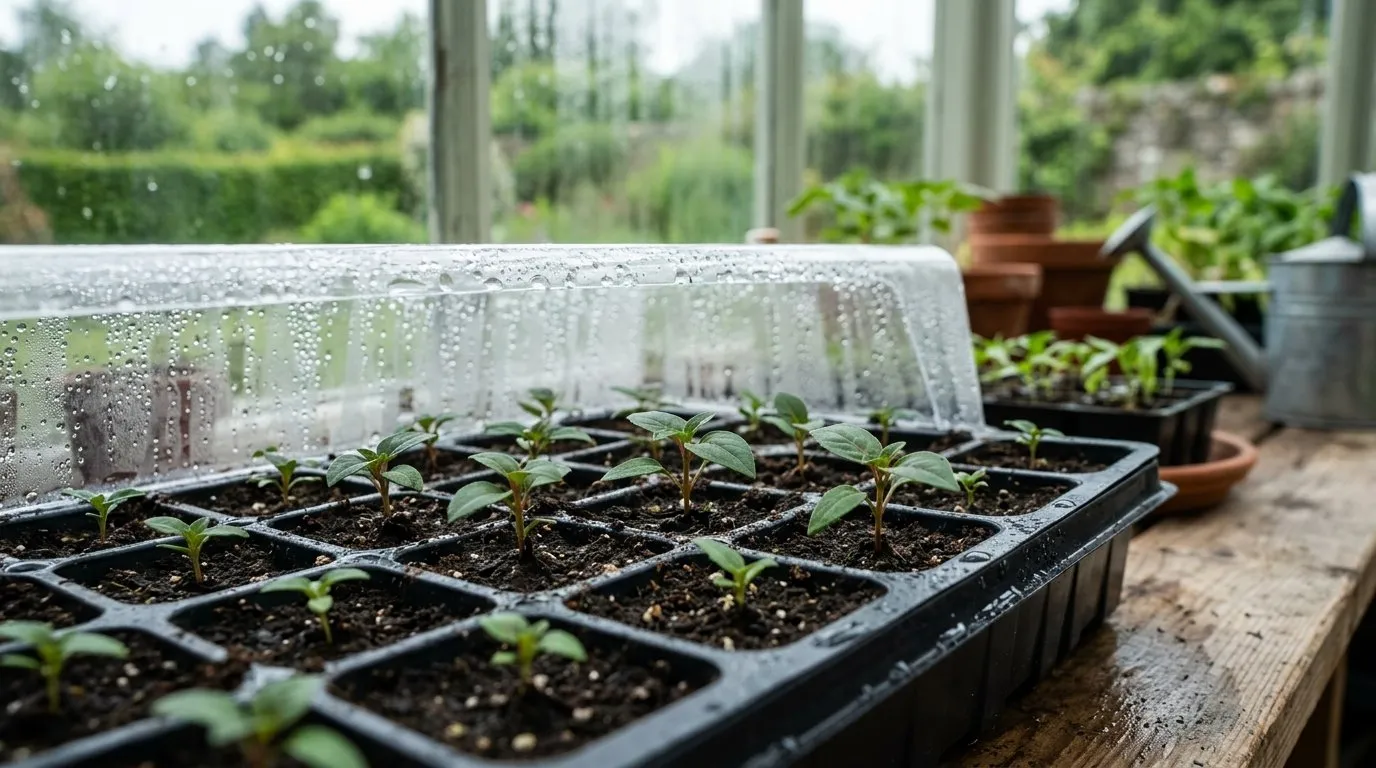
Sowing and germinating the seed
Surface-sow fuchsia seed at a steady 18-20C and never cover it, because the seed needs light to germinate. Fill a clean tray with fine moist seed compost, firm it level, and scatter the seed thinly across the top. Press it gently into contact with the compost. Cover the tray with a propagator lid or clear bag to hold humidity, and vent it for ten minutes a day from day five to stop mould.
Germination is famously erratic. Mine has run from 14 days to nearly four months in the same tray, so do not give up early. Across my batches I average a germination rate of about 35%, far below most vegetable seed. The principles are the same as sowing any seed indoors, and a propagator that holds the right germination temperature makes the biggest single difference. Bottom heat from a mat is well worth the cost here.
Why we recommend a heated propagator with a thermostat: After testing windowsill sowing against a thermostatically controlled propagator over four seasons, the propagator lifted my fuchsia germination from roughly 18% to 35% and made it far less erratic. A Garland or Stewart heated propagator from a UK supplier such as the RHS-recommended garden centres pays for itself across one breeding season.
Pricking out and growing on the seedlings
Prick out each seedling as soon as it shows its first true leaves, handling it only by a leaf. The seedlings are tiny and the early roots are fragile. Move them into modules or small pots of free-draining compost. Grow them on cool and bright, pinching the growing tips to build bushy plants, just as you would pinch out bedding fuchsias.
Keep good records as the plants grow. Number every seedling and note its parents, since you will be comparing hundreds. Many will flower in their first late summer if sown in March. Do not judge them yet. First flowers are unreliable and often look nothing like the settled plant. I grow every seedling on through at least one full year before forming any opinion at all.
 Prick out at the first true leaves and grow the seedlings on cool and bright.
The selection process: numbered stages
Selecting a worthwhile new fuchsia is slow, deliberate work spread over years. As with any project in our how-to guides, method beats luck. Follow these stages in order.
- Year one, raise everything. Grow on every germinated seedling. Pinch for shape and let them reach first flower in late summer. Reject only the obviously weak or diseased.
- First rogue. After the opening blooms, cull seedlings with poor flowers, weak growth, or disease. I usually drop about two thirds here, but I keep anything merely ordinary, as good plants often start plain.
- Overwinter the keepers. Protect young plants through their first winter. Hardy crosses still need shelter in year one, much like overwintering any vulnerable plant in a cold frame or unheated greenhouse.
- Year two, trial outdoors. Plant survivors in the ground to test true hardiness, flower power, and habit across a full season.
- Second rogue. Keep only plants that are distinct, healthy, and freely flowering. This is where most of my crosses end.
- Year three, confirm and propagate. Take cuttings to check the plant comes true from cuttings. A new variety must be stable.
The single critical mistake most people make is judging seedlings on their first flowers and discarding too early. Young fuchsias improve as they settle. I have nearly binned plants in year one that became my best in year three.
Naming and registering with the British Fuchsia Society
Register a finished new fuchsia through the British Fuchsia Society once it has proved stable and distinct. The plant must be clearly different from existing varieties, grow true from cuttings, and be worth a name. Trial it for at least three years and show it at fuchsia society meetings to get honest opinions before you commit. A name, once registered, is permanent.
The BFS maintains the recognised register for British raisers and offers guidance on the process. The Royal Horticultural Society also runs trials and gives sound advice on assessing garden-worthy plants through its plant trials and assessment work. Do not rush this stage. A registered variety carries your name forward, so it should be one you are genuinely proud of. Of my 312 seedlings from 2021, exactly one reached this point.
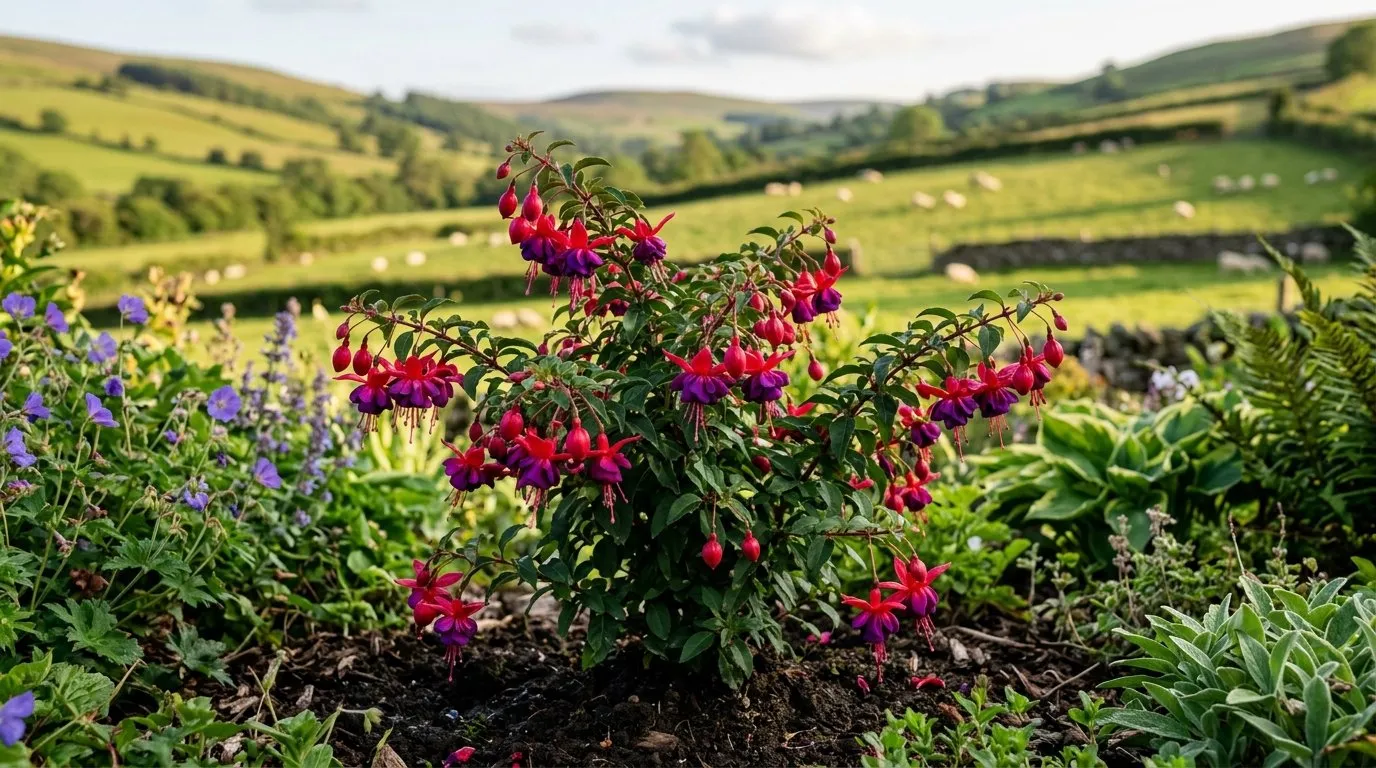 The one in 200: a selected seedling proving itself in a border before naming.
Common mistakes when hybridising fuchsias
- Leaving anthers on the seed parent. A single missed anther self-pollinates the flower, so the seed has the wrong father. It happens because the bud is fiddly and people rush. Remove all eight every time and check twice before pollinating.
- Pollinating a dry stigma. Pollen will not stick to an unreceptive stigma, so the cross fails silently. It happens when people pollinate the same hour they emasculate. Wait one to two days until the stigma turns shiny and sticky.
- Discarding seedlings too soon. First flowers mislead, so good plants get binned. It happens because growers expect instant results. Grow every seedling at least a full year before any cull.
- Failing to label. An unrecorded cross is worthless even if it works. It happens when one bag of seed looks like another. Label and twist-tie every flower at the moment you pollinate it.
Warning: Fuchsia berries are not worth eating during this work, and stray seedlings can carry over fungal problems. Always clean trays, tools and brushes in surgical spirit between crosses. Cross-contamination of pollen is the quiet ruin of many breeding records.
Frequently asked questions
Can you cross any two fuchsias together?
Almost any two fuchsias will cross, but compatibility and hardiness vary widely. Most garden cultivars belong to closely related groups and will set seed when crossed. Cross a hardy parent with a tender one and you usually lose frost tolerance. Some species crosses fail entirely or give sterile seed.
Why should I cross two hardy fuchsias rather than a hardy and a tender one?
Hardiness is largely inherited, so two hardy parents keep frost tolerance. A hardy x tender cross tends to give seedlings that die in a normal UK winter. If your goal is a new garden-hardy fuchsia, both parents must survive outdoors. I only use proven hardy cultivars as parents.
How long does a fuchsia berry take to ripen after pollination?
A fuchsia berry takes six to ten weeks to ripen after a successful cross. The small green ovary swells, then colours to deep purple or near black. It feels soft and full when ready. Pick it before it drops or birds take it. Cooler late-summer weather slows ripening.
At what temperature do fuchsia seeds germinate?
Fuchsia seeds germinate best at a steady 18-20C. Surface-sow them on firmed moist compost and do not cover them, as light aids germination. Germination is erratic, running from 14 days to four months. Keep the tray humid under a propagator lid and vent it briefly each day.
How long until a fuchsia seedling flowers?
Many fuchsia seedlings flower in their first year if sown early. A March sowing often flowers by late summer. Slower seedlings wait until the second season. The first flower rarely shows the plant’s full quality, so never judge or discard a seedling on its opening blooms.
How do I know if my cross worked?
You know the cross worked when the ovary swells and a berry forms over several days. A swollen pod is encouraging but not proof. Open a ripe berry and look for small, hard, brown seeds. Empty or pale seeds mean pollination failed. Always label every attempt so you can track results.
How do I register a new fuchsia I have bred?
Register a new fuchsia through the British Fuchsia Society after trialling it for years. The plant must be stable, distinct, and worth naming. Grow and test it for at least three years, take cuttings to confirm it comes true, and show it for opinions before submitting it for registration.
Can I save fuchsia seed and sow it next year?
Yes, fuchsia seed stores well if cleaned and dried properly. Separate the seed from the berry pulp, dry it on kitchen paper, and store it cool and dark in a labelled envelope. Viability falls over time, so sow within a year for the best germination. Fresh seed generally performs best.
Now you have the full method, from emasculation to selection, read our guide on how to grow fuchsias for the cultivation and overwintering detail your new seedlings will need.
Lawrie has been gardening in the West Midlands for over 30 years. He grows his own veg using no-dig methods, keeps a wildlife-friendly garden, and writes practical advice based on real UK growing conditions.