Key takeaways
- Drip kits cut water use by up to 70 percent versus a sprinkler on the same bed
- Emitters run at 2 or 4 litres per hour; a 30-minute cycle wets to 20cm deep
- UK mains sit at 3 to 4 bar; drip needs 1 to 2 bar, so fit a pressure reducer
- A 120-mesh filter is essential in hard-water areas or emitters clog within weeks
- Kits cost £25 to £120; a DIY 16mm build covers 20m of bed for about £35
- Drain and store the kit before the first frost or freezing water splits the pipe
A drip irrigation kit is the most efficient way to water a UK garden through a dry summer. The best drip irrigation kits deliver water slowly, straight to the root zone, at 2 to 4 litres per hour per emitter. That cuts water use by up to 70 percent against a sprinkler, and it keeps foliage dry, which lowers disease. It also frees you from the watering can during a heatwave or a fortnight away.
What a drip irrigation kit actually does
A drip irrigation kit is a network of pipe and small outlets that drips water onto the soil at each plant. Water leaves the mains or a butt, passes through a filter and pressure reducer, then travels along a supply pipe. At each plant, an emitter or a length of thin micro-tube releases a slow, measured trickle.
Kits range from a £25 starter set for a dozen pots to a £120 system covering a whole allotment. You can also build your own from parts. The parts are cheap and standard, so a system grows with your garden.
The five watering systems explained
Not all drip kits work the same way. Choosing the right type for your layout matters more than the brand on the box. There are five main systems sold in the UK.
Micro-drip and spaghetti line uses a thin 4mm micro-tube running off a 13mm supply pipe to each pot. You place one dripper per container and adjust the flow. It is the most flexible system for a mixed patio of 40 to 50 pots.
Pressure-compensating inline dripline is a 16mm pipe with drippers moulded inside at fixed spacings of 30cm, 33cm or 50cm. Each dripper releases the same amount whether it sits first or last on the run, so it copes with long rows and slopes.
Soaker or porous hose weeps water along its whole length. It is cheap and simple for a single straight bed, but flow is uneven over 10m and it clogs fast in hard water.
Gravity and olla systems need no mains or electricity. A raised butt feeds a dripline, or you bury a terracotta olla that seeps water into the soil. Both suit an allotment with no tap.
Automatic timer kits bundle a battery timer, filter and dripline in one box, ready to plug onto a tap. Hozelock and Claber sell these as complete sets.
Best drip irrigation kits compared
| Kit / system | Type | Price band | Coverage | Timer needed | Mains pressure | Best use | Reliability |
|---|---|---|---|---|---|---|---|
| Gardena Micro-Drip | Micro-drip, spaghetti | £40-£90 | 40-50 pots | Optional | 1-4 bar | Mixed patio pots and troughs | 1st, most flexible |
| DIY 16mm inline dripline | Pressure-compensating | £30-£50 | 20-30m of row | Optional | 1-2 bar | Veg rows, hedges, long beds | 2nd, best value |
| Hozelock Automatic Watering Kit | Timer kit, micro-drip | £45-£80 | 20-25 pots | Included | 1-4 bar | Patios, holidays, beginners | 3rd, easiest start |
| Claber Aquauno / Oasis | Timer kit, gravity option | £30-£120 | 20 pots | Included | 0.5-4 bar | Balconies, short breaks | 4th, neat but small |
| Blumat gravity carrots | Gravity, no electricity | £25-£60 | 12-20 pots | None | Gravity only | Allotments, greenhouses off-grid | 5th, off-grid winner |
| Soaker / porous hose | Weeping hose | £15-£35 | 8-12m straight | Optional | 1-2 bar | One simple straight bed | 6th, clogs in hard water |
For most UK gardens with a tap, our gold-standard pick is pressure-compensating inline dripline. It is the cheapest way to cover rows and hedges, it waters evenly on a slope, and the moulded drippers resist blockage better than open micro-tube. For a mixed patio of pots at different sizes, Gardena Micro-Drip wins on flexibility, because you tune each pot. You can browse timers, dripline and fittings at Greenhouse Stores’ irrigation systems and kits range.
How drip irrigation soaks the soil
Understanding how water moves through soil makes every setting obvious. A drip emitter does not flood the surface. It releases water slowly, and the water spreads out and down through the soil in a wetted bulb around the emitter.
The process runs in clear stages. First, water pools at the surface for a few seconds. Then it soaks down under gravity and sideways by capillary action. On our clay-loam, a 2 litre-per-hour emitter run for 30 minutes wets a bulb roughly 25cm wide and 20cm deep. On sandy soil the same litre goes deeper and narrower, so you space emitters closer.
| Soil type | Wetted width per emitter | Run time to 20cm | Emitter spacing |
|---|---|---|---|
| Sandy | 15-20cm | 20-30 min | 20-25cm |
| Loam | 25-30cm | 30-40 min | 30cm |
| Clay | 30-40cm | 40-60 min | 30-40cm |
The critical mistake most people make is running the kit for a few minutes every day. Short daily bursts only wet the top few centimetres. Roots then stay shallow and dry out fast. The fix is fewer, longer runs. One 40-minute cycle every two or three days sends water deep and pulls roots down with it.
Sizing a drip kit for pots, beds and rows
Size the kit to the plants, not to the tap. Start by counting what you need to water. Pots take one emitter each. Rows and beds take a length of inline dripline. Hedges take one or two emitters per shrub, depending on spread.
For patio pots, allow one adjustable dripper per container. A single 13mm supply loop with 4mm micro-tube spurs feeds 40 to 50 pots comfortably from a standard tap. Set small pots to 2 litres per hour and large tubs to 4.
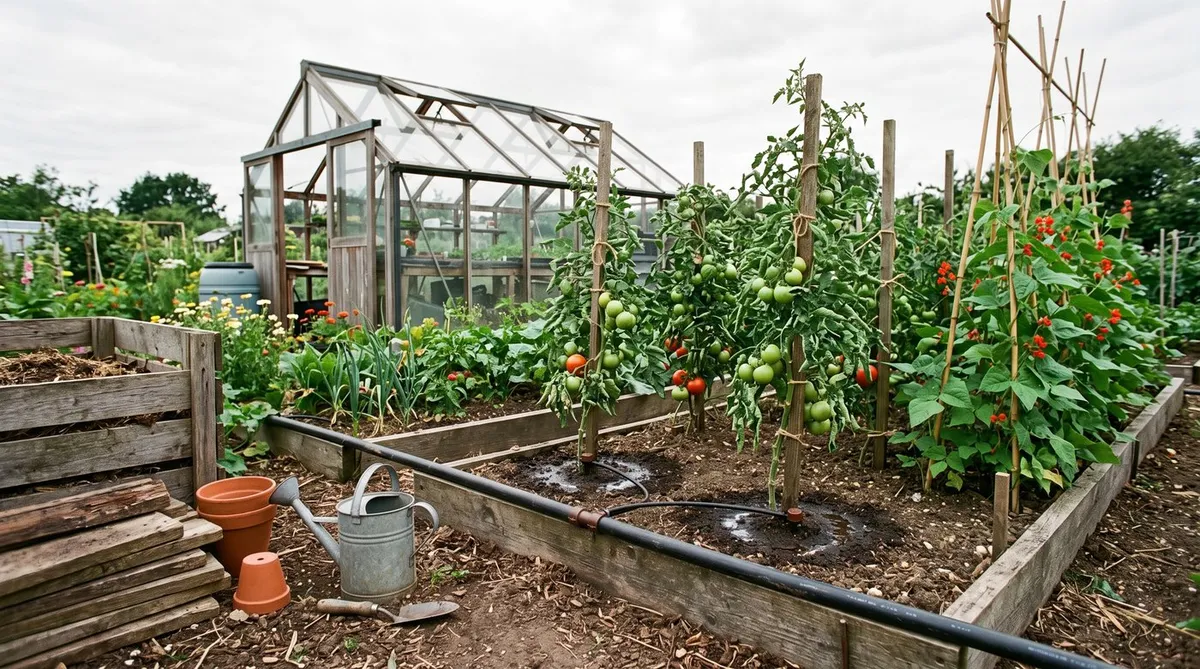
For raised veg beds and rows, use 16mm inline dripline with drippers at 30cm. A standard 1.2m wide bed needs one line down the centre for shallow-rooted crops, or two lines for wider spacing. Twenty metres of dripline covers about three average allotment beds.
For hedges and shrubs, run a single dripline along the base with one dripper per plant. Newly planted beech or hornbeam whips need a full 40-minute soak twice a week through their first summer. Our container vegetable growing guide lists the pot crops that respond best to steady drip watering.
Why a filter and pressure reducer matter on UK mains
This is the section that saves your kit. UK mains water arrives at 3 to 4 bar, and most drip systems are designed for 1 to 2 bar. Connect a kit straight to the tap and the pressure blows emitters off the pipe and splits joints. A pressure reducer screwed onto the tap drops it to a steady 1.5 bar. They cost £6 to £10.
The filter matters just as much, and it is the part almost everyone skips. Mains water carries fine grit, and hard-water areas add limescale. The emitter holes are under 1mm across, so they block easily. A 120-mesh (155-micron) inline filter catches the debris before it reaches them.
Hard water is a real problem across much of England. Our supply near Stoke runs at about 280 ppm, and without a filter our first kit lost a fifth of its emitters to scale in one summer. Fit the filter at the tap, and rinse it out once a month. It takes two minutes and it is the difference between a kit that lasts years and one that fails in weeks.
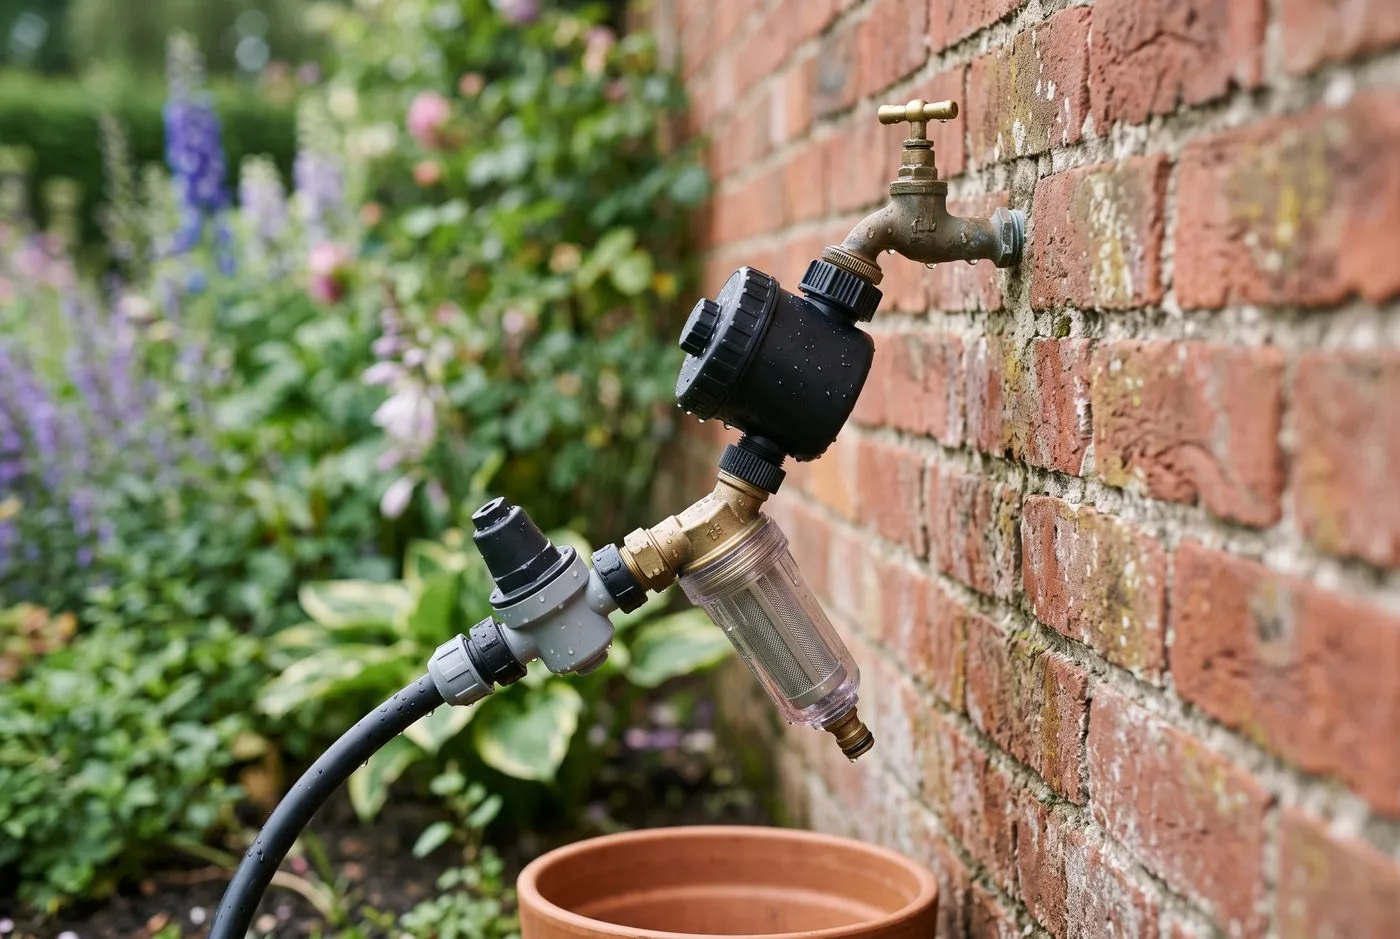 The two fittings that decide whether a kit survives: a 120-mesh filter to trap grit and scale, and a pressure reducer to drop UK mains from 4 bar to a safe 1.5.
Adding a battery timer or tap computer
A battery tap timer turns a drip kit into an automatic system. It screws between the tap and the filter, and it opens and closes the water on a schedule you set. Simple dial timers cost £15 to £25. Digital tap computers with multiple programmes cost £25 to £45.
Set one cycle in the early morning, around 6am, before the heat builds. A single run of 30 to 45 minutes suits most beds on 2 litre-per-hour emitters. Avoid evening watering where slugs are a problem, because wet soil overnight draws them out.
A timer also covers you when away. A drip kit on a timer will keep a full patio alive through a two-week holiday with no help. Change the AA batteries each spring, because a dead battery fails closed and your plants get nothing. For a wider look at automatic options, see our guide to greenhouse auto-watering systems for holidays and other holiday watering solutions.
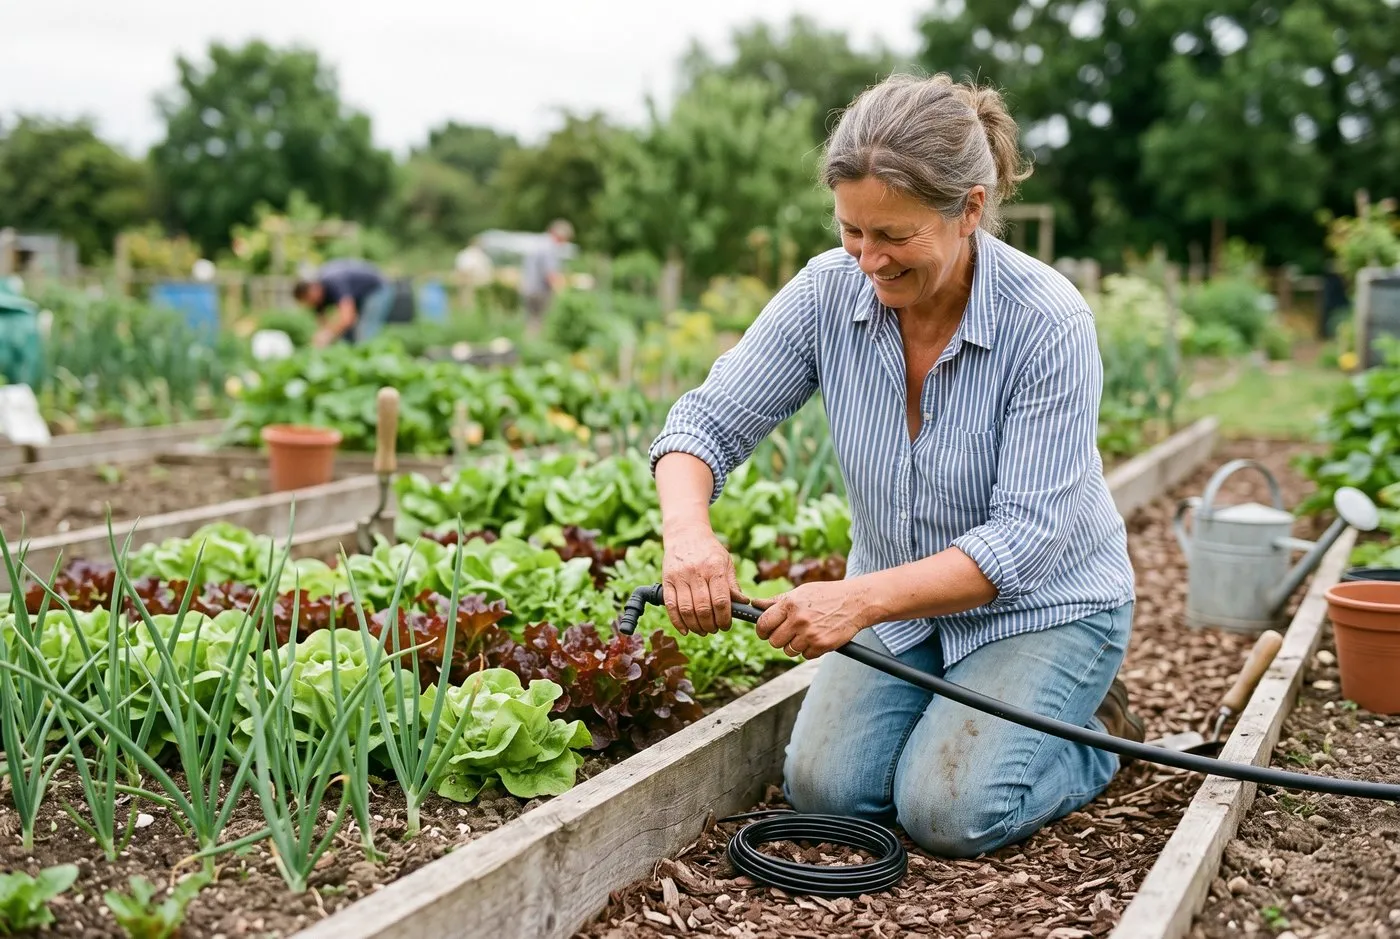 Connecting a barbed elbow to the supply pipe on the allotment. Push the pipe fully home over the barb, or the joint blows apart at pressure.
Month-by-month drip irrigation calendar
Drip watering is not just a summer job. Setting up early and packing down properly makes the kit last for years.
| Month | Task |
|---|---|
| January | Kit drained and stored. Order any new dripline or fittings in the winter sales. |
| February | Plan the layout for the year. Sketch new beds and count emitters needed. |
| March | Reassemble the system on a mild day. Check for split pipe and perished washers. |
| April | Fit the filter and pressure reducer. Flush the line and pressure-test before planting. |
| May | Connect the timer and set a light schedule as growth starts. Watch for early dry spells. |
| June | Step up run time as temperatures rise. Rinse the filter. Check every emitter drips. |
| July | Peak demand. Run 40 minutes every two to three days. Refill butts feeding gravity kits. |
| August | Watch the far ends of long runs for weak flow. Clear any blocked emitters. Cover holidays with the timer. |
| September | Ease back the schedule as nights cool and rain returns. Rinse the filter again. |
| October | Reduce watering to occasional. Keep the kit ready for a late warm spell. |
| November | Disconnect at the tap. Open the far end and drain fully before the first frost. |
| December | Coil and store pipe under cover. Bring timers and reducers indoors to protect them from freezing. |
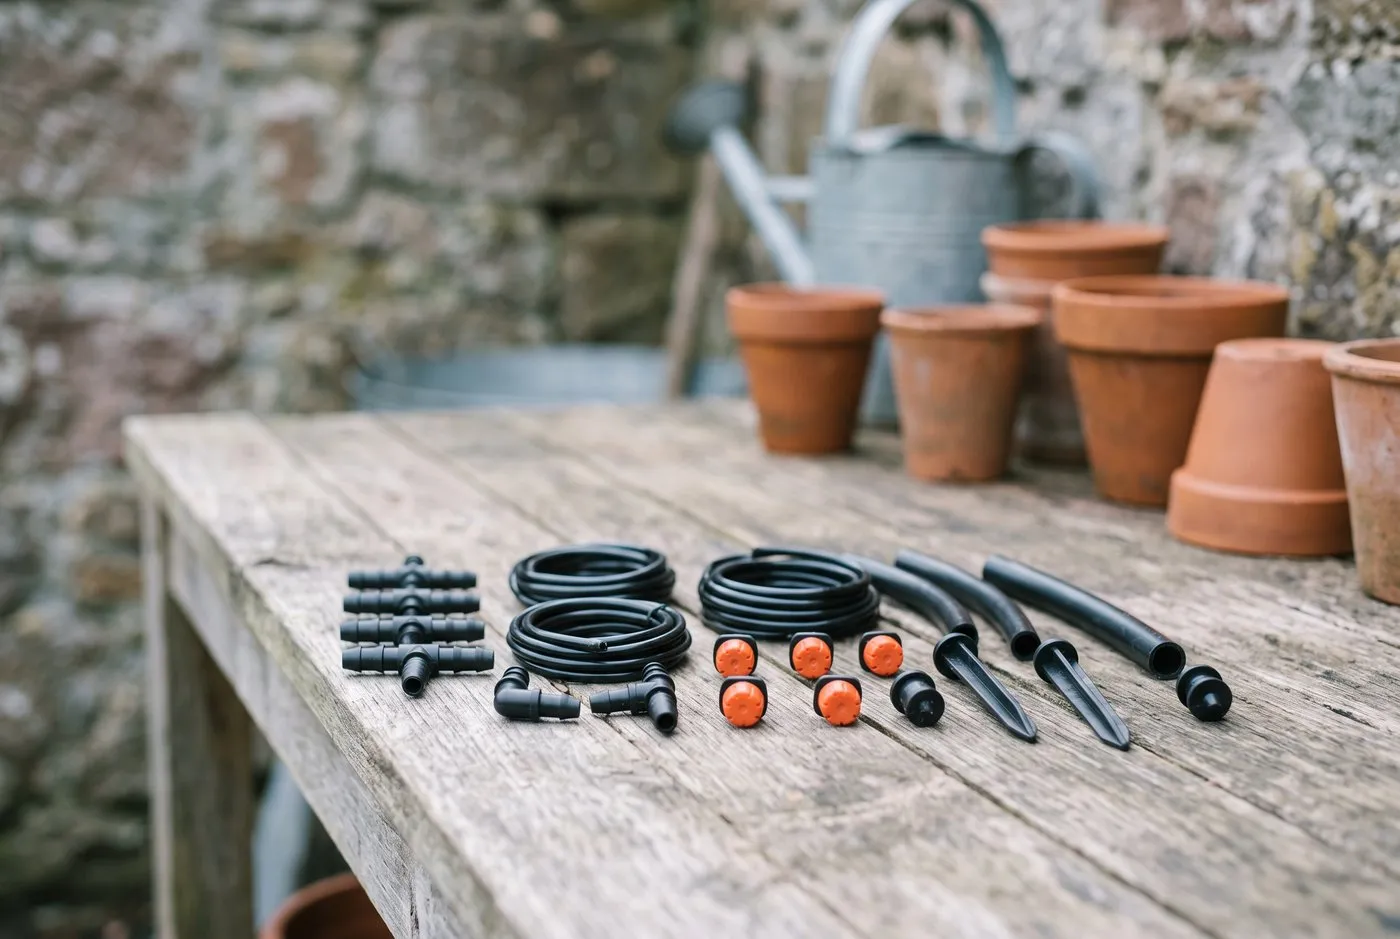 Push-fit micro-drip fittings assemble without tools. Adjustable drippers let you set each pot separately, from 1 litre per hour for herbs to 4 for a thirsty tomato.
Why drip kits block, starve and split
Most drip kit failures trace back to three root causes, and all three are avoidable. Fixing the cause, not the symptom, is what keeps a system running for years.
Blocked emitters come from grit and limescale, not bad luck. The tiny holes clog when unfiltered water passes through them. The permanent fix is a 120-mesh filter rinsed monthly, plus a yearly flush of the whole line. In hard-water areas, choose pressure-compensating drippers, which self-clean better than open micro-tube.
Low pressure at the far end starves the last plants on a long run. On a standard non-compensating kit, a 25m line drops flow badly by the end. The cause is a run that is too long for the pipe diameter. The cure is pressure-compensating dripline, or splitting one long run into two shorter loops off a tee.
Split and kinked pipe comes from frost and from tight bends. Water left in the pipe over winter freezes and cracks it. A sharp bend round a bed corner kinks and cuts the flow. Drain the kit before frost, and use elbow connectors at corners rather than forcing a bend.
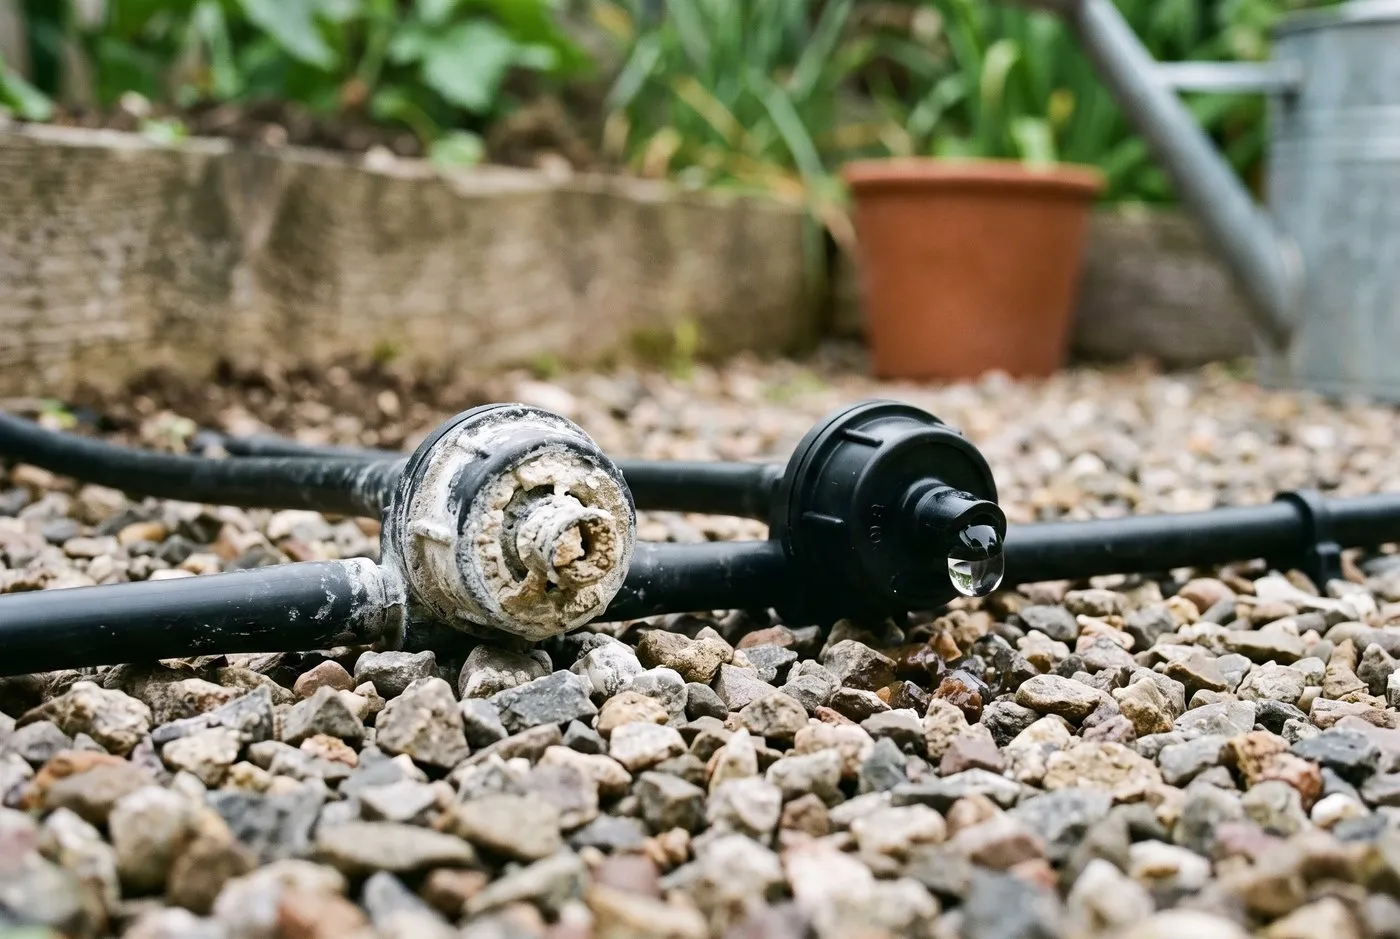 A blocked emitter, left, crusted with limescale next to a clean one. In hard-water areas an unfiltered kit loses emitters like this within a single summer.
Draining and storing the kit before winter
Frost is the biggest killer of a drip kit in the UK. Water trapped in the pipe freezes, expands and splits the line and the emitters. A single hard frost can wreck a whole system left connected. Pack it down properly and the same kit lasts a decade.
In November, before the first hard frost, disconnect the kit at the tap. Remove the timer, filter and pressure reducer, and bring them indoors, because their plastic bodies crack when the water inside freezes. Open the end cap on the far end of each line and let gravity drain the pipe. On a level run, lift one end to help it empty.
Coil the dripline loosely and store it under cover in a shed or garage. Tight coils kink and set a permanent bend over winter. Label the timer batteries to change in spring. Come March, a quick pressure test on a mild day tells you if anything perished. For the wider principles behind pairing a kit with butts and mulch, see our guide to what mulch is and how to use it to lock moisture in.
Warning: Never leave a battery timer or pressure reducer connected outdoors over winter. Water sits inside the mechanism, freezes, and cracks the housing. A replacement digital timer costs £25 to £45, far more than the two minutes it takes to unscrew it and store it dry indoors.
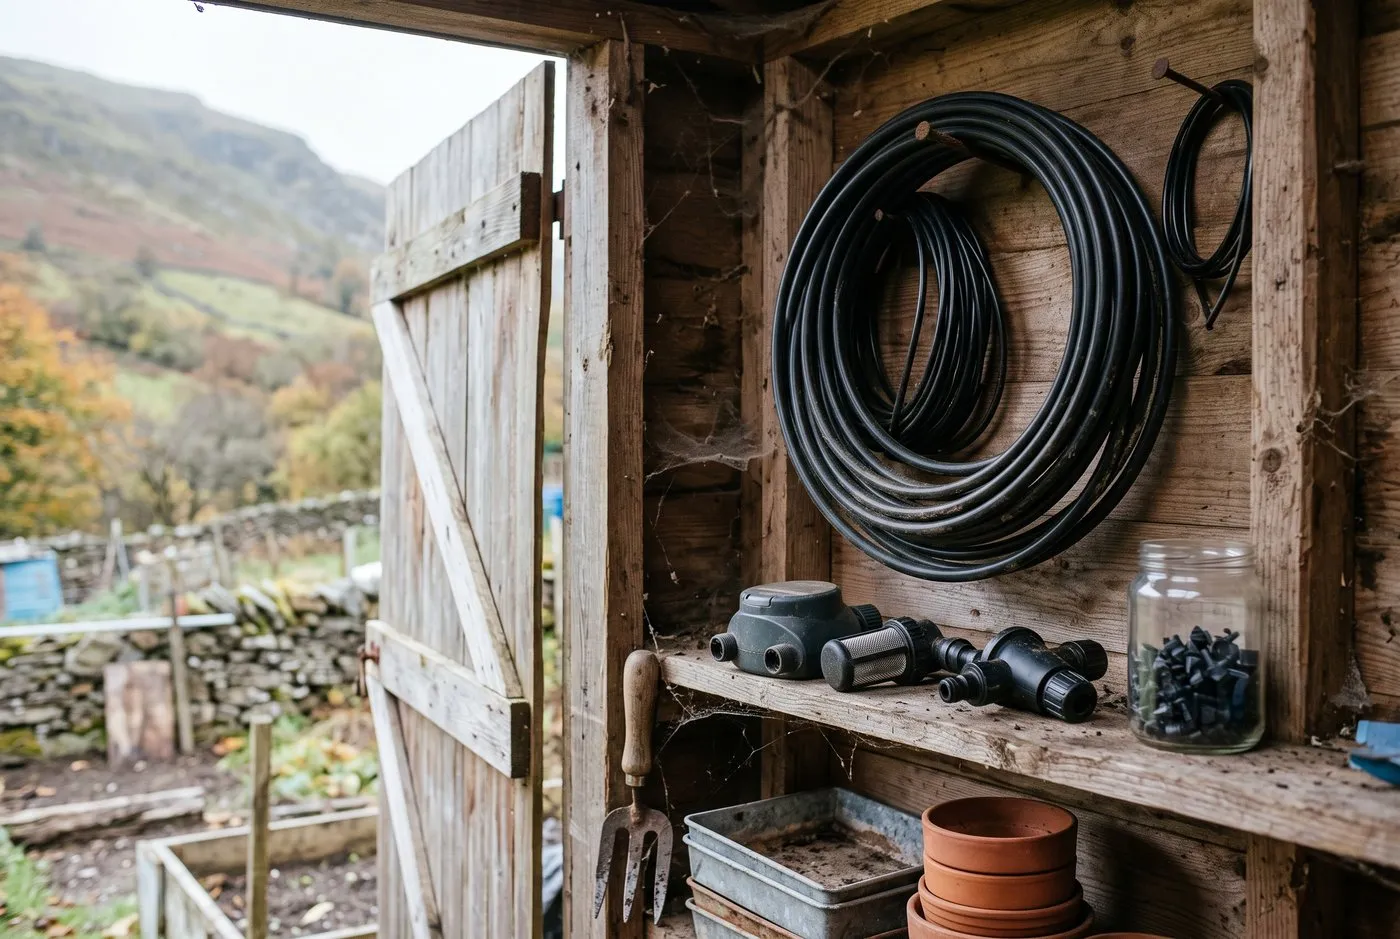 Drained and coiled loosely for winter. The timer, filter and reducer come indoors, because trapped water freezes and cracks their plastic bodies.
Common mistakes with drip irrigation kits
- Skipping the filter. The single biggest error. Unfiltered water blocks the sub-millimetre emitter holes within weeks, especially in hard-water areas. Always fit a 120-mesh filter at the tap and rinse it monthly.
- Ignoring pressure. Connecting straight to UK mains at 3 to 4 bar blows emitters off and splits joints. Fit a pressure reducer to drop it to 1.5 bar. It costs under £10 and saves the whole kit.
- Short daily watering. Running the kit five minutes a day only wets the surface and keeps roots shallow. Water deeply and less often: one 40-minute cycle every two to three days.
- Running lines too long. On non-compensating kits, a run over 20m starves the far end. Use pressure-compensating dripline for long rows, or split into shorter loops.
- Leaving it out for winter. Frost splits pipe and cracks timers. Drain, disconnect and store the kit under cover before the first hard frost every year.
Gravity and off-grid kits for allotments
Not every plot has a tap, and an allotment often has none. A gravity-fed drip kit solves this. Raise a water butt or tank about 1 metre on blocks or a stand, and feed a dripline off the bottom outlet. Gravity gives roughly 0.1 bar per metre of height, enough to run a short low-flow line.
Flow is gentler than mains, so space emitters closer and run them longer. Blumat carrot sensors are the neatest off-grid option. Each terracotta cone sits in the soil and opens a valve only when the soil dries, drawing water from a reservoir by suction. They need no timer and no power.
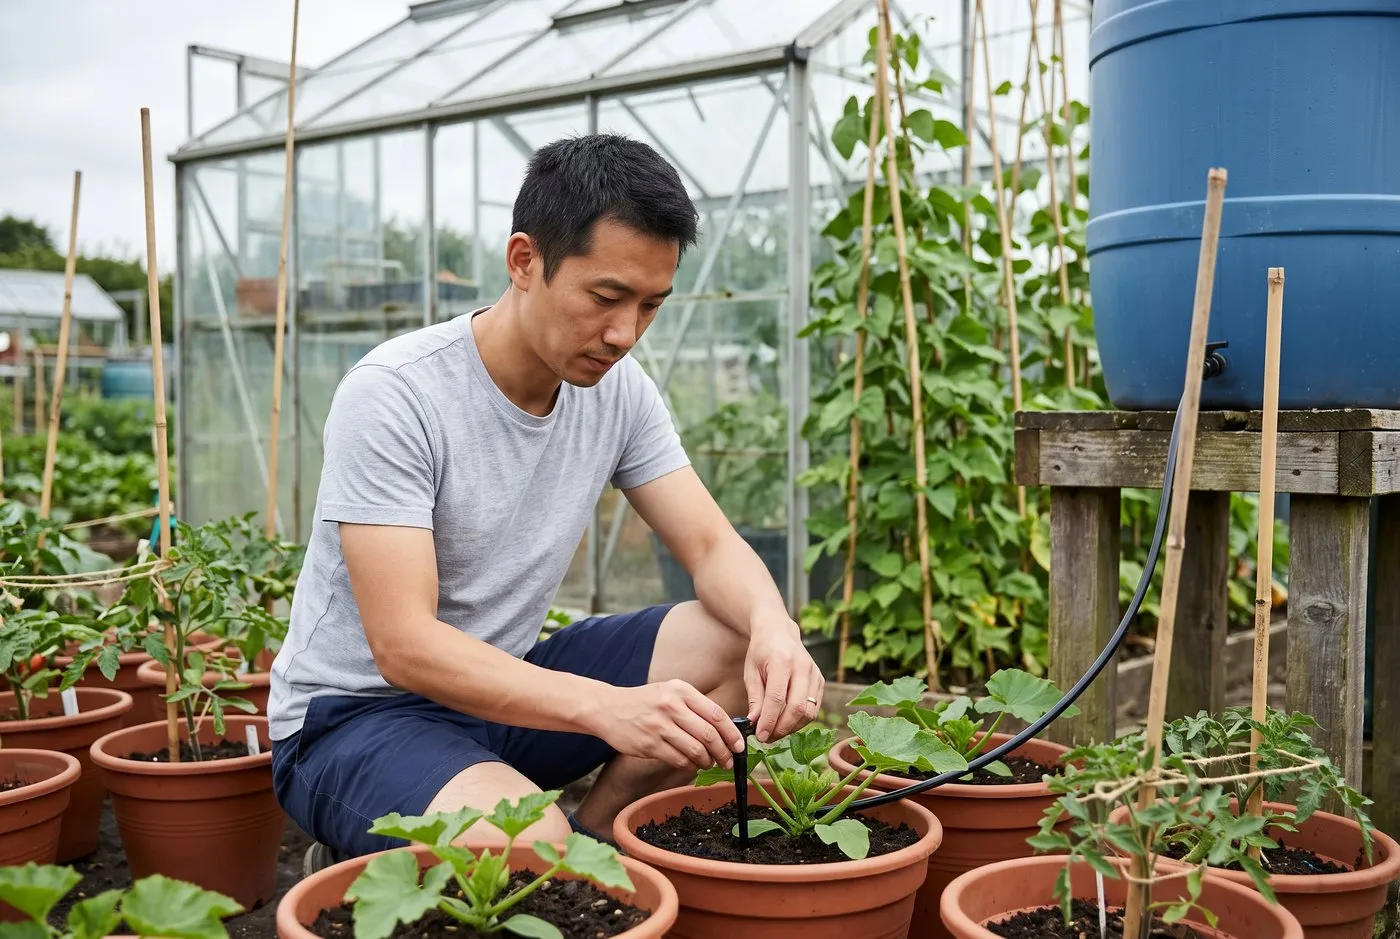 Setting drippers into pots fed by a raised butt on the allotment. A gravity kit needs no mains or power, just a barrel lifted about a metre.
Now you know which drip irrigation kit suits your garden, read our guide to hot weather watering in a UK heatwave for the next step in keeping plants alive through summer. You can browse more of our how-to guides for jobs to pair with it.
Frequently asked questions
What is the best drip irrigation kit for a UK garden?
A pressure-compensating inline dripline kit is the best all-round choice for UK gardens. It waters rows, beds and hedges evenly, even on a slope or a long run. For mixed patio pots, a micro-drip kit like Gardena Micro-Drip is easier to set up and adjust per plant.
Do drip irrigation kits work on UK mains water pressure?
Yes, but you must fit a pressure reducer first. UK mains run at 3 to 4 bar and most drip kits want 1 to 2 bar. Without a reducer, emitters pop off and pipes split. A £6 to £10 reducer at the tap solves it.
How much water does a drip irrigation kit save?
Do I need a filter on a drip irrigation system?
Yes, a filter is essential, especially in hard-water areas. A 120-mesh (155-micron) inline filter stops grit and scale blocking the tiny emitter holes. Skipping it is the single most common reason drip kits fail within a season.
Can you use a drip kit on an allotment with no tap?
Yes, a gravity-fed kit runs from a raised water butt or tank with no mains or electricity. Blumat carrot-style systems and gravity dripline work from a barrel lifted about 1 metre. Flow is gentler, so space emitters closer and run them longer.
How long should a drip irrigation system run?
Run most kits for 30 to 45 minutes, once early in the morning. That wets the soil to about 20cm on 2 litre-per-hour emitters. Check by digging down after a week. Sandy soil needs shorter, more frequent runs than clay.
Should I turn off my drip kit in winter?
Yes, drain and store the kit before the first hard frost. Water left in the pipe freezes, expands and splits the line and emitters. Disconnect at the tap, open the far end, let it drain, then coil it under cover until spring.
Our team produces practical UK gardening guidance from source research, contributor records and established horticultural practice. Editorial standards are overseen by Matt W.