How to Root Prune Plants in Pots
Root prune pot-bound plants to revive them without potting up. Tested on 40+ UK containers: timing, how much root to cut and which plants love it.
Key takeaways
- Remove 20-25% of the root ball, never more than a third in one go
- Cut a matching 20-25% of top growth to balance water demand
- Root prune deciduous plants in late winter, evergreens after flowering
- A 3-yearly root-prune cycle keeps a plant in the same pot for decades
- Acers, citrus, hostas, bamboos and patio fruit respond well; magnolias hate it
- No feed for 4-6 weeks after, then a half-strength liquid feed
Root pruning is the trick that keeps a container plant healthy without ever moving it into a bigger pot. Once you understand it, you stop the endless cycle of potting up. Every tired plant gets shifted into a larger container until it is too heavy to lift and still looks miserable. Instead, you refresh the same plant in the same pot by cutting back the roots and the top growth together. It sounds brutal. It is one of the kindest things you can do for a pot-bound acer, citrus or hosta.
This guide covers how to spot a root-bound plant in seconds and the science of why circling roots strangle one. It explains when and how to root prune, and which species love it. It also covers the right tools and the aftercare that locks in recovery. Every figure comes from a six-season trial on 40-plus container plants in my Staffordshire test garden.
How to tell a plant is pot-bound and needs root pruning
A pot-bound plant gives away its trouble through five clear signs. Spot any one of them and the plant is a candidate for root pruning rather than another season of decline.
Water tells the first story. Pour a litre onto the surface and watch. On a healthy pot it takes 10-20 seconds to start draining. On a pot-bound plant the water runs straight through the drainage holes in 2-4 seconds. Roots have displaced almost all the compost, so nothing is left to hold moisture. The plant is then thirsty within a day.
Growth is the second tell. A plant that grew 30cm two summers ago and barely 5cm last year has run out of room and food. The leaves shrink, colour fades, and flowering tails off. Tip the plant out and the picture confirms it. White roots circle the cylinder, a dense matted plate sits at the base, and barely any compost shows. Roots creeping out of the drainage holes are the final giveaway.
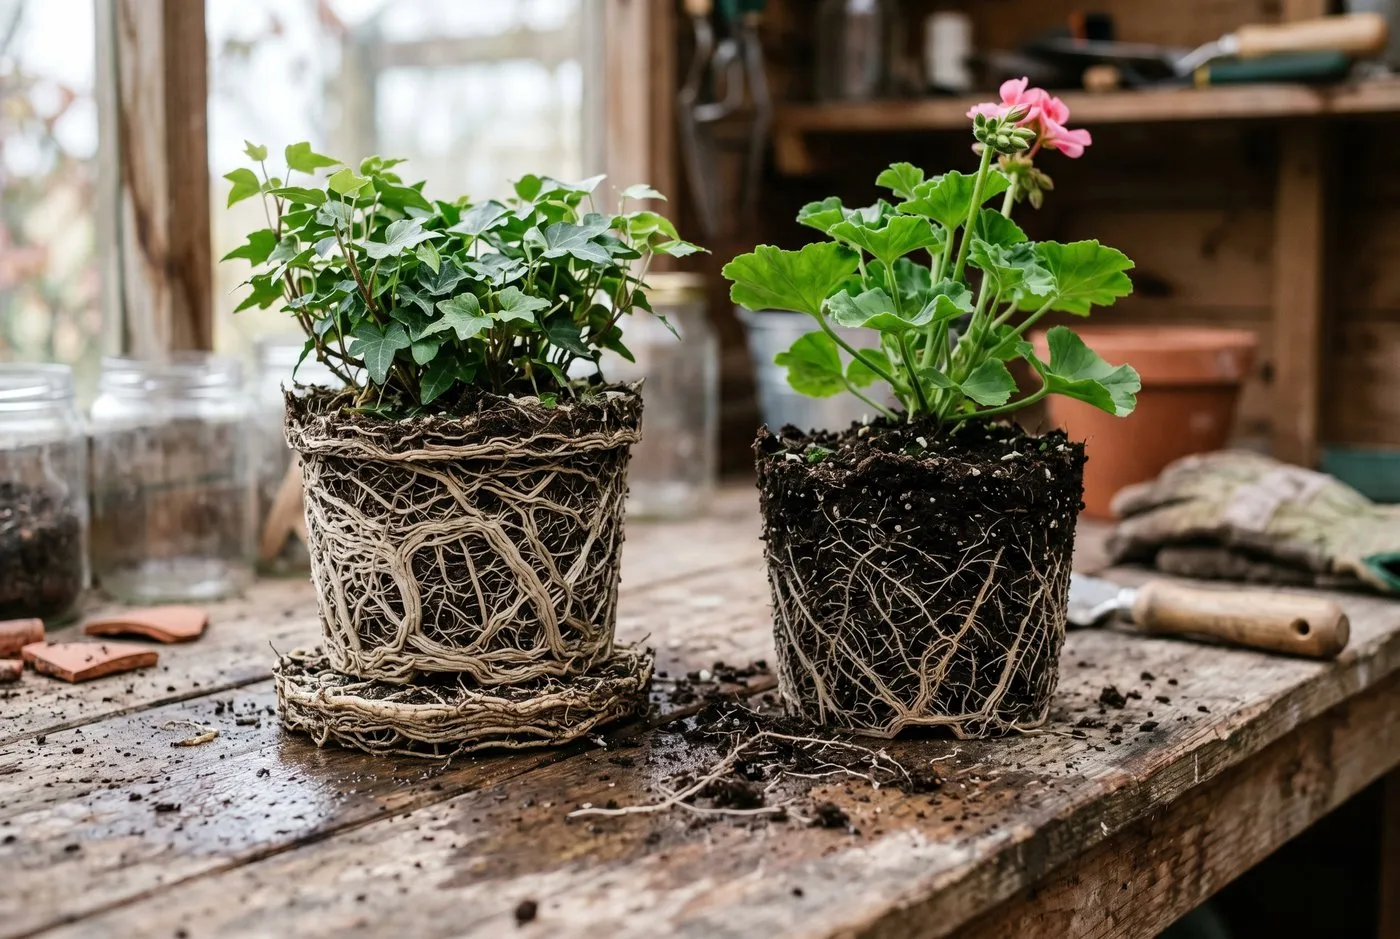 Left: a pot-bound root ball with dense white roots circling the cylinder and a solid base plate. Right: a healthy root ball with compost still visible between feathery roots. The circling pattern on the left is the problem root pruning fixes.
Pot-bound versus simply hungry
Not every struggling pot needs root pruning. A plant can be hungry rather than root-bound, and the fix is different. If the root ball still shows compost between the roots and slides out loosely, the plant is short of food, not space. A top-dress and a feed will sort it.
Root pruning is for the plant whose roots have taken over the entire pot. The clearest test is the tip-out. If the root ball holds the exact shape of the pot when removed, it is pot-bound. Look for a solid wall of roots on every side. The fix is to cut, not to feed. Our trial showed that feeding a pot-bound plant gave a brief green-up. It faded within six weeks, because the roots had no room to use the nutrients.
The science of why circling roots strangle a plant
Circling roots are not just untidy. Over time they physically choke the plant, and understanding why explains the whole point of root pruning. A root growing in open ground spreads outward in every direction, seeking water and food. A root in a pot hits the wall and turns. With nowhere else to go, it follows the curve round and round.
These circling roots thicken with age. Where they cross and press against the stem and against each other, they squeeze. This is called girdling. The thickening roots constrict the flow of water and sugars, exactly as a tight wire around a tree trunk would. The plant slowly starves itself even when watered and fed. On a long-neglected pot, you can find roots wrapped a full turn or more around the base of the stem.
There is a second problem running alongside. The compost between the roots breaks down and washes away over two or three years. What started as an open, airy mix becomes a dense, airless plug of root and spent material. Oxygen cannot reach the roots, drainage collapses, and the fine feeder roots that actually take up water die off. The plant is then both girdled and suffocating. Root pruning solves both at once: it removes the worst circling roots and makes room for fresh, open compost.
What happens to a root ball over one, two and three years
The decline runs on a predictable timeline, and knowing it tells you when to act.
Year one is the good year. A young plant in fresh compost roots out steadily, the mix stays open, and growth is strong. The roots reach the pot wall by late summer but have not yet started serious circling.
Year two is when circling sets in. Roots that hit the wall in year one now spiral round the cylinder. The compost has lost perhaps a third of its structure. Growth is still reasonable but slowing, and the plant dries out faster between waterings.
Year three is the turning point. The pot is a solid mass of circling roots, the original compost is largely gone, girdling has begun, and growth stalls. This is the moment to root prune. The critical mistake most people make is to wait past this point and instead pot up, year after year, chasing the decline with ever-bigger containers rather than fixing the root ball. The other common error is to root prune but cut almost nothing off, taking a token slice that does not break the circling pattern, so the plant declines again within a season.
When to root prune container plants
Timing decides whether root pruning revives a plant or kills it. The rule splits by plant type. Deciduous plants are pruned in dormancy; evergreens and flowering plants are pruned after they flower.
Deciduous plants, including acers, patio fruit trees and hostas, are best root pruned in late winter to early spring. That means late January to mid-March in most of the UK. The plant is dormant, carrying no leaves to support, so cutting the roots causes minimal stress. New roots and shoots then grow away together as the soil warms. Avoid pruning once the buds have broken and the plant is in full leaf. The reduced root system cannot supply the leaves, and the plant wilts badly.
Evergreens, citrus and most flowering shrubs are different. They carry leaves year-round or flower at a set time. Prune them straight after flowering, when the surge of spring growth has finished. For agapanthus, that means autumn. For a patio camellia, late spring once the flowers drop. Never root prune in the heat of midsummer or during a drought, whatever the plant. The stress of cut roots plus high water demand is the worst combination.
Reading your own plant rather than the calendar
Dates are a guide, not a law. The surest signal is the plant’s own state. A deciduous plant with no leaves and fat, unbroken buds is ready, whatever the date on the calendar. A plant already pushing soft new growth is not.
In a mild West Country garden the window opens in January. In a cold Pennine or Scottish garden it may not open until March. Watch your own plant and your own weather. If a hard frost is forecast within a few days of pruning, wait, because freshly cut roots are vulnerable to freezing. A cool, frost-free, overcast spell is the target. For plants that shrug off this kind of disturbance, see our guide to container plants that thrive on neglect.
How to root prune a plant step by step
Root pruning takes about 45 minutes per plant and costs roughly £8 in fresh compost. The method is the same whether you are reviving an acer, a citrus or a clump of hostas. The full numbered steps appear in the how-to box on this page; this section explains the thinking behind each one.
Start with a well-watered plant and cool conditions. Tip it out, read the roots, then slice 20-25% off the root ball, taking the matted base plate and paring the sides. Score the four sides 10mm deep so new roots branch outward into fresh compost rather than carrying on their circle. The single most important balancing act follows: cut a matching 20-25% off the top growth. A reduced root system cannot supply a full canopy. Skipping this step is why so many home attempts end in a wilted, sulking plant.
Then repot into the same scrubbed pot, working fresh compost firmly down the sides. Water in well, and move the plant somewhere sheltered and shaded for a fortnight. The fresh compost is the half of the job people forget. Removing roots without replacing the exhausted soil leaves the plant in the same airless plug it started in.
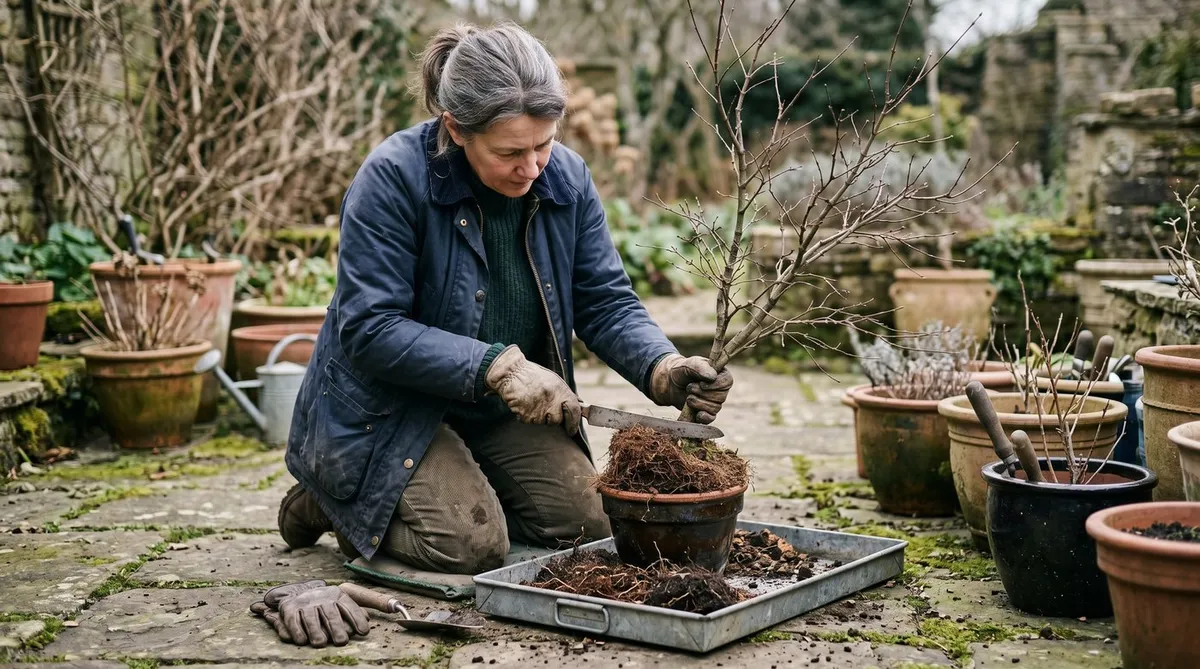
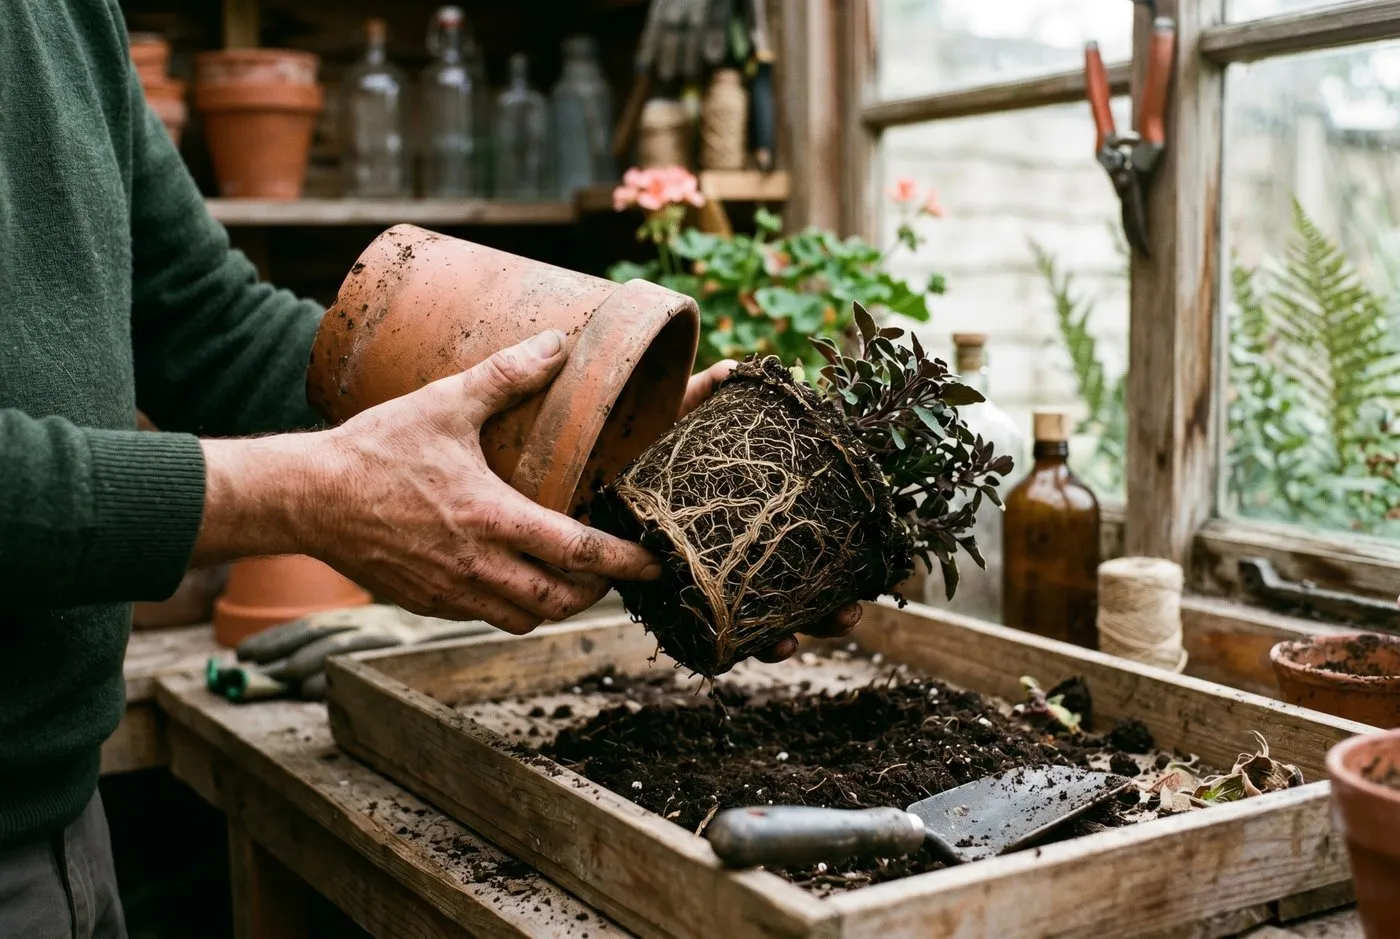 Tipping the plant out to read the roots. Support the stem, slide the root ball clear, and look for the circling pattern before you cut.
Slicing the root ball cleanly
The cut itself worries people most, so it pays to be deliberate. Stand the root ball on a firm surface and commit to clean, decisive strokes. A sawing, hesitant action tears roots and leaves ragged ends that heal slowly. A clean slice with a serrated bread knife severs the root and the plant seals the wound quickly.
Take the bottom slab first, because the densest circling and the matted base plate sit there. Then pare the sides to reach your 20-25% target. Hold the removed material against the whole root ball to judge the proportion by eye. With dense, woody root balls like bamboo, swap the bread knife for a pruning saw and expect to use real force. The roots will look alarming once cut. That is normal and the plant recovers fast.
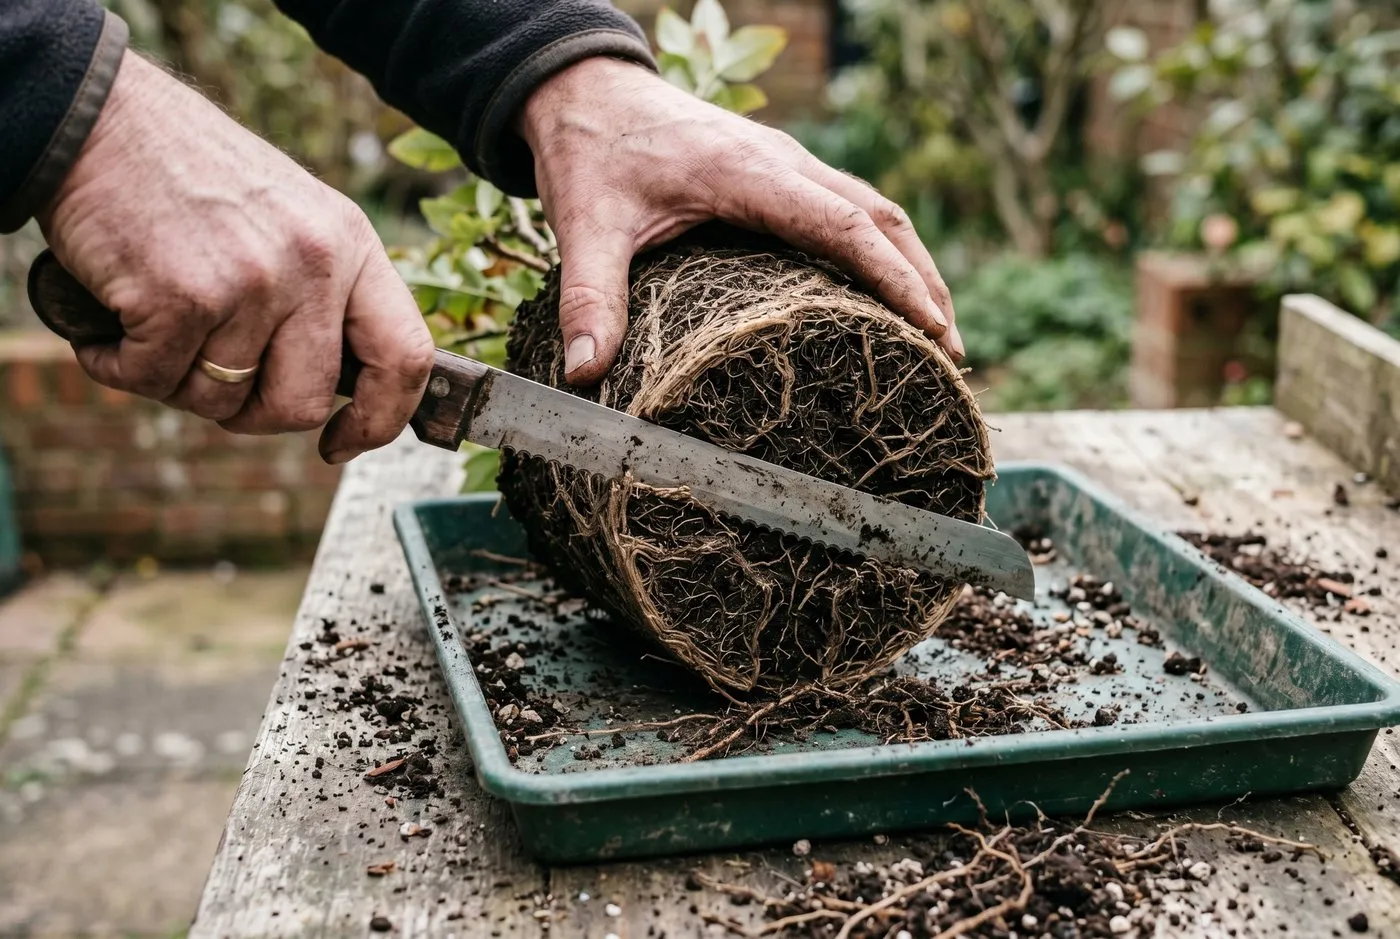 Slicing the matted base plate off the root ball with an old bread knife. Clean, decisive strokes heal faster than hesitant sawing.
Scoring the sides and refreshing the compost
Scoring the sides finishes the job the slicing started. Four to six vertical cuts, each 10mm deep, run from the top of the root ball to the bottom. Each severed root tip then branches and grows outward into the new compost instead of resuming its circle. Tease the outer roots loose with a hand fork so they splay out rather than holding the old pot shape.
The fresh compost matters as much as the cutting. Use a loam-based mix such as John Innes No 2 or No 3 for woody, long-term plants. It holds structure for years. Add grit for anything that hates wet feet, and mix in a handful of slow-release fertiliser. If you make your own, our DIY potting compost recipe gives proportions that suit container shrubs. Work the fresh mix firmly down every side so the new roots meet open, airy compost on contact.
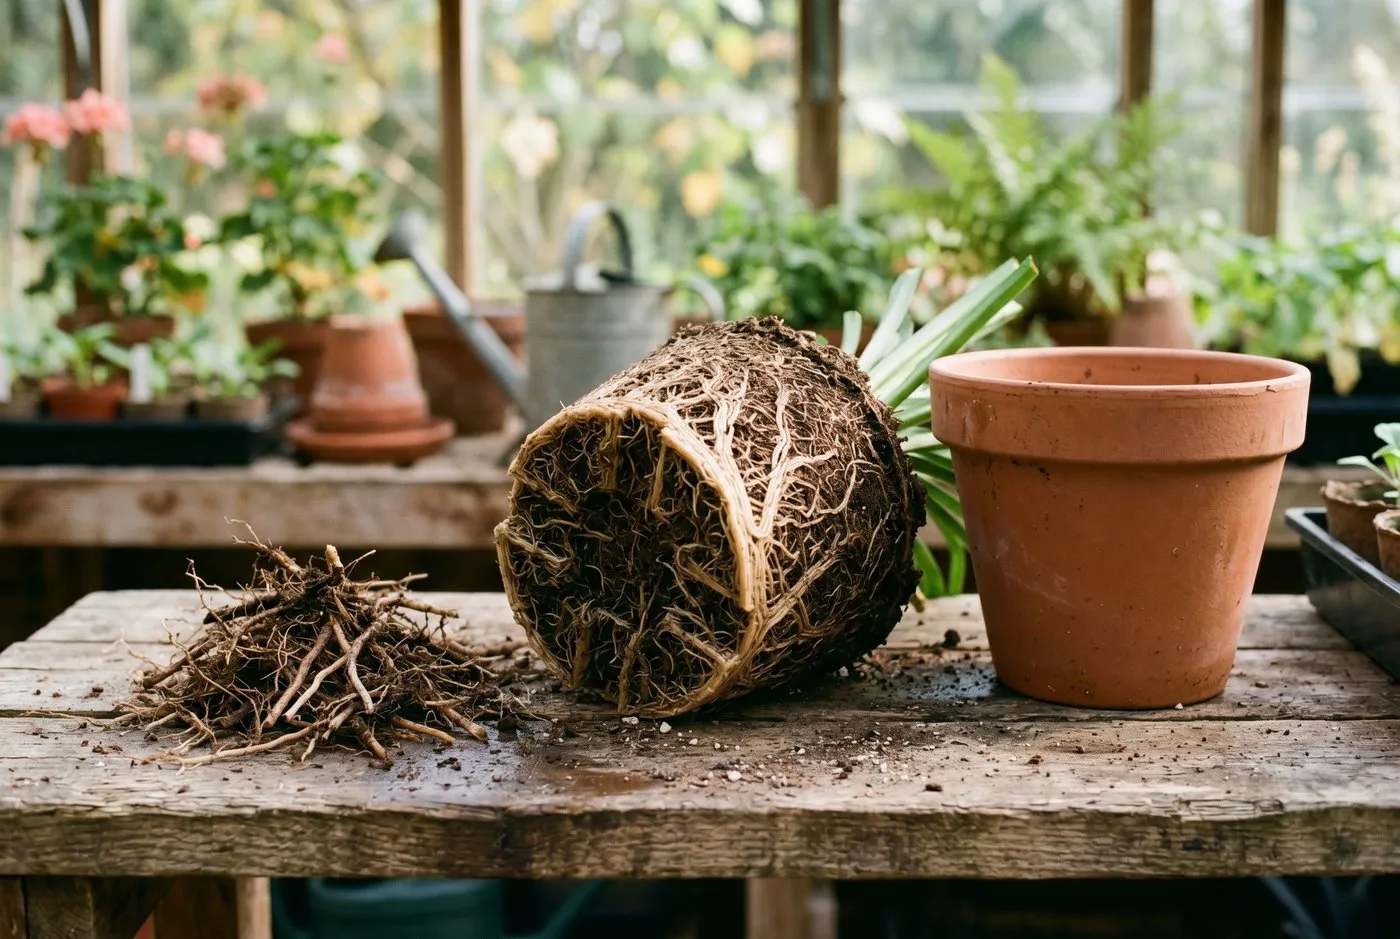 The trimmed root ball, ready to go back into its scrubbed pot. Around a quarter of the roots are gone and the circling base plate is removed.
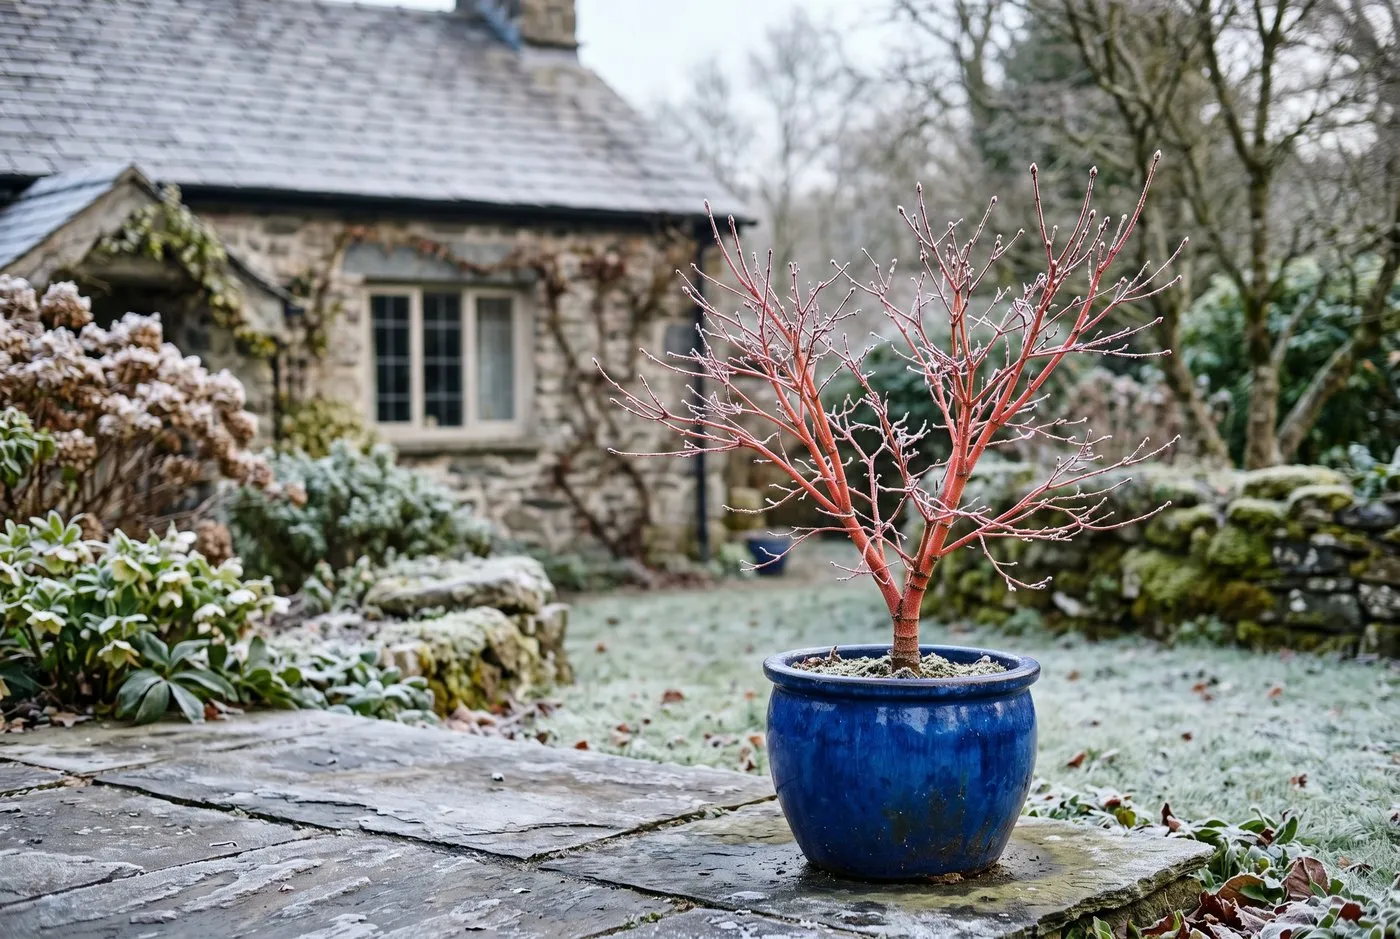 A ‘Sango-kaku’ acer in late winter, the ideal moment to root prune a deciduous container plant. Bare branches mean no leaves to support while the roots recover.
Which plants love root pruning and which hate it
Most fibrous-rooted container plants take root pruning in their stride. A few resent it badly. Knowing which is which saves you from killing a treasured plant.
Acers, hostas, bamboos, agapanthus, patio apples and pears, olives and citrus all respond well. They have fibrous root systems that branch readily from cut surfaces, so they bounce back with vigorous fresh growth. Acers in particular reward root pruning with a flush of bright new extension growth, as my ‘Sango-kaku’ trial showed. Bamboos almost demand it, because a contained bamboo turns its pot into solid root within a couple of seasons.
The plants to leave alone are magnolias, deep tap-rooted species, and fleshy-rooted perennials. Magnolias have brittle, fleshy roots that heal slowly and sulk for years after disturbance. Tap-rooted plants resent having their main anchor root cut. Fleshy-rooted perennials store energy in thick roots and rot at heavy cut surfaces. For these, pot up one size or simply top-dress. Never take more than 10-15% if you must intervene at all.
Plant-by-plant root pruning guide
This table summarises how the main container plants in the trial responded. It gives the proportion of root to remove and the best timing for each.
| Plant | Response | Root to remove | Best timing |
|---|---|---|---|
| Acer (Japanese maple) | Excellent, vigorous regrowth | 20-25% | Late winter, dormant |
| Citrus (lemon, orange) | Very good | 15-20% | After flowering, spring |
| Hosta | Excellent, divides easily | 25%, or split the clump | Early spring before leaves |
| Bamboo (containerised) | Excellent, needs it | Up to 30% | Early spring |
| Agapanthus | Good, but flowers best slightly pot-bound | 15-20% | Autumn, after flowering |
| Patio apple or pear | Very good | 20-25% | Mid-winter, dormant |
| Olive | Good | 15-20% | Spring, after frost risk |
| Magnolia | Poor, resents disturbance | Avoid, or top-dress only | Do not root prune |
| Tap-rooted plants | Poor | Avoid, pot up instead | Do not root prune |
Agapanthus is the interesting case. It flowers best when slightly pot-bound, so do not over-cut. Take only 15-20% to refresh the compost without removing so much root that you lose a year of flowers. Our trial confirmed this: hard-pruned agapanthus skipped flowering the following summer, while a light refresh flowered normally.
Why we recommend a hori-hori
After six seasons of root pruning across 40-plus pots, the one tool I reach for on dense root balls is a Japanese hori-hori. The serrated edge saws through matted bamboo and acer roots that blunt secateurs in minutes, while the pointed blade scores the sides cleanly. I tested a Niwaki hori-hori against an old bread knife and a folding pruning saw on ten pot-bound plants. The hori-hori cut the job time by roughly a third and left the cleanest wounds, which sealed fastest. In the UK, Niwaki and Burgon & Ball both sell solid stainless versions for £25-£40. A bread knife does the job for free, but if you root prune more than a few pots a year, a hori-hori earns its keep.
For everyday root balls, an old bread knife still handles most of the work, and it costs nothing. Keep one in the potting shed purely for roots. Add secateurs for the top growth and a pruning saw for the heaviest woody root balls, and you have the full kit. None of it is specialist or expensive.
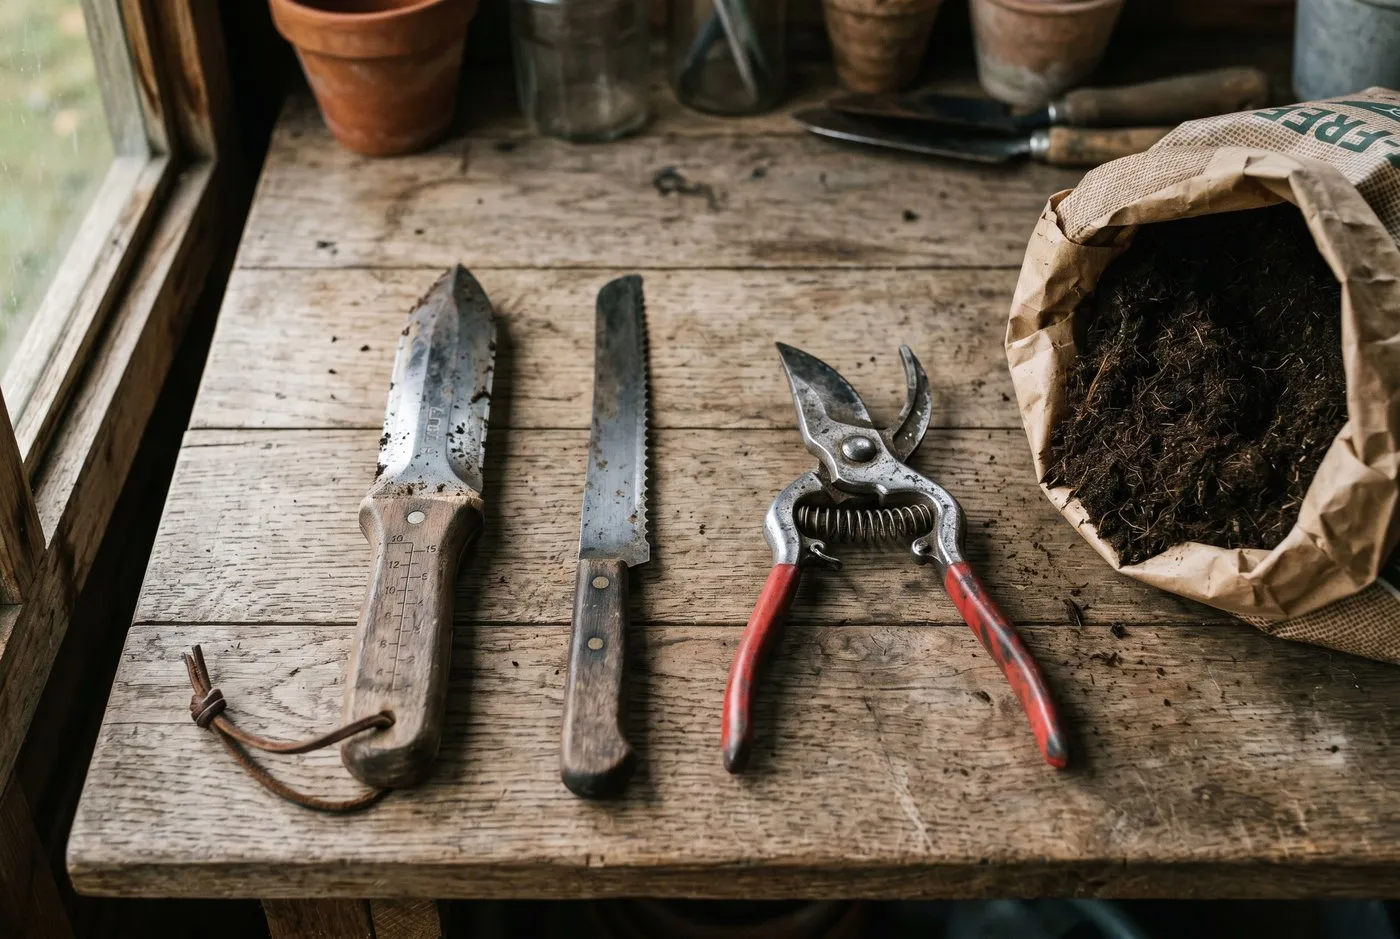 The root-pruning toolkit: a hori-hori for dense roots, an old bread knife for everyday root balls, and secateurs for the matching top-growth cut.
Root prune or pot up: choosing the right method
Root pruning is one of four ways to deal with a tired container plant. It is not always the right one. The choice depends on how pot-bound the plant is and how long you want the fix to last. It also depends on whether the plant tolerates root disturbance.
The four options run from the most thorough to the least. Root pruning and refreshing the compost is the gold-standard fix. It suits a genuinely pot-bound plant you want to keep in the same pot. Potting up one size suits a plant that has merely filled its current pot. Use it when you are happy to let the plant grow larger. Top-dressing buys a season for a plant that is hungry rather than root-bound. Doing nothing is only an option for a plant that is still growing well.
| Method | Effort | Buys you how long | Best for | Role |
|---|---|---|---|---|
| Root prune and refresh | High, 45 min | 3 years, repeatable forever | Pot-bound plants kept in the same pot | Gold-standard revival |
| Pot up one size | Medium, 15 min | 1-3 years | Plants you want to grow larger | Growth, not revival |
| Top-dress only | Low, 5 min | 1 season | Hungry but not yet pot-bound | Quick holding fix |
| Do nothing | None | None | Plants still growing well | No intervention needed |
Root pruning wins for any plant you want to hold at a fixed size for years. A patio acer or a bonsai-style specimen are good examples. Potting up wins when you genuinely want a bigger plant and have room for a bigger pot. The mistake is treating potting up as the answer to every tired plant. It only postpones the day the plant becomes too big to move and still pot-bound inside its giant container.
Root cause: why container plants decline and how to prevent it
Container plants decline for two linked reasons, and both are fixed by the same routine. The first is compost exhaustion. Over two or three years, the original mix breaks down, loses structure, and washes its nutrients out of the drainage holes. The second is root circling and girdling, where roots run out of room, spiral, thicken and slowly choke the plant.
Neither problem is solved by feeding alone. Feeding a plant in exhausted, airless compost is like pouring petrol into a car with a blocked fuel line. The permanent prevention is a three-yearly root-prune cycle. Every third spring, tip the plant out, prune 20-25% of the roots, refresh the compost, and balance the top growth. This single routine keeps a plant healthy in the same pot for decades. The Royal Horticultural Society backs the same approach to container maintenance in its growing in containers advice.
A three-yearly cycle also fits naturally with your other container care. Pair it with the right plant choices and the right compost and you rarely lose a pot. Our guide to the best plants for pots year-round helps you stock containers that take this routine well.
The bonsai connection
Bonsai is root pruning taken to its logical end. A bonsai stays in a tiny pot for decades because its roots are pruned hard every year or two. That is exactly the principle behind keeping any patio plant at a fixed size. Bonsai growers cut a third of the roots, comb them out, and repot in fresh, fast-draining mix. They balance every root cut with a matching trim of the canopy.
You do not need bonsai skill to borrow the idea. The takeaway is simple: a plant in a pot can live happily for many years if you periodically reduce and refresh its roots. UK bonsai groups such as the Federation of British Bonsai Societies run beginner days where you can watch the technique done properly on a small scale. It demystifies the whole process and makes cutting an acer’s roots feel far less drastic.
Common root pruning mistakes to avoid
Most root-pruning failures come down to a handful of repeated errors. Avoid these five and your success rate climbs sharply.
The first mistake is cutting too little. A timid slice that does not break the circling roots leaves the plant pot-bound again within a season. Commit to the full 20-25%. The second is the opposite: cutting too much. Taking half the root ball or more in one go is more than the plant can recover from. Stick to the 20-25% rule, a third at the absolute most.
Gardener’s tip: Hold the removed roots against the whole root ball before you finish. If the slice you have taken looks like a quarter or a fifth of the total, you are on target. If it looks like a third or more, stop cutting now.
The third mistake is forgetting to cut the top growth. A full canopy on a reduced root system wilts and stresses the plant. Always balance the cut. The fourth is wrong timing, root pruning a deciduous plant in full leaf or any plant in a midsummer drought.
Warning: Never root prune a plant in active growth on a hot, dry day. The cut roots cannot supply the water the leaves demand, and the plant can collapse within hours. Wait for dormancy or a cool, overcast, frost-free spell.
The fifth mistake is reusing the old, exhausted compost. The whole benefit of root pruning is to give the new roots fresh, open compost to grow into. Pack the trimmed plant back in its old plug and you have wasted the effort. Dealing with young plants outgrowing their cells? Our guide to fixing root-bound seedlings covers the smaller-scale version of the same problem.
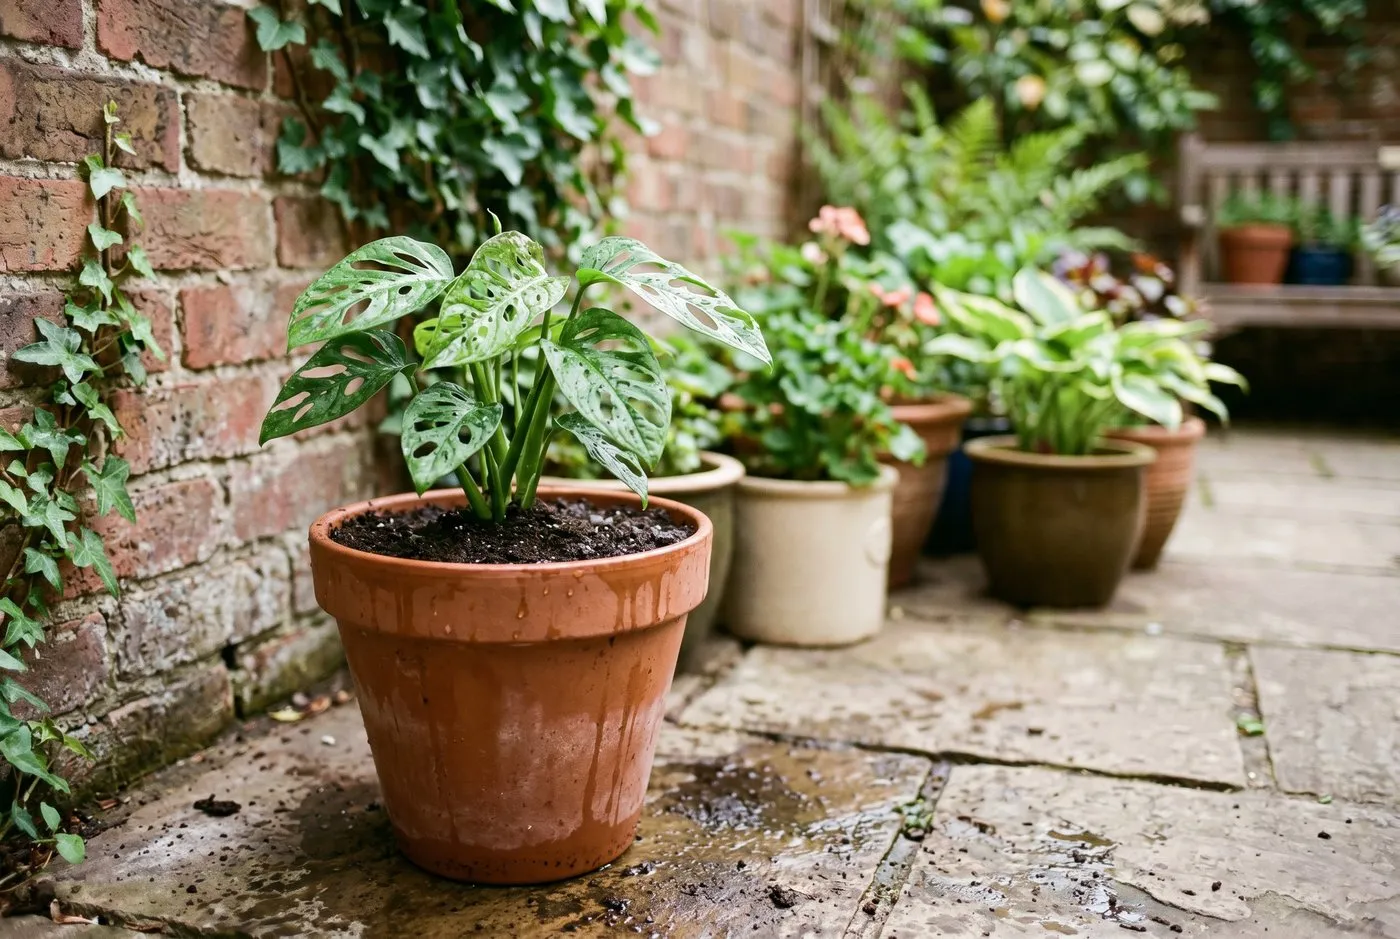 Aftercare: the repotted plant moved to a sheltered, shaded corner for two weeks while new roots form. Keep the compost damp but never waterlogged, and withhold feed for 4-6 weeks.
Aftercare for the first two weeks
The two weeks after root pruning decide whether the plant sails through or stalls. The reduced root system cannot yet supply a normal water demand, so the plant needs shelter while it rebuilds. Move the pot out of wind and strong sun into a sheltered, shaded corner. A north or east-facing spot is ideal in spring.
Watering is a balance. Keep the compost damp so new roots have moisture to grow into. Never let it sit waterlogged, because the cut roots rot easily in cold, wet soil. Check daily with a finger; water when the top 2cm feels dry. Hold off all feeding for 4-6 weeks. The fresh compost already carries enough nutrients, and feeding cut roots only forces soft growth they cannot support. After the settling-in period, begin a half-strength liquid feed and build up through the season.
By midsummer the plant should be away. New extension growth, fresh leaves, and a renewed appetite for water all signal success. The same care applies whether you are reviving an acer, an olive or a patio rose. For roses, see how it fits the wider routine in our guide to growing patio roses in pots. For fruit trees, the principle runs right through growing fruit in pots and containers.
Frequently asked questions about root pruning plants in pots
Can you root prune a plant in a pot?
Yes, and it is the proper fix for a pot-bound plant. Tip it out, slice 20-25% off the root ball, score the sides, then repot in fresh compost in the same pot. It revives the plant without forcing you into an ever-bigger container. The technique works on acers, citrus, hostas, bamboos and most fibrous-rooted plants. Done every three years, it keeps a plant healthy in the same pot for decades.
How much root can you safely cut off a pot-bound plant?
Remove 20-25%, never more than a third in one go. Cut a matching amount of top growth to balance the smaller root system. Tap-rooted and fleshy-rooted plants take less, around 10-15%, because they store energy and resent heavy cutting. Hold the removed roots against the whole root ball to judge the proportion by eye before you finish. Cutting too little leaves the plant pot-bound again within a season.
When is the best time to root prune container plants?
Late winter to early spring for deciduous plants, while dormant. Evergreens and flowering plants prefer pruning straight after flowering. Avoid hot dry spells. A cool, damp day in February or March gives the lowest stress and the fastest regrowth. In mild gardens the window opens in January; in cold Pennine or Scottish gardens it may not open until March. Read your own plant: fat unbroken buds mean it is ready.
Which plants should you not root prune?
Avoid magnolias, tap-rooted plants and most fleshy-rooted perennials. Magnolias have brittle, slow-healing roots that sulk for years. Tap-rooted plants like many trees from seed resent disturbance. When unsure, pot up one size instead and root prune nothing. Fleshy-rooted perennials store energy in thick roots and rot at heavy cut surfaces. Take no more than 10-15% if you must intervene at all.
What tools do you need to root prune a plant?
An old bread knife handles most root balls cleanly. A pruning saw or hori-hori suits dense, woody or matted roots like bamboo. Add secateurs for the top growth and a bucket of water to soak the trimmed plant before repotting. A hand fork helps tease the outer roots loose. None of it is specialist or expensive, and a bread knife kept just for roots does the everyday work for free.
Do you feed a plant after root pruning?
No, withhold feed for 4-6 weeks. Fresh compost already holds enough nutrients, and feeding cut roots encourages soft growth they cannot support. After 4-6 weeks, start a half-strength liquid feed and build up slowly through the season. During those first weeks, focus on shelter and careful watering instead. Keep the compost damp but never waterlogged so the new roots have moisture without rotting.
Root pruning turns the tired, declining container plant from a problem into a project you can fix in 45 minutes. Do it once, see an acer flush with new growth, and the endless cycle of potting up loses its appeal for good. Keep a clean bread knife in the shed, mark a three-yearly date in your calendar, and start with one pot-bound plant this dormant season. For more ways to keep containers thriving with less work, read our full guide to how-to gardening projects. Browse the rest of the container range from there.
Lawrie has been gardening in the West Midlands for over 30 years. He grows his own veg using no-dig methods, keeps a wildlife-friendly garden, and writes practical advice based on real UK growing conditions.