Key takeaways
- A seed snail is compost rolled inside a 12-15cm wide strip of foam underlay or bubble wrap, stood on end in a pot
- One 13cm pot holds a 60cm strip and around 20 sweet pea seeds; the same seedlings in root trainers need four times the bench space
- The coil gives roots 12-15cm of straight vertical run, so seedlings come out long-rooted and never pot-bound
- Best crops: sweet peas, broad beans, runner beans, chillies, tomatoes and onions; skip carrots and other root crops
- Unrolling is the payoff: seedlings lie spaced along the strip and lift away with almost no root damage
- The failure modes are drying out, waterlogging and sowing too deep; a coil holds less compost than it looks, so check it daily
Seed snails have earned their moment. The method is simple: spread moist compost along a strip of foam or bubble wrap, roll it up like a Swiss roll, stand it on end in a pot and sow into the top. One 13cm pot then does the work of twenty modules. The trend took off online in 2024 and it is not a gimmick. It solves two real problems at once, the annual shortage of windowsill space and the circled, pot-bound roots that plague deep-rooted seedlings in cells.
What is a seed snail?
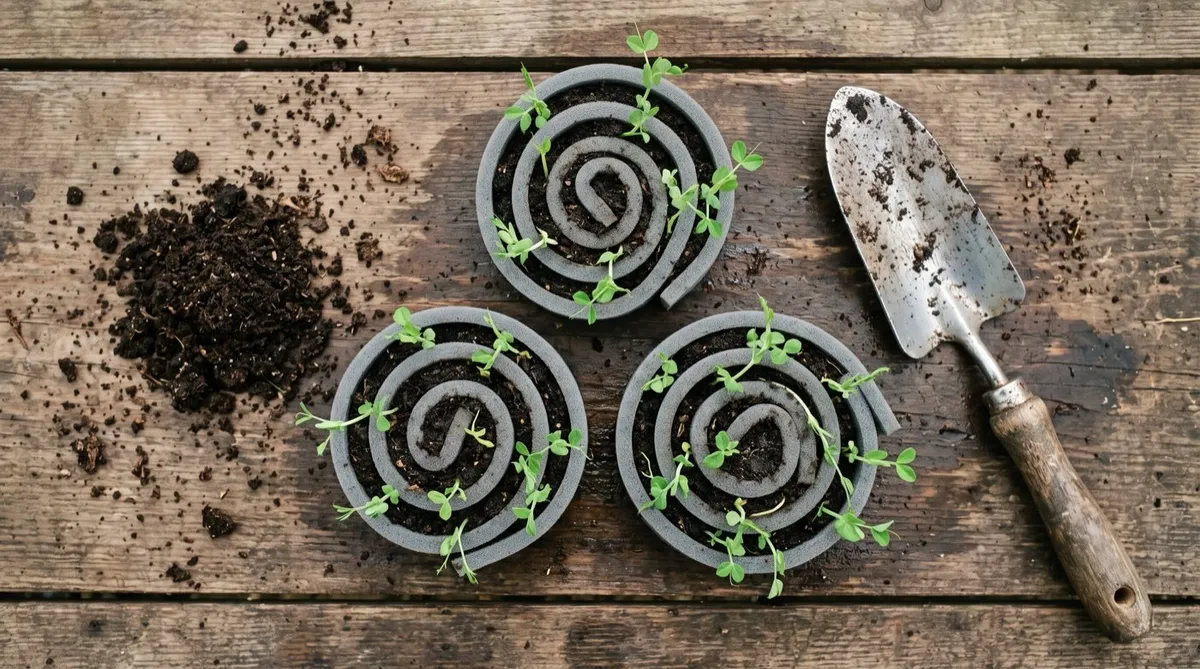
A seed snail is a coil of compost held in shape by a rolled strip of flexible, waterproof membrane. Picture a Swiss roll stood on its end. The membrane forms the spiral walls, the compost fills the gap between them, and the open top face is your seed bed. Seeds are sown into the exposed compost edge, roots grow straight down through the coil, and shoots come up through the spiral like the whorls on a snail shell. That shell look is where the name comes from.
The technique spread from allotment social media into the mainstream around 2024, and growing sites such as GrowVeg now rate it as a serious space-saving method rather than a novelty. The claim that grabs attention is density. A shoebox-sized tray of snails can hold several hundred seedlings. The claim that matters more is root quality. A module gives a root 4-5cm before it hits plastic and starts circling. A snail made from a 12cm strip gives the same root 12cm of straight, unobstructed run.
Nothing about it is new, strictly speaking. Nurseries have long-rooted plants in deep cells, and gardeners have rolled cuttings in polythene for decades. The seed snail just combines the two ideas into something you can build in ten minutes from packaging you were about to throw away.
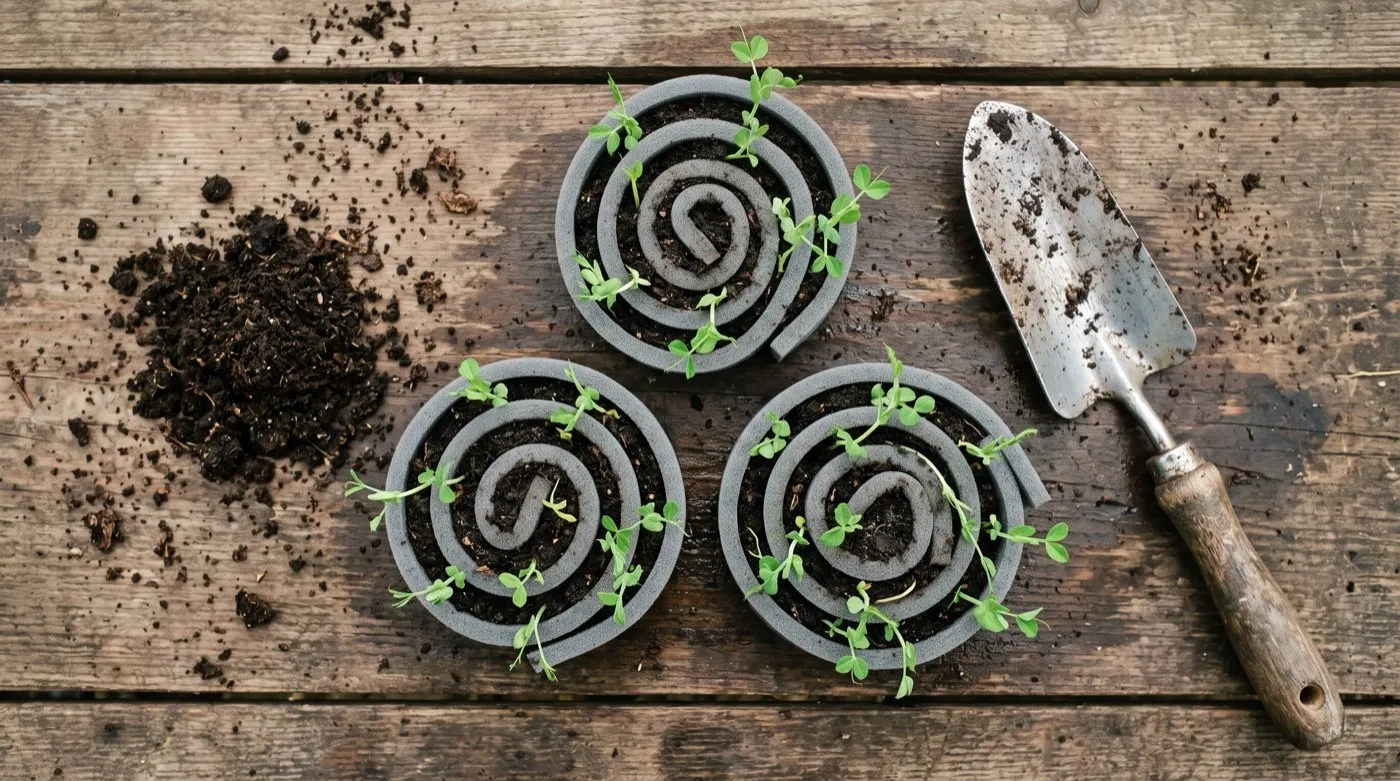 Three finished seed snails on the bench. The spiral top face is the seed bed; each coil replaces a tray of modules.
The kit list: membrane, compost and tape
You need four things, and three of them are probably in the house already. The whole build costs pennies per snail.
The compost. Ordinary peat-free multipurpose is fine, sieved if it is lumpy. Seed compost is even better for fine seed. Garden Organic’s seed sowing guidance makes the point that seeds carry their own nutrients, so a rich mix buys you nothing at this stage. What matters is moisture. Pre-wet the compost until it holds together when squeezed but does not drip.
Tape and a pot. Masking tape or painter’s tape holds the roll closed; string or a wide elastic band does the same job. A 13cm pot suits a 60cm strip. A deep seed tray takes a whole family of snails standing shoulder to shoulder.
A label. Every snail looks identical from above once sown. Write the variety and date on a plastic label and push it into the coil centre, or write directly on the membrane’s outer face with a permanent marker before rolling.
How to make a seed snail step by step
The build takes about ten minutes once the compost is moistened. Dimensions matter more than technique, so measure the first one and you will do the rest by eye.
- Cut the strip. For sweet peas, beans and anything deep-rooted, cut it 12-15cm wide and 60cm long. For lettuce, onions and other shallow starters, 8-10cm wide is enough. Go to 100cm long if you want more capacity, but the roll gets heavy.
- Lay it flat and add compost. Spread pre-moistened compost 2cm deep along the strip, pressing it down firmly as you go. Leave the last 5cm of the strip bare so the membrane can overlap and seal the roll. Firm the bottom long edge especially well, because that edge carries the coil’s weight.
- Roll it up. Start at the compost-covered end and roll gently but firmly, keeping the bottom edge level as you go. Aim for a tight, even coil. A 60cm strip with 2cm of compost rolls to roughly 11-12cm across.
- Tape it. Run two strips of masking tape around the roll, one a third from the top and one a third from the bottom. Check the base: if compost is falling out, the roll is too loose. Unroll and start again rather than nursing a slumper.
- Stand it in a pot. Sit the snail upright in a 13cm pot, spiral face up, and pack any gap around it with spare compost. The pot catches drainage and stops the coil unwinding.
- Sow. Push large seeds into the top edge to their normal depth: 1.5cm for sweet peas, 4-5cm for broad and runner beans, following the spiral line with a 3cm gap between seeds. Scatter fine seed such as chillies, tomatoes and onions 1-2cm apart on the surface and cover with 0.5-1cm of sieved compost.
- Water and label. Water gently from the top once, label the coil, and cover with a clear bag or propagator lid until germination.
A 60cm strip takes about 20 sweet pea seeds at 3cm spacing. The same strip takes 40 or more onion or chilli seeds sown finer.
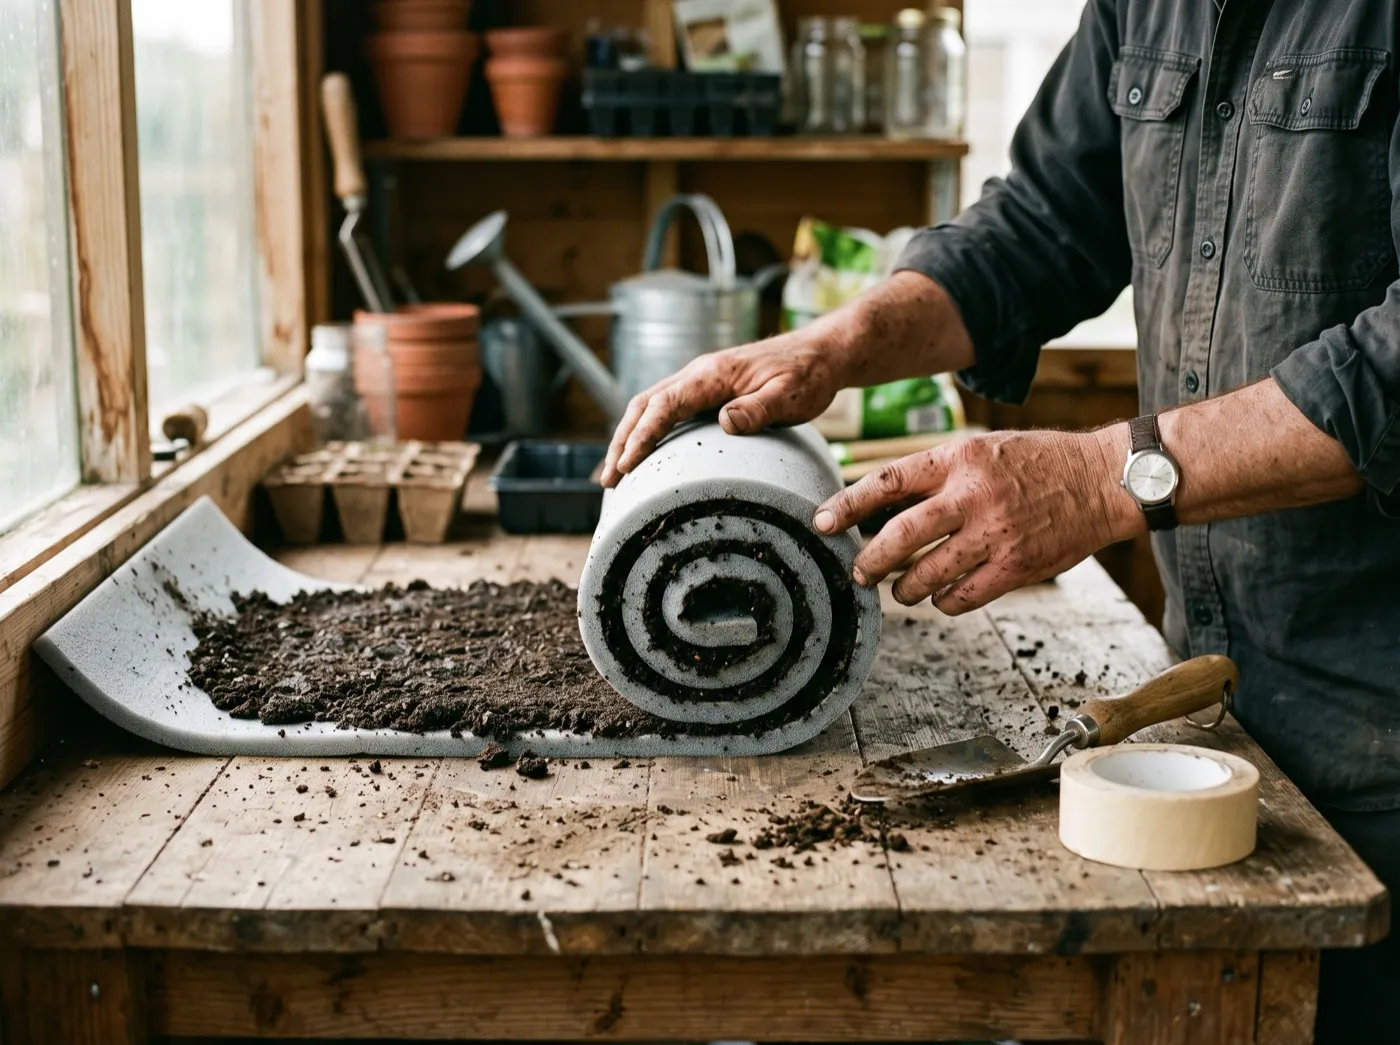 Rolling the strip. Compost goes on 2cm deep with the last 5cm of membrane left bare to seal the coil.
Gardener’s tip: Get the compost moisture right before you roll, because you cannot fix it afterwards. Squeeze a handful. It should hold together like a wrung-out sponge with no drips. Too dry and the coil sheds compost from the base as you roll. Too wet and the centre of the snail sits airless for weeks, and the seeds in it rot instead of sprouting.
What can you sow in a seed snail?
Anything you would normally start in modules or pots will grow in a snail, but the method favours big seeds and long roots. These are the crops where it beats trays outright.
Sweet peas are the classic seed snail crop and the reason most people build their first one. They hate root disturbance and demand depth, which is why growers buy root trainers for them in the first place. Push seeds in 1.5cm deep, 3cm apart along the spiral. The RHS sows sweet peas about 1cm deep in pots on the same principle of a long, cool root run, as set out in its lathyrus growing guide. Our own sweet pea growing guide covers varieties and training once they leave the coil.
Beans of every kind suit the depth. Broad beans go in 4-5cm deep from February under cover, runner and French beans in late April for planting out after frost. Use the wider 15cm strip for these, because a runner bean root will hit the base of a 10cm coil in a fortnight.
Chillies and tomatoes work sown fine along the top edge. Chillies benefit most, since they are sown in January or February when windowsill space is at its scarcest. Sow 1cm apart, cover lightly, and keep the coil at 18-25C. Full growing detail is in our chilli pepper guide.
Onions and leeks are a quiet triumph in snails. Sow 1cm apart in February, let the seedlings reach pencil-lead thickness, then unroll and plant them out like tiny leeks. Our onion growing guide picks up from there.
Two exclusions. Skip carrots, parsnips and anything grown for its taproot, because transplanting forks them. And skip cucurbits sown late; courgettes and squash grow so fast that they swamp a coil before you can blink.
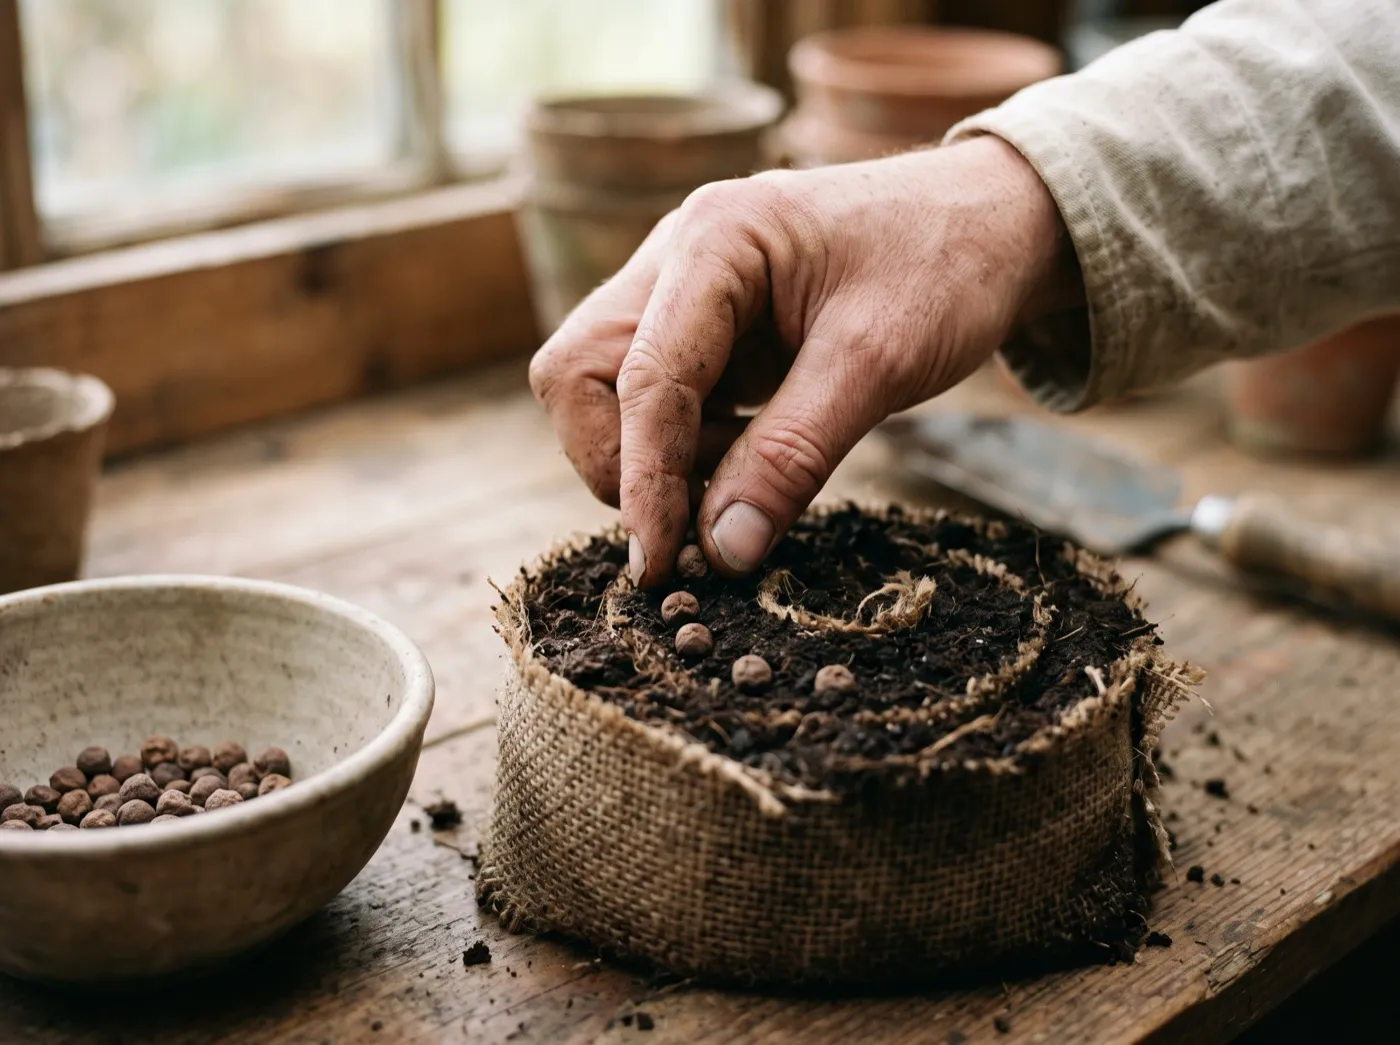 Sowing sweet peas 3cm apart along the spiral. Large seeds go in to their normal packet depth.
Do seed snails actually save space?
Yes, and by more than most space-saving tricks manage. The saving comes from geometry. A tray of modules spends most of its footprint on plastic walls and gaps. A snail packs the same compost into a solid cylinder with no dead space at all.
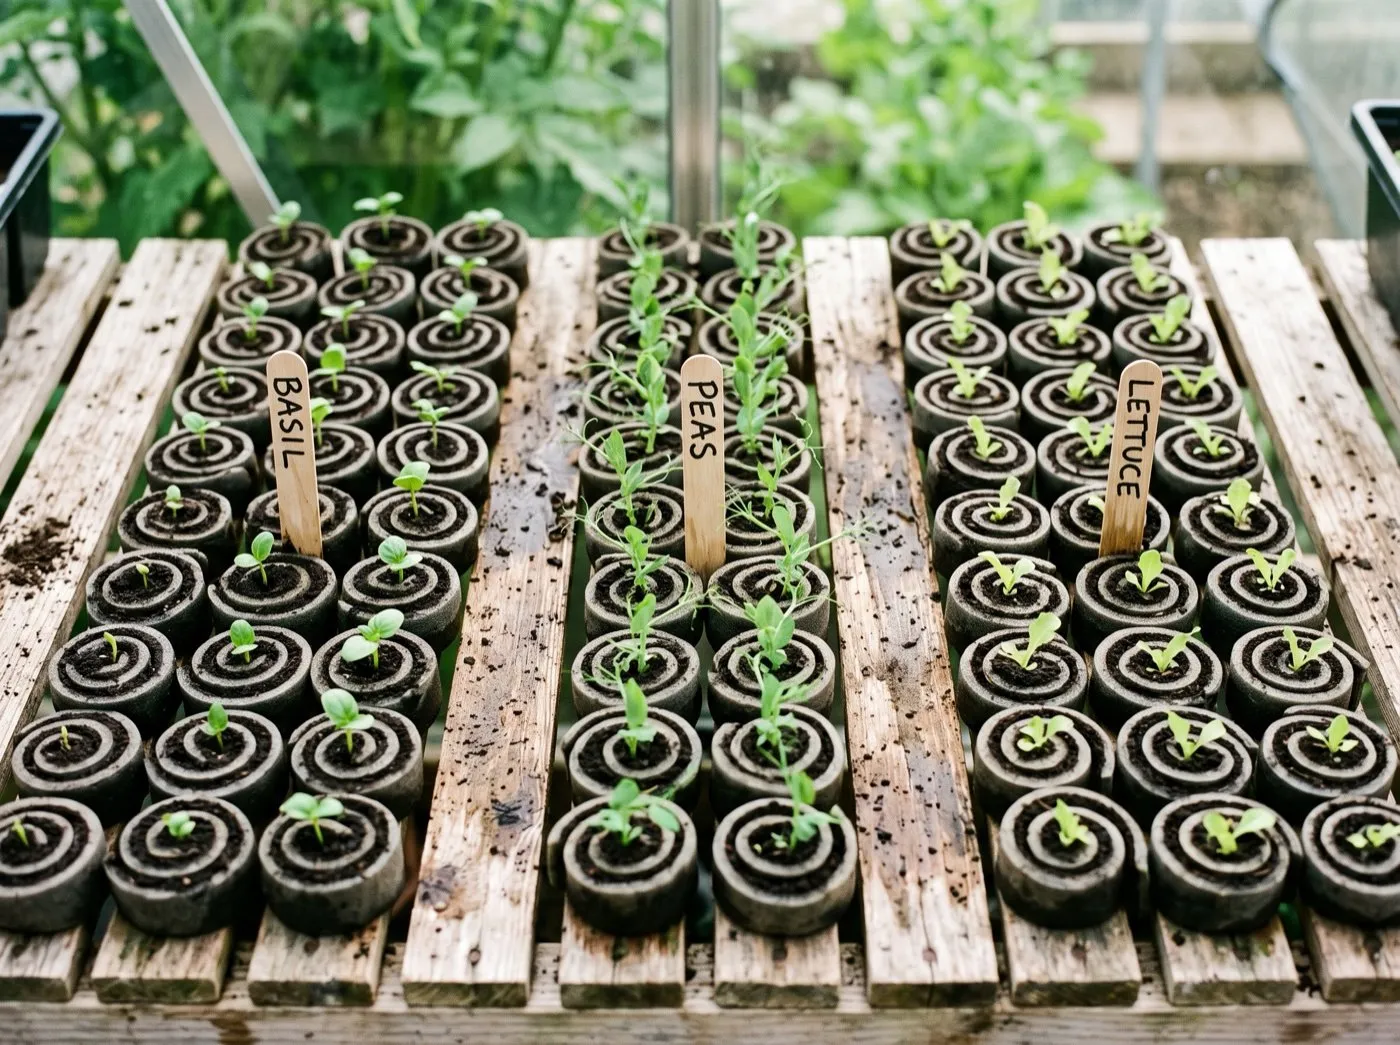 Seven coils on a single shelf. The same seedlings in module trays would fill the whole staging.
Seed snails vs modules, root trainers and loo-roll tubes
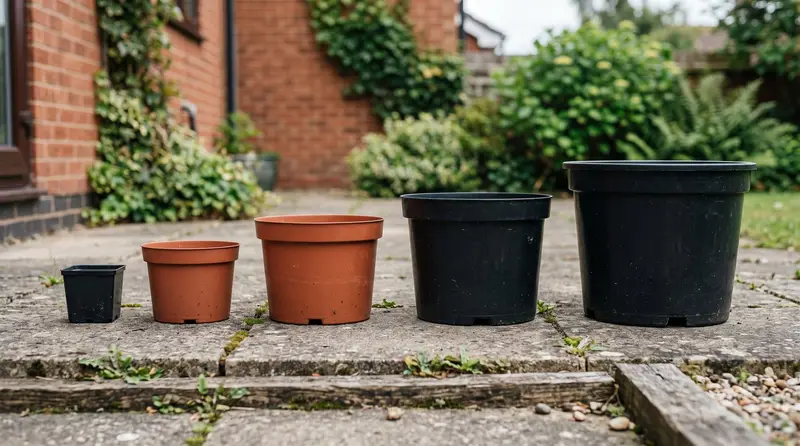
The honest summary: root trainers remain excellent and forgiving, and they are the right choice if you water erratically. Loo-roll tubes are free but mould up in cool springs. Modules still win for shallow-rooted crops sown in bulk. The snail wins wherever depth and bench space are both short, which for most UK growers means February to April on a windowsill. If you like this end of the propagation spectrum, the closely related plug-free technique in our soil blocking guide pairs well with snails, blocks for brassicas and lettuce, coils for climbers.
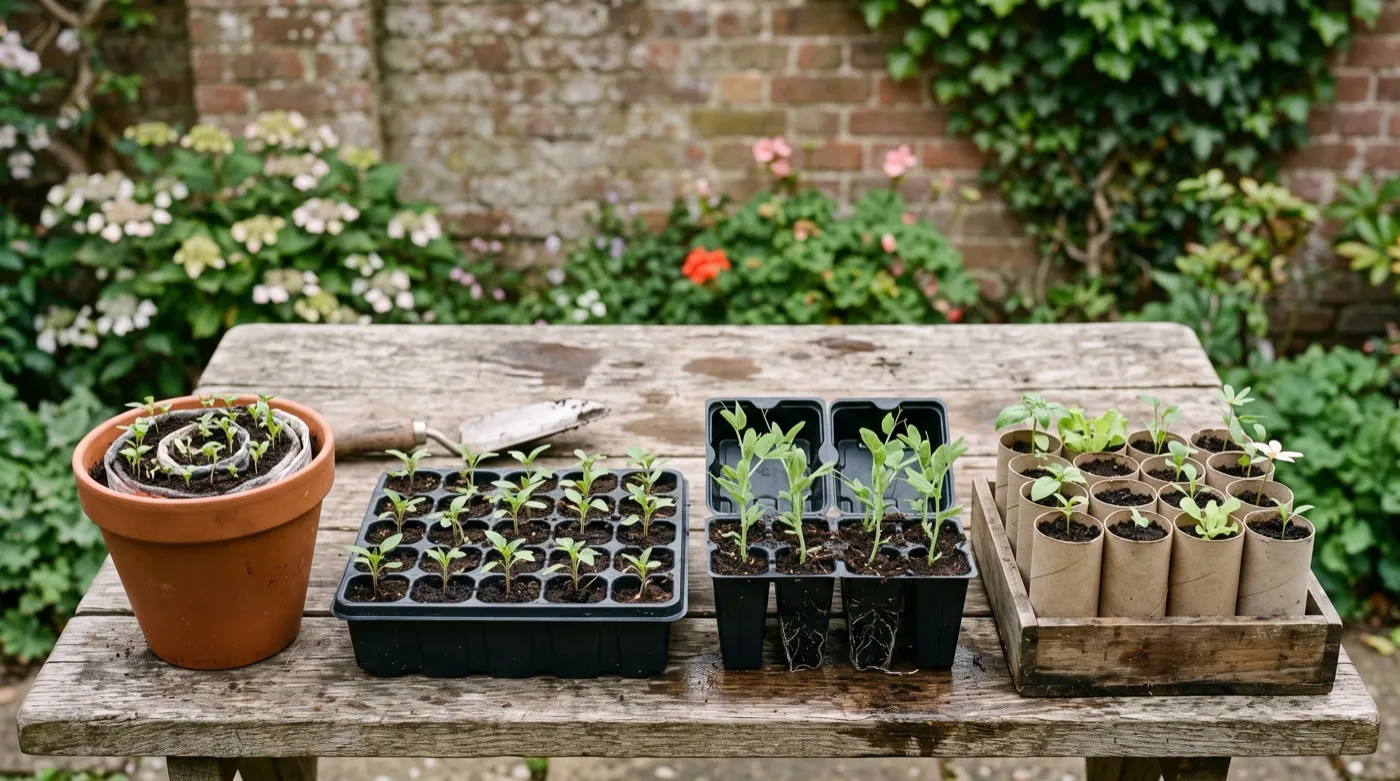 The four contenders side by side. The coil holds the most root depth per centimetre of bench.
A month-by-month sowing calendar
Seed snails earn their keep across a longer season than most people expect. Chillies open it in January and autumn sweet peas close it in October. Sow to this calendar and a couple of coils are working for you in eight months of the year.
| Month | Sow in seed snails | Notes |
|---|---|---|
| January | Chillies, sweet peas (late month) | Chillies need 18-25C; a heated propagator pays off |
| February | Chillies, onions, leeks, broad beans, sweet peas | Peak snail season; windowsill space at its tightest |
| March | Tomatoes, sweet peas, onions, peas | Tomatoes germinate at 18-21C; see timing guide below |
| April | Runner beans (late), French beans, sweetcorn | Sow beans 4-5cm deep in 15cm-wide coils |
| May | French beans, sweetcorn, successional peas | Unroll April snails; harden off before planting |
| June | Successional lettuce, beetroot for leaf | Shade coils; they overheat faster than pots |
| July | Spring cabbage, kale, autumn salads | Keep coils out of full sun and water daily |
| August | Winter lettuce, spring onions | Small 8cm-wide coils are enough |
| September | Hardy annual flowers | Cornflowers and calendula overwinter well from coils |
| October | Sweet peas for autumn sowing | Overwinter the whole coil in a cold frame |
| November | Nothing new | Clean and store membranes for reuse |
| December | Nothing new | Order seed; cut strips ready for January |
Match sowing dates to heat, not habit. A March tomato sowing only works if you can hold 18C or more; our guide on when to plant tomatoes sets out the timings by region, and the temperature tables in our seed germination temperature guide apply to coils exactly as they do to pots.
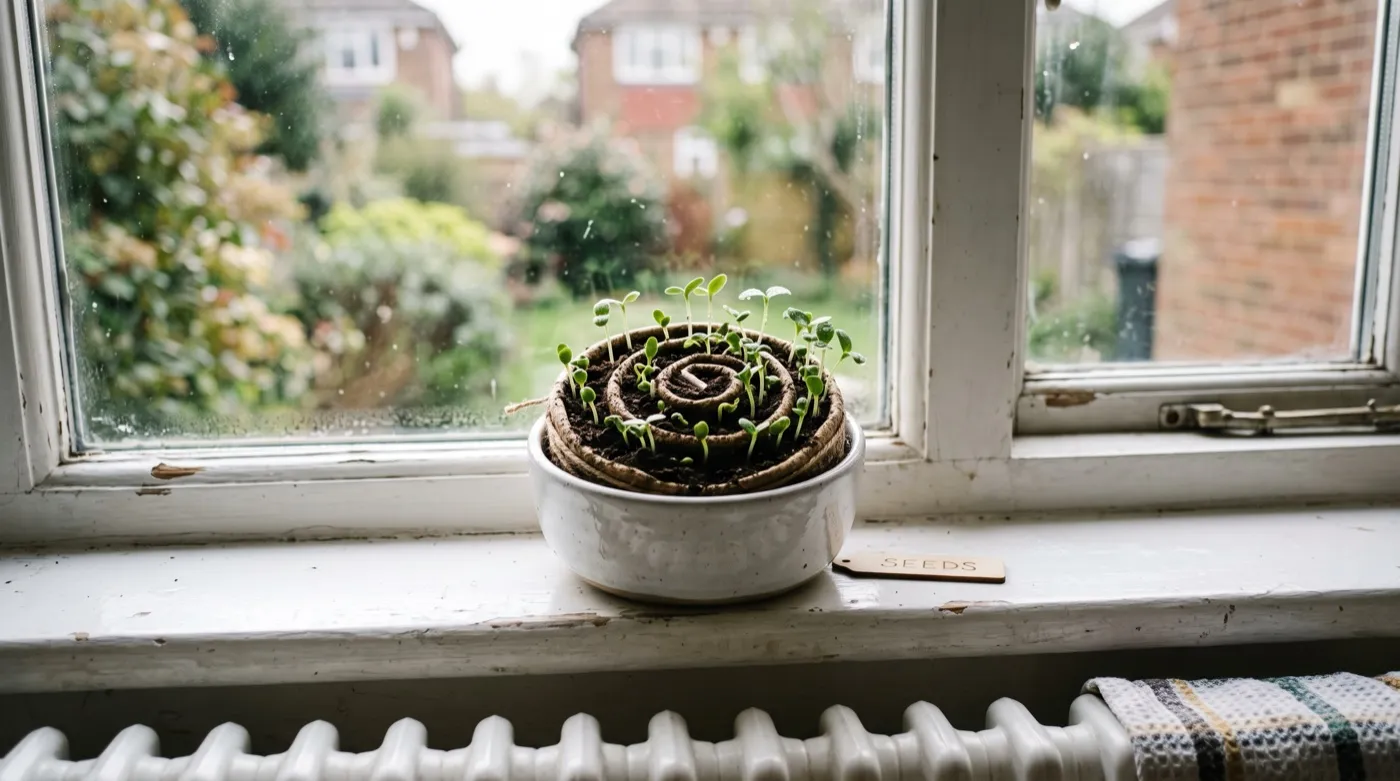 February on the windowsill. One coil above the radiator holds what would otherwise be half a tray of modules.
Unrolling, pricking out and planting
Unrolling is the moment the method sells itself. Where a module tray makes you squeeze and pull each plug, a snail simply opens.
Time it by the roots, not the calendar. Tip the coil and look underneath. When white root tips show at the base of the membrane, the seedlings are ready to move. For sweet peas that is usually five to six weeks from sowing; for chillies and tomatoes, when the first true leaves are fully out. Leave a snail too long and the roots knit together along the bottom edge, which surrenders the method’s main advantage.
Fine-sown snails of onions, chillies or tomatoes get pricked out rather than planted direct. Unroll, lift each seedling with a dibber under the roots, and pot on exactly as you would from a seed tray. The spacing along the strip makes this quicker than untangling a crowded tray.
Whatever came off the coil still needs acclimatising before it faces the garden. A week to ten days of gradually longer spells outside does it, and the full routine is in our guide to hardening off seedlings.
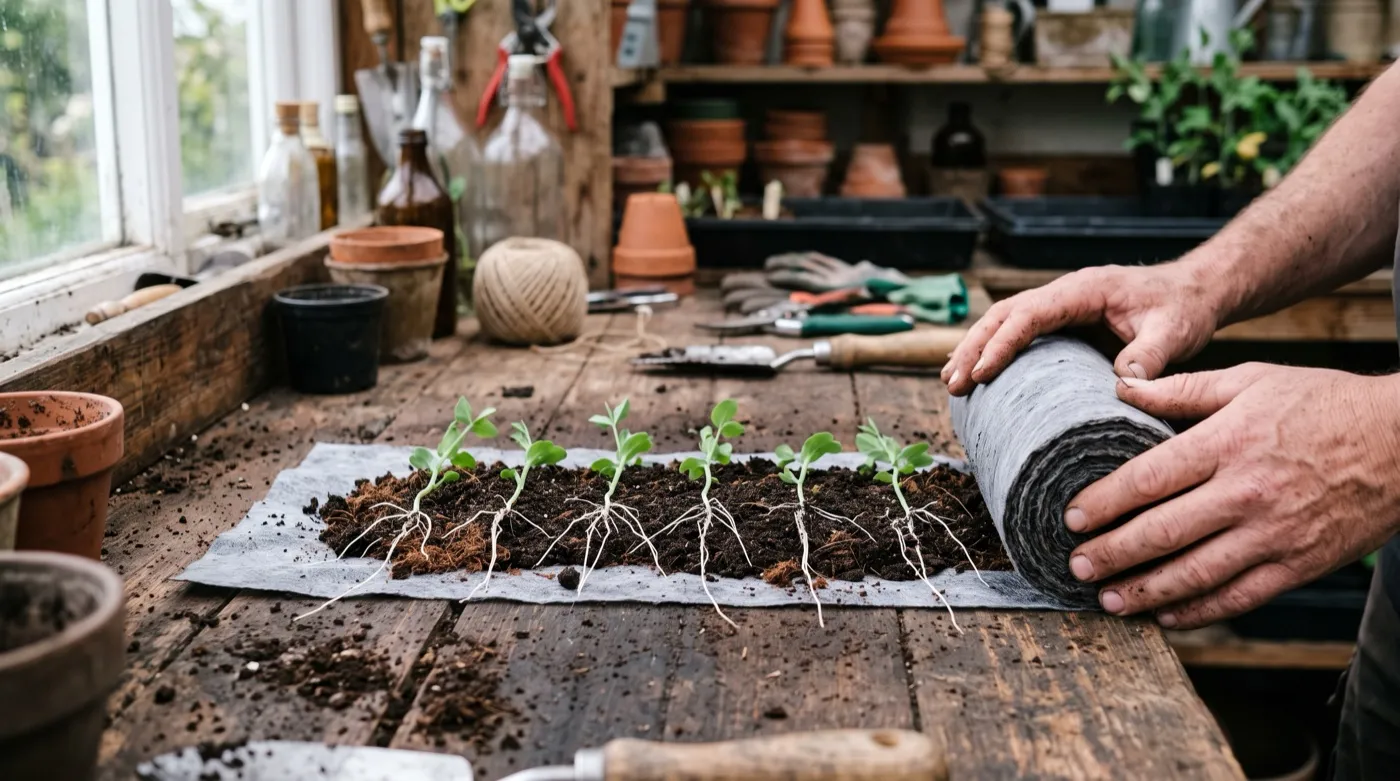 The payoff. Unrolled at six weeks, the seedlings lie evenly spaced with 13cm of straight root and no circling.
Why seed snails fail (and how to fix it)
Drying out
This is failure mode number one by a distance. A coil holds perhaps a third of the compost a same-sized pot holds, the top face is open to the air, and foam membrane wicks nothing. In a warm March greenhouse a snail can go from moist to bone dry in 36 hours. Check daily by pressing a finger to the top face. Water by standing the pot in 2-3cm of water for ten minutes and letting the coil drink from the base, the same wicking principle covered in our bottom watering guide. Top watering works but washes fine seed into the spiral gaps.
Rot and green slime
The opposite fault. Roll a snail with dripping-wet compost, or stand it permanently in a saucer of water, and the coil centre turns anaerobic. Seeds rot, the membrane greens over, and fungus gnats move in. Wring the compost to sponge-damp before rolling, empty standing water after each soak, and give coils air movement rather than a sealed bag once seedlings are up.
Sowing too deep
The coil’s loose, open compost makes it easy to push seeds far deeper than intended, and a seed at double depth exhausts itself before reaching light. Hold the packet depth: 1.5cm for sweet peas, 4-5cm for beans, a 0.5-1cm covering for chillies, tomatoes and onions. With fine seed, sow on the surface and sieve compost over rather than poking holes.
Stretch and overcrowding
Snails on a dim windowsill produce leggy seedlings just as trays do, and the tight spacing makes the stretch worse once neighbours shade each other. Give coils your brightest sill or bench, turn them a quarter-turn daily, and unroll on time. If stems have already stretched, the rescues in our guide to leggy seedlings apply unchanged, and sweet peas forgive legginess entirely because you can bury the stem at planting.
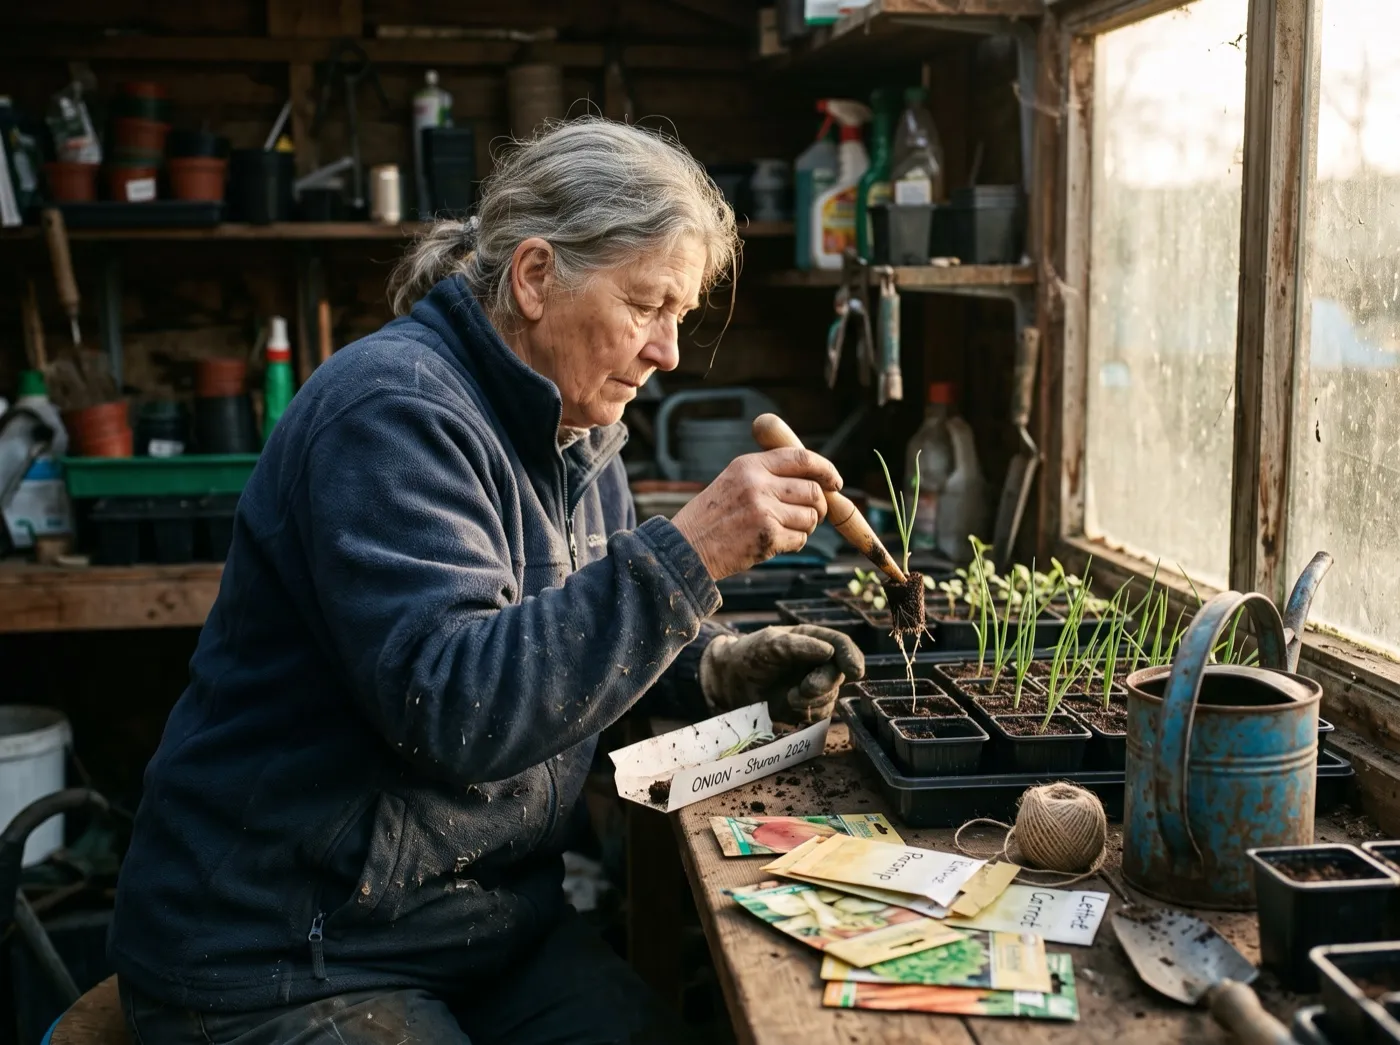 Pricking out from an opened coil. The row spacing makes this quicker than untangling a crowded seed tray.
Frequently asked questions
What is a seed snail?
A seed snail is a strip of flexible membrane spread with compost and rolled into a coil. The roll stands upright in a pot with the spiral facing up, and seeds are sown into the exposed compost edge. Each seedling grows down through its own layer of the coil, so roots run straight instead of circling. One snail replaces a tray of modules on the windowsill.
What is the best material for a seed snail?
Foam laminate-flooring underlay is the best material, with bubble wrap a close second. Both are waterproof, flexible and grippy enough to hold a 2cm layer of compost while you roll. Thick polythene from old compost bags works but is floppier. Avoid kitchen roll, newspaper and thin cardboard, which collapse into mush after two weeks of watering.
How deep should the compost be in a seed snail?
Spread the compost about 2cm deep along the strip. Thinner than 1.5cm dries out within hours and gives roots too little to feed on. Deeper than 3cm makes the roll fat, heavy and hard to keep tight, and one strip fills a bucket of compost. At 2cm a 60cm strip rolls to roughly 11-12cm across, which drops neatly into a 13cm pot.
What seeds grow best in seed snails?
Big-seeded climbers and long-rooted crops do best: sweet peas, broad beans, runner beans and French beans. Chillies, tomatoes and onions also work well sown 1-2cm apart along the top edge. Avoid carrots, parsnips and other root crops, because the unrolling and transplanting that makes the method useful is exactly what forks a taproot.
How often should you water a seed snail?
Check daily and expect to water every one to two days once seedlings are up. A coil holds far less compost than a pot the same size, and the top edge is open to the air, so it dries from the surface down. Stand the pot in 2-3cm of water for ten minutes and let the coil wick it up rather than flooding the top.
How do you get seedlings out of a seed snail?
Peel off the tape and unroll the strip flat on the bench. The seedlings lie in a row along the compost, evenly spaced with their roots spread across the membrane. Lift each one by its leaves with the compost that clings to the roots, then pot on or plant straight out. Damage is minimal because nothing needs pulling from a cell.
Are seed snails better than root trainers?
Once your first coil is rolled and sown, the same windowsill routines of light, warmth and patience apply as with any tray, and they are all laid out in our guide to sowing seeds indoors.
Our team produces practical UK gardening guidance from source research, contributor records and established horticultural practice. Editorial standards are overseen by Matt W.